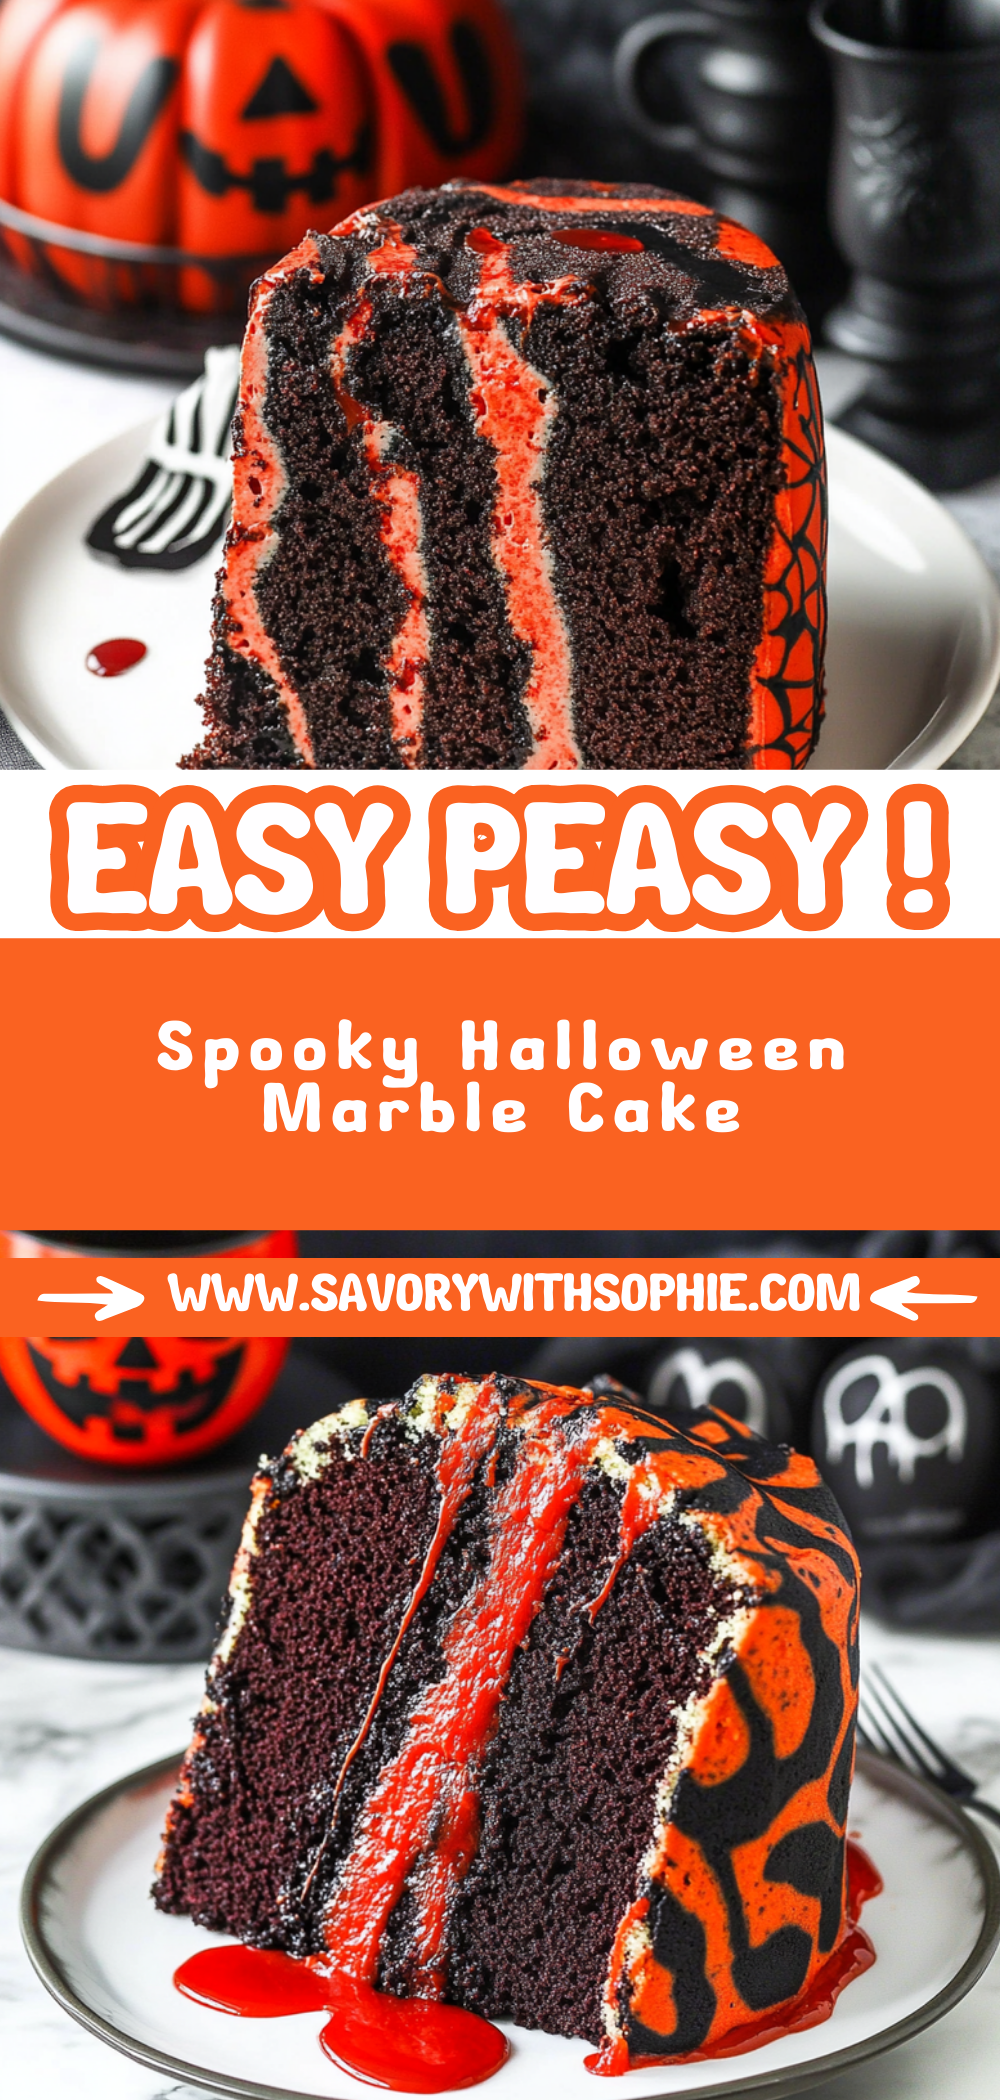
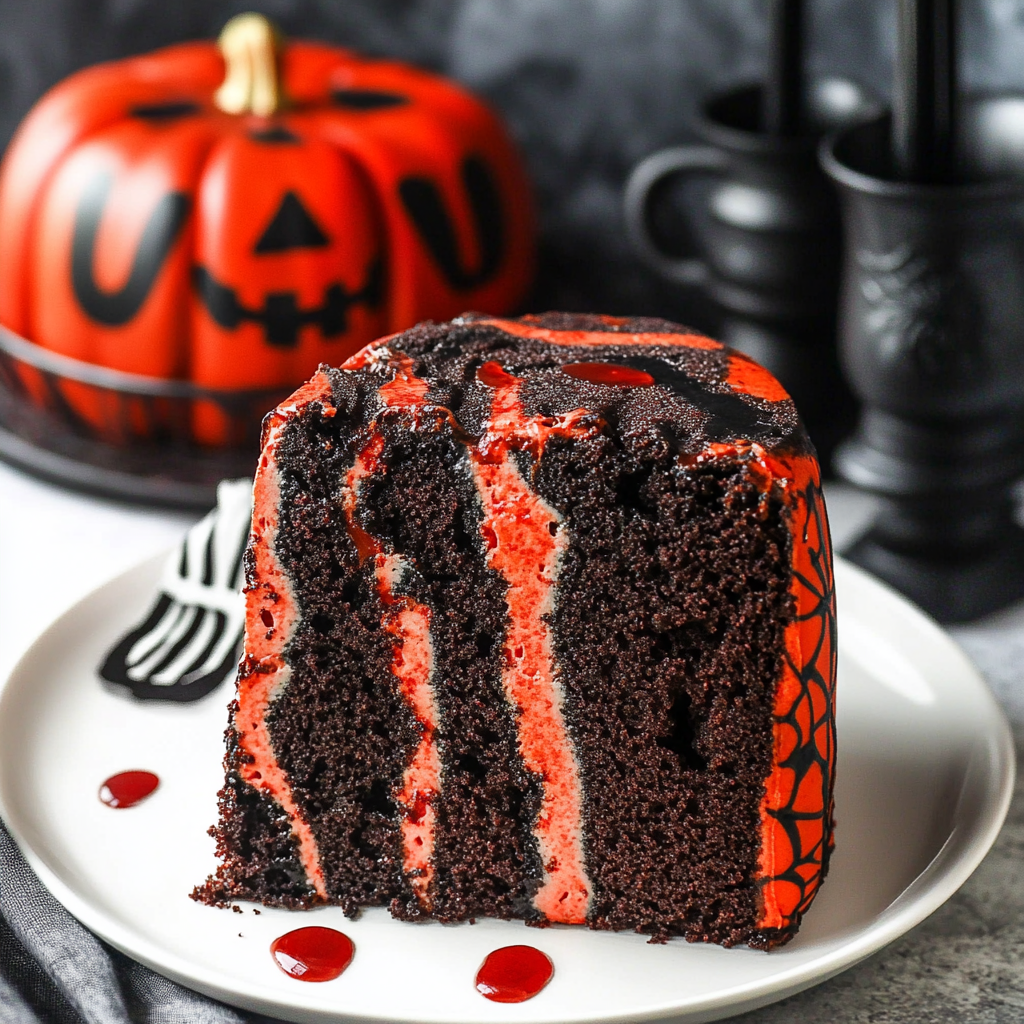
Enchanting Spooky Halloween Marble Cake Recipe to Thrill!
Spooky Halloween Marble Cake is the ultimate treat to enchant your Halloween gatherings. This visually striking dessert, featuring a blend of red and black, is sure to thrill guests of all ages with its eerie decorations.
Whether you’re hosting a costume party or looking for a festive dessert, this cake perfectly captures the spirit of the season. With its drippy red “blood” icing and spooky sprinkles, it not only tantalizes the taste buds but also serves as a centerpiece that will leave everyone spellbound.
Why You'll Love This Spooky Halloween Marble Cake
- This incredible Spooky Halloween Marble Cake transforms simple ingredients into restaurant-quality flavors that will blow your mind.
Foolproof techniques guarantee perfect results every single time making even novice cooks feel like professional chefs.
Stunning visual appeal with gorgeous colors creates the ultimate Instagram-worthy dish for any occasion.
Endlessly adaptable for different dietary needs while working beautifully for meal prep or entertaining groups effortlessly.
Ingredients for Spooky Halloween Marble Cake
Here is what you will need to make this delicious Spooky Halloween Marble Cake:
2 1/4 cups (293g) all purpose flour: Essential for structure.
2 1/2 tsp baking powder: Helps the cake rise.
1/4 tsp baking soda: Balances acidity in the batter.
1/2 tsp salt: Enhances flavor.
1/2 cup (112g) unsalted butter, room temperature: Adds richness and moisture.
1/2 cup vegetable oil: Keeps the cake tender.
1 1/2 cups (310g) sugar: Sweetens and helps with browning.
1 tbsp vanilla extract: Adds depth of flavor.
4 large eggs: Binds ingredients together.
1 cup (240ml) buttermilk: Provides acidity and moisture.
5 oz bittersweet chocolate (60% cacao), chopped: Infuses rich chocolate flavor.
Black gel icing color: For darkening the batter.
Red gel icing color: For creating that creepy red hue.
2 1/4 cups (504g) unsalted butter: Base for frosting, providing creaminess.
8 cups (920g) powdered sugar: Sweetens and thickens frosting texture.
1 cup (114g) natural unsweetened cocoa powder: Deep chocolate flavor in frosting.
2 tsp vanilla extract: Enhances frosting flavor profile.
5-7 tbsp (75-105ml) water/cream: Adjusts frosting consistency as needed.
1/4 tsp salt: Balances sweetness in frosting.
Black gel icing color: For decorative accents on frosting.
4 oz red Wilton candy melts: Used for “blood” effect on top of cake.
2 tbsp heavy whipping cream: To melt with candy melts for drizzling consistency.
Sprinkles (see notes): For final spooky decoration.
How to Make Spooky Halloween Marble Cake
Follow these simple steps to prepare this delicious Spooky Halloween Marble Cake:
**Step 1: Prepare Your Baking Pans**
Preheat your oven to 350°F (175°C). Grease and flour two 9-inch round cake pans to ensure easy removal after baking.
**Step 2: Mix Dry Ingredients**
In a medium bowl, whisk together the all-purpose flour, baking powder, baking soda, and salt until well combined.
**Step 3: Cream Butter and Sugar**
In a large mixing bowl, beat together the softened unsalted butter, vegetable oil, and sugar until fluffy and light in color.
**Step 4: Add Eggs and Vanilla**
Add eggs one at a time while mixing well after each addition, then stir in vanilla extract until fully incorporated.
**Step 5: Combine Wet Ingredients**
In another bowl, combine the buttermilk and melted bittersweet chocolate until smooth before gradually adding it to the butter mixture.
**Step 6: Create Marble Effect**
Divide the batter evenly into two bowls; tint one half with black gel icing color and one with red gel icing color before swirling them together in your prepared pans for a stunning marble effect!
Perfecting Spooky Halloween Marble Cake Cooking Process
To create a flawless Spooky Halloween Marble Cake, efficiency is key. Organizing your workspace and gathering all ingredients beforehand allows for a seamless cooking experience. This preparation not only saves time but also ensures that you don’t miss any critical steps while baking, leading to delicious results.
Add Your Touch to Spooky Halloween Marble Cake
Feel free to customize the Spooky Halloween Marble Cake by incorporating different flavors or colors. You could add orange gel icing for a more vibrant Halloween theme or swap out bittersweet chocolate for white chocolate for a unique twist. Experiment with various sprinkles to enhance the festive look!
Storing and Reheating Spooky Halloween Marble Cake
To maintain the freshness of your Spooky Halloween Marble Cake, store it in an airtight container at room temperature for up to three days. If you need to keep it longer, wrap it tightly in plastic wrap and refrigerate for up to a week. For reheating, let it sit at room temperature before serving.
Chef's Helpful Tips for Spooky Halloween Marble Cake
I remember organizing a Halloween party where this cake stole the show. Everyone was fascinated by its eerie appearance and couldn’t resist its decadent taste. It was a delightful moment filled with laughter and spooky fun.
FAQs About Spooky Halloween Marble Cake
What is Spooky Halloween Marble Cake?
Spooky Halloween Marble Cake is a festive dessert featuring a striking combination of red and black marble cake layers. It’s adorned with spooky decorations like drippy red icing representing fake blood and topped with fun themed sprinkles like bloody eyeballs and bones. This cake not only looks impressive but also offers a delicious flavor that makes it perfect for Halloween celebrations.
How can I make my cake more visually appealing?
To enhance the visual appeal of your Spooky Halloween Marble Cake, consider using contrasting colors in your frosting or adding edible glitter for an extra touch of spookiness. Different shaped cookie cutters can be used to create themed decorations from fondant or marzipan, which can be placed on top of the cake or around its base. Choosing vibrant sprinkles can also elevate the overall look and make it more festive.
Can I modify the recipe for dietary restrictions?
Yes, you can easily modify the Spooky Halloween Marble Cake recipe to accommodate dietary restrictions. For a gluten-free version, substitute all-purpose flour with a gluten-free blend. If you’re looking for an egg-free option, you can replace eggs with applesauce or flaxseed meal mixed with water as binding agents in baking.
What are some serving suggestions for this cake?
When serving your Spooky Halloween Marble Cake, consider pairing it with whipped cream or vanilla ice cream to balance its richness. Presentation is vital; serve slices on black or orange plates to enhance the theme further. A light dusting of cocoa powder or powdered sugar can add an elegant touch while maintaining the spooky aesthetic.
Conclusion for Spooky Halloween Marble Cake
The Spooky Halloween Marble Cake is not just a dessert; it’s an experience that brings joy and festivity to any gathering. Its striking red and black design combined with delicious flavors makes it a centerpiece worthy of admiration during your celebrations. Whether you’re hosting a party or simply enjoying the season, this cake promises both delight and spookiness that everyone will remember!
Spooky Halloween Marble Cake
Ingredients
Method
- Preheat your oven to 350°F (175°C). Grease and flour two 9-inch round cake pans to ensure easy removal after baking.
- In a medium bowl, whisk together the all-purpose flour, baking powder, baking soda, and salt until well combined.
- In a large mixing bowl, beat together the softened unsalted butter, vegetable oil, and sugar until fluffy and light in color.
- Add eggs one at a time while mixing well after each addition, then stir in vanilla extract until fully incorporated.
- In another bowl, combine the buttermilk and melted bittersweet chocolate until smooth before gradually adding it to the butter mixture.
- Divide the batter evenly into two bowls; tint one half with black gel icing color and one with red gel icing color before swirling them together in your prepared pans for a stunning marble effect!