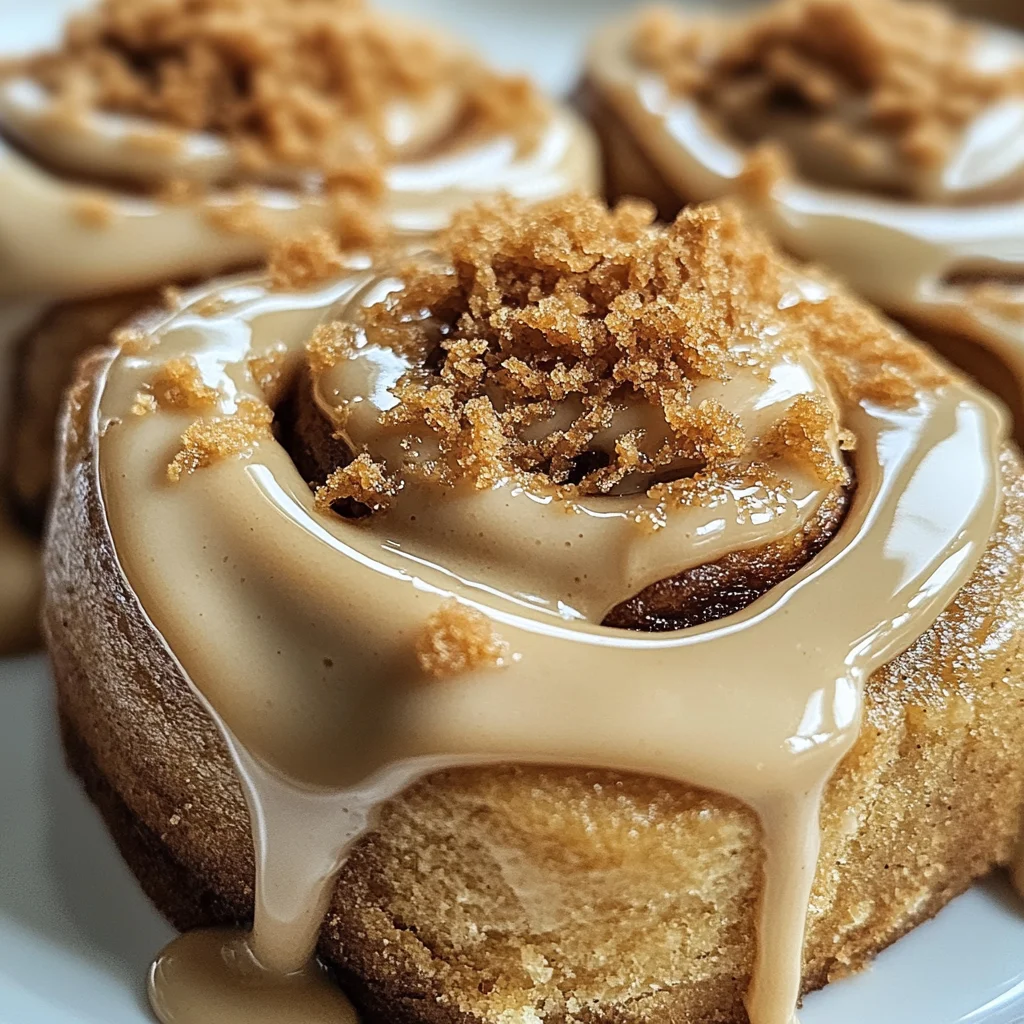
Biscoff Cookie Butter Cinnamon Rolls Recipe delights everyone!
There’s something utterly magical about the aroma of freshly baked cinnamon rolls wafting through the house, isn’t there? It’s a warm hug for the soul, a gentle reminder of cozy mornings and sweet indulgences. Today, I’m thrilled to share with you my cherished recipe for Biscoff Cookie Butter Cinnamon Rolls, a delightful twist on a classic that will not only awaken your taste buds but also fill your heart with joy. Imagine soft, fluffy dough spiraled around that creamy Biscoff cookie butter, mingling with warm cinnamon to create an experience that transcends mere breakfast or dessert. This is more than just food; it’s an experience, a revelation that brings together tradition and innovation in every bite.
As we embark on this culinary adventure together, I promise you’ll be captivated by the process. There’s something so rewarding about watching the dough rise and transform into puffy clouds of sweetness. And let’s not forget the dreamy glaze that drizzles over each roll like liquid gold, making every mouthful feel like a celebration. Whether you’re treating yourself on a lazy Sunday morning or impressing friends at a brunch gathering, these cinnamon rolls are bound to delight everyone! So roll up those sleeves and let’s dive into the magic of baking!
Biscoff Cookie Butter Cinnamon Rolls Recipe delights everyone!: A Sweet Indulgence
I can hardly contain my excitement as I introduce you to these Biscoff Cookie Butter Cinnamon Rolls! They are truly a labor of love, filled with rich layers of cookie butter and aromatic spices that dance together harmoniously. When you take your first bite, you’ll find that they are light yet satisfying—a perfect balance that will have you coming back for seconds…or thirds! Trust me when I say these rolls are perfect for any occasion—breakfast, brunch, or even as an afternoon snack paired with your favorite cup of tea or coffee.
Ingredients:
Let’s gather our ingredients and embark on this delightful journey together! Each component plays an important role in creating these divine rolls, so let’s take a moment to appreciate what we’re working with.
- 4 cups all-purpose flour (500 g). Flour is the backbone of any baked good, providing structure and stability to our rolls. When selecting your flour, look for high-quality all-purpose flour—this ensures your dough will rise beautifully and yield those fluffy textures we crave. If you’re feeling adventurous or need a gluten-free option, consider using a blend designed specifically for baking; just keep in mind this might alter the texture slightly.
- 1/4 cup granulated sugar (50 g). Sugar does more than simply sweeten; it helps activate the yeast and contributes to that golden-brown crust we all adore. It also adds moisture to our dough. For added depth of flavor, raw cane sugar can be used here as well—it will give your rolls a subtle caramel-like note that pairs wonderfully with the Biscoff cookie butter.
- 2 1/4 teaspoons active dry yeast (1 packet). Yeast is truly magical—it transforms our simple mixture into soft clouds through fermentation! Make sure your yeast is fresh; expired yeast won’t give us that beautiful rise we’re after. When activating it in warm milk (not hot!), you’ll see tiny bubbles form—this frothiness indicates it’s ready to work its wonders in our dough!
- 1 cup whole milk (240 ml), warmed. Milk adds richness and moisture to our dough while also helping activate the yeast along with sugar. Warmed milk creates an inviting environment for yeast growth—too hot can kill it off while too cold won’t activate it properly.
- 1/3 cup unsalted butter (75 g), melted. Butter introduces decadence into our rolls—its fat coats the flour proteins resulting in tenderness while providing flavor throughout each layer. Always choose unsalted butter so you can control the saltiness of your end product; if you’re dairy-free, coconut oil or vegan butter works beautifully as well!
- 2 large eggs. Eggs contribute moisture and act as binders in our dough while also enriching flavor and texture; they help create that soft crumb we dream about! If you’re looking for an egg substitute due to dietary preferences, consider using flax eggs or applesauce which will still lend some moisture without compromising too much on texture.
- 1/2 cup Biscoff cookie butter (150 g). This is where the magic truly happens! Biscoff cookie butter adds warmth and nostalgia with its caramelized flavor profile—a luscious spread made from crushed cookies blended into creamy perfection. You can even make your own if you’re feeling crafty!
- 1 tablespoon ground cinnamon. Ahh…the spice of life! Cinnamon enhances warmth and coziness in desserts—it pairs perfectly with both sweet dough and Biscoff cookie butter alike! Don’t hesitate to adjust how much you use according to personal taste; sometimes, I like adding nutmeg or cardamom for an extra kick!
- 1/4 teaspoon salt. Salt may seem minimal but it’s absolutely paramount! It enhances flavor by balancing sweetness while strengthening gluten structure, allowing for better elasticity within our roll’s dough.
For the glaze:
- 1/2 cup powdered sugar (60 g). Powdered sugar is essential for achieving that velvety-smooth glaze we drizzle over our rolls at the end—it’s light texture makes it easy to blend into creamy mixtures without clumping.
- 2 tablespoons Biscoff cookie butter (30 g). Adding more cookie butter here infuses this simple glaze with deliciousness—we want every bite drenched in that rich flavor!
- 1–2 tablespoons milk (15–30 ml). Adding milk creates flow in our glaze allowing us to achieve just the right consistency—be mindful as you add it slowly until you’ve reached your desired thickness!

Equipment You’ll Need:
Now that we have everything prepped and ready to go, let’s chat about some essential tools you’ll need on this journey! Having the right equipment makes this process smoother and more enjoyable—it sets us up for success!
- Mixing bowls – A set of sturdy mixing bowls ensures we have plenty of space for combining ingredients without messes spilling onto countertops; opt for glass or stainless steel since they hold heat well during rising stages.
- Measuring cups & spoons – Precision matters in baking! Invest in quality measuring cups and spoons so you know exactly how much flour or sugar goes into each step—you’ll thank yourself later when everything turns out perfectly balanced!
- A stand mixer or hand mixer – While not strictly necessary, having either type helps speed up kneading time significantly compared to doing it by hand; plus they do all the hard work so we can enjoy sipping coffee instead!
- Rolling pin – This trusty tool assists us in rolling out our dough evenly into rectangles without frustration; look for one made from hardwood which provides good weight distribution while preventing sticking.
- Baking dish – A 9×13 inch pan works wonderfully here; choose one made from glass or ceramic which retains heat evenly during baking giving those beautiful golden edges we’re after.
Step 1: Activating Our Yeast
Let’s start by activating our yeast because this step is crucial for creating those pillowy soft cinnamon rolls we dream about! In a mixing bowl, combine your warm milk (not boiling!), granulated sugar, and active dry yeast together gently—give it just enough stir to mix them lightly but don’t overdo it! Now set aside this mixture for about 5–10 minutes until frothy bubbles form at the surface—that’s when you know it’s alive and ready to work its magic within our dough!
Step 2: Mixing It All Together
Once you’ve seen those frothy bubbles dancing atop your mixture—which signals life—you can add melted unsalted butter along with two large eggs right into that bowl too! Use a whisk or spatula here until everything melds beautifully together—the warmth from melted butter envelops all ingredients ensuring smooth incorporation while infusing rich flavors throughout every layer ahead!
Step 3: Kneading Our Dough
Now comes one of my favorite parts: kneading! Gradually introduce four cups of all-purpose flour along with salt into this beautiful mixture—begin mixing either with hands or stand mixer fitted with paddle attachment until combined then switch gears using hands if necessary afterwards because trust me…there’s nothing quite like feeling tactile textures transform before your very eyes! Knead until soft yet elastic—about 8–10 minutes total if by hand; don’t rush this step since developing gluten allows proper rising later on—it should spring back gently when poked indicating readiness!
Step 4: The First Rise
After kneading has been completed successfully—and oh how satisfying it feels—place this lovely ball inside greased bowl covered lightly by kitchen towel allowing warmth from surrounding air assist us during its first rise phase lasting approximately one hour until doubled nicely in size…don’t rush this step either as patience leads towards lightness down path ahead! During rising moments take time catching breath savoring anticipation building around fragrant aromas filling kitchen…it’s worth every second waiting!
As you can see already from these initial steps alone—the journey toward creating these heavenly Biscoff Cookie Butter Cinnamon Rolls Recipe delights everyone requires care but yields extraordinary results full of flavor bliss awaiting discovery soon enough…stay tuned for further guidance through each subsequent step leading closer towards final masterpiece creation soon arriving on plates before sharing joyously amongst loved ones gathered around table feasting happily upon such goodness created together!
Step 5: Roll Out the Dough to Perfection
Now comes the moment that feels like magic—rolling out your beautifully risen dough! Once you’ve allowed your dough to rise until it has doubled in size, which usually takes about an hour, it will feel pillowy soft and fragrant, a true testament to its fermentation process. Gently punch down the dough; this is known as de-gassing, and it helps redistribute those precious yeast cells that have multiplied beautifully during the rise. Flour your work surface generously to prevent sticking, and carefully turn out the dough onto it. Using a rolling pin, roll the dough into a rectangle approximately ¼ inch thick. Trust me when I say that this thickness is crucial; it allows for just the right amount of softness while still holding the filling beautifully.
As you roll, make sure to maintain an even thickness across the entire surface. This consistency ensures that every bite of your cinnamon rolls offers a perfect balance of fluffy dough and sweet filling. If you notice any resistance while rolling, don’t hesitate to let the dough rest for a few minutes; this allows the gluten to relax and makes rolling out much easier. As you work, take a moment to appreciate how wonderful your kitchen smells—yeast, warmth, and anticipation fill the air! Once you’ve achieved that lovely rectangle shape, you’re ready for the next step.
Step 6: Spread on That Irresistible Filling
This is where our Biscoff Cookie Butter shines! In a separate bowl, combine ½ cup of Biscoff cookie butter with 1 tablespoon of ground cinnamon. Mix them together until they create a smooth, luscious spread that practically begs to be slathered on warm bread. This filling will not only infuse your rolls with an utterly intoxicating sweetness but also bring warmth from the cinnamon that dances through every bite. Don’t rush this part; enjoy spreading this delightful concoction over your rolled-out dough with an offset spatula or even just a sturdy spoon.
Leave about an inch around the edges bare; this is absolutely paramount because it allows for proper sealing when we roll everything up later on. The aroma wafting from this heavenly mixture is nothing short of enchanting—it’s like a hug in dessert form! As you spread it evenly across the surface, imagine how each bite will be filled with sweet layers of flavor. You can almost taste it already! Once you’ve covered every inch of your rectangle (except those edges!), it’s time to move on to shaping our rolls.
Step 7: Rolling Up Your Cinnamon Rolls Like a Pro
With your filling smoothed out across the dough, it’s time to roll everything up into one glorious log! Starting from one end of your rectangle, gently lift and begin rolling tightly towards the opposite end. Think about how each turn brings all those flavors together into one harmonious spiral—it’s truly satisfying! Make sure to keep it tight but not too tight; if you feel too much resistance as you’re rolling, simply stop and adjust your grip. The goal here is for each layer of filling to hug its neighbors closely without squeezing them too harshly.
Once you’ve rolled all the way to the end, pinch those edges together firmly so they don’t unravel during baking—this little tip can make all the difference in retaining that beautiful spiral shape we crave in cinnamon rolls! Now comes another crucial step: slice your log into 12 equally sized pieces using a sharp knife or dental floss (yes, you read that right—floss works wonders!). Each piece should be about 1-1½ inches thick; this ensures even baking and gives everyone their fair share of gooey goodness. Arrange these lovely rolls in a greased baking dish lined snugly together—they’ll cozy up nicely as they rise again!
Step 8: Letting Those Rolls Rise Again
Patience truly pays off here as we give our rolls another chance to puff up before they meet their golden fate in the oven. Cover your baking dish with a clean kitchen towel or plastic wrap loosely (we don’t want them suffocating!) and allow them to rise in a warm spot for about 30-45 minutes until they are noticeably puffy and have expanded quite a bit. This rise creates those airy pockets that make cinnamon rolls so delightfully fluffy; when baked correctly, they should be light enough that they almost float off your plate!
You might find yourself peeking under that cover now and then—don’t worry if they don’t look dramatically larger within just a few minutes; sometimes these things take time! Look for signs like softening edges or increased height as indicators that they’re ready for baking. While waiting, preheat your oven to 350°F (175°C) so it’s nice and hot when it’s time for these beauties to bake. The moment will come when you see them puffed up beautifully—trust me on this—it’s worth every second of anticipation!
Conclusion:
As we wrap up our culinary journey through this Biscoff Cookie Butter Cinnamon Rolls Recipe delights everyone!, I can’t help but feel a surge of excitement. We’ve transformed simple ingredients into something truly extraordinary—a treat that is not only mouth-wateringly delicious but also evokes feelings of warmth and comfort reminiscent of cozy gatherings with loved ones. The combination of sweet Biscoff cookie butter swirled with fragrant cinnamon creates a flavor profile that’s both familiar yet utterly unique; it’s like embracing old traditions while celebrating new ones.
This recipe is an absolute must-try—not just for its divine taste but also because of the joy that comes from making it. Picture yourself pulling these golden-brown beauties from the oven; the moment is magical as they rise puffy and perfect, filling your kitchen with an aroma that beckons everyone close. Whether it’s breakfast on a lazy Sunday morning or dessert after dinner with friends, there’s something profoundly satisfying about sharing these cinnamon rolls with others—or treating yourself because you absolutely deserve it!
Imagine savoring one with your morning coffee—just close your eyes and picture it now: the rich glaze drizzled over that soft roll as you take your first bite; it’s heaven! For an afternoon pick-me-up, serve them alongside a velvety cup of chai tea or even warm apple cider during those crisp fall days when all you want is comfort food wrapped in love. And if you’re feeling truly indulgent? Try pairing one with a scoop of vanilla ice cream; I promise it transforms this already delightful treat into an experience that’s simply divine.
Feeling adventurous? This recipe is wonderfully adaptable! You can easily swap out Biscoff cookie butter for other nut butters like almond or cashew for varying flavor experiences. Want more spice? Add some nutmeg or cardamom to the filling for an aromatic twist that will impress any guest at your table! You could even experiment by adding chocolate chips or nuts if you’re looking for added texture and richness—truly, the possibilities are endless! So go ahead, roll up those sleeves (pun intended), try this recipe, and share your own twists—I can’t wait to hear how yours turn out!