Watermelon Water
There’s something utterly enchanting about the act of creating something as simple yet transformative as Watermelon Water. With just two ingredients, this drink bridges the gap between nourishment and sheer delight, making your hydration game not just a chore but a refreshing experience. Imagine a sun-drenched afternoon, the laughter of friends ringing in the air, and you’re sipping on this vibrant, liquid gold that’s as invigorating for your spirit as it is for your body. Every sip is like biting into a perfectly ripe watermelon on a hot day; it bursts with flavor and quenches your thirst while reminding you that simplicity can be extraordinary. I promise you, once you try this recipe, you’ll never look at water the same way again!
Watermelon has always held a special place in my heart—not just because of its sweet juiciness but also due to the memories it evokes; picnics in the park, family gatherings, and summer barbecues. It’s a fruit that embodies joy and celebration, making it the perfect choice for this Watermelon Water recipe. The method itself is so straightforward yet allows for endless creativity; you can easily infuse it with zesty citrus or cooling mint to create variations that suit every palate and occasion. Whether you’re looking to impress guests or simply want to treat yourself to something refreshing after a long day, this drink is not just about hydration—it’s about embracing those little moments of joy in our daily lives.
Watermelon Water: A Refreshing Escape
Let me take you on this delightful journey of making Watermelon Water—it’s so easy and rewarding! You’ll find yourself enchanted by the vibrant colors and invigorating taste that can only come from fresh watermelon and pure water. It’s not just a drink; it’s an experience designed to refresh your mind and body alike.
Ingredients:
As we embark on this culinary adventure together, let’s talk about what you’ll need for this revitalizing recipe.
- 4 cups cubed or chopped watermelon. This is where all the magic begins! Watermelon isn’t just delicious; it’s packed with hydration—about 92% water—making it an ideal base for our drink. When selecting your watermelon, look for one that’s heavy for its size with a smooth skin free from bruises or dents. A deep green color indicates ripeness, while creamy yellow spots suggest it sat on the ground long enough to sweeten up perfectly. If you’re feeling adventurous, don’t hesitate to substitute with other fruits like cantaloupe or honeydew for unique twists that will keep things exciting!
- 4 cups water. This might seem mundane at first glance, but trust me when I say that using good quality water makes all the difference in elevating your Watermelon Water experience. Whether you opt for filtered tap water or sparkling mineral water depends on your personal preference; both options will harmonize beautifully with the sweetness of watermelon. The quality of water enhances the overall flavor profile of your drink and ensures that every sip feels profoundly satisfying rather than flat or lackluster.
Equipment You’ll Need:
Now that we’ve gathered our ingredients let’s make sure we have the right tools at hand! Having the proper equipment can truly enhance your cooking experience, turning what could be tedious into something enjoyable.
- Blender – This essential tool is key to achieving that smooth consistency we desire in our Watermelon Water. A powerful blender will effortlessly puree the watermelon into a silky mix without leaving behind any chunks. If you don’t have a high-speed blender, don’t fret! Just blend for longer until everything is well incorporated.
- Mesh strainer or cheesecloth – After blending our ingredients into submission, we’ll need this handy tool to strain out any pulp from our mixture. Straining not only gives us that clear liquid gold but also helps concentrate the flavor without any fibrous distractions getting in the way of our refreshing sip.
- Pitcher – Once we’ve strained our concoction into a pitcher, it becomes easier to serve our masterpiece! Choose one that’s big enough to hold at least six cups while allowing some room for ice if desired—presentation matters when you’re sharing this drink with others.
Preparing the Watermelon Water
Step 1: Blend Your Ingredients Together
First things first—let’s bring together our two stars: watermelon and water! Place those juicy cubes of watermelon right into your blender along with four cups of water. As they collide in the blending bowl, you’ll hear that delightful whirring sound which signals their union—a true symphony of flavors coming together! Blend everything until completely smooth; aim for about 30 seconds to a minute here—this step is crucial because we want every bit of watermelon goodness fully incorporated into our drink.
Step 2: Strain for Perfection
Now comes an important moment: straining your mixture! Take your mesh strainer or cheesecloth and position it over a large bowl or pitcher (the one you’ll use later). Pour the blended mixture through it slowly—this process separates any pulp from liquid gold we’re after here. Don’t rush this step; allow gravity to do its thing as you gently press down on any leftover solids if necessary—think of it as coaxing out every last drop of flavor! The result should be a stunningly clear beverage ready for chilling.
Step 3: Chill Out
Once you’ve strained everything beautifully into your pitcher, it’s time to chill! Why chill? Cold temperatures enhance our taste buds’ ability to appreciate subtle flavors while providing refreshment during hot days when we need it most. You can either pop it straight into the refrigerator for about an hour or serve immediately over ice if you’re eager to dive in right away! Trust me—there’s something extraordinarily satisfying about enjoying an ice-cold drink after all that hard work.
Step 4: Get Creative!
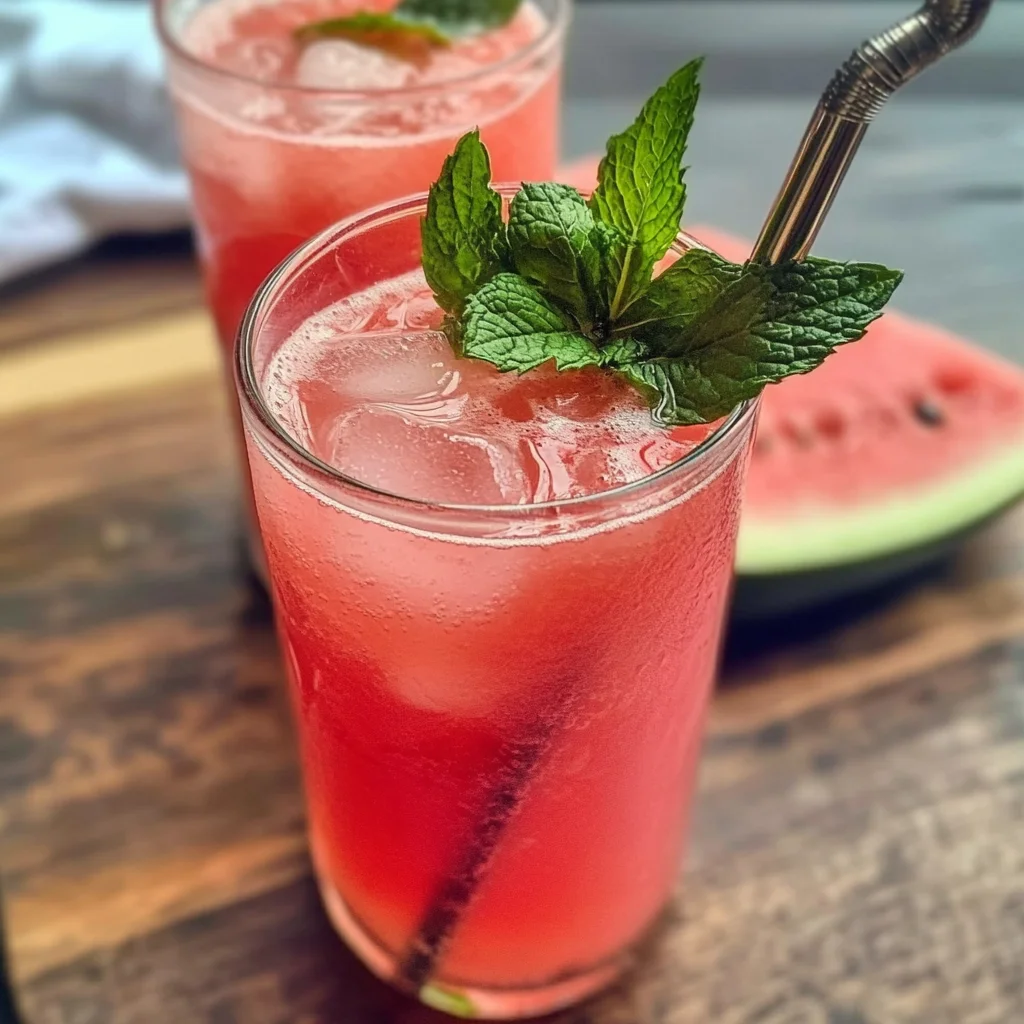
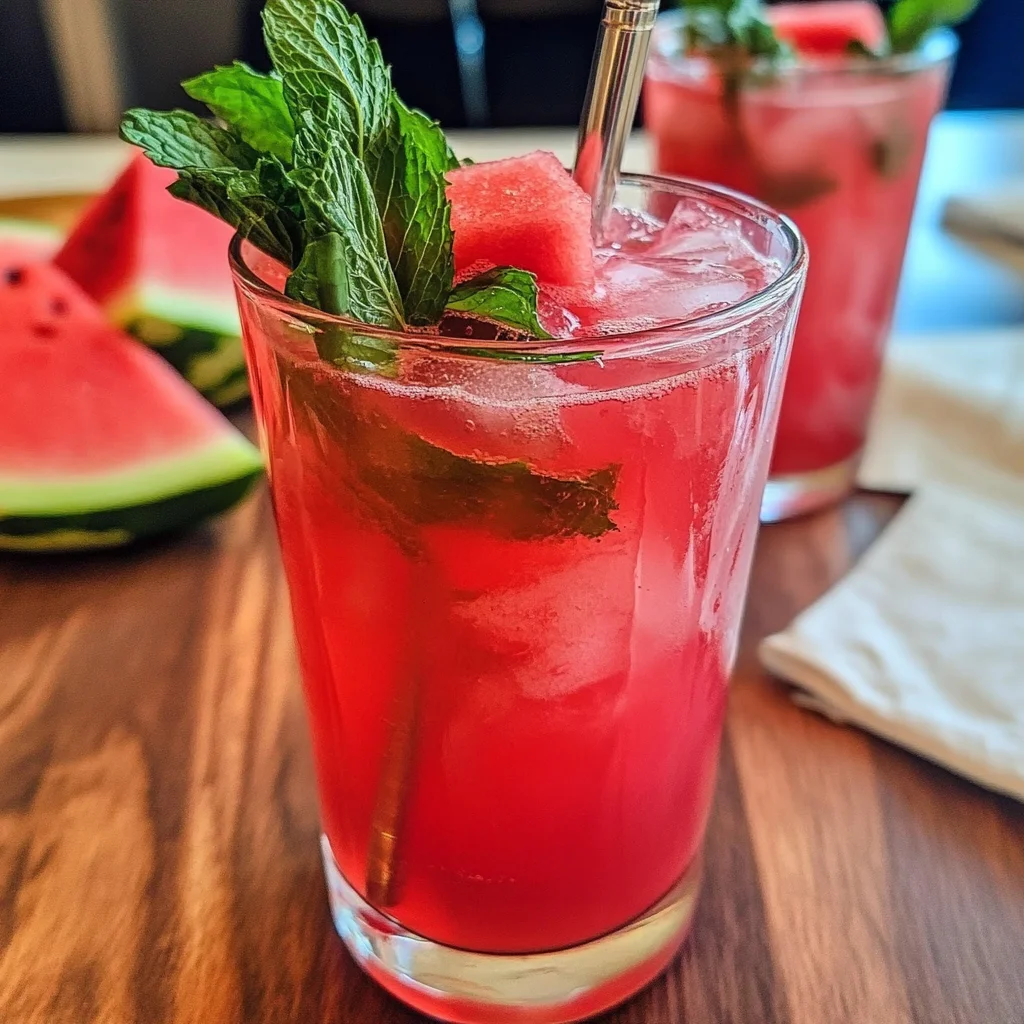
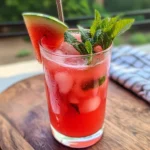
Now here comes my favorite part: infusing flavors! While plain Watermelon Water is already fabulous on its own, why not take it up another notch? Add slices of zesty lemon or lime for brightness; toss in sprigs of fresh mint for that cooling effect; or even mix in berries like strawberries or raspberries for an extra burst of color and taste! Just let these additions steep within your chilled mixture before serving—you’ll surprise yourself with how much more delightful each sip can become!
And there you have it—a simple yet profound way to elevate hydration while embracing seasonal delights! Enjoy every sip knowing you’ve created something genuinely special from scratch.
Refreshing Watermelon Water: A Simple Yet Extraordinary Hydration Experience
Ah, my friends, the arrival of warmer days always has me yearning for something deliciously refreshing to sip on. If you’re like me, you know that staying hydrated is not just about drinking water; it’s about enjoying every moment that comes with it! That’s where this delightful Watermelon Water comes into play—a vibrant concoction that’s not only thirst-quenching but also a feast for the senses. Imagine a drink that captures the essence of summertime in every drop. This recipe is so simple and yet profoundly satisfying, turning mere hydration into an extraordinary experience. Let’s dive into the next steps of crafting this delightful beverage!
Step 5: Blend Until Smooth
Once you have your watermelon cubes ready, it’s time to unleash your inner blender master! Place the four cups of cubed watermelon into your blender along with the four cups of water. Now, why do we blend? This step is crucial because blending thoroughly allows the sweet, juicy essence of the watermelon to be released completely into the water. You want to blend until there are no large chunks left—about 30 to 60 seconds should do the trick. You’ll witness a transformation as the bright pink flesh becomes a frothy, liquid gold potion that promises refreshment. And trust me on this: the more you blend, the more flavors meld together harmoniously, creating an utterly intoxicating taste.
As you blend, watch for a smooth texture; it should resemble a luscious smoothie rather than a chunky mixture. If you notice any clumps lingering around, don’t hesitate to give it another whirl! This process not only enhances flavor but also ensures an even distribution of nutrients from that watermelon—think vitamins A and C dancing their way into your body, nourishing you from within. Feel free to take a moment and inhale that intoxicating aroma wafting from your blender; it’s a prelude to pure bliss.
Step 6: Strain for Purity
Now that your watermelon mixture is beautifully blended, we arrive at an essential step: straining. Pour this vibrant puree through a fine mesh strainer or cheesecloth placed over a pitcher or bowl—this technique is known as straining and is absolutely paramount to achieving that refreshing clarity in your drink. Why strain? It removes all those fibrous bits and pulp that might otherwise muddle your experience, leaving behind pure watermelon essence infused in water.
As you pour, use a spatula or spoon to gently press down on the pulp in the strainer. This will encourage every last drop of that heavenly liquid gold to flow into your pitcher—don’t waste any! Take your time with this step; rushing can lead to remnants of pulp sneaking their way back into your drink, and we want nothing less than pure refreshment here. The result should be a crystal-clear beverage with an enticingly light pink hue that beckons you to take a sip. Trust me when I say this will be worth every moment spent straining!
Step 7: Chill Out
After straining your luscious Watermelon Water into the pitcher, it’s time for perhaps one of my favorite steps: chilling! While you may be tempted to dive right in (and who could blame you?), allowing it some time in the refrigerator makes all the difference in enhancing flavors and achieving optimal refreshment. Ideally, let it chill for at least one hour—but I often find that if I can wait for two hours or even longer, those flavors deepen and meld together beautifully.
Why chill? The cooling process not only lowers the temperature but allows any residual sweetness from the watermelon to blossom further. As it chills, those lovely notes become even more pronounced while creating an utterly invigorating sensation when you take your first sip after waiting patiently (I know it’s hard!). If you’re feeling particularly fancy—and why not?—you can pour it over ice right before serving for an extra frosty experience!
Step 8: Final Touches – Infusing Flavors
To elevate this already spectacular Watermelon Water, let’s talk about infusions! While perfectly delicious as-is, adding zesty citrus slices or fragrant herbs can turn this drink into something truly extraordinary. Consider tossing in some fresh mint leaves or slices of lime or lemon right before serving; these ingredients introduce layers of brightness and complexity that dance on your palate—a symphony of flavors awaiting each taste.
If you’re feeling adventurous (and I wholeheartedly encourage this!), try adding other fruits like cucumber slices for freshness or berries for additional sweetness—they add both color and excitement! Just remember to let them sit in the chilled Watermelon Water for at least another 15-30 minutes before serving so their flavors can mingle beautifully with our main event—the watermelon! What makes these additions so special is how they personalize your drink; each sip becomes representative of who you are and what flavors resonate with you most deeply.
Conclusion:
As we wrap up this journey through creating your very own Watermelon Water, I hope you’re feeling just as excited as I am! This delightful recipe brings together simplicity and flavor in such a beautiful way; not only does it quench your thirst, but each sip bursts with the goodness of fresh watermelon—a truly extraordinary experience! The key flavors harmonize so well together like an inviting symphony of summer sweetness and hydration. It’s hard not to feel uplifted by something so refreshing and vibrant.
This recipe is an absolute must-try—not only because it’s delicious but also because making it is an enjoyable process filled with anticipation. Picture yourself pouring this gorgeous pink drink into glasses at a summer gathering or perhaps serving it at a picnic under the sun; it’s versatile enough for any occasion! The joy lies in how effortlessly this drink can elevate any moment—whether it’s a leisurely brunch with friends or an afternoon refreshment during yard work.
Imagine savoring one of these thirst-quenching glasses while lounging on the porch, or perhaps enjoying one during an afternoon pick-me-up; they pair beautifully with light salads or grilled vegetables. For a truly decadent experience, consider blending some fresh mint into the mix—it adds such an intoxicating aroma and enhances the flavor profile beautifully. The possibilities are endless!
Feeling adventurous? You could easily adapt this recipe by adding various fruits like strawberries or peaches—each bringing its own flair while maintaining that lovely hydration factor we adore so much! Or perhaps try infusing some basil for an unexpected herbal twist that will delight your taste buds. I invite you to experiment with these variations and share your creations with me! Let’s celebrate our love for food and creativity together—your kitchen is waiting for you!
Watermelon Water
Refreshing and hydrating Watermelon Water recipe made easy! Enjoy vibrant flavors and stay cool all day long—try it today!
- Prep Time: 10 minutes
- Cook Time: 0 minutes
- Total Time: 10 minutes
- Yield: Approximately 6 servings 1x
- Category: Beverage
- Method: Blending
- Cuisine: American
Ingredients
- 4 cups cubed watermelon
- 4 cups water
Instructions
- Blend the watermelon cubes and water together until smooth (about 30-60 seconds).
- Strain the blended mixture through a mesh strainer or cheesecloth into a pitcher to remove any pulp.
- Chill in the refrigerator for at least one hour or serve immediately over ice.
- Get creative! Add slices of lemon, lime, or fresh mint to infuse flavors before serving.
Nutrition
- Serving Size: 1 cup (240ml)
- Calories: 45
- Sugar: 9g
- Sodium: 2mg
- Fat: 0g
- Saturated Fat: 0g
- Unsaturated Fat: 0g
- Trans Fat: 0g
- Carbohydrates: 11g
- Fiber: 0g
- Protein: 1g
- Cholesterol: 0mg