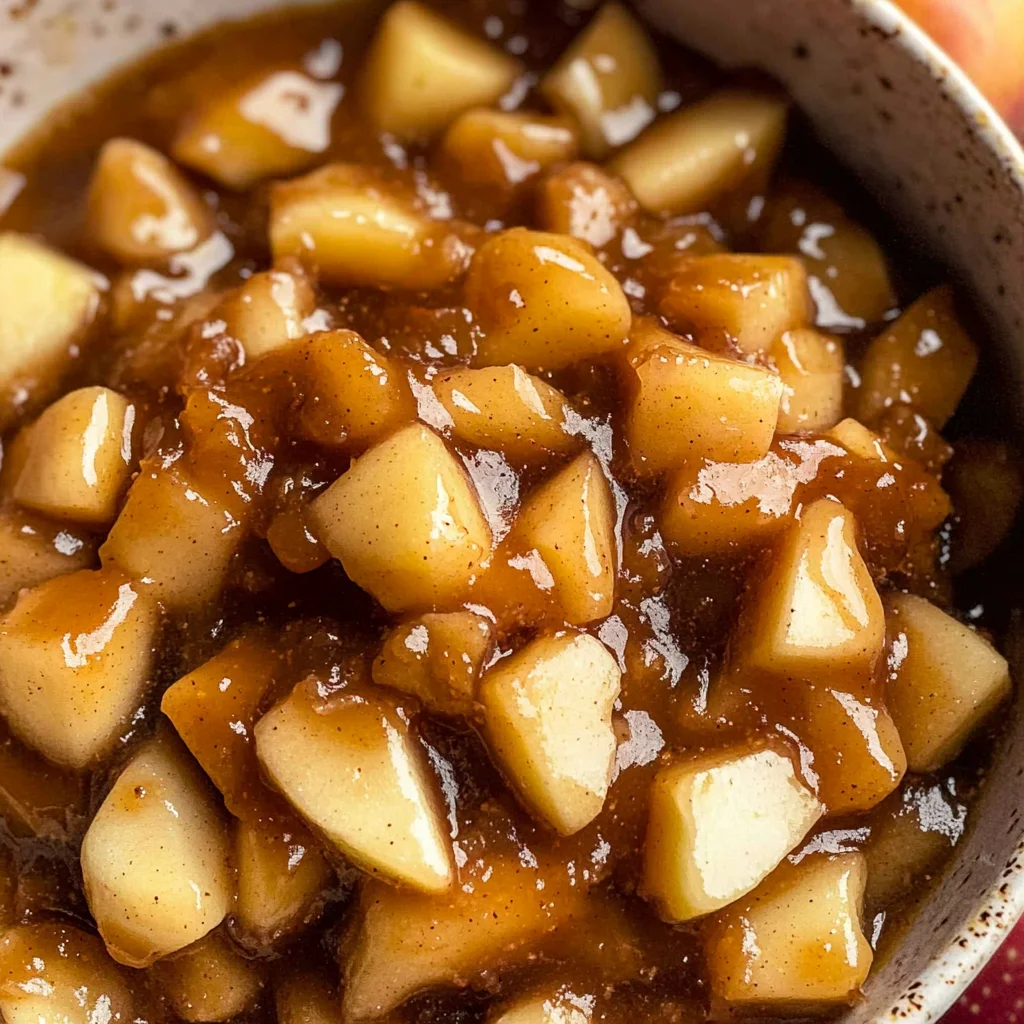
Homemade apple pie filling with brown sugar recipe
There’s something utterly enchanting about the scent of warm apples and spices wafting through the kitchen, isn’t there? It’s like a warm hug from your favorite season, an invitation to gather around the table and savor life’s simple pleasures. I’ve always been captivated by how a jar of Homemade apple pie filling with brown sugar can transform an ordinary day into something extraordinary. This recipe is not just about making a filling; it’s about creating memories that linger long after the last slice is served. The sweet aroma of cinnamon, the tartness of fresh apples, and that rich touch of brown sugar come together to create a symphony of flavors that evoke nostalgia and warmth. Imagine this filling nestled between flaky pastry layers or drizzled over warm pancakes—it’s pure magic!
As we dive into this fall-inspired delight, let’s take a moment to appreciate its versatility. This homemade apple pie filling is perfect for traditional pies, but it doesn’t stop there! You can use it in turnovers for those cozy mornings or spoon it over waffles as a breakfast treat that will make you feel like you’ve stepped straight into a charming café in autumn. And let’s not forget about those chilly evenings when all you want is something comforting and delicious to warm your soul. Trust me on this: once you try this recipe, you’ll find yourself reaching for it time and time again.
Homemade Apple Pie Filling with Brown Sugar Recipe: A Cozy Fall Classic
This delightful recipe is your ticket to creating a luscious apple pie filling bursting with flavor, perfect for any occasion that calls for comfort food. With just a handful of ingredients, you’ll discover that making your own filling is not only simple but also incredibly rewarding. Let’s embark on this delicious culinary journey together!
Ingredients:
Before we jump into cooking, let me guide you through the ingredients we’ll be using today. Each one plays an essential role in crafting that unforgettable taste.
- 4 medium apples (Granny Smith or Honeycrisp), peeled, cored, and diced. Choosing the right apple is absolutely paramount in this recipe. Granny Smith apples lend their tartness which beautifully balances the sweetness of the brown sugar, while Honeycrisp offers a delightful crunchiness that holds up well during cooking. Make sure to select firm apples—soft ones won’t give you that satisfying texture we crave in our filling.
- 2 tablespoons unsalted butter. Butter adds richness and depth to our filling; it’s what gives each bite that luxurious mouthfeel. When melted, it creates a base for our sugars and spices to meld together harmoniously. I recommend using high-quality unsalted butter so you can control the salt levels throughout your dish—this can truly elevate the flavors!
- ⅓ cup light brown sugar. This ingredient not only sweetens but also provides a hint of caramel undertones thanks to its molasses content. Light brown sugar melts beautifully into our apple mixture, creating that luscious syrupy consistency we adore. If you’re feeling adventurous, consider experimenting with dark brown sugar for an even deeper flavor profile!
- 1 teaspoon ground cinnamon. Ah, cinnamon—it’s like autumn captured in spice form! This aromatic addition transforms our apple filling into something special by enhancing the natural sweetness of the apples while adding warmth and comfort. Freshly ground cinnamon will offer more intense flavors than pre-ground options; it’s worth seeking out if you can.
- ½ teaspoon apple pie spice. A blend of spices typically including nutmeg and allspice; it’s what gives our filling its signature apple pie flavor without being overpowering. Just a touch adds complexity without overshadowing the star ingredient: our apples.
- 2 tablespoons water. Water helps create steam as we cook down our apples, assisting them in softening gracefully while allowing their juices to release—a crucial step for achieving that perfect balance of flavor and texture.
- 1 tablespoon lemon juice. This little splash adds brightness to our filling while helping to prevent browning of the apples as they cook down. The acidity cuts through sweetness beautifully, rounding out each flavor note for an utterly intoxicating experience.
- 2 teaspoons cornstarch + 2 teaspoons water (for thickening). The cornstarch slurry acts as our thickener here; it’s non-negotiable if we want that jammy consistency that clings lovingly to each apple slice! Mixing it with water before adding ensures no lumps form—who wants lumpy pie filling?
Equipment You’ll Need:
Having the right tools can elevate your cooking experience from ordinary to extraordinary! Let’s ensure you’re equipped with everything needed to create your homemade masterpiece.
- Medium skillet or saucepan: A sturdy skillet will allow us to cook our ingredients evenly over medium heat without burning them—this step is where all those beautiful flavors meld together! If you don’t have a non-stick option handy, any heavy-bottomed pan will do just fine.
- Wooden spoon or spatula: This trusty tool will help us stir everything together gently without damaging those precious apple pieces as they soften and release their heavenly juices.
- Measuring cups and spoons: Precision matters when baking or cooking! Accurate measurements ensure consistent results every time—a must-have in any kitchen!
Now that we have all our ingredients at hand and tools ready, let’s get started on preparing this divine Homemade apple pie filling with brown sugar recipe!
Step 1: Melting Butter Bliss
First things first—place your skillet over medium heat and add those two tablespoons of unsalted butter until it’s completely melted. Take a moment here; swirl the pan gently so every inch gets coated in golden goodness! Why melt it slowly? Because this allows us to maximize flavor extraction from every ingredient we’ll add next—trust me on this one! As soon as it’s bubbling delightfully but not browning (we’re not going for burnt!), we’re ready for the next step.
Step 2: Apple Symphony
Now comes the fun part: add your diced apples directly into that melted butter! Follow this with light brown sugar, ground cinnamon, apple pie spice, water, and lemon juice—all these components should mingle together like old friends at a reunion! Stir well until each piece of apple is coated beautifully in buttery sweetness—you’ll know you’re on track when you see them glistening under their sugary cloak.
Step 3: Cook Until Tender
Let this mixture simmer away for about 5–7 minutes while stirring occasionally—this rhythm allows those apples to soften luxuriously without losing their structure entirely! As they begin releasing their juices (oh my goodness—the smell!), keep an eye out; we want them tender yet still holding shape rather than mushy blobs floating around aimlessly! The melting sugar should transform into a syrupy sauce by now—it’s starting to look absolutely magical!
Step 4: Thickening Wonder
Once you’ve reached that perfect tender stage with your apples swimming happily in syrupy bliss, grab yourself a small bowl and mix 2 teaspoons cornstarch with 2 teaspoons water until smooth—a slurry fit for royalty! Pour this concoction back into our glorious apple mixture while stirring constantly—this ensures everything thickens evenly without clumping up on us unexpectedly (and nobody wants lumpy fillings!). Continue cooking for another minute or two until everything becomes glossy and jammy—the final result should cling lovingly onto each piece of fruit waiting patiently!
And there you have it—we’re just getting warmed up here! Your homemade apple pie filling with brown sugar is taking shape beautifully before your very eyes… Stay tuned as we dive deeper into finishing touches next!
Step 5: Perfecting the Sweetness and Spice
Once you’ve added the cornstarch slurry to your bubbling apple mixture, it’s like magic watching everything come together into a luscious filling. This step is absolutely paramount because the cornstarch acts as a thickening agent, which transforms your apple pie filling from a simple fruit mixture into something that can hold its own in a flaky crust or atop a warm waffle. As you pour in the slurry, make sure to stir continuously; this technique prevents any lumps from forming, ensuring that your filling has that smooth, luxurious texture we all dream of.
You’ll notice almost immediately how the sauce begins to thicken as it cooks for just another 1 to 2 minutes. Keep an eye on it during this time; you want to see that beautiful glossy sheen developing on the apples as they become enveloped in their syrupy bath. The aroma wafting through your kitchen will be utterly intoxicating, evoking memories of cozy autumn afternoons spent with loved ones. Trust me, you’ll know it’s ready when the sauce clings to the apples beautifully rather than being runny—this consistency is vital for ensuring your baked goods don’t turn soggy. If you find your filling isn’t thickening to your liking, don’t hesitate to add a little more cornstarch mixed with water and keep stirring until you achieve perfection.
Step 6: Cooling Down for Flavor
Now comes a step that many might be tempted to rush: cooling! Once you’ve removed your skillet from the heat, let this glorious apple pie filling cool down to room temperature before using it in any of your delightful creations. I know it’s hard to resist diving right in—especially when you’ve already been enchanted by those warm spices and sweet apples—but patience here is key. Allowing the filling to cool not only helps it set up nicely but also enhances the flavors as they mingle and deepen while resting.
Picture this: as the mixture sits quietly on your countertop, those warm notes of cinnamon and brown sugar continue to infuse into every apple piece, creating an even more profound flavor profile. This resting period allows for the natural juices of the apples to meld beautifully with the spices and sugar, resulting in a filling that’s profoundly satisfying and bursting with flavor when you take that first bite. If you’re preparing ahead of time, feel free to cover it tightly once cooled and store it in the refrigerator for up to three days—though I promise it won’t last long once your family gets wind of what’s cooking!
Step 7: Filling Your Crust
With our homemade apple pie filling with brown sugar now beautifully thickened and cooled, it’s time for one of my favorite parts: assembling everything into a pie! If you’re using store-bought or homemade dough (I’m always advocating for homemade if you have some time—it truly makes a difference!), roll out one disk into a circle about 1/8 inch thick and gently fit it into your pie dish without stretching it—this is crucial because a well-fitted crust ensures even baking and prevents shrinkage later on.
Once your bottom crust is prepped, fill it generously with the cooled apple mixture; don’t be shy! You want those apples piled high so they can peek out lovingly over the top of their crusty blanket when baked. Remember, this is where all that work really shines—you should be able to see little glimmers of caramelized brown sugar peeking through among those tender apple slices! Spread them evenly across the bottom but don’t pack them too tightly; leaving some space allows steam to escape during baking which is essential for achieving that perfect texture.
Step 8: The Final Touches Before Baking
Now let’s talk about sealing in all that deliciousness! For the top crust (if you’re using one), roll out another disk just like before, then gently lay it over your filled pie. Here’s where some artistry comes into play—whether you choose a full crust or go for a lattice design (which is such an elegant touch!), make sure there are plenty of slits or openings for steam to escape during baking. This step isn’t just about aesthetics; it’s actually quite essential because trapped steam can create sogginess or even cause your beautiful pie crusts to bubble over.
Before popping this masterpiece into the oven, brush the top crust with a bit of melted butter or plant-based milk—this will give you that stunning golden color we all crave while also adding extra richness. You might want to sprinkle a touch of granulated sugar over it too; trust me on this—it enhances both flavor and texture with those delightful little caramelized bits! When ready, place your pie on a baking sheet (to catch any drips) and slide it into an oven preheated at 425°F (220°C). Bake until golden brown and bubbly—usually around 45-50 minutes—but keep an eye on it! Oven temperatures can vary widely; watch for that lovely golden hue on top and listen for those enticing bubbling sounds coming from within.
Next Major Phase – Baking Your Perfect Homemade Apple Pie Filling with Brown Sugar Recipe
As your pie bakes away in its cozy oven retreat, take a moment—enjoy those sweet aromas wafting through your home! This fragrant symphony signals not only deliciousness but also comfort—a reminder of family gatherings or quiet moments spent enjoying life’s simple pleasures. Once baked to perfection, allow your creation ample time to rest before slicing; this crucial step allows all those lovely flavors to settle back down after their wild baking adventure without making a mess when cutting. Serve warm or at room temperature alongside vanilla ice cream—a contrast so divine it’ll have everyone asking for seconds!
Whether enjoyed as dessert after dinner or at breakfast topped on pancakes or waffles, I assure you this homemade apple pie filling with brown sugar will bring warmth and joy into every bite shared with loved ones around your table. Happy baking!
Storage and Enjoyment Tips for Your Homemade apple pie filling with brown sugar recipe
Now that your kitchen is filled with the delightful aroma of baked apples and warm spices, it’s time to savor the fruits of your labor! This homemade apple pie filling with brown sugar recipe is not just a treat to enjoy immediately; it’s also a wonderful companion for many occasions. Whether you’re making a classic pie, some scrumptious turnovers, or simply dolloping it over pancakes for a cozy breakfast, knowing how to store this liquid gold can extend its joy long after it’s made. Let’s dive into how we can keep this deliciousness fresh for future indulgences!
Storing Leftover Homemade apple pie filling with brown sugar recipe
To preserve your homemade apple pie filling, transfer it into an airtight container—think glass jars or plastic containers that seal tightly. Always allow the filling to cool completely before sealing it up; this step is crucial as trapping heat can lead to condensation and sogginess. When stored properly in the refrigerator, your delightful concoction will remain fresh for about 5 to 7 days. To maintain the quality of your apple filling, consider placing a slice of bread in the container; this little trick helps absorb excess moisture and keeps your apples perfectly tender without turning mushy. I promise you’ll be amazed at how good it tastes even after storage! When you’re ready to use it again, simply reheat it gently on the stove or in the microwave until warmed through—a perfect way to bring back that comforting aroma.
Freezing Homemade apple pie filling with brown sugar recipe for Later
If you find yourself with extra filling (or if you’re simply preparing for future cravings), freezing is a fantastic option! Just pour the cooled mixture into freezer-safe bags or containers—be sure to leave some space at the top since liquids expand when frozen. When done right, your homemade apple pie filling will keep well for up to 3 months in the freezer without losing its wonderful flavor and texture. When inspiration strikes and you want to whip up a quick dessert, simply take out what you need and let it thaw overnight in the refrigerator or place it directly in a saucepan over low heat until warmed through. This convenience means you can enjoy that delicious homemade goodness anytime without starting from scratch—what’s not to love?
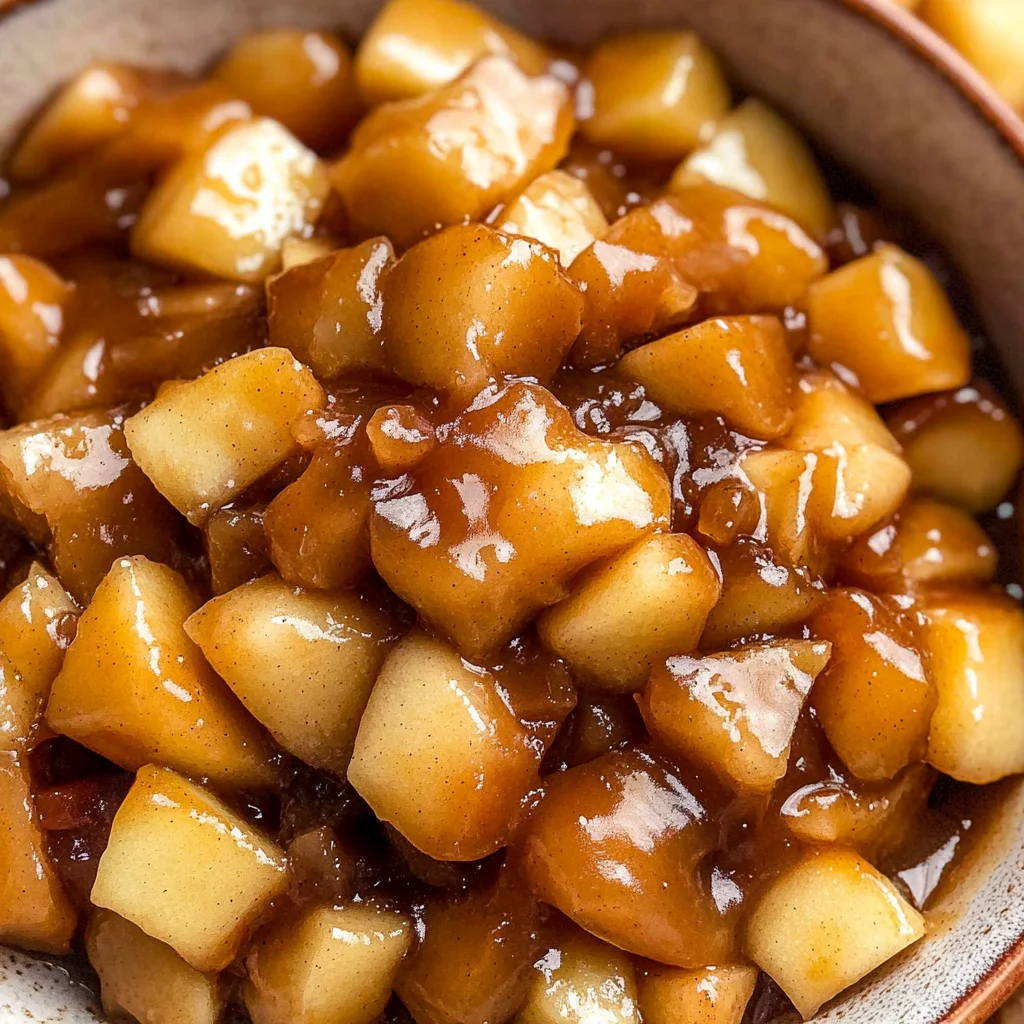
Homemade Apple Pie Filling with Brown Sugar
There’s nothing quite like the aroma of warm apples and spices filling your kitchen, creating an atmosphere of comfort and nostalgia. This homemade apple pie filling with brown sugar recipe captures that essence beautifully, transforming fresh apples into a luscious filling perfect for pies, pancakes, or even as a delightful topping for waffles. The combination of tart Granny Smith apples and sweet brown sugar, enhanced by cinnamon and spices, results in a rich flavor profile that’s sure to evoke cherished memories. Whether you’re preparing for a holiday gathering or simply craving a taste of fall, this versatile apple filling will become a staple in your dessert repertoire.
- Prep Time: 10 minutes
- Cook Time: 10 minutes
- Total Time: 20 minutes
- Yield: About 2 servings 1x
- Category: Dessert
- Method: Stovetop
- Cuisine: American
Ingredients
- 4 medium apples (Granny Smith or Honeycrisp), peeled, cored, and diced
- 2 tablespoons unsalted butter
- ⅓ cup light brown sugar
- 1 teaspoon ground cinnamon
- ½ teaspoon apple pie spice
- 2 tablespoons water
- 1 tablespoon lemon juice
- 2 teaspoons cornstarch + 2 teaspoons water
Instructions
- Melt butter in a medium skillet over medium heat.
- Add diced apples, brown sugar, cinnamon, apple pie spice, water, and lemon juice to the skillet. Stir to coat the apples evenly.
- Simmer for 5–7 minutes until apples are tender but not mushy.
- In a small bowl, mix cornstarch with water until smooth; add to the apple mixture while stirring continuously until thickened (about 1–2 minutes).
- Remove from heat and let cool before using.
Nutrition
- Serving Size: ½ cup (125g)
- Calories: 160
- Sugar: 28g
- Sodium: 10mg
- Fat: 4g
- Saturated Fat: 2g
- Unsaturated Fat: 2g
- Trans Fat: 0g
- Carbohydrates: 32g
- Fiber: 3g
- Protein: 0g
- Cholesterol: 10mg