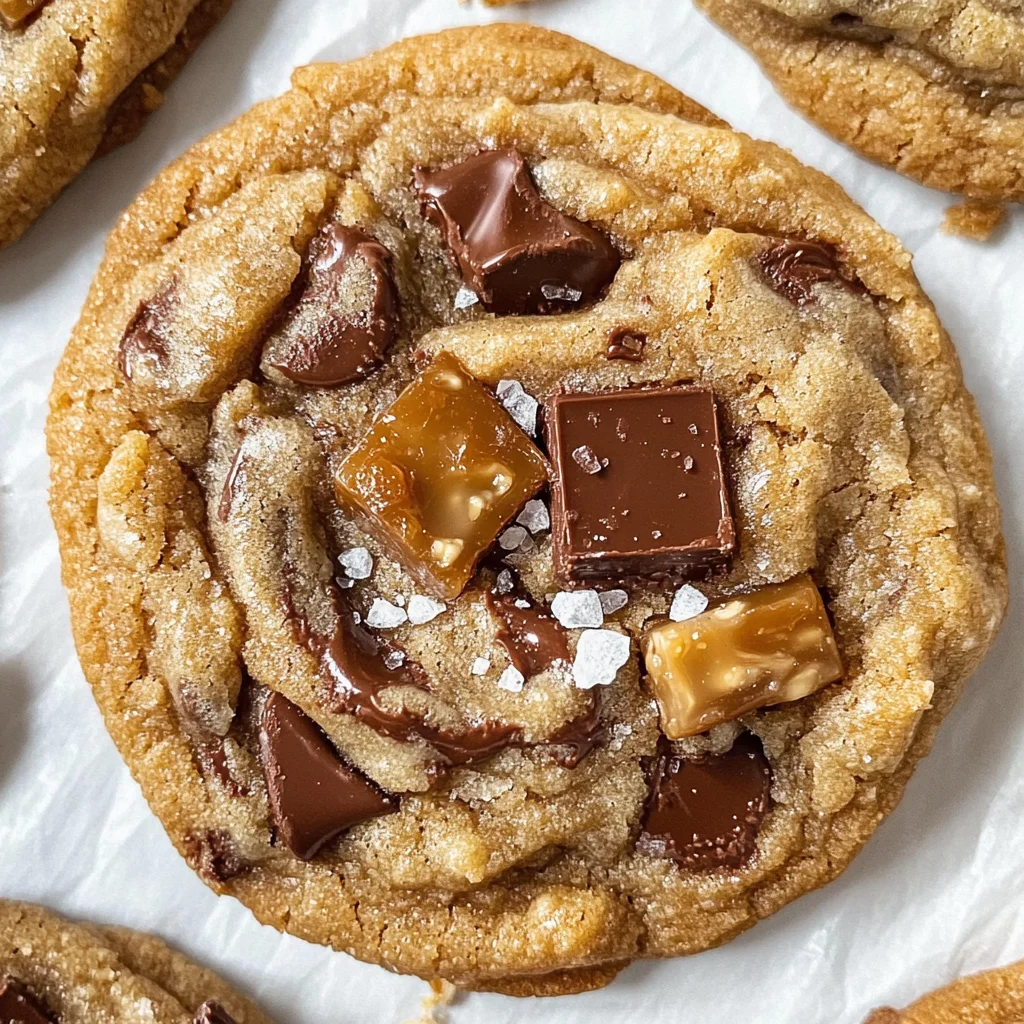
Brown Butter Toffee Cookies
There’s something truly magical about the aroma of freshly baked cookies wafting through the kitchen. It invokes memories of childhood, family gatherings, and warm embraces. When I think of my favorite treats, Brown Butter Toffee Cookies take center stage, not just because they are delicious but because they embody a beautiful harmony of flavors and textures that create sheer joy in every bite. Imagine sinking your teeth into chewy cookies, their nutty brown butter essence mingling with the sweet and salty crunch of homemade toffee—it’s like a hug for your taste buds! These cookies are more than just a dessert; they’re an experience that invites you into my world of baking, where every ingredient is cherished and every step is an adventure.
Allow me to share this delightful recipe with you, one that’s become a staple in my home and has captivated the hearts (and stomachs) of many friends and family members alike. The process may seem involved at first glance, but trust me when I say it’s absolutely worth it. With each step, you’ll uncover the secrets behind achieving that perfect chewiness and a flavor profile that dances between sweet and salty. Whether you’re baking for a holiday celebration or simply indulging in some self-care on a quiet afternoon, these Brown Butter Toffee Cookies will bring warmth and joy to your heart.
Brown Butter Toffee Cookies: A Sweet Symphony of Flavor
These cookies are a labor of love that combines the rich depth of brown butter with the irresistible crunch of homemade saltine cracker toffee. The moment you take your first bite, you’ll understand why they have earned such a special place in my heart. Each cookie is an invitation to slow down, savor the moment, and share something delightful with those you care about.
Ingredients:
As we embark on this culinary journey together, let’s talk about each ingredient that plays a pivotal role in crafting these incredible cookies. Every element contributes uniquely to the final masterpiece.
- 20 saltine crackers. These humble crackers form the base for our homemade toffee, adding both structure and a surprising crunch that contrasts beautifully with the soft cookie dough. Their salty nature balances out the sweetness perfectly—it’s this interplay of flavors that makes these cookies so addictive! If you’re looking for alternatives, you could use matzo or another saltine-type cracker; just ensure it has that same delightful crispness.
- 1/2 cup (1 stick) unsalted butter. Using unsalted butter allows us to control the amount of salt in our cookies precisely—this helps emphasize those sweet notes without overpowering them. When melted down into our toffee mixture alongside brown sugar, it creates a luscious caramel layer that’s integral to our cookie’s texture and flavor. Always choose high-quality butter; it truly makes all the difference!
- 1/2 cup light brown sugar (packed). This sugar adds moisture and depth while promoting chewiness thanks to its higher moisture content compared to granulated sugar. The molasses present in brown sugar enhances those lovely caramel notes we’re aiming for in our cookies. Don’t skip packing it tightly; this ensures you get all that rich flavor!
- 6 ounces semisweet chocolate chips. Chocolate chips are essential for providing rich bursts of sweetness amidst the salty crunch from our toffee—think of them as little pockets of joy! If you prefer dark chocolate or even dairy-free options, feel free to substitute according to your preference; they all work beautifully here.
- Sea salt for topping (optional). A sprinkle of flaky sea salt elevates these cookies from delicious to extraordinary! That touch of salt on top not only enhances the flavors but also gives each cookie an exquisite finish that’s hard to resist.
- 1 cup (2 sticks) unsalted butter (cubed). This is what we’ll be browning for our cookie dough—a crucial step that introduces rich nuttiness into our treat! Just like before, opt for unsalted butter so we can control seasoning perfectly.
- 2 1/2 cups all-purpose flour (spooned and leveled). Flour provides structure; too much can lead to dense cookies while too little might yield an overly flat result. Spoon it lightly into your measuring cup before leveling off—this ensures accuracy and guarantees fluffy results!
- 1 teaspoon baking soda. This leavening agent is vital for creating those slightly puffed edges while keeping the centers delightfully chewy—trust me; we want this balance! Make sure it’s fresh for optimal performance; baking soda loses its potency over time.
- 1 cup light brown sugar (packed). Yes! We’re using this again because there’s nothing quite like its flavor profile when paired with browned butter—it’s what gives our dough its lovely caramel undertones.
- 1/3 cup granulated sugar. This provides sweetness while helping achieve that crisp edge we adore in cookies! The combination with brown sugar promotes perfect texture too—balance is key here!
- 2 large eggs (at room temperature). Eggs act as binders while adding moisture—their room temperature state allows them to incorporate smoothly into our dough for an even consistency.
- 2 teaspoons pure vanilla extract. Vanilla elevates everything—it’s like magic in liquid form! Always go for pure extract over imitation if possible; it imparts unparalleled depth and richness.
Equipment You’ll Need:
Having the right tools makes all the difference when creating something as delightful as Brown Butter Toffee Cookies! While they aren’t ingredients, these essential partners will help ensure your baking experience is smooth sailing.
- 9×13-inch baking dish – This size is perfect for making your homemade saltine cracker toffee! It allows enough space for even layering without crowding those delicious crackers together—a crucial factor in achieving uniformity during baking.
- Parchment paper – Lining your pans prevents sticking and makes cleanup effortless! Plus, it’s great for ensuring even baking by allowing heat circulation around your goodies without any fuss.
- Medium saucepan – A sturdy saucepan is vital for both making your buttery caramel mixture as well as browning your butter later on—the heavier base helps distribute heat evenly!
- Rubber spatula – You’ll want one handy for folding ingredients together gently yet effectively while mixing up your dough or spreading chocolate over warm toffee layers—it’s versatile!
- Mixing bowls – Having multiple sizes at hand allows you flexibility when whisking dry ingredients separately before combining them with wet ones—this keeps things organized!
Now that we have everything prepared let’s dive deep into making these delectable Brown Butter Toffee Cookies!
Step 1: Crafting Your Homemade Toffee
To begin this magical journey towards cookie perfection, start by preheating your oven to 425°F—this prepares us for that glorious transformation ahead! Line a 9×13-inch baking dish with parchment paper; this simple act ensures easy removal later on after we’ve poured our luscious caramel over those saltines lined up neatly below it—straightforward yet oh-so-important! Lay out 20 saltine crackers evenly across the bottom—these will serve as both base and crunch factor once we introduce our buttery goodness above them.
Next comes the fun part: melting together half a cup of unsalted butter along with half a cup packed light brown sugar in a medium saucepan over medium-high heat while stirring occasionally until bubbling away happily on its own—the smell will already start enchanting you! Once boiling begins—which takes about five minutes or so—you’ll reduce heat slightly without stirring further so those sugars can meld beautifully into liquid gold!
After four or five minutes have passed (or until everything looks bubbly), remove from heat promptly so things don’t get away from you; pour this stunning mixture directly over those laid-out crackers using either wooden spoons or rubber spatulas—spread generously until all surfaces are covered evenly because everyone deserves some love here too!
Bake this masterpiece in preheated oven just enough time (around four–five minutes) till bubbly throughout then remove carefully—don’t forget how hot everything is still lingering post-bake! Now sprinkle six ounces semisweet chocolate chips atop warm caramel surface allowing residual warmth from below melt them gently before taking another spatula action covering entire area evenly again—it should look heavenly now! If desired sprinkle sea salt atop before letting cool entirely by transferring dish straight into freezer temporarily whilst moving onto next stages—we’re making progress here!
Step 2: Browning Your Butter
While awaiting magic from above pan cooling down slowly let’s focus on producing brown butter next which brings heavenliness unmatched amongst conventional options used elsewhere—all about depth here people! Pour one full cup cubed unsalted butter into another medium saucepan resting comfortably over medium heat gear up patience mode since this process takes roughly five minutes depending upon stovetop capabilities monitored closely throughout duration—we’re aiming golden hues folks—not burned bits ruining dreams!
Swirl lovingly around melted blocks watching bubbling foamy action unfold gradually transitioning milk solids turning golden brown before reaching aromatic bliss level wafting through air intoxicating senses near & far alike—I promise you won’t regret investing time here letting aromas permeate surroundings soaking deeply into hearts sharing happiness soon thereafter promising satisfaction levels skyrocketing exponentially once bitten into those chewy treasures ahead waiting patiently afterward still needing assembly further down line now…
Step 3: Mixing Together Dough Components
As browned beauty cools down slightly take opportunity whisk together two-and-a-half cups all-purpose flour alongside one teaspoon baking soda within large mixing bowl whose purpose becomes clear when combining dry elements beforehand ensuring no lumps exist anywhere whatsoever—it allows smooth incorporation later on during wet ingredient additions further along journey ahead always crucial towards balanced end results desired ultimately…
Once cooled enough pour combined sugars sticking together like long-lost friends meeting again inviting happiness back again instantly via gentle whisk motions gradually bringing everything together until no yellow streaks remain visible anymore—that’s right just keep mixing until uniformity achieved blissfully filling bowl whole-heartedly ready welcoming new arrivals soon entering scene now…
Step 4: Chilling Out Before Baking
Now here’s where patience pays off big time folks once more—we need our freshly combined dough resting within freezer briefly enhancing texture stability prior forming individual balls later ahead which means grabbing chopped-up pieces resembling lovely golden shards carefully set aside earlier patiently waiting eagerly longing joining forces within cold embrace soon enough…
By breaking apart cooled-toffee chunks smartly using sharp knife instead hands avoiding melted chocolate moments letting blades do tough work means less mess overall leading smoother transitions later onward plus conserving precious energy left over towards shaping final product enjoying even greater success level achieved alongside communal spirit shared among friends/family during future gatherings sure comes along hand-in-hand herein providing lasting memories formed forevermore…
Stay tuned as we continue with more steps leading towards assembling these heavenly Brown Butter Toffee Cookies bound destined capture hearts everywhere served warm fresh today tomorrow always remembering we love what we create together through simple acts kindness infused lovingly baked goods nourishing souls beyond measure!…
Brown Butter Toffee Cookies: A Delicious Journey
Oh, my friends, we are about to dive into a delightful culinary adventure that will transform your kitchen into a haven of sweet aromas and joyful memories. The moment you take that first bite of these Brown Butter Toffee Cookies, you’ll understand why I’m so passionate about sharing this recipe with you. It’s not just a cookie; it’s an experience—a symphony of flavors that dances on your palate, bringing together the rich nuttiness of brown butter with the irresistible crunch of homemade saltine cracker toffee. Trust me, once you make these, they will become a beloved staple in your home.
Step 5: The Art of Browning Butter
Now, let’s get to one of the most pivotal steps in our journey: browning the butter. This is where the magic truly begins! Take your unsalted butter—yes, we want unsalted here for precise control over flavor—and place it in a medium saucepan over medium heat. As the butter melts, keep a close eye on it and start swirling it gently. This is crucial because we want to ensure even cooking and prevent any burning. After about five minutes, the butter will begin to bubble fervently and foam up like it’s having a party! Don’t worry; this is all part of the process.
As you watch this transformation unfold, you’ll notice things getting wonderfully aromatic—this is when those nutty notes start to emerge. It’s absolutely paramount to stir constantly during this step because as the milk solids settle at the bottom, they can quickly go from golden to burnt if left unattended. You want that beautiful golden-brown color reminiscent of warm caramel; it’ll be deeply fragrant and utterly intoxicating! Once you see those tiny specks turning brown and smell that nutty aroma filling your kitchen (you might just find yourself swooning!), remove it from the heat immediately and let it cool for about ten minutes before moving on.
Step 6: Crafting Your Cookie Dough
While your glorious brown butter cools slightly, grab a large mixing bowl and whisk together your all-purpose flour and baking soda—this step ensures that our cookies have just the right lift. I promise you, taking the time to combine dry ingredients thoroughly will yield a more uniform texture in your cookies. Once your butter has cooled enough so that it won’t cook the eggs (we don’t want scrambled eggs in our cookies!), pour it into a mixing bowl along with both sugars—the light brown sugar adds depth and moisture while granulated sugar contributes to that lovely crispness when baked.
Now comes the fun part! Use a whisk to blend these ingredients together until they’re well combined; you’re looking for a smooth mixture without any lumps. Add in those two large eggs—make sure they’re at room temperature for better emulsification—and whisk again until no yellow streaks remain. This is where you’ll see everything come together beautifully; trust me on this—it makes all the difference for achieving that perfect chewy texture later on! Once combined, pour this luscious wet mixture into your dry ingredients and fold them together gently with a rubber spatula until just incorporated. It might look dry at first—don’t fret! As you mix, you’ll feel everything coming together harmoniously into a rich dough.
Step 7: The Sweet Addition of Toffee
Now it’s time for perhaps my favorite part—the addition of our homemade saltine cracker toffee! But before we get there, let’s take a quick detour; pop your cookie dough into the freezer for about ten minutes while we prepare our delectable toffee bits. Remember that beautiful slab of chocolatey goodness sitting in the freezer? Remove it now and grab a sharp knife because we need to chop this treat into small pieces. Be careful not to break it apart using your hands; if you do, some chocolate might melt from the warmth of your fingers—which we want to avoid for presentation!
Once you’ve chopped up your glorious toffee into bite-sized morsels (don’t worry if some pieces are irregular; rustic is charming!), it’s time to fold them gently into our cookie dough—resist the urge to overmix here! We want those little chunks scattered throughout each cookie for delightful surprise bites of crunchy sweetness with every munch. Save some bits aside for topping later—they’ll add an extra flair when they’re sprinkled atop each cookie fresh out of the oven! Cover your dough tightly with plastic wrap and let it chill in the refrigerator for at least two hours or up to three days if you’re planning ahead; I know patience can be tough sometimes but believe me, allowing those flavors to meld makes all the difference.
Step 8: Prepping for Baking Perfection
Ahh, we’ve reached another thrilling stage in our baking adventure! Preheat your oven to 350°F (that’s about 175°C) – this is an absolute non-negotiable step as starting with an adequately heated oven ensures even baking throughout each cookie batch. While that’s heating up beautifully, line two large baking sheets with parchment paper or silicone baking mats—this helps prevent sticking while also ensuring those lovely bottoms get enough golden-brown love during baking.
Once everything is preheated and ready, take out your chilled dough from its cozy refrigerator nap. Using a cookie scoop or simply two tablespoons (no judgment here!), portion out dollops onto your prepared sheets keeping them spaced apart by several inches—you don’t want them merging into one giant cookie! Bake these beauties in batches for about 8-10 minutes until their edges turn gloriously golden brown while their centers remain soft yet set—that’s where the magic lies! Keep an eye on them towards those last few minutes because every oven behaves differently; some may bake quicker than others.
Conclusion:
As we wrap up our delightful journey through making these Brown Butter Toffee Cookies, I can’t help but reflect on how special this recipe is—not just because of its incredible flavors or textures but due to the warmth it brings into your kitchen. I’ve always been captivated by how simple ingredients can be transformed into something truly extraordinary with just a little bit of care and attention. The nutty aroma of browned butter mingling with sweet caramelized sugar creates a symphony of flavors that dance on your palate with every bite! It’s not merely about satisfying your sweet tooth; it’s about crafting memories with each batch.
This recipe is undeniably a must-try not only because of its irresistible taste but also because of the sheer joy it brings while making it. Imagine gathering friends or family around as you pull these golden delights from the oven—the anticipation is palpable! Whether it’s for holiday gatherings or just because you deserve something special after a long week, these cookies are perfect for almost any occasion. They effortlessly blend nostalgia with modern indulgence; pulling one apart reveals oozy chocolate and crunchy toffee bits that beckon everyone closer.
And let me tell you about serving suggestions—imagine savoring one with your morning coffee or tea as a decadent pick-me-up during those busy weekdays. For an afternoon treat while curled up with a good book? Absolutely blissful! If you’re feeling adventurous (and who doesn’t sometimes?), try pairing these cookies with vanilla ice cream; imagine biting into warm cookie goodness accompanied by cold creaminess—pure magic!
Feeling adventurous? This recipe is wonderfully adaptable too! Think about adding chopped nuts for extra texture or even swapping out chocolate chips for white chocolate if that’s your jam. You could fold in dried fruits like cranberries or apricots for a burst of tartness that complements the sweetness beautifully. The world is your oyster here—get creative and make these cookies uniquely yours! As always, I invite you to try this recipe out and share your experiences with me; let’s connect through our love of baking—it’s such an inviting community!
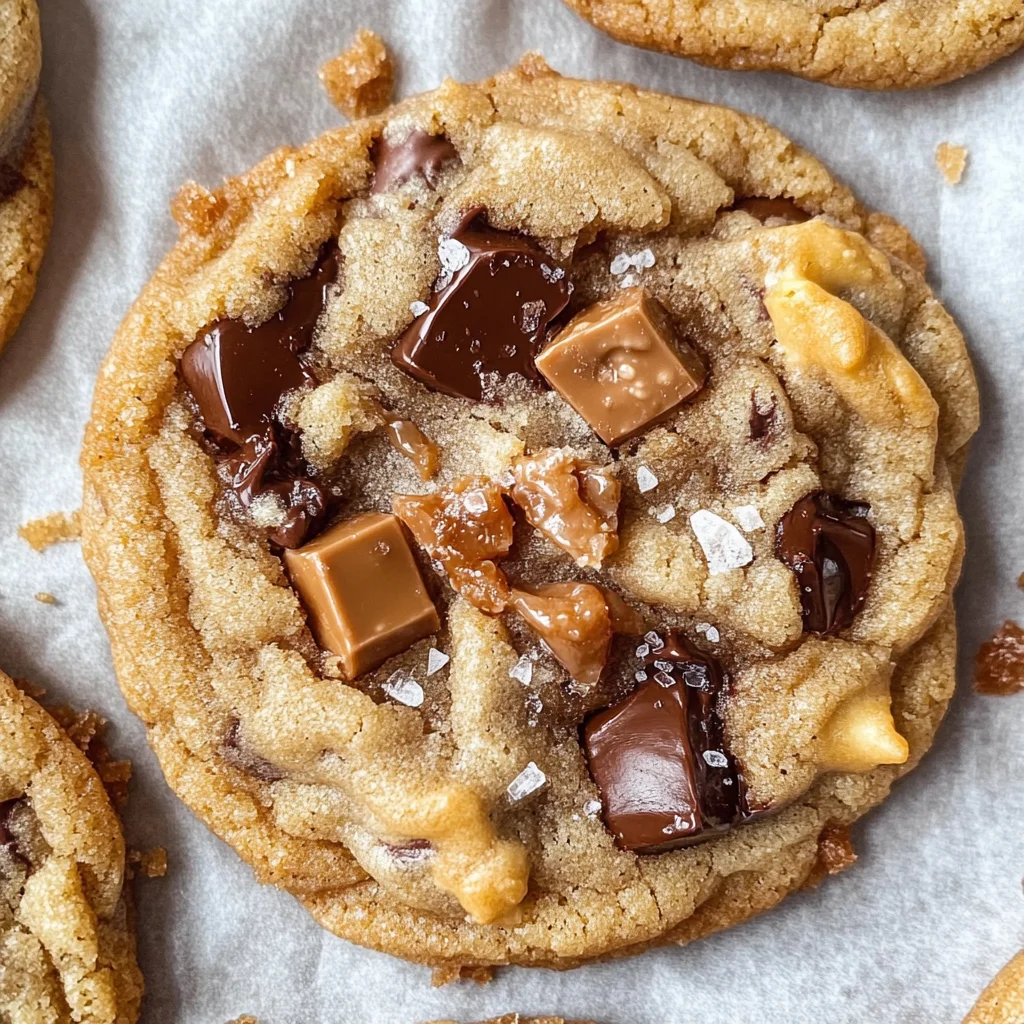
Brown Butter Toffee Cookies
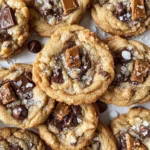
Indulge in the delightful experience of baking Brown Butter Toffee Cookies, where every bite is a harmonious blend of chewy cookie goodness and the irresistible crunch of homemade saltine cracker toffee. The nutty flavor of browned butter enhances the sweetness, while chocolate chips add rich bursts of flavor. Perfect for any occasion, these cookies are not just treats; they are warm memories waiting to be shared with friends and family. Whether enjoyed with a cup of coffee or as a festive dessert, these cookies promise to bring joy and satisfaction. This recipe is simple enough for novice bakers yet rewarding for seasoned pros—let’s dive into the magic!
- Prep Time: 30 minutes
- Cook Time: 15 minutes
- Total Time: 45 minutes
- Yield: Approximately 24 cookies 1x
- Category: Dessert
- Method: Baking
- Cuisine: American
Ingredients
- 20 saltine crackers
- 1 cup unsalted butter (divided)
- 1 cup light brown sugar (packed)
- 1/3 cup granulated sugar
- 2 large eggs
- 2 ½ cups all-purpose flour
- 1 teaspoon baking soda
- 6 ounces semisweet chocolate chips
- Sea salt (for topping, optional)
Instructions
- Preheat your oven to 425°F and line a 9×13-inch baking dish with parchment paper.
- Lay saltine crackers evenly on the bottom of the dish.
- In a medium saucepan, melt ½ cup unsalted butter with ½ cup brown sugar over medium heat until bubbling. Pour over the saltines and bake for about 5 minutes until bubbly.
- Remove from oven, sprinkle chocolate chips on top, and let them melt before spreading evenly.
- Cool in the freezer while preparing cookie dough.
- Brown the remaining butter in a saucepan over medium heat until golden and fragrant. Let cool slightly.
- In a bowl, whisk together flour and baking soda.
- Combine sugars in another bowl, then mix in browned butter and eggs until smooth.
- Fold dry ingredients into wet mixture until just combined.
- Stir in chopped toffee pieces from the cooled mixture.
- Chill dough in the refrigerator for at least two hours.
- Preheat oven to 350°F, scoop dough onto lined baking sheets, and bake for 8–10 minutes until edges are golden.
Nutrition
- Serving Size: 1 cookie (40g)
- Calories: 180
- Sugar: 12g
- Sodium: 120mg
- Fat: 8g
- Saturated Fat: 5g
- Unsaturated Fat: 3g
- Trans Fat: 0g
- Carbohydrates: 25g
- Fiber: <1g
- Protein: 2g
- Cholesterol: 20mg