Black Forest Cheesecake Bars: Decadent Delight at Home
I first fell in love with the idea of Black Forest Cheesecake Bars after a memorable visit to a charming little café tucked away in the hills. They had this decadent dessert that was just calling my name—a luscious cheesecake layered with rich chocolate and topped with tart cherries. It was a feast for both the eyes and the taste buds, and I couldn’t shake the thought of recreating it at home. With a tight budget and an insatiable sweet tooth, I figured, why not give it a shot? Surely, I could whip up something even better than what they served!
Let me tell you, perfecting these Black Forest Cheesecake Bars wasn’t a walk in the park. I lost count after my fifth attempt—yes, five! Each time, I tweaked the crust or adjusted the cream cheese ratios because I was on a quest for that perfect balance of creamy richness and chocolaty goodness. There were times when my kitchen looked like a war zone, and I might have even shed a tear or two over failed batches. But hey, every misstep brought me closer to that dreamy combination of flavors I was chasing.
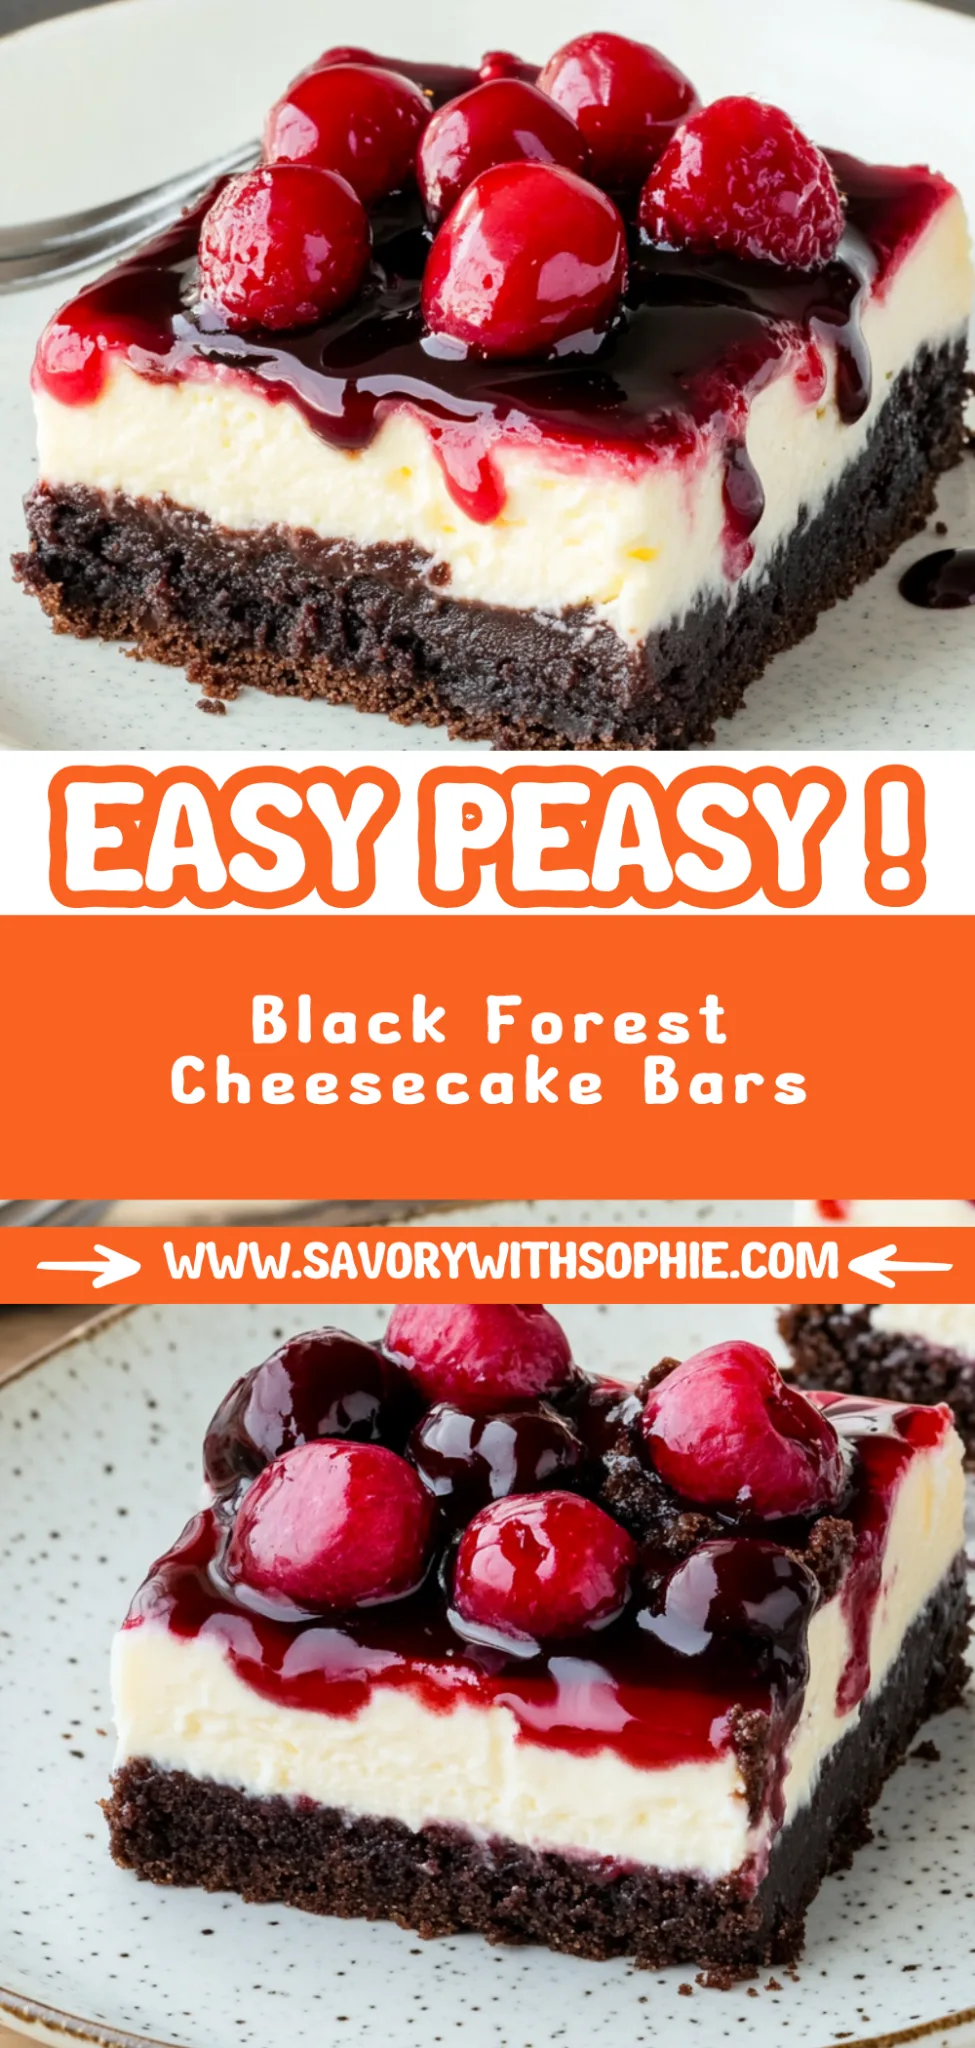
Finally, after what felt like an eternity (and too many late-night fridge raids), I nailed it! These bars are everything you’d hope for: ultra-creamy cheesecake rests on a perfectly crumbly chocolate crust, all topped with juicy cherries and clouds of whipped cream. The texture is so silky smooth you’ll be tempted to eat them straight from the pan. Trust me when I say you won’t want to miss out on these heavenly treats—I can’t wait for you to try my version of Black Forest Cheesecake Bars!
These Black Forest Cheesecake Bars are….
….the ultimate indulgence that brings the classic flavors of Black Forest cake straight to your dessert table!
1. They deliver a decadent chocolate flavor that perfectly balances the creamy cheesecake filling. The use of chocolate graham cracker crumbs in the crust infuses each bite with rich cocoa notes, making these bars an irresistible treat for chocolate lovers.
2. Irresistible texture – a crunchy yet tender crust that contrasts beautifully with the creamy cheesecake filling. The combination of melted unsalted butter and graham cracker crumbs ensures a perfect base that holds its shape while providing a delightful crunch.
3. I use a simple yet effective technique by melting the butter before mixing it with the graham cracker crumbs. This method not only helps to evenly distribute the fat throughout the crust but also enhances its flavor and makes it easier to press into the pan, creating a solid foundation for the luscious cheesecake layer.
4. These bars offer incredible value compared to store-bought desserts, allowing you to create a gourmet experience at home without breaking the bank. With just a handful of affordable ingredients, you can whip up a batch that serves multiple guests, making it perfect for gatherings or special occasions.
PS These Black Forest Cheesecake Bars yield about 12 generous squares and can be easily stored in the fridge for several days, making them an ideal make-ahead dessert!
Ingredients for the Black Forest Cheesecake Bars
Each ingredient in this dish plays an essential role in flavor and texture. Here’s what you’ll need:
- 1 cup chocolate graham cracker crumbs: Forms a rich and flavorful base for the bars.
- 1/4 cup granulated sugar: Sweetens the crust to balance the chocolate.
- 1/2 cup unsalted butter (melted): Binds the crust ingredients together while adding richness.
- 16 oz cream cheese (softened): Provides a creamy and tangy filling that is the star of the dessert.
- 1/2 cup sour cream: Enhances the cheesecake’s tanginess and adds depth of flavor.
- 1/2 cup granulated sugar: Sweetens the filling, creating a perfect balance with the tartness of the cherries.
- 1 teaspoon vanilla extract: Adds warm notes that elevate the overall flavor profile.
- 2 large eggs (lightly beaten): Helps to set the filling, giving it a smooth and stable texture.
- 1 cup cherry pie filling: Offers a sweet-tart topping that complements the rich cheesecake beautifully.
- 1 cup whipped cream (for serving): Provides a light and airy contrast to the dense bars.
- 1 tablespoon chocolate shavings (for garnish): Adds an elegant touch and enhances the chocolate flavor.
You MUST Press the Crust Firmly. Trust Me!
I’ll admit it: I thought I could skip the part about really pressing the crust down into the pan. I tried, oh how I tried! But after several attempts, I had to face the truth—there’s just no shortcut. If you don’t press that chocolate graham cracker mixture firmly enough, your cheesecake bars will crumble like a bad relationship.
So why is this step so crucial? Think of it as building a solid foundation for a house; without it, everything on top can fall apart. When you press the crust firmly, you create a sturdy base that holds its shape and provides texture contrast to the creamy cheesecake filling. It keeps those luscious layers intact and enhances the overall experience of each bite.
What does pressing the crust do?
- Texture — A well-pressed crust results in a firmer base that holds up against the creamy filling, preventing it from becoming soggy.
- Stability — The pressure helps bind the crumbs together, ensuring that when you cut into the bars, they hold their shape beautifully.
- Flavor Distribution — Pressing releases more butter into the crumbs, enhancing the chocolatey flavor throughout rather than leaving dry bits behind.
- Even Cooking — A compact crust bakes more evenly, giving you a consistent texture that complements the rich cheesecake filling.
- Shelf Life — A properly pressed crust prevents moisture from seeping in too quickly, allowing your bars to stay fresher for longer.
Different pressing times
- 10 seconds (okay) — Just enough to keep things together but may result in crumbly edges when cutting.
- 30 seconds (good) — Better binding and stability; bars hold together better but may still be slightly soft at the edges.
- 1 minute (great) — Ideal pressure; creates a firm base that withstands cutting and adds delightful crunch.
- More than 1 minute (fantastic) — Truly packed down; may yield a denser crust that some might find overly hard.
Don’t underestimate this step! The most common mistake is not pressing hard enough or being too gentle with your crust mixture. If it’s not compacted well, your beautiful Black Forest Cheesecake Bars will fall apart when you try to serve them—and trust me, no one wants a dessert disaster!
How to make Black Forest Cheesecake Bars
Are you ready to see how straightforward it is to make the Black Forest Cheesecake Bars of your dreams??
1. PREPARE THE CRUST
Let’s kick things off with a deliciously chocolatey base!
Preheat – Preheat the oven to 350°F (175°C). This step is essential for ensuring that your crust bakes evenly and becomes nice and firm.
Combine – In a mixing bowl, combine 1 cup of chocolate graham cracker crumbs, 1/4 cup of granulated sugar, and 1/2 cup of melted unsalted butter. Mix until everything is well combined; you want a crumbly mixture that’s slightly moistened from the butter.
Press – Press the mixture firmly into the bottom of a greased 9×13 inch baking pan. Make sure it’s compact—this will create a sturdy base for your creamy cheesecake filling.
Bake – Place the pan in the preheated oven and bake for 10 minutes, or until fragrant and set. Once done, remove it from the oven and let it cool slightly while you prepare the filling.
HANDY TIPS
- If you can’t find chocolate graham cracker crumbs, regular graham crackers with cocoa powder work too!
- For an extra crunch, consider adding chopped nuts to the crust mixture before pressing it into the pan.
2. MAKE THE CHEESECAKE FILLING
Get ready for that luscious filling that makes these bars irresistible!
Beat – In a large mixing bowl, beat 16 oz of softened cream cheese using an electric mixer until smooth and creamy. This should only take about a minute; you’re aiming for no lumps at all!
Mix – Add in 1/2 cup sour cream, 1/2 cup granulated sugar, and 1 teaspoon vanilla extract. Mix until everything is well combined; this helps to balance out the richness of the cream cheese with some tanginess from the sour cream.
Incorporate Eggs – Add the beaten eggs one at a time, mixing on low speed until just combined after each addition. ⚠️ Do not overmix here! Overmixing can cause cracks in your cheesecake later on.
HANDY TIPS
- Make sure your cream cheese is at room temperature for easier mixing—no one wants clumps!
- You can switch up flavors by using different extracts like almond or hazelnut instead of vanilla if you’re feeling adventurous!
3. BAKE THE CHEESECAKE
Now we’re going to bake this beauty to perfection!
Pour – Pour the cheesecake filling over the baked crust and use a spatula to smooth out the top evenly. This helps ensure that every bite has a consistent texture.
Bake – Bake in the preheated oven for 30-35 minutes, or until the edges are set but the center is still slightly jiggly—this slight jiggle means it’ll set perfectly as it cools down.
Cool – Turn off the oven and let the cheesecake cool inside with the door slightly ajar for 1 hour. This helps prevent cracks from forming due to sudden temperature changes.
HANDY TIPS
- If your cheesecake starts browning too quickly on top, you can cover it loosely with foil during baking to prevent burning.
- I recommend checking doneness at around 30 minutes so you don’t overbake it—nobody likes dry cheesecake!
4. CHILL AND SERVE
The final touches bring everything together beautifully!
Refrigerate – Refrigerate the cheesecake for at least 4 hours or preferably overnight to set completely. This chilling time allows all those delicious flavors to meld together perfectly.
Top & Serve – Once set, top with cherry pie filling, whipped cream, and chocolate shavings before cutting into bars. 💡 TIP: Use a hot knife (dip in hot water) when cutting for clean edges!
HANDY TIPS
- Feel free to substitute homemade cherry topping if you’re feeling inspired—it adds an extra personal touch!
- These bars can be made ahead of time; they actually taste better after sitting overnight as flavors deepen!
You’ve just created a show-stopping dessert that’s both rich and refreshing—perfect for any occasion! These decadent Black Forest Cheesecake Bars are sure to impress anyone who takes a bite! Make these once, and I wager they will invade your dreams every night too! – Nagi x
FAQ – Black Forest Cheesecake Bars
How long do these cheesecake bars last in the fridge?
These Black Forest Cheesecake Bars will keep well in the refrigerator for about 5 to 7 days. After day 3, I find they’re about 95% as good, but by day 5, you might notice a slight decline in texture as the crust can become softer. To maximize freshness, cover them tightly with plastic wrap or store them in an airtight container. Just make sure to keep them chilled until ready to serve!
❄️ Do I really have to chill? YES YOU DO.
Yes, chilling is absolutely essential! After baking, you need to refrigerate these bars for at least 4 hours (or ideally overnight) to allow the cheesecake filling to set properly. Skipping this step results in a gooey mess that won’t hold its shape when you cut it into bars. Trust me, I’ve tried it — and nobody wants a cheesecake soup on their plate!
Can I freeze these cheesecake bars?
Absolutely! You can freeze these cheesecake bars for up to 3 months. To freeze, make sure they are completely chilled and set first. Then, wrap them tightly in plastic wrap followed by aluminum foil to prevent freezer burn. When you’re ready to enjoy them, simply transfer them to the refrigerator and let them thaw overnight. 💡 Note: The texture may change slightly after freezing, so they’re best enjoyed fresh if possible!
🌾 Can these be made gluten free?
Yes, you can easily make these bars gluten-free! Simply substitute the chocolate graham cracker crumbs with gluten-free chocolate cookie crumbs or gluten-free graham cracker crumbs. The rest of the ingredients are naturally gluten-free as well (just double-check your sugar and whipped cream brands). This way, everyone can indulge without worry!
Can I reduce the sugar or substitute with sweeteners?
Nope, you cannot reduce the sugar in this recipe without affecting the texture and flavor of your cheesecake filling — trust me, I’ve tested it! If you’re looking for a sugar substitute, I recommend using a granulated sweetener designed for baking (like erythritol or monk fruit), but keep in mind that it may affect how well the filling sets. Just stick with the original measurements for guaranteed deliciousness!
Why do I need to let the cheesecake cool in the oven?
Letting the cheesecake cool in the oven with the door slightly ajar helps prevent cracking on top by allowing it to cool down gradually. Rapid temperature changes can cause cracks and an uneven surface — which is not what we want! I always leave mine in there for about an hour before transferring it to the fridge; it’s worth it for that smooth finish.
Can I add other toppings besides cherries?
Of course! While cherry pie filling is classic for Black Forest flavors, feel free to get creative! You could use fresh berries like raspberries or strawberries for a different twist. Alternatively, try drizzling melted chocolate over the top or even adding crushed Oreos for extra crunch. The possibilities are endless — just have fun with it!
Troubleshooting
I will continue to add more to this Troubleshooting section as I start seeing questions coming through from people who have made the recipe.
Troubleshooting tips
“My cheesecake bars are too thin! 😩”
- You may have used a smaller pan than the specified 9×13 inch. The filling needs the right surface area to set properly, and a smaller pan will result in thinner bars.
- If you didn’t press the crust firmly enough into the bottom of the pan, it can lead to a lack of structure for the filling. Make sure to pack it down well!
- I bet they were still YUM though!
“My cheesecake filling is too soft and wobbly! 😱”
- If you didn’t bake it long enough, especially if you pulled it out when it was still very jiggly in the center, it won’t firm up properly in the fridge.
- Overmixing after adding eggs can incorporate too much air, causing the filling to puff up and collapse as it cools, leading to a softer texture.
- I bet they were still YUM though!
“The edges of my cheesecake are dark and uneven! 🔥”
- Baking at an incorrect temperature (especially if your oven runs hot) can cause the edges to cook faster than the center. Always check with an oven thermometer if you’re unsure!
- If your crust was pressed too thin or unevenly, it could lead to uneven browning during baking. Make sure it’s evenly distributed across the bottom.
- I bet they were still YUM though!
“My crust is crumbly and falling apart! 😢”
- If you used too many chocolate graham cracker crumbs or not enough melted butter, your crust won’t hold together well. Aim for a perfect 1 cup of crumbs mixed with 1/2 cup of butter.
- Not pressing the crust firmly into the pan can also cause crumbliness. Make sure to really pack it down so it creates a solid base for your filling!
- I bet they were still YUM though!