Chewy Pumpkin Snickerdoodle Cookies: Fall’s Cozy Delight
I first stumbled upon the idea of Chewy Pumpkin Snickerdoodle Cookies during a cozy autumn afternoon at a charming little café that boasted a mouthwatering array of seasonal treats. The moment I took a bite, I was hooked—soft, chewy, and bursting with that warm pumpkin spice flavor we all crave this time of year. Naturally, I couldn’t resist the urge to recreate these delightful cookies at home; after all, who wouldn’t want to enjoy them in their pajamas without spending a small fortune at a café? Plus, I had this sneaky suspicion I could amp up the flavors even more!
Let me tell you, perfecting my version of Chewy Pumpkin Snickerdoodle Cookies was no walk in the park. I lost count after about five attempts (and way too many late-night cookie binges). Each batch was an experiment—one too dry, another too cakey—but it was all part of the fun! I was on a mission to achieve that ideal balance of soft and chewy texture while packing in just enough pumpkin goodness and spiced complexity to make my taste buds dance.
But oh boy, was it worth every single failed attempt! These cookies turned out to be deliciously soft and chewy, with a heavenly blend of cinnamon and nutmeg playing off the rich pumpkin flavor. When you take a bite, you get that perfect melt-in-your-mouth experience that’s simply irresistible—and they stay fresh for days! Trust me, you’re going to want to dive into these comforting little morsels as soon as possible. Happy baking!
These Chewy Pumpkin Snickerdoodle Cookies are…
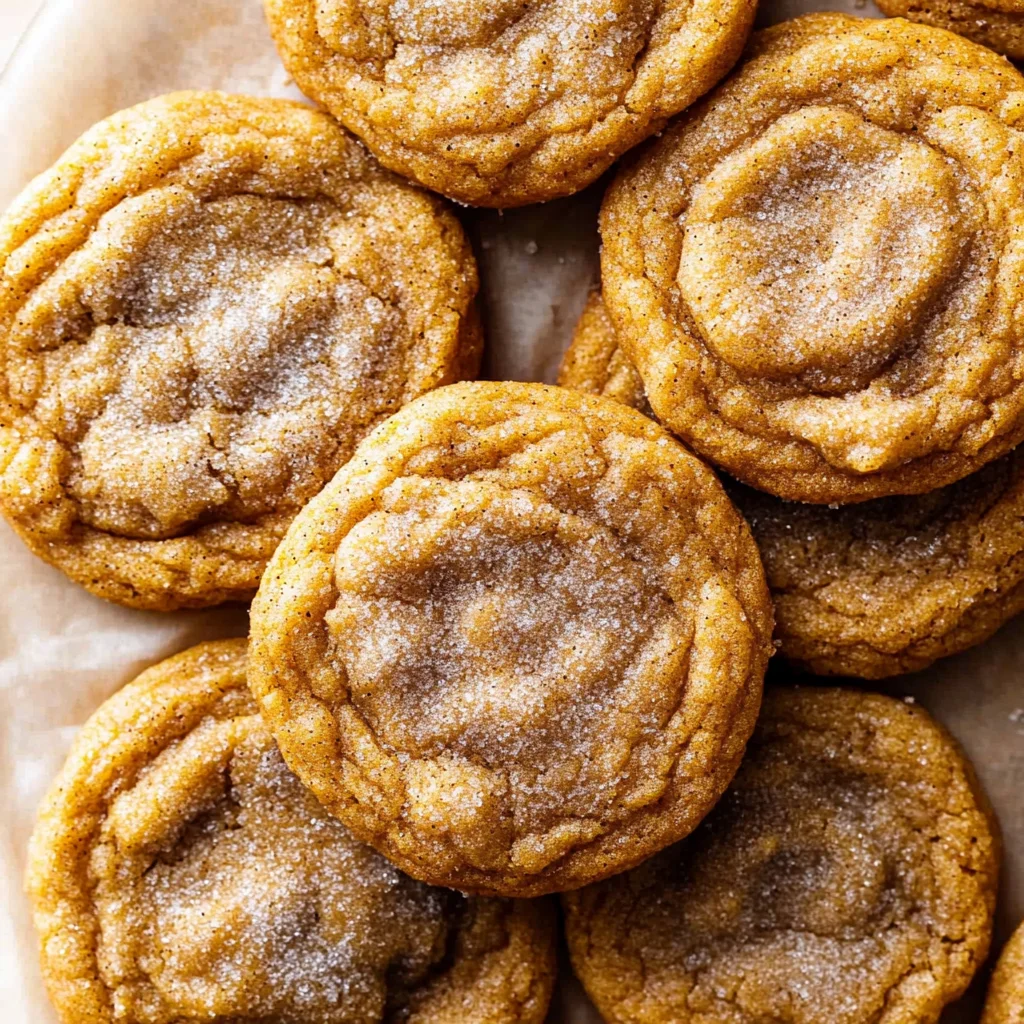
….the ultimate fall treat that brings together the warm, cozy flavors of the season!
1. They deliver an irresistibly warm flavor with a delightful blend of cinnamon and nutmeg. The combination of these spices, paired with the rich sweetness of pumpkin puree, creates a depth of flavor that truly captures the essence of fall in every bite.
2. Their perfect chewy texture will have you hooked from your first taste! Thanks to the balance between all-purpose flour and cream of tartar, these cookies achieve a soft, pillowy inside while maintaining a slight crispness on the outside—such a satisfying contrast!
3. The baking technique is key to achieving that ideal chewiness. By using both baking soda and cream of tartar, I found that they create just the right balance of lift and structure, ensuring these cookies are thick yet tender, elevating them above your average snickerdoodle.
4. Exceptional value for your baking dollar—these Chewy Pumpkin Snickerdoodle Cookies can be made with pantry staples like flour, sugar, and spices. Plus, using canned pumpkin puree makes this recipe accessible year-round, ensuring you can enjoy this delicious treat whenever the craving strikes!
PS These cookies yield about 24 delightful treats, perfect for sharing or savoring throughout the week!
Ingredients for the Chewy Pumpkin Snickerdoodle Cookies
Each ingredient in this dish plays an essential role in flavor and texture. Here’s what you’ll need:
2 cups all-purpose flour: Provides the structure and chewy texture of the cookies.
1 teaspoon baking soda: Helps the cookies rise and become light.
1 teaspoon cream of tartar: Creates tenderness and enhances the cookie’s chewiness.
1/2 teaspoon salt: Balances sweetness and elevates other flavors.
1 teaspoon cinnamon: Infuses warm, comforting spice that defines snickerdoodles.
1/2 teaspoon nutmeg: Adds a subtle depth and earthiness to the flavor profile.
1/2 cup unsalted butter (softened): Contributes richness and a tender crumb.
1 cup pumpkin puree (canned or homemade): Gives moisture, flavor, and seasonal charm to the cookies.
1 cup brown sugar (packed): Provides a deep sweetness and enhances chewiness with its molasses content.
1/2 cup granulated sugar: Sweetens while helping create a slightly crisp exterior.
1 large egg: Binds ingredients together for a cohesive dough.
1 teaspoon vanilla extract: Adds a hint of warmth that complements the spices beautifully.
1/4 cup granulated sugar: For rolling, creates a delightful sweet crust on the outside.
1 tablespoon cinnamon: Enhances the signature snickerdoodle flavor in the coating.
You Must Chill the Dough. No Shortcuts!
I’ll be honest: I tried to skip this step. I thought, “Who really needs to chill cookie dough? It’s just a few minutes in the fridge!” But after several batches and a lot of regrettable taste tests later (let’s just say some were not fit for public consumption), I’ve come to realize that chilling the dough is non-negotiable if you want those chewy, soft pumpkin snickerdoodle cookies to shine.
Chilling the dough allows the flour to hydrate fully, which is crucial when using all-purpose flour. Think of it like letting a good sauce simmer—everything comes together beautifully over time. When you chill the dough, the butter firms up, and this leads to a thicker cookie that holds its shape while baking instead of spreading out too much. Trust me on this one; your future self will thank you!
What does chilling the dough do?
- Texture: Chilling allows the gluten in the flour to relax, leading to a softer, chewier cookie.
- Flavor Development: The longer resting time gives flavors like cinnamon and nutmeg a chance to infuse throughout, enhancing the overall taste.
- Shape Retention: Cold butter helps control spread during baking, resulting in cookies that maintain their lovely round shape.
- Baking Consistency: Ensures even baking by allowing all ingredients to meld together properly before hitting the oven.
- Moisture Balance: The moisture from the pumpkin puree distributes evenly throughout the dough, preventing any part from becoming too dry or too wet.
Different chilling times
- 30 minutes (decent) — A quick chill helps slightly with texture and shape but results in cookies that are still more flat than chewy.
- 1 hour (good) — Noticeably better than 30 minutes; the cookie has improved chewiness and holds its form better.
- 2 hours (very good) — The ideal minimum! Expect more pronounced flavors and a lovely chewy texture without excessive spread.
- ⭐️ 12 hours⭐️ (best) — Pure cookie nirvana! The ultimate combination of flavor infusion and perfect chewiness, making each bite heavenly.
Beware of the temptation to skip or shorten this chilling time! Many first-time bakers overlook it, thinking they can whip up cookies on a whim. Skipping this crucial step will lead to sad, flat cookies lacking that delightful chewiness we’re all after. Don’t say I didn’t warn you!
How to make Chewy Pumpkin Snickerdoodle Cookies

Are you ready to see how straightforward it is to make the Chewy Pumpkin Snickerdoodle Cookies of your dreams??
1. PREPARE THE OVEN AND BAKING SHEET
Let’s get that oven warmed up and ready for some deliciousness!
1. Preheat – Preheat your oven to 350°F (175°C) and line a baking sheet with parchment paper. This will prevent the cookies from sticking and help them bake evenly.
2. MIX DRY INGREDIENTS
The foundation of flavor starts here!
2. Whisk – In a mixing bowl, whisk together the all-purpose flour, baking soda, cream of tartar, salt, cinnamon, and nutmeg until everything is well combined. This ensures that the leavening agents are evenly distributed throughout the dough, giving your cookies that perfect lift and flavor balance.
3. CREAM BUTTER AND SUGARS
Time to cream it up for that airy texture!
3. Cream – In another bowl, cream together the softened unsalted butter, brown sugar, and granulated sugar until light and fluffy. This process incorporates air into the butter, which is key for achieving those soft and chewy centers you love in snickerdoodles.
4. ADD PUMPKIN AND EGG
Pumpkin spice season is officially here!
4. Mix – Mix in the pumpkin puree, large egg, and vanilla extract until well combined. The pumpkin adds moisture and richness to your cookies while enhancing their fall flavor profile.
5. COMBINE MIXTURES
Let’s bring it all together!
5. Add – Gradually add the dry ingredients to the wet ingredients, mixing until just combined. Be careful not to overmix; you want a tender cookie where every bite melts in your mouth!
6. FORM COOKIES
Get ready to scoop!
6. Scoop – Using a cookie scoop or tablespoon, drop dough onto the prepared baking sheet, spacing them about 2 inches apart. This spacing allows for even spreading as they bake — we don’t want cookie puddles!
7. PREPARE CINNAMON SUGAR COATING
The secret weapon for snickerdoodles!
7. Mix – In a small bowl, mix together the granulated sugar and cinnamon for the coating. This gives your cookies that signature sweet-spicy crust that makes snickerdoodles so irresistible!
8. COAT COOKIES
Roll with it!
8. Roll – Roll each cookie dough ball in the cinnamon sugar mixture before placing on the baking sheet. This step adds an extra layer of flavor while creating a delightful texture on the outside.
9. BAKE COOKIES
Time to transform dough into delicious cookies!
9. Bake – Bake in the preheated oven for 10-12 minutes or until the edges are set but the centers are still soft and slightly underbaked looking — they’ll continue to firm up as they cool.
10. COOL AND SERVE
The sweet reward after all your hard work!
10. Cool – Allow cookies to cool on the baking sheet for about 5 minutes before transferring them to a wire rack to cool completely. This helps them set properly while keeping those soft centers intact.
HANDY TIPS
- For smaller cookies: Use a smaller scoop or roll into balls instead of discs; bake for about 12-14 minutes.
- Want thicker cookies? Chill your dough for at least 30 minutes before scooping; this helps prevent excessive spreading.
Make these once, and I wager they will invade your dreams every night too! – Nagi x
FAQ – Chewy Pumpkin Snickerdoodle Cookies
How long will these cookies keep? 🍪
These Chewy Pumpkin Snickerdoodle Cookies will stay fresh for about 1 week when stored properly in an airtight container at room temperature. However, their quality does start to decline slightly after a few days. I’d rate them at 97% as good on day 3, but by day 7, they might only be about 85% as delightful. If you want to keep them for longer, consider freezing them!
❄️ Can I freeze these cookies?
Absolutely! To freeze the cookies, once they are fully cooled, place them in a single layer in an airtight container or a freezer bag with as much air removed as possible. They can be frozen for up to 3 months. When you’re ready to enjoy them, simply thaw at room temperature for about 30 minutes or pop them in the microwave for a few seconds to warm them up. Just be careful not to overheat!
🌾 Can these be made gluten free?
Yes, you can make gluten-free versions of these cookies! Simply substitute the all-purpose flour with a gluten-free flour blend that is designed for baking. I’ve had success using blends with xanthan gum included since it helps mimic the structure that gluten provides. Just remember that texture may vary slightly, and they might not be quite as chewy as the original.
Can I reduce the sugar or substitute with sweeteners? 🥄
No, you cannot reduce the sugar without affecting the texture and overall outcome of the cookies — trust me, I tested this multiple times! The sugar is crucial not just for sweetness but also for achieving that chewy texture we all love. If you want to use a sweetener like stevia or erythritol, I recommend checking specific conversion charts since these alternatives can vary widely in sweetness compared to sugar.
Why do we cream the butter and sugars together? 🧈
Creaming butter and sugars together is essential because it incorporates air into the mixture which helps create a light and fluffy cookie texture. This step also ensures that your sugars dissolve properly during baking, contributing to that delightful chewiness! If you skip this step or rush it, you’ll risk ending up with denser cookies — and trust me, nobody wants that!
💡 Can I add other flavors or mix-ins?
Definitely! Feel free to customize your Chewy Pumpkin Snickerdoodle Cookies by adding mix-ins like chocolate chips, chopped nuts (walnuts or pecans work well), or even white chocolate chunks for a fun twist. You can also experiment with flavorings — adding a teaspoon of maple syrup or swapping out vanilla extract for almond extract could elevate these cookies even further!
Do I really have to chill the dough before baking? 🤔
Nope! You don’t have to chill this particular dough since it’s already quite moist from the pumpkin puree. Chilling is usually recommended for doughs that are too soft or sticky; however, if you prefer a thicker cookie or want to enhance the flavors overnight, feel free to chill it for about 30 minutes — just know it’s not necessary here. Enjoy those delicious aromas filling your kitchen right away!
Troubleshooting
I will continue to add more to this Troubleshooting section as I start seeing questions coming through from people who have made the recipe.
Troubleshooting tips
“My cookies were not as thick as yours!”
- You might have added too much pumpkin puree or didn’t measure your flour accurately. Pumpkin adds moisture, and if there’s too much, it can prevent the cookies from rising properly.
- Not creaming the butter and sugars long enough can also affect thickness; if they aren’t light and fluffy, your cookies may not hold their shape.
I bet they were still YUM though!
“My cookies came out wonky!”
- If your dough was too warm when scooping, the cookies may spread unevenly while baking. Chill the dough for about 30 minutes before scooping to help them keep their shape.
- Using a cookie scoop that’s too small or large can lead to misshapen cookies; make sure you’re using the right size for even baking!
I bet they were still YUM though!
“The surface of my cookies split and had massive crevices 😭”
- This can happen if your oven temperature is too high, causing the outside to set quickly while the inside remains soft. Make sure your oven is calibrated correctly and try reducing the heat slightly next time.
- Overmixing after adding the dry ingredients can also lead to cracks; mix until just combined to keep them tender and chewy!
I bet they were still YUM though!
“My cookies turned out too dry!”
- If you accidentally added more flour than called for (even a little extra can make a big difference), it can dry out the dough. Always measure your flour accurately by spooning it into the measuring cup and leveling it off.
- Baking for too long will also result in dry cookies; keep an eye on them and remove them once the edges are set while centers are still soft.
I bet they were still YUM though!
Chewy Pumpkin Snickerdoodle Cookies
Ingredients
Method
- Preheat your oven to 350°F (175°C) and line a baking sheet with parchment paper.
- In a mixing bowl, whisk together the flour, baking soda, cream of tartar, salt, cinnamon, and nutmeg.
- In another bowl, cream together the softened butter, brown sugar, and granulated sugar until light and fluffy.
- Mix in the pumpkin puree, egg, and vanilla extract until well combined.
- Gradually add the dry ingredients to the wet ingredients, mixing until just combined.
- Using a cookie scoop, drop dough onto the prepared baking sheet, spacing them about 2 inches apart.
- In a small bowl, mix together the granulated sugar and cinnamon for the coating.
- Roll each cookie dough ball in the cinnamon sugar mixture before baking.
- Bake in the preheated oven for 10-12 minutes, or until the edges are set but the centers are still soft.
- Allow cookies to cool on the baking sheet for 5 minutes before transferring to a wire rack to cool completely.