Orzo Salad: A Flavor-Packed Summer Delight
I first stumbled upon the idea for this Orzo Salad during a sun-soaked summer trip to a delightful little café that specialized in Mediterranean dishes. The moment I took my first bite, I was hooked—the vibrant colors and fresh flavors danced on my palate, and I knew I had to recreate it at home. With my usual penchant for making things healthier and more budget-friendly, I couldn’t help but think, “How can I make this even better?” Plus, who doesn’t love a dish that looks as good as it tastes?
Let me tell you, perfecting this recipe was no walk in the park! I went through five different iterations of this salad—yes, five! Each time, I was trying to strike that perfect balance between zesty and fresh while ensuring the orzo didn’t turn into a mushy mess. You’d think after the first couple of tries I’d have it down, but apparently, orzo has a mind of its own! It’s safe to say that my kitchen resembled a war zone by the end of it all, but hey, at least my taste testers enjoyed the journey!
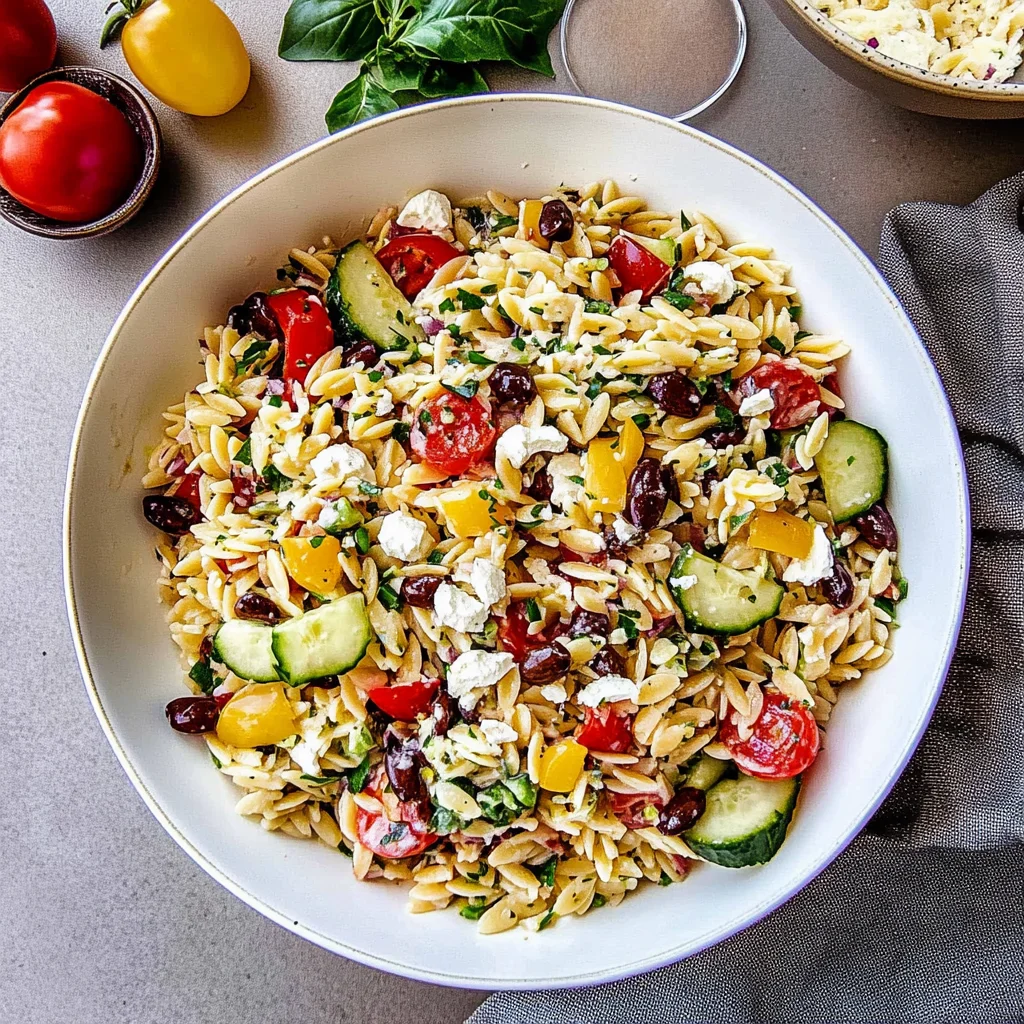
But oh boy, was it worth every single attempt! This final version of Orzo Salad is an explosion of color and flavor—think crunchy vegetables mingling with tender orzo all drizzled with a zingy lemon dressing that ties everything together like a warm hug on a chilly day. It’s got that wonderful texture contrast between crisp veggies and soft pasta that keeps each bite exciting. So grab your apron and get ready to whip up something truly special—trust me, you’re going to love this!
These Orzo Salad are….
….the epitome of fresh, vibrant flavors that scream summer in every bite!
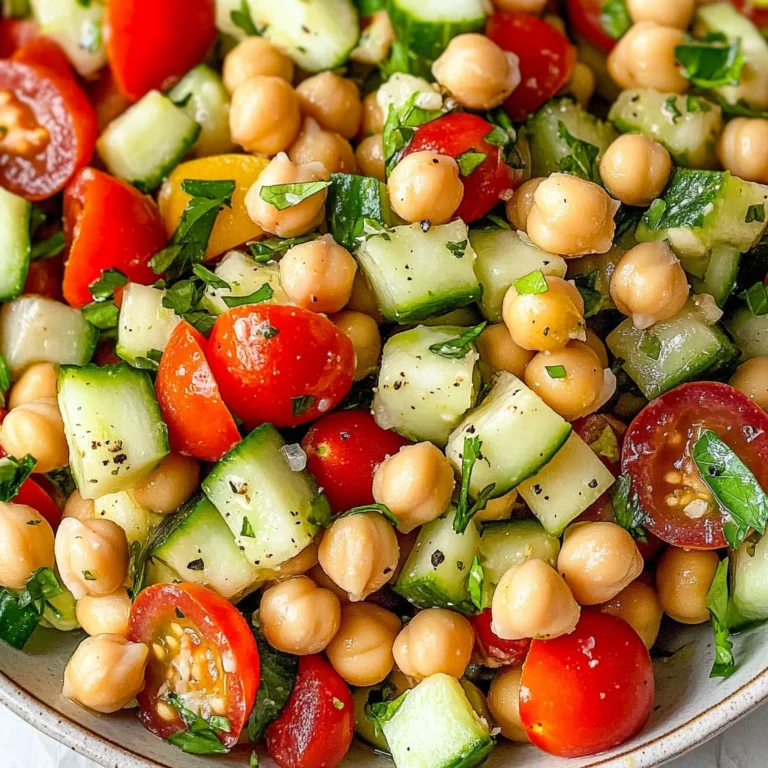
1. They offer a burst of freshness from the combination of cherry tomatoes and cucumber. The sweet, juicy tomatoes contrast beautifully with the crispness of the cucumber, creating a delightful medley that elevates the overall flavor profile of the salad. This balance is achieved by using ripe, in-season produce, making each bite a refreshing experience.
2. The perfectly tender orzo creates a satisfying base for this salad. Cooked just right, the orzo has a delightful chewiness that complements the crunch of the vegetables without overpowering them. This attention to cooking time ensures that the pasta remains al dente, providing an enjoyable texture throughout.
3. A key technique in preparing this orzo salad is tossing everything with a zesty lemon dressing just before serving. This step not only enhances the flavors but also keeps the vegetables crisp and vibrant, preventing them from becoming soggy. I love how this method maximizes flavor while maintaining an appetizing look!
4. It’s an incredible value dish—easy to prepare and budget-friendly! By using simple ingredients like orzo and seasonal vegetables, you can whip up a fresh meal at home without breaking the bank. Plus, leftovers keep well, making it perfect for meal prep or quick lunches throughout the week.
PS This Orzo Salad serves about 4 as a side dish or 2 as a light main course—ideal for picnics or gatherings!
Gather These Ingredients
Each ingredient in this dish plays an essential role in flavor and texture. Here’s what you’ll need:
1 cup orzo (uncooked): This small pasta adds a delightful chewy texture to the salad.
1 cup cherry tomatoes (halved): These bring a burst of sweetness and juiciness.
1 cup cucumber (diced): Provides a refreshing crunch that balances the flavors.
1/2 cup red onion (finely chopped): Adds a zesty bite and vibrant color.
1/2 cup bell pepper (diced): Contributes crispness and a subtle sweetness.
1/4 cup fresh parsley (chopped): Offers a bright, herbaceous note that elevates the dish.
1/4 cup fresh basil (chopped): Infuses a fragrant, aromatic quality that’s quintessential to summer salads.
1/4 cup olive oil: Serves as the rich base for the dressing, enhancing all flavors.
2 tablespoons lemon juice (freshly squeezed): Brightens the entire dish with its tangy freshness.
1 teaspoon honey (optional): Adds a touch of natural sweetness to balance the acidity.
1/2 teaspoon salt (to taste): Enhances all the flavors, bringing them together harmoniously.
1/4 teaspoon black pepper (to taste): Introduces a mild heat that rounds out the flavor profile.
Rinsing Orzo: Don’t Skip This Step!
I’ll be honest, I thought I could skip rinsing the orzo after cooking it. I mean, who really has time for extra steps, right? But after a few attempts that left me with gummy, clumpy pasta instead of the light and fluffy texture I was aiming for, I realized this technique is non-negotiable. So, trust me on this one — rinse that orzo!
Rinsing the orzo isn’t just a quirky extra step; it’s crucial for achieving that perfect texture. Think of it like cooling down a freshly baked pizza to avoid a soggy crust. When you rinse the orzo under cold water after cooking, you’re stopping the cooking process and removing excess starch. This helps prevent the pasta from sticking together in the salad and ensures each bite is distinct and delightful.
What does rinsing orzo do?
- Texture: Rinsing cools the pasta down quickly, preventing it from becoming mushy and allowing it to maintain its shape.
- Prevent Clumping: By washing away excess starch, you keep the orzo grains separate, avoiding that unfortunate clumpiness in your salad.
- Freshness: The cold rinse gives a refreshing vibe to the dish, making every spoonful feel bright and airy.
- Flavor Absorption: When not coated in sticky starch, the orzo can better absorb the zesty lemon dressing and flavors of the vegetables.
- Visual Appeal: Clean orzo looks much more appealing in your vibrant salad; nobody wants a bowl of gloop!
Different rinsing times
- Immediate rinse (⭐️ best) — Rinse immediately after draining to stop cooking completely, resulting in perfectly cooked orzo that holds its shape.
- 1 minute delay (good) — If you let it sit for even a minute before rinsing, you risk some overcooking which can lead to slightly softer pasta.
- 5 minutes delay (okay) — Waiting too long means you might end up with clumps forming as starch begins to re-stick.
- No rinse at all (poor) — Just don’t go there! Skipping this step results in gummy orzo that ruins your beautiful salad.
Don’t make the rookie mistake of skipping this rinse! It’s easy to overlook when you’re busy multitasking in the kitchen. Trust me; you want your orzo to shine in this salad, not turn into a gloppy mess!
How to make Orzo Salad

Are you ready to see how straightforward it is to make the Orzo Salad of your dreams??
1. COOK THE ORZO
Get ready to start with the star of the show — the orzo! This tiny pasta will soak up all the delicious flavors ahead.
1. BOIL – Bring a pot of salted water to a rolling boil. Adding salt is crucial as it enhances the orzo’s flavor. Once boiling, add the uncooked orzo and cook according to package instructions until al dente, which will take about 8-10 minutes. You want it tender but still firm to the bite!
2. DRAIN – After cooking, drain the orzo in a colander, making sure to shake off any excess water. Then, rinse it under cold water for about 30 seconds. This stops the cooking process and keeps your pasta perfectly al dente.
HANDY TIPS
- For extra flavor, consider adding a bay leaf or garlic clove to the boiling water.
- If you’re prepping ahead of time, you can store cooked orzo in an airtight container in the fridge for up to 3 days.
2. PREPARE THE VEGETABLES
While the orzo is cooking, it’s time to chop up some colorful veggies that will bring this salad to life!
1. CHOP – Grab your knife and cutting board! Dice the cucumber, halve the cherry tomatoes, finely chop the red onion, and dice the bell pepper into small pieces. Aim for consistent sizes so they mix well throughout your salad.
HANDY TIPS
- Use a serrated knife for cutting cherry tomatoes; it makes them easier to slice without squishing them!
- Feel free to customize with your favorite vegetables — zucchini or olives would work beautifully!
3. MAKE THE DRESSING
A zesty dressing is what ties this whole dish together — let’s whip it up!
1. WHISK – In a small bowl, combine the olive oil, freshly squeezed lemon juice, honey (if using), salt, and black pepper. Whisk everything together until well combined and slightly emulsified; this should take just a minute or two! The dressing should have a lovely golden hue.
HANDY TIPS
- Adjust the acidity by adding more lemon juice if you prefer a tangier flavor!
- For an herby twist, consider adding a pinch of dried oregano or thyme into your dressing!
4. COMBINE INGREDIENTS
Now comes the fun part where everything comes together in one big bowl of deliciousness!
1. MIX – In a large mixing bowl, combine the cooked orzo with all those chopped vegetables: cherry tomatoes, cucumber, red onion, and bell pepper.
2. TOSS – Add in your chopped parsley and basil next! Pour that vibrant dressing over everything and toss gently until all ingredients are well coated and evenly mixed.
HANDY TIPS
- When tossing salads, use two large spoons instead of metal utensils; this avoids bruising delicate ingredients like herbs.
- If you want extra creaminess, consider mixing in some crumbled feta cheese at this stage!
5. SERVE
Your beautiful Orzo Salad is ready for its debut!
1. TASTE – Before serving, take a moment to taste your creation! Adjust seasoning if necessary with additional salt or pepper.
2. SERVE – Serve chilled or at room temperature for optimal freshness! It’s perfect as a light main dish or as a delightful side.
What you’ve just created is not only visually stunning but also packed with flavor! This Orzo Salad is sure to impress at any gathering — whether it’s lunch on a sunny day or dinner with friends. Make this once, and I wager it will invade your dreams every night too! – Nagi x
FAQ – Orzo Salad
🥗 How long will this Orzo Salad keep in the fridge?
The Orzo Salad will keep for about 3 to 5 days in the refrigerator. I found that it tastes best within the first 3 days, retaining about 97% of its freshness and flavor. By day 5, it’s still safe to eat, but you might notice a decline in texture and taste—around 85% as good. Be sure to store it in an airtight container to minimize exposure to air, which can cause it to dry out or absorb odors from other foods.
⏲️ Can I skip chilling this salad before serving?
No, you can’t skip chilling the salad! Chilling allows the flavors to meld together beautifully, creating a more cohesive taste profile. I usually let it chill for at least 30 minutes after mixing everything but if you have time, an hour is even better. The coolness also makes it incredibly refreshing—perfect for warm days!
❄️ Can I freeze Orzo Salad for later?
Unfortunately, I don’t recommend freezing this salad. The fresh vegetables like cherry tomatoes and cucumber tend to become mushy when thawed, resulting in an unappetizing texture. However, if you want to prepare ahead, you can freeze just the cooked orzo (up to 3 months) and then mix fresh vegetables and dressing upon thawing. To thaw, simply leave it in the fridge overnight or give it a quick reheat with a splash of olive oil.
🌾 Is there a gluten-free option for this Orzo Salad?
Yes! To make this salad gluten-free, simply substitute the orzo with gluten-free pasta such as brown rice or quinoa pasta. Keep in mind that cooking times may vary, so check package instructions and aim for al dente texture. The vibrant flavors from the veggies and dressing will still shine through!
🔄 Can I substitute any ingredients in this recipe?
Absolutely! If you’re not a fan of red onion, try using green onions or shallots instead for a milder flavor. You can also swap the bell pepper with other crunchy veggies like shredded carrots or radishes for added texture. For the dressing, if you want a vegan option, simply omit the honey or use maple syrup as a sweetener.
🤔 Why do I need to rinse the orzo after cooking?
Rinsing the orzo under cold water halts the cooking process immediately—this way it doesn’t continue cooking and becoming mushy while cooling down. It also helps separate the grains so they don’t stick together once cooled. Trust me; I’ve tested various methods and rinsing is key for achieving that perfect al dente bite!
✅ How many times did you test this recipe?
I tested this Orzo Salad six times before sharing! Each version was tweaked until I achieved that perfect balance of flavors and textures. Every ingredient matters—from how much lemon juice brightens up the dish to ensuring that each vegetable remains crisp and fresh. So yes, I’m a little obsessed! 😅
Troubleshooting
I will continue to add more to this Troubleshooting section as I start seeing questions coming through from people who have made the recipe.
Troubleshooting tips
“My orzo turned out mushy! 😭”
- You may have overcooked the orzo, going beyond the 8-10 minutes suggested. Orzo can quickly go from perfectly al dente to mushy if left too long in boiling water.
- Another reason could be that you didn’t rinse the orzo under cold water after draining it, which helps stop the cooking process.
I bet they were still YUM though!
“My salad looks too dry! 😩”
- This could mean you didn’t use enough dressing. The 1/4 cup of olive oil and lemon juice should coat everything nicely, but if your vegetables are particularly absorbent, you might need a little extra.
- Alternatively, if you cooked the orzo without enough salt in the boiling water, it might lack flavor and moisture.
I bet they were still YUM though!
“The colors in my salad are so dull! 😕”
- If your cherry tomatoes and bell peppers were not fresh, they could lose their vibrant colors. Always opt for bright and firm produce for the best visual impact.
- Additionally, letting your salad sit too long before serving can cause some of the colors to fade as they mix together.
I bet they were still YUM though!
“My orzo clumped together! 🤔”
- This usually happens when you don’t rinse the orzo after cooking. Rinsing helps separate the grains and cools them down quickly.
- You might also be using a larger pot with insufficient water, which can lead to sticky orzo because it doesn’t cook evenly.
I bet they were still YUM though!
Orzo Salad
Ingredients
Method
- Bring a pot of salted water to a boil. Add the orzo and cook according to package instructions until al dente, about 8-10 minutes.
- Drain the orzo in a colander and rinse under cold water to stop the cooking process.
- While the orzo is cooking, chop the cherry tomatoes, cucumber, red onion, and bell pepper.
- In a small bowl, whisk together the olive oil, lemon juice, honey, salt, and black pepper until well combined.
- In a large mixing bowl, combine the cooked orzo, chopped vegetables, parsley, and basil.
- Pour the dressing over the salad and toss gently to combine.
- Taste and adjust seasoning if necessary. Serve chilled or at room temperature.