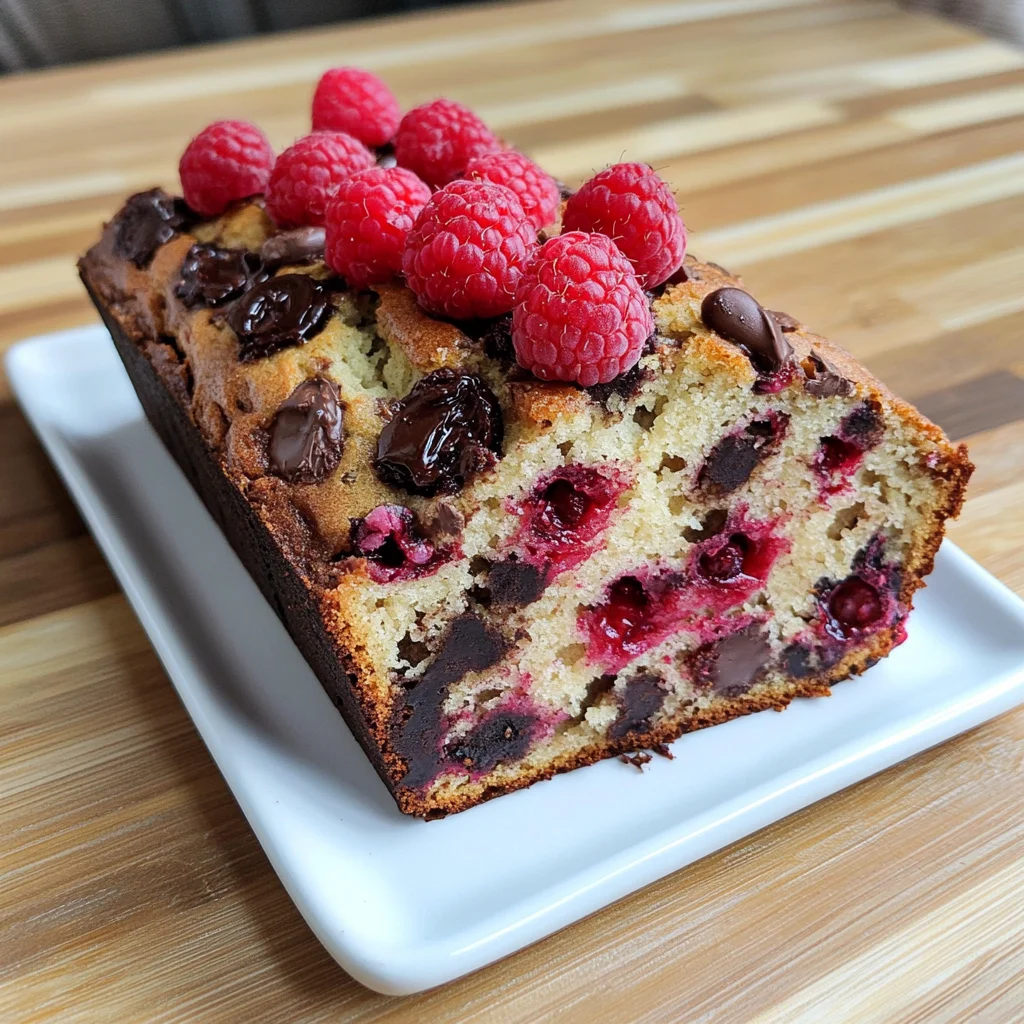
Raspberry Dark Chocolate Banana Bread
There’s something utterly magical about the aroma of freshly baked bread wafting through the kitchen, isn’t there? It’s as if the very essence of comfort has taken shape, enveloping you in a warm embrace with every delightful whiff. Today, I want to share with you one of my all-time favorite recipes: Raspberry Dark Chocolate Banana Bread. This isn’t just any banana bread; it’s a glorious fusion of flavors that transforms the humble banana into a star, surrounded by luscious raspberries and decadent dark chocolate. The experience is not merely about filling our bellies but about creating memories, nurturing our souls, and bringing loved ones closer together. I promise you, each slice is an invitation to savor life’s sweetest moments.
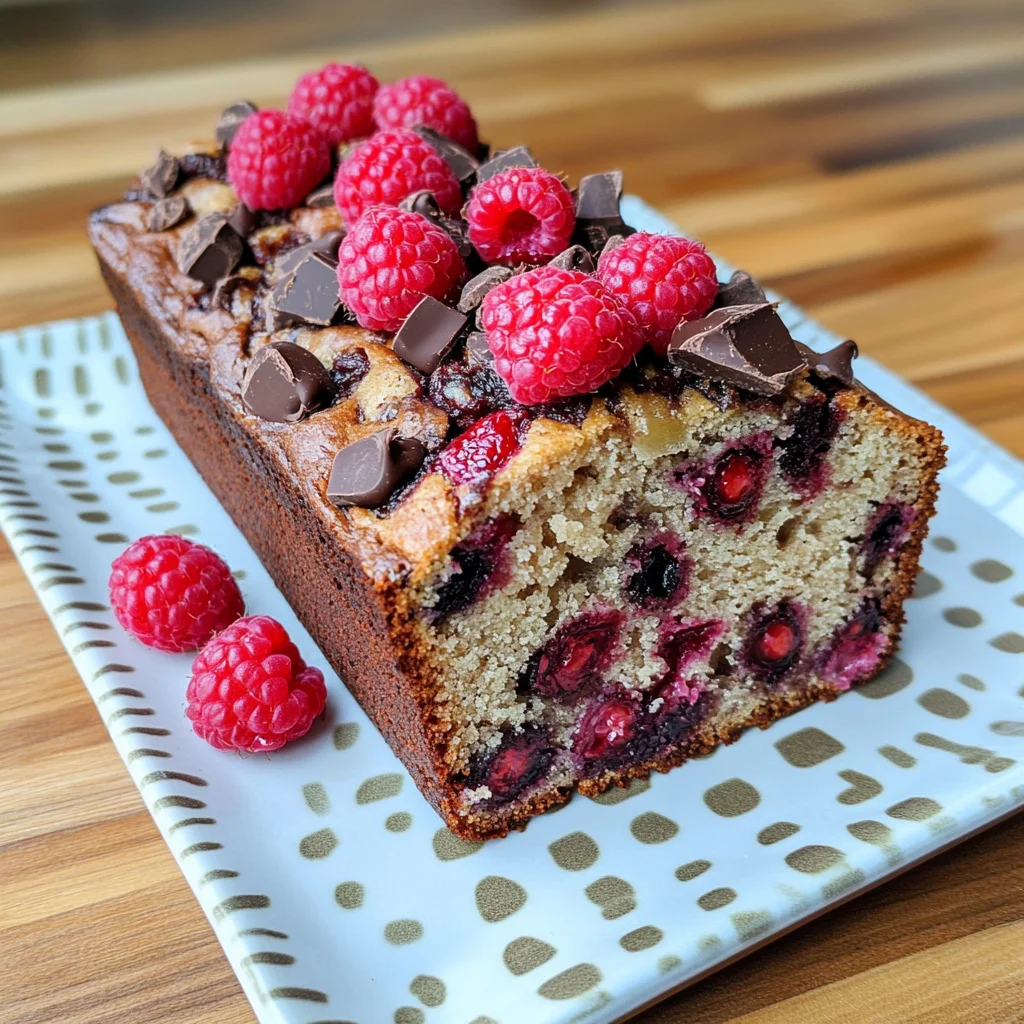
Imagine slicing into this rich loaf—the crust slightly crisp while the inside remains soft and moist. As you take your first bite, the sweetness of ripe bananas dances harmoniously with the tartness of fresh raspberries and the bittersweet notes of dark chocolate. It’s a symphony of flavors that perfectly captures the essence of comfort food while still feeling indulgent. Whether it’s a cozy morning treat with coffee or a satisfying afternoon snack, Raspberry Dark Chocolate Banana Bread is sure to impress anyone lucky enough to share in this experience. So roll up your sleeves, grab those overripe bananas sitting on your counter, and let’s embark on this delicious culinary journey together!
Raspberry Dark Chocolate Banana Bread: A Deliciously Indulgent Twist on a Classic
Welcome to an adventure that takes the classic banana bread we all know and love and elevates it to new heights! This Raspberry Dark Chocolate Banana Bread is perfect for when you want that comforting flavor but crave something a little extra special. With its moist crumb packed with rich chocolate chunks and vibrant bursts of raspberry, it’s truly extraordinary!
Ingredients:
As we dive into this recipe together, let’s take a moment to appreciate each ingredient that will play a vital role in crafting our delightful loaf. Each component brings its own character and charm to this dish, ensuring that every bite leaves you craving more.
- 2 cups all-purpose flour. This foundational ingredient provides structure to our banana bread while allowing it to rise beautifully during baking. When selecting flour, look for high-quality all-purpose flour that offers versatility in texture—this ensures your bread will have just the right balance between lightness and density. If you’re looking for alternatives, whole wheat flour can add a nutty flavor and additional fiber but may lead to a denser loaf; if you go this route, consider using half whole wheat and half all-purpose flour for best results.
- ¾ teaspoon baking soda. This leavening agent is crucial for giving our banana bread that lovely rise and airy texture we all adore. Baking soda reacts with acidic ingredients like mashed bananas and yogurt to create bubbles of carbon dioxide that help lift the batter as it bakes. Make sure your baking soda is fresh—old baking soda can lose its potency over time—so check the expiration date before getting started!
- ½ teaspoon salt. While it might seem small compared to other ingredients, salt plays an indispensable role in enhancing flavors throughout the loaf. It balances out sweetness while also intensifying the natural flavors of both the bananas and chocolate—a little pinch goes a long way towards elevating your banana bread from ordinary to extraordinary.
- 1 cup granulated white sugar. Sugar not only sweetens our loaf but also contributes moisture by attracting water during baking—a vital component in achieving that tender crumb we crave! For those who prefer less sweetness or are looking for healthier alternatives, consider using coconut sugar or reducing the amount slightly without compromising flavor.
- 4 tablespoons (½ stick) unsalted butter, at room temperature. Butter adds richness and depth to our bread while also contributing to its moist texture. Using unsalted butter gives you control over how much salt goes into your recipe; room temperature butter integrates smoothly into the batter without lumps—this step is absolutely paramount for achieving even distribution throughout.
- 2 large eggs. Eggs act as binders within our batter while also providing moisture and structure thanks to their proteins. They contribute richness as well—so use large eggs for best results! If you’re looking for egg substitutes due to dietary restrictions or preferences, consider using flaxseed meal mixed with water or applesauce as effective alternatives.
- 1½ cups mashed ripe banana (about 3 bananas). Ripe bananas are not just sweet but also bring natural moisture into our loaf! The browner they are on the outside, the sweeter they become on the inside; this caramelization process enhances their flavor profile significantly—so don’t shy away from using those speckled beauties! If you’re in a pinch without ripe bananas at hand, you can speed up ripening by placing them in a paper bag at room temperature overnight.
- ⅓ cup plain low-fat yogurt. This ingredient adds tanginess while also keeping our banana bread incredibly moist—there’s nothing worse than dry quick breads! Yogurt works wonders here by creating an ultra-tender crumb thanks to its acidity which reacts with baking soda too; feel free to swap it out for buttermilk or even dairy-free yogurt if needed!
- 1 teaspoon vanilla extract. Vanilla extract lends warmth and depth of flavor that’s simply irresistible; it’s like adding a hug in liquid form! Always opt for pure vanilla extract over synthetic versions when possible—its complex profile makes all the difference in elevating your recipe.
- 1 cup dark chocolate chunks or chips. Dark chocolate brings luxurious richness into every bite—it melts beautifully as it bakes creating gooey pockets throughout our bread that’s undeniably dreamy! Select high-quality chocolate (70% cacao or higher) for robust flavor; if you’re feeling adventurous, try mixing different types for an even more complex taste experience!
- 1 cup halved raspberries, tossed in 1 tablespoon all-purpose flour before adding them into batter. Raspberries add vibrant color along with tartness which perfectly complements sweet notes from bananas & chocolate—they’re essential! Tossing them lightly in flour prevents them from sinking during baking so each slice showcases those gorgeous little jewels nestled throughout your loaf.
Equipment You’ll Need:
Now that we’ve gathered everything necessary for our delightful creation, let’s make sure we have all our trusty tools at hand—the right equipment can truly make or break your cooking experience! You don’t need fancy gadgets here; just reliable essentials will do wonders in guiding us through this baking adventure together.
- 9×5-inch loaf pan – A good-quality loaf pan ensures even heat distribution while baking which results in perfectly shaped loaves every time! Opt for non-stick coated options if possible—they make releasing baked goods so much easier after cooling.
- Mixing bowls (medium & large) – Having separate bowls allows us better organization when combining ingredients seamlessly without any mishaps along the way—it keeps things tidy too!
- Electric mixer – While mixing by hand could work fine here too—a handheld electric mixer saves energy & time especially when creaming butter & sugar together until fluffy—that’s key!
- Measuring cups & spoons – Precision matters immensely when baking; investing in reliable measuring tools helps ensure accuracy throughout each step so everything turns out just right!
- Rubber spatula – Essential for scraping down sides of bowls & folding ingredients gently without deflating air incorporated earlier during mixing—it helps maintain optimal texture!
Let’s get ready now—our ingredients are prepped & tools are assembled—it’s almost time to dive into making this beautiful Raspberry Dark Chocolate Banana Bread!
Step 1: Prepping Your Oven & Pan
First things first—you’ll want to preheat that oven of yours to 350°F (175°C). This is crucial because starting off with an adequately heated oven ensures even cooking throughout every inch of your loaf once it hits those hot walls—not only does it help achieve optimal rise but also contributes towards developing that gorgeous golden crust we’re after! While waiting patiently (and perhaps sneaking some tastes of those mashed bananas), spray your 9×5-inch loaf pan liberally with cooking spray or brush it lightly with melted butter—and trust me on this part: it’s absolutely non-negotiable if you want smooth removal later on after cooling!
Step 2: Whisking Dry Ingredients
In a medium bowl—grab yourself those trusty whisk friends—and combine 2 cups all-purpose flour along with ¾ teaspoon baking soda & ½ teaspoon salt until evenly blended together like old pals having fun at brunch! This process ensures everything gets distributed evenly before joining forces with wet ingredients later on… Don’t rush through this step—you want each dry ingredient working harmoniously together as they form their base foundation once mixed fully!
Step 3: Creaming Butter & Sugar
Next up comes one of my absolute favorite steps—the creaming process! In another large bowl (an electric mixer makes life easier here), beat together 1 cup granulated sugar along with 4 tablespoons softened unsalted butter at medium speed until well-combined; aim for roughly one minute till everything looks light & fluffy like clouds dancing above us! Why do we cream? Well folks…this technique incorporates air into batter allowing rising action during baking so don’t skip ahead thinking it’ll be fine without aerating properly—it won’t be quite right otherwise!
Step 4: Adding Eggs & Bananas
Now comes an exciting moment—let’s introduce two large eggs one at a time into our creamy mixture while continuing beating gently after each addition until fully combined before moving onto adding those beautifully ripe mashed bananas next (about 1½ cups should suffice). Mixing these ingredients ensures moisture gets evenly distributed across batter yielding flavorful bites filled with sweetness later on down line—it’s simply divine watching transformation unfold before my eyes every single time I bake this beauty!
Stay tuned as we further explore how easy yet rewarding making Raspberry Dark Chocolate Banana Bread proves itself…
Step 5: The Magical Mixing Moment
Now that your ingredients are prepped and ready to embrace each other, let’s dive into the mixing process, which is truly where the magic begins! In your large bowl, you’ve already beaten together the sugar and butter until they form a creamy, fluffy mixture. This step is absolutely paramount because it incorporates air into the batter, resulting in a delightfully light and airy loaf. Trust me when I say that this texture is what sets your Raspberry Dark Chocolate Banana Bread apart from ordinary banana bread. Next, it’s time to add those eggs—one at a time—making sure to beat well after each addition. As you do this, you’ll notice how the mixture transforms into something luscious and inviting.
Once those eggs have been lovingly mixed in, it’s time to introduce the mashed ripe bananas, yogurt, and vanilla extract. These ingredients not only enhance the flavor profile with their sweet, fruity notes but also contribute moisture—keeping your banana bread wonderfully tender. When you mix these in, take a moment to enjoy that intoxicating aroma wafting through your kitchen; it’s such a delightful preview of what’s to come! Now here’s where we need to be mindful: as you stir in the flour mixture from earlier, do so gently until just combined. Over-mixing at this stage can lead to dense bread instead of the soft crumb we desire. So be patient; stop mixing as soon as there are no dry pockets of flour left.
Step 6: The Artful Addition of Chocolate and Raspberries
Once you’ve achieved that perfect batter consistency—smooth yet slightly lumpy—it’s time for one of my favorite parts: adding in the dark chocolate chunks and raspberries! Start by folding in those rich, velvety chocolate pieces; they’ll create little pockets of indulgence throughout the bread. As you fold them in gently with a spatula or wooden spoon, watch how they integrate beautifully into the batter, leaving swirls of chocolate goodness behind. This is where that symphony of flavors really starts coming together—the sweet bananas mingling with dark chocolate creates an utterly intoxicating combination that will have everyone racing to grab a slice!
Next up are those gorgeous halved raspberries! Before tossing them in, don’t forget to coat them lightly with that tablespoon of all-purpose flour—this clever trick helps prevent them from sinking straight to the bottom during baking. Gently fold them into your batter with care; these vibrant gems will not only infuse your banana bread with bursts of tartness but also add a lovely pop of color. Can you just picture how beautiful this loaf will look once baked? It’s crucial not to overwork it here; we want those raspberries intact for maximum juiciness and flavor when baked!
Step 7: Spoon It All Into Your Loaf Pan
Now comes the fun part—transferring that heavenly batter into your prepared loaf pan! Using a spatula or large spoon, carefully scoop out your mixture and spoon it into your greased pan. Don’t rush this step; take your time spreading it evenly so that it bakes uniformly. As you do this, consider giving it a gentle shake or tap on the counter once filled; this helps eliminate any air bubbles lurking within and ensures an even bake throughout your loaf. If you’re feeling extra creative (and who wouldn’t?), sprinkle some additional chocolate chunks and raspberry halves on top for an inviting touch—it adds visual appeal that’s simply irresistible!
Once everything is nicely settled in its pan, it’s time to slide it into that preheated oven at 350°F (175°C). Baking can feel like waiting for magic to happen; I promise you it’s worth every second! You’ll want to set a timer for about 50 minutes but keep an eye on it as baking times can vary based on oven quirks. The aroma wafting through your home will be heavenly—a warm blend of chocolatey sweetness mixed with fruity undertones.
Step 8: Testing for Perfect Doneness
As the timer approaches its end, let’s talk about how to determine if your Raspberry Dark Chocolate Banana Bread is perfectly baked without being overdone! Insert a wooden pick or toothpick into the center—if it comes out clean or with just a few moist crumbs clinging to it, congratulations! You’ve achieved banana bread perfection! If there’s still wet batter clinging onto the pick, don’t worry; simply give it another five minutes before testing again.
While waiting for this glorious moment can feel agonizing (trust me—I’ve been there!), try to resist opening the oven door too early; doing so can cause sudden temperature fluctuations that might affect rising. Instead, use those last few moments wisely by dreaming up all sorts of delicious toppings or spreads for when it’s cool enough to slice! Once done baking, remove the loaf pan from the oven carefully—you don’t want any accidental burns at this stage when you’ve come so far.
Final Touches: Cooling Down & Enjoying Every Slice
Step 9: Cooling Your Creation
After you’ve pulled out that beautifully golden-brown loaf from its cozy oven home, allow it to cool in the pan for about 15 minutes on a wire rack before attempting any slicing action—it feels like forever but trust me when I say patience is key here! Cooling allows steam inside the bread to escape slowly while setting its structure properly; cutting too soon may lead to gummy slices instead of those lovely firm pieces we crave.
Once those precious minutes have passed and you’re ready for action again, gently remove your banana bread from its pan by running a knife along the edges if needed—a little nudge should help release it effortlessly onto that cooling rack. Letting it cool completely before slicing gives all those flavors more time to meld together beautifully—a transformative effect that’s absolutely non-negotiable if you want peak taste satisfaction.
When you’re finally ready for that first slice—and oh boy will it be worth every moment spent waiting—you’ll find yourself enveloped in warmth as each bite melts away on your tongue! The perfect balance between sweet bananas and dark chocolate punctuated by zesty raspberries creates an experience that’s profoundly satisfying and utterly extraordinary.
So go ahead—slice yourself a piece (or two) of this Raspberry Dark Chocolate Banana Bread and revel in every delightful morsel as you share stories around the table or savor quiet moments alone with a cup of coffee or tea. Life is too short not to indulge in such deliciousness! Enjoy every bite—you deserve nothing less than extraordinary!
Storage and Enjoyment Tips for Your Raspberry Dark Chocolate Banana Bread
Ah, the moment has arrived! Your Raspberry Dark Chocolate Banana Bread is golden brown, bursting with flavor, and ready to take center stage on your kitchen counter. The enticing aroma wafts through your home, beckoning friends and family to gather around and share in this delicious creation. But let’s be honest; we all know that sometimes the best part of baking is enjoying the leftovers! So, how do you keep this delightful bread at its best? Let’s dive into some storage tips that will preserve every mouthwatering slice for your future indulgence.
Storing Leftover Raspberry Dark Chocolate Banana Bread
To keep your Raspberry Dark Chocolate Banana Bread fresh and flavorful, I recommend storing it in an airtight container or wrapping it tightly in plastic wrap. This will help maintain its moist texture and prevent it from drying out—because nobody wants a crumbly slice when you can have pure bliss instead! If stored properly, this delightful bread can last about 3-5 days at room temperature. However, if you’d like to extend its lifespan, pop it into the refrigerator where it can last up to a week. Trust me on this: if you want to savor that luscious chocolate and tangy raspberry goodness even longer, consider slicing up the bread before storage. This way, each slice remains perfect when you’re ready to enjoy another piece. And here’s a fun fact—this banana bread actually improves in flavor after sitting for a day or two as the ingredients meld beautifully together! When you’re ready for a taste of heaven again, simply warm a slice in the microwave for about 10-15 seconds or toast it lightly to revive those decadent chocolate chunks.
Freezing Raspberry Dark Chocolate Banana Bread for Later
Now, if you find yourself with more deliciousness than you can handle right away—or if you’re just planning ahead—freezing is an excellent option! To freeze your banana bread properly, allow it to cool completely first (this step is absolutely paramount!). Wrap individual slices or the whole loaf tightly in plastic wrap and then place them inside a freezer-safe bag or container. When packaged correctly, your Raspberry Dark Chocolate Banana Bread can stay frozen for up to three months without losing its fabulous flavor. When you’re ready to indulge again, simply remove the desired amount from the freezer—there’s no need to defrost overnight! You can enjoy a slice straight from the freezer or let it thaw at room temperature for about 30 minutes before warming it up slightly. This convenient method allows you to have this utterly intoxicating treat on hand whenever those cravings hit!
With these storage tips under your belt, you’re fully equipped to relish every bite of your Raspberry Dark Chocolate Banana Bread over time!