Strawberry Cheesecake Cinnabon Rolls: Sweet Indulgence Aw…
I still remember the first time I tasted a strawberry cheesecake cinnamon roll at my favorite café—it was like a sweet explosion of flavors that I couldn’t shake off. The combination of soft, fluffy dough filled with creamy cheesecake and juicy strawberries was so divine that I found myself daydreaming about it for weeks. So, naturally, I decided to take on the challenge of recreating these Strawberry Cheesecake Cinnabon Rolls at home. Let’s be real: it’s not just about saving a few bucks, but also the thrill of making something that beats store-bought any day.
Let me tell you, perfecting this recipe was no walk in the park. After what felt like a small eternity and probably way too many flour-covered kitchen disasters, I finally got it right after about six attempts! Each round had its own set of trials—too dense, too sweet, or not enough strawberry goodness—but each flop taught me something new. Honestly, I might have made more mess than actual rolls during this process, but hey, nothing worth having comes easy, right?
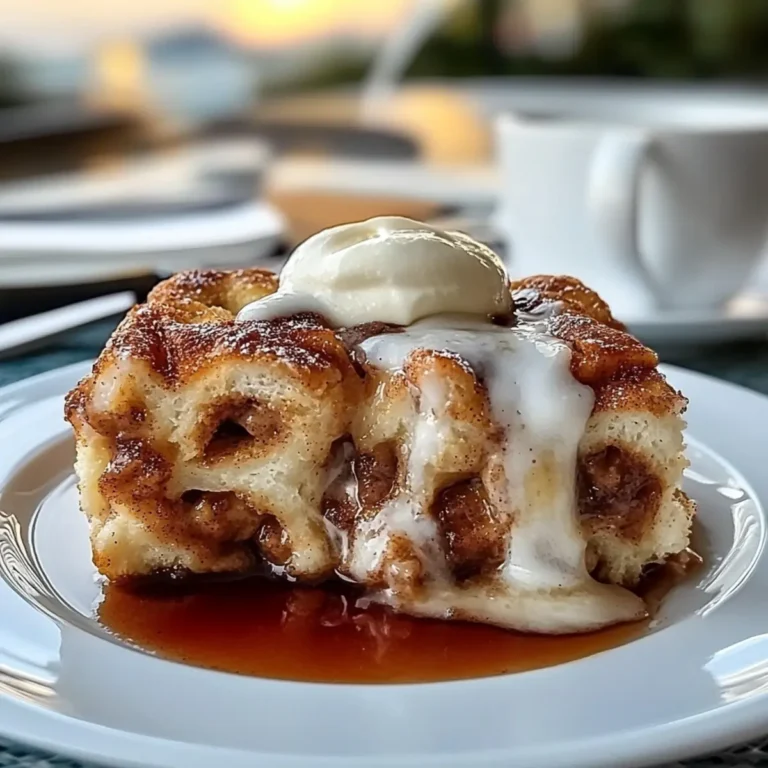
But oh boy, was it worth every sticky moment! The final result is pure magic: deliciously soft and fluffy cinnamon rolls bursting with a creamy cheesecake mixture and fresh strawberries, all drizzled with a sweet cream cheese frosting that ties everything together. They’re heavenly warm out of the oven, with a texture that’s both light and indulgent. Trust me when I say you’ll want to dive into these Strawberry Cheesecake Cinnabon Rolls as soon as they’re cool enough to handle! So grab your apron and let’s get rolling—you won’t regret it!
These Strawberry Cheesecake Cinnabon Rolls are…
….the ultimate indulgence for cinnamon roll lovers and cheesecake enthusiasts alike!
1. They deliver a burst of fruity sweetness that elevates each bite, thanks to the fresh strawberries mixed into the creamy filling. The combination of cream cheese and strawberries creates a harmonious balance of tangy and sweet flavors that is simply irresistible.
2. Incredibly soft and fluffy with a light, airy crumb that melts in your mouth. This texture is achieved by using warm milk and instant yeast, which ensures the dough rises perfectly, resulting in rolls that are pillowy soft.
3. A simple yet effective technique involves allowing the dough to rise twice, creating layers of flavor and fluffiness. This method not only enhances the texture but also deepens the overall taste profile, making each roll a delightful surprise.
4. These rolls are an affordable treat compared to those from fancy bakeries, especially considering they yield a generous batch. With basic ingredients like flour, sugar, and butter, you can whip up these Strawberry Cheesecake Cinnabon Rolls at home without breaking the bank!
PS These rolls yield about 12 perfect portions, making them ideal for sharing (or enjoying all by yourself!).
Ingredients for the Strawberry Cheesecake Cinnabon Rolls
Each ingredient in this dish plays an essential role in flavor and texture. Here’s what you’ll need:
Dough
2 cups all-purpose flour (plus more for dusting): Provides the structure and soft texture of the rolls.
1 packet instant yeast: Helps the dough rise, creating a light and fluffy consistency.
1 tablespoon sugar: Adds a hint of sweetness to balance the flavors.
1/2 teaspoon salt: Enhances the overall taste of the dough.
1/2 cup milk (warm): Activates the yeast and contributes to a tender texture.
1 large egg (beaten): Acts as a binder and adds richness to the dough.
2 tablespoons butter (melted): Introduces moisture and a rich buttery flavor.
Filling
1 cup cream cheese (softened): Creates a creamy, luscious filling that pairs perfectly with strawberries.
1/4 cup sugar: Sweetens the cheesecake mixture, enhancing its flavor.
1 teaspoon vanilla extract: Infuses warmth and depth into the filling.
1 cup fresh strawberries (sliced): Adds vibrant freshness and fruity flavor to each bite.
Topping
4 oz cream cheese (softened): Forms a rich base for the creamy frosting that complements the rolls.
1/2 cup powdered sugar: Sweetens the frosting to balance the tanginess of cream cheese.
2 tablespoons milk: Adjusts the consistency of the frosting for easy drizzling.
- 1 teaspoon vanilla extract: Provides aromatic sweetness to finish off your rolls beautifully.
You Must Knead the Dough. No Shortcuts!
I know, kneading dough sounds like a workout you didn’t sign up for, and I tried to skip it. But trust me when I say that if you want those irresistibly soft and fluffy Strawberry Cheesecake Cinnabon Rolls, you absolutely must knead the dough properly. I thought about cutting corners and just mixing everything together, but after a few failed attempts (and some very sad rolls), I learned my lesson the hard way!
Kneading the dough is crucial because it develops gluten, which gives your rolls that chewy yet tender texture we all crave in a good cinnamon roll. Think of it like giving your dough a spa day—massaging out all its worries until it’s soft and ready to rise. Without proper kneading, you’d end up with dense, sad rolls instead of the fluffy delights you’re aiming for.
What does kneading the dough do?
- Texture — Proper kneading creates gluten structure which makes your cinnamon rolls chewy on the inside while remaining soft.
- Rise — A well-kneaded dough traps more air bubbles during proofing, resulting in beautifully risen rolls that are light and airy.
- Shape — Kneading helps create a smooth surface tension in the dough, making it easier to roll out into a perfect rectangle without tearing.
- Flavor — The process of kneading helps develop complex flavors through fermentation; your cinnamon rolls will taste infinitely better than rushed versions.
- Consistency — Ensures that every bite is uniform; your rolls won’t have random pockets of density or dryness.
Different kneading times
- 1 minute (poor) — Barely mixes ingredients; dough is sticky and won’t rise properly, leading to flat cinnamon rolls.
- 5 minutes (fair) — Dough starts to come together but may still be unevenly textured; results in slightly dense rolls.
- ⭐️ 10 minutes⭐️ — Ideal! The dough is smooth, elastic, and ready to rise beautifully for light and fluffy rolls.
- Beyond 15 minutes (diminishing returns) — Over-kneaded dough can become tough; avoid turning your culinary masterpiece into a workout failure!
Don’t make the mistake of under-kneading your dough! Insufficient kneading will leave you with flat and dense cinnamon rolls that will make you question all your life choices. Be diligent and give that dough the attention it deserves!
How to make Strawberry Cheesecake Cinnabon Rolls

Are you ready to see how straightforward it is to make the Strawberry Cheesecake Cinnabon Rolls of your dreams??
1. PREPARE THE DOUGH
Let’s kick off with a fluffy, pillowy dough that will be the perfect base for our sweet rolls!
1. COMBINE – In a mixing bowl, combine warm milk, sugar, and yeast. Let this mixture sit for about 5 minutes until it becomes frothy. This step is crucial because it activates the yeast, ensuring your rolls rise beautifully.
2. MIX – Add in the flour, salt, melted butter, and beaten egg. Mix until a dough forms; you want to see everything come together into a cohesive mass.
3. KNEAD – Knead the dough on a floured surface for about 5 minutes until smooth and elastic. This develops the gluten, giving your rolls that soft texture we all love! Once smooth, place it in a greased bowl, cover with a cloth, and let rise for 1 hour until doubled in size.
HANDY TIPS
- Ensure your milk is warm (not hot!) as this helps activate the yeast without killing it.
- If your kitchen is cool, you can create a warm spot for rising by placing the bowl in an oven turned off but with the light on.
2. MAKE THE FILLING
Time to whip up that creamy cheesecake filling that will complement our rolls perfectly!
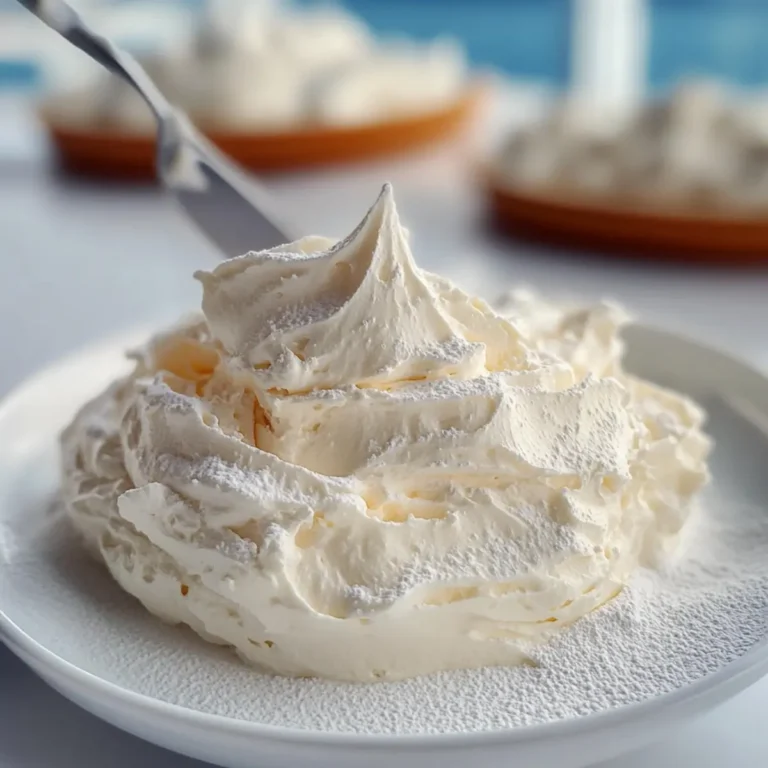
4. MIX – In a bowl, mix softened cream cheese, sugar, and vanilla extract until smooth. A hand mixer works great here if you have one; otherwise, just use some elbow grease!
5. FOLD – Gently fold in the sliced strawberries into the cream cheese mixture. Be careful not to crush them too much; you want lovely strawberry pieces throughout.
HANDY TIPS
- For easier mixing, ensure your cream cheese is at room temperature; it blends better!
- You can substitute fresh strawberries with other berries like raspberries or blueberries for a delicious twist.
3. ASSEMBLE THE ROLLS
Now comes the fun part—putting everything together to form those irresistible rolls!
6. PREHEAT – Preheat your oven to 350°F (175°C) so it’s ready when your rolls are assembled.
7. ROLL OUT – On a floured surface, roll out the dough into a rectangle about ¼ inch thick. Try to keep an even thickness for uniform cooking!
8. SPREAD – Spread the cream cheese filling evenly over the dough using a spatula or back of a spoon.
9. ROLL – Roll the dough tightly into a log starting from one long edge; this helps create those classic cinnamon roll layers.
10. CUT – Cut the rolled dough into 8 equal pieces using a sharp knife or dental floss for clean cuts! Place these rolls in a greased baking dish and let them rise again for another 30 minutes.
HANDY TIPS
- If you want larger rolls, feel free to cut fewer pieces; just adjust baking time accordingly.
- Make sure to leave some space between each roll in the baking dish so they have room to puff up!
4. BAKE AND FROST
The moment we’ve been waiting for—baking these beauties and topping them off with cream cheese frosting!
11. BAKE – Bake the rolls in your preheated oven for 20-25 minutes until golden brown on top and fragrant throughout your kitchen!
12. PREPARE FROSTING – While they bake, prepare your frosting by mixing softened cream cheese, powdered sugar, milk, and vanilla extract until smooth and creamy.
13. DRIZZLE – Once the rolls are done baking, let them cool slightly before drizzling with cream cheese frosting—this will melt slightly into those warm rolls!
HANDY TIPS
- For an extra touch of flavor in your frosting, consider adding lemon zest!
- Keep an eye on the rolls towards the end of baking; ovens can vary so look for that lovely golden hue!
Make these once, and I wager they will invade your dreams every night too! – Nagi x
FAQ – Strawberry Cheesecake Cinnabon Rolls
🍓 How long will these rolls keep?
These Strawberry Cheesecake Cinnabon Rolls are best enjoyed fresh, but they can be stored in an airtight container at room temperature for up to 2 days. After that, their quality starts to decline significantly—by day three, they’re about 85% as good, and by day four, you’re looking at roughly 75%. If you want to stretch their shelf life a bit longer, consider refrigerating them for up to a week; just know that refrigeration can dry them out slightly.
⏳ Can I skip the rising time for the dough?
No, you really can’t skip the rising time! The first rise of 1 hour is crucial for developing the gluten structure and allowing the yeast to work its magic. This results in soft and fluffy rolls rather than dense bricks. The second rise after cutting the rolls is equally important—30 minutes is necessary to let them puff up nicely before baking. Trust me, skipping either step will result in a disappointing texture.
❄️ Can I freeze these rolls?
Absolutely! You can freeze the unbaked rolls after you’ve cut them and placed them in your greased baking dish. Just cover tightly with plastic wrap and then foil; they’ll keep well in the freezer for up to 2 months. To bake from frozen, simply remove from the freezer and let them thaw in the fridge overnight. Then follow the second rise instructions before baking. If you’re freezing baked rolls, allow them to cool completely before wrapping them tightly for freezing.
🌾 Can I make these rolls gluten-free?
Yes, you can make gluten-free Strawberry Cheesecake Cinnabon Rolls! I recommend using a high-quality gluten-free all-purpose flour blend that includes xanthan gum—this helps mimic the elasticity of gluten. Just substitute the 2 cups of all-purpose flour with an equal amount of your chosen gluten-free blend. However, keep in mind that gluten-free doughs may not rise as much as traditional ones, so don’t be alarmed if they don’t look quite as fluffy!
🥛 What can I use instead of cream cheese in the filling?
If you’re looking to substitute cream cheese due to dietary restrictions or personal preference, mascarpone cheese works wonderfully as a swap—it has a similar creamy texture but is sweeter and less tangy. You could also try ricotta cheese blended smooth; however, it tends to be less thick than cream cheese, so adding a tablespoon of powdered sugar might help achieve a more similar flavor profile.
🤔 Why do I need warm milk when preparing the dough?
Using warm milk (not hot!) activates the instant yeast effectively by providing an optimal environment for fermentation. Yeast thrives at temperatures between 100°F (37°C) and 110°F (43°C). If your milk is too hot, it could kill the yeast—resulting in no rise at all. On the flip side, if it’s too cold, it won’t activate properly either. So aim for that sweet spot! But don’t worry if you mess this part up; I’ve tested this recipe way too many times, so there’s always another chance!
Troubleshooting
I will continue to add more to this Troubleshooting section as I start seeing questions coming through from people who have made the recipe.
Troubleshooting tips
“My rolls turned out too dense and tough! 😩”
- Your dough might not have risen enough due to cold ingredients or room temperature. Warm milk is crucial for activating the yeast, and if your environment is too chilly, the rising process can be sluggish.
- You may have over-kneaded the dough. Kneading for too long can develop too much gluten, making the rolls tough rather than fluffy.
- I bet they were still YUM though!
“My rolls didn’t rise at all! What happened? 😱”
- If your yeast isn’t fresh, it won’t activate properly. Always check the expiration date on your instant yeast before starting!
- You might not have let the dough sit in a warm enough place to rise. Ideally, it should be in a cozy spot away from drafts; try placing it in a turned-off oven with the light on.
- I bet they were still YUM though!
“The filling oozed out during baking! 😬”
- You may have rolled the dough too loosely when forming the log. A tight roll helps keep the filling contained while baking.
- If you didn’t allow the cream cheese filling to cool down after mixing, it could have been too runny and unable to stay inside during baking.
- I bet they were still YUM though!
“My cinnamon rolls came out too pale and undercooked! 🔥”
- It sounds like your oven might not have been hot enough. Ensure you preheat your oven properly; an accurate temperature is key to achieving that beautiful golden brown color.
- You could also be using a glass dish that retains heat differently than metal. Glass takes longer to heat up, so keep that in mind when checking baking times!
- I bet they were still YUM though!