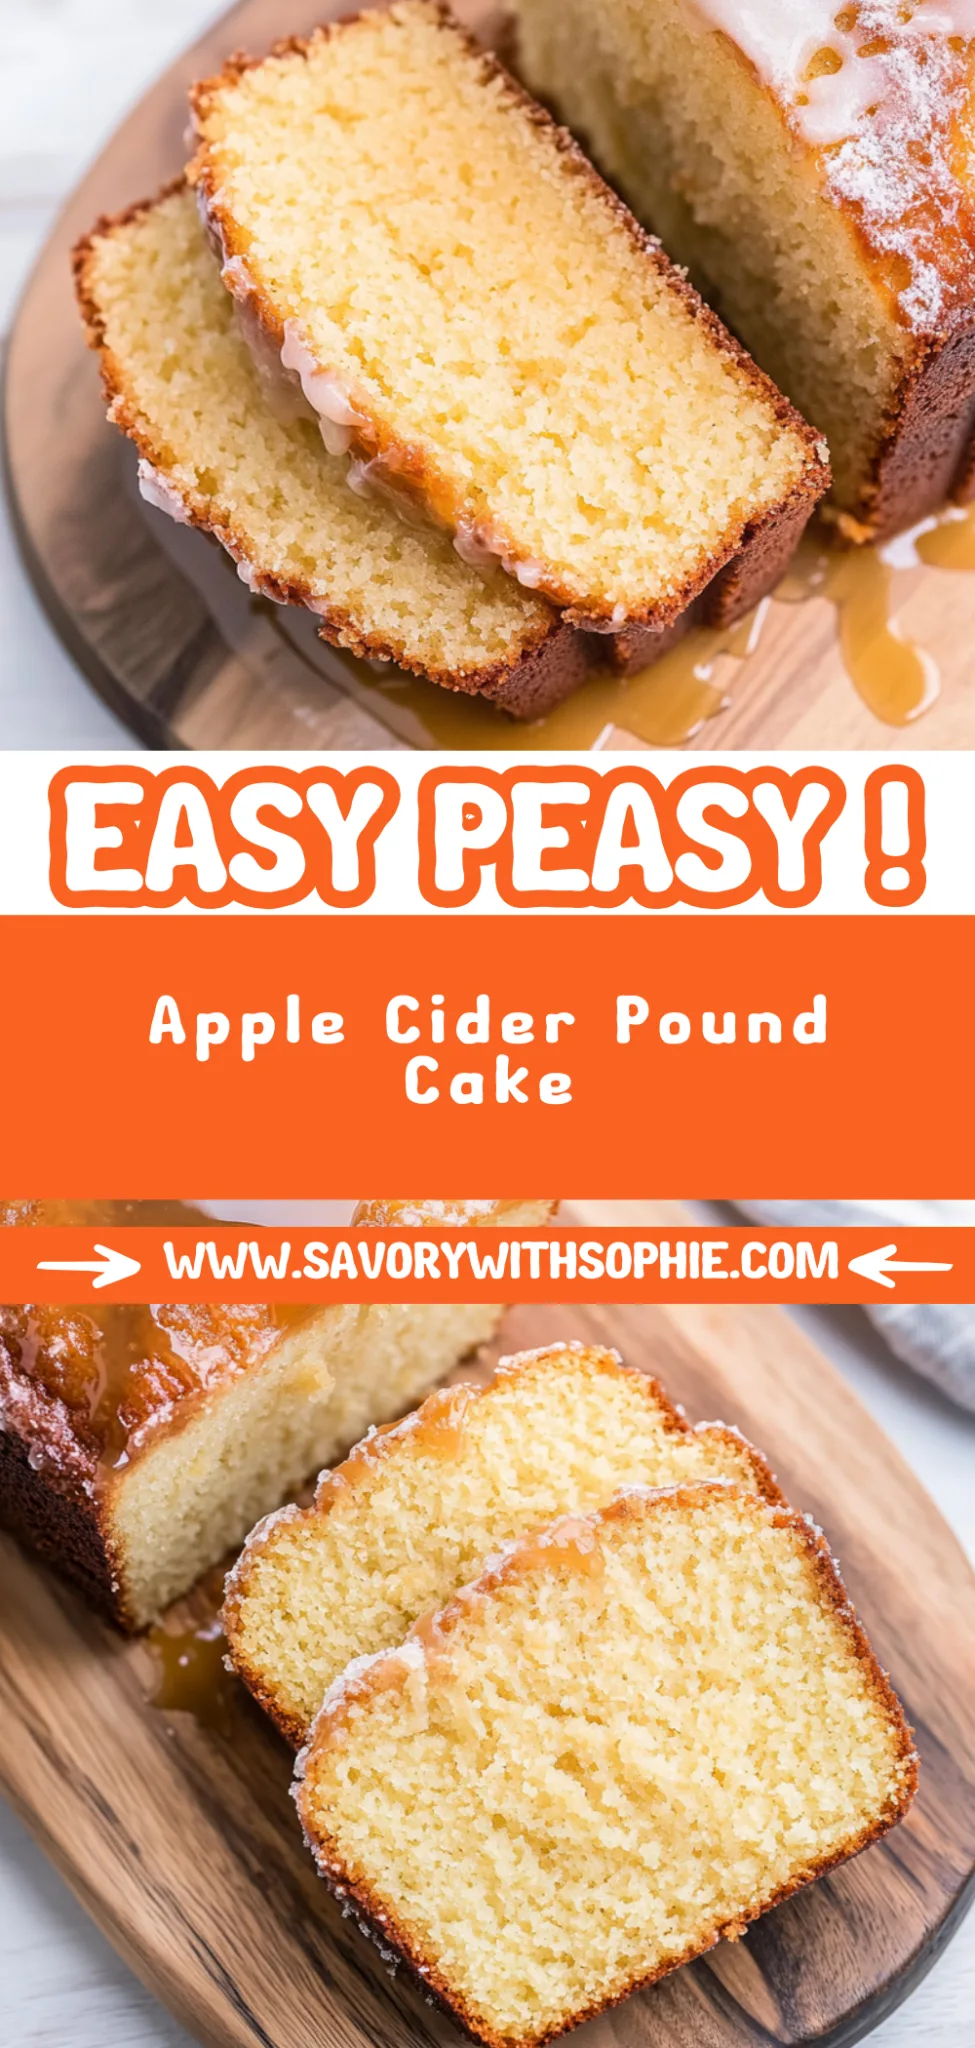
Apple Cider Pound Cake: Cozy Fall Flavor Bliss
I first stumbled upon the idea of an Apple Cider Pound Cake during a cozy fall outing at a local café, where I was instantly captivated by their seasonal menu. The moment I took a bite, I was enveloped in the warm, comforting flavors that reminded me of crisp autumn days and family gatherings. It was so good that I couldn’t shake the craving for it later that week, and that’s when I decided to recreate this delightful treat at home. Plus, let’s be real—there’s something incredibly satisfying about making something so delicious yourself rather than paying for a slice that disappears in seconds!
After several attempts (and more than a few cake mishaps), I finally nailed down the perfect recipe for my Apple Cider Pound Cake. It took me three rounds of testing to get just the right balance of moisture and spice without turning it into a dense brick—trust me, my kitchen looked like a flour bomb went off! Each iteration brought its own challenges: from figuring out how much apple cider to use without making it soggy to mastering the art of achieving that perfectly golden crust. I definitely had my fair share of “oops” moments, but every failed attempt got me one step closer to perfection.
Let me tell you, all those trials were worth it! The final result is nothing short of heavenly—a moist and flavorful pound cake infused with the warm spices of apple cider that practically screams fall. This cake boasts an incredible texture that’s both tender and rich, with a flavor profile that’s perfectly balanced between sweet and spiced. It’s destined to be the star of your next gathering or just a cozy afternoon treat. So grab your ingredients, and let’s dive into making this scrumptious Apple Cider Pound Cake together—I promise you won’t regret it!
These Apple Cider Pound Cake are…
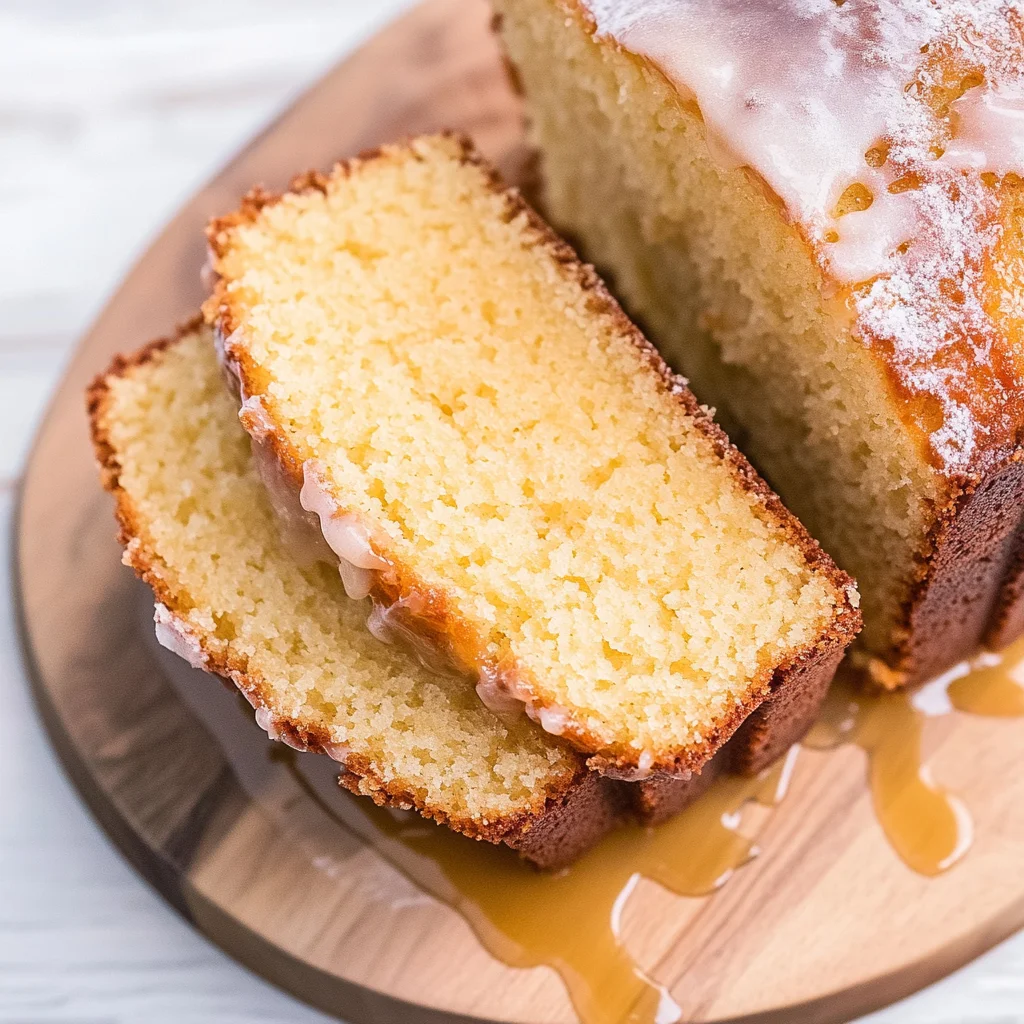
…an autumnal delight that brings the cozy essence of fall to your table!
1. They feature a warm, spiced flavor that envelops your senses, thanks to the infusion of fresh apple cider and a blend of cinnamon and nutmeg. This combination not only heightens the cake’s sweetness but also adds a comforting depth that perfectly captures the essence of the season.
2. Expect a deliciously tender texture with a moist crumb that melts in your mouth. The use of softened unsalted butter and eggs creates a rich density while ensuring every bite is soft yet satisfying, making it a wonderful treat for gatherings or quiet afternoons.
3. I’ve perfected my mixing technique to ensure an even distribution of flavors throughout the cake. By creaming the butter and sugar until light and fluffy before gradually adding the eggs, I ensure that each slice bursts with flavor and richness, elevating this pound cake above ordinary recipes.
4. This recipe offers incredible value, as it’s made with simple, accessible ingredients you likely already have in your pantry. With just one cup of apple cider and basic staples like flour and sugar, you can whip up a gorgeous dessert at home that rivals any gourmet bakery offering.
PS This Apple Cider Pound Cake yields one beautifully baked loaf perfect for sharing or savoring throughout the week!
Ingredients for the Apple Cider Pound Cake
Each ingredient in this dish plays an essential role in flavor and texture. Here’s what you’ll need:
- 1 cup unsalted butter (softened): Provides richness and a tender crumb.
- 2 cups granulated sugar: Sweetens the cake while contributing to its moistness.
- 4 large eggs: Binds the ingredients together and adds structure.
- 1 cup apple cider (preferably fresh): Infuses the cake with a warm, fruity flavor.
- 3 cups all-purpose flour (sifted): Forms the base of the cake, giving it structure.
- 1 teaspoon baking powder: Helps the cake rise for a light texture.
- 1 teaspoon baking soda: Acts as a leavening agent, enhancing the cake’s fluffiness.
- 1 teaspoon ground cinnamon: Adds a warm, aromatic spice that complements the cider.
- 1/2 teaspoon ground nutmeg: Introduces a subtle warmth and depth to the flavor profile.
- 1/2 teaspoon salt: Balances sweetness and enhances overall flavor.
The Secret to Perfectly Creamed Butter and Sugar — Don’t Skip This Step!
I must confess, I tried to shortcut the creaming process once, thinking that a quick mix would suffice. Spoiler alert: it didn’t! The result was a dense, sad pound cake that left me questioning my baking skills. Trust me, it’s not worth the risk—spend the extra time to get this step right!
The science behind creaming butter and sugar is all about aeration. When you whip those two together until light and fluffy, tiny air pockets are formed—this is what gives your pound cake a tender crumb and delightful rise. It’s like inflating a balloon; without enough air, you’re left with something flat and uninviting. In our recipe for Apple Cider Pound Cake, this technique helps incorporate the sweetness of the granulated sugar while ensuring that the butter evenly coats the flour particles when added later, leading to a moist and flavorful cake.
What does creaming butter and sugar do?
- Increases volume — By incorporating air into the mixture, your pound cake rises beautifully as it bakes.
- Enhances texture — A well-creamed batter results in a light and tender crumb instead of a dense loaf.
- Improves flavor distribution — The sugar dissolves better when creamed with butter, allowing for an even sweetness throughout.
- Creates moisture balance — The buttery richness blends with other wet ingredients (like apple cider), resulting in a moist cake that isn’t greasy.
- Promotes even baking — Properly creamed batter ensures uniform heat distribution during baking, preventing unevenly cooked sections.
Different creaming times
- 1 minute (okay) — Barely mixed; some sugar may remain undissolved, leading to a denser texture in your cake.
- 3 minutes (good) — Achieves some aeration but still lacks that fluffy quality; you’ll notice slight improvements in texture.
- 5 minutes (great) — Optimal creaming time where the mixture is light and airy—this is where magic happens!
- Beyond 5 minutes (diminishing returns) — While it won’t ruin your batter, over-creaming can lead to separation or excessive air pockets which might collapse during baking.
Just remember: if you skimp on creaming the butter and sugar, you’re likely to end up with a disappointingly dense pound cake. No one wants that! So take the time to properly cream them together for that perfect slice of fall goodness.
How to make Apple Cider Pound Cake
Are you ready to see how straightforward it is to make the Apple Cider Pound Cake of your dreams??
1. PREPARE THE BATTER
Let’s get that delicious batter ready for baking!
1. Preheat – Preheat the oven to 350°F (175°C) and grease and flour a 9×5 inch loaf pan. This ensures your cake slides right out after baking, making for an easier transfer!
2. Cream – In a mixing bowl, cream together the softened butter and granulated sugar until light and fluffy. This process incorporates air into the mixture, giving your cake a lovely rise and texture.
3. Add Eggs – Add the eggs one at a time, mixing well after each addition. This step helps to emulsify the mixture, ensuring a smooth batter without lumps.
4. Stir in Cider – Stir in the apple cider until well combined. Not only does this add moisture, but it infuses delightful flavor into every bite!
5. Whisk Dry Ingredients – In another bowl, whisk together the flour, baking powder, baking soda, cinnamon, nutmeg, and salt. This helps distribute the leavening agents evenly throughout the flour.
6. Combine – Gradually add the dry ingredients to the wet ingredients, mixing until just combined. Be careful not to overmix; you want a tender crumb!
HANDY TIPS
- Use fresh apple cider for enhanced flavor!
- For an extra moist cake, consider adding an additional tablespoon of apple cider.
- Make sure your butter is at room temperature for easy creaming!
2. BAKE THE CAKE
Now it’s time to bake that beautiful batter!
7. Pour – Pour the batter into the prepared loaf pan. Ensure it’s evenly spread for uniform baking.
8. Bake – Bake in the preheated oven for 60 minutes or until a toothpick inserted into the center comes out clean. You’ll know it’s done when it’s golden brown and smells amazing!
9. Cool – Remove from the oven and let cool in the pan for 10 minutes before transferring to a wire rack to cool completely. Cooling in the pan helps prevent breakage.
HANDY TIPS
- If using a different size pan, adjust baking time accordingly; smaller pans may bake faster!
- Check for doneness by looking for a springy top that bounces back when lightly pressed.
3. PREPARE THE GLAZE
Let’s finish off this cake with a sweet drizzle!
10. Whisk Glaze – In a small bowl, whisk together the powdered sugar and apple cider until smooth. The glaze should be slightly thickened but pourable.
11. Drizzle – Drizzle the glaze over the cooled pound cake before serving. This adds an irresistible sweetness that complements all those warm spices perfectly.
HANDY TIPS
- For a thicker glaze, use less apple cider; adjust until you reach your desired consistency!
- Feel free to add more spices like cinnamon or nutmeg into your glaze for an extra flavor kick!
That’s it! You’ve just created a stunning Apple Cider Pound Cake that’s sure to impress at any gathering—perfectly moist and full of fall flavors! Make this once, and I wager it will invade your dreams every night too! – Nagi x
FAQ – Apple Cider Pound Cake
🍏 How long will this pound cake keep?
When stored properly, this Apple Cider Pound Cake will stay delicious for about 4-5 days at room temperature. I find that it retains about 97% quality on day 3, and around 90% by day 5. To keep it fresh, wrap it tightly in plastic wrap or store it in an airtight container. If you notice any signs of moisture or mold, it’s best to err on the side of caution and discard it.
❄️ Can I freeze this pound cake?
Yes, you can absolutely freeze this Apple Cider Pound Cake! To freeze, allow the cake to cool completely, then wrap it tightly in plastic wrap followed by aluminum foil to prevent freezer burn. It can be kept in the freezer for up to 3 months. When you’re ready to enjoy it again, simply thaw it overnight in the refrigerator and then bring it to room temperature before serving. If you’ve glazed the cake, wait until after thawing to add the glaze for the best texture!
🌾 Is there a gluten-free option for this pound cake?
Certainly! You can substitute all-purpose flour with a gluten-free flour blend that is designed for baking. I recommend using a blend that contains xanthan gum to replicate the texture of traditional flour. Keep in mind that gluten-free flours may absorb liquid differently, so you might need to adjust the amount of apple cider slightly — start with 3/4 cup and see if the batter reaches your desired consistency.
🍬 Can I reduce the sugar or substitute with sweeteners?
No, you cannot reduce the sugar in this recipe without affecting both taste and texture. I tried reducing it several times and found that cutting down even by 1/2 cup resulted in a denser and less flavorful cake. If you’re looking for alternatives like Stevia or monk fruit sweetener, you’ll need to follow specific conversion guidelines provided by those products since they have different sweetness levels compared to granulated sugar.
🥚 What is the purpose of adding eggs one at a time?
Adding eggs one at a time helps incorporate air into the batter more effectively and ensures each egg is fully mixed before adding the next. This technique promotes better emulsification and results in a lighter, fluffier cake texture. If you dump all the eggs in at once, you risk creating a dense batter that won’t rise as beautifully — trust me, I’ve tested this approach more times than I’d like to admit!
🍏 Can I add other flavors or ingredients to customize my pound cake?
Absolutely! This recipe is quite versatile. You can add nuts like chopped pecans or walnuts for added crunch or fold in some dried cranberries or raisins for a fruity twist. For an extra flavor kick, consider adding 1 teaspoon of vanilla extract or even swapping out some apple cider for orange juice for a citrusy note. Just remember not to overload your batter; stick with about 1 cup total of additional mix-ins to maintain its structure.
⏲️ Do I really need to let the cake cool before glazing?
Yes! Letting your pound cake cool completely before glazing is crucial; otherwise, you’ll end up with a gooey mess instead of a beautiful drizzle over your cake. Cooling allows the glaze to set properly rather than melting into the warm cake — trust me, I’ve learned this lesson the hard way more than once! 😅 So patience really is key here!
Troubleshooting
I will continue to add more to this Troubleshooting section as I start seeing questions coming through from people who have made the recipe.
Troubleshooting tips
“My cake came out too dense! 😩”
- You may have overmixed the batter after adding the dry ingredients. This can develop gluten in the flour, resulting in a denser texture.
- Another possibility is using too much flour; make sure to measure it correctly by spooning it into your measuring cup and leveling it off without packing it down.
- I know it’s tempting to dig in right away, but don’t forget that letting the cake cool completely enhances its texture, too! I bet it was still YUM though!
“My pound cake didn’t rise much! 😱”
- If your baking powder or baking soda is expired, this can lead to insufficient leavening, causing your cake to not rise properly. Always check the freshness of your leavening agents!
- Additionally, if you added too many wet ingredients (like apple cider), this can weigh down the batter and prevent proper rising.
- No worries, even a flatter cake can be delicious! I bet they were still YUM though!
“The top of my cake cracked! 😳”
- Cracking often happens when there’s too much heat in the oven or if the batter was mixed too vigorously.
- Ensure your oven temperature is calibrated correctly; sometimes ovens run hotter than they indicate.
- A little crack never hurt anyone—just think of it as charming character! I bet they were still YUM though!
“My glaze turned out lumpy and not smooth! 🤔”
- If the apple cider you used was cold or straight from the fridge, it may not mix well with powdered sugar and can cause lumps. Always use room temperature ingredients for smoother results.
- Be sure to whisk the glaze thoroughly until smooth; sometimes a little extra elbow grease goes a long way!
- Even a lumpy glaze can add a rustic touch—who doesn’t love homemade charm? I bet they were still YUM though!
Apple Cider Pound Cake
Ingredients
Method
- Preheat the oven to 350°F (175°C). Grease and flour a 9x5 inch loaf pan.
- In a mixing bowl, cream together the softened butter and granulated sugar until light and fluffy.
- Add the eggs one at a time, mixing well after each addition.
- Stir in the apple cider until well combined.
- In another bowl, whisk together the flour, baking powder, baking soda, cinnamon, nutmeg, and salt.
- Gradually add the dry ingredients to the wet ingredients, mixing until just combined.
- Pour the batter into the prepared loaf pan.
- Bake in the preheated oven for 60 minutes, or until a toothpick inserted into the center comes out clean.
- Remove from the oven and let cool in the pan for 10 minutes before transferring to a wire rack to cool completely.
- In a small bowl, whisk together the powdered sugar and apple cider until smooth.
- Drizzle the glaze over the cooled pound cake before serving.