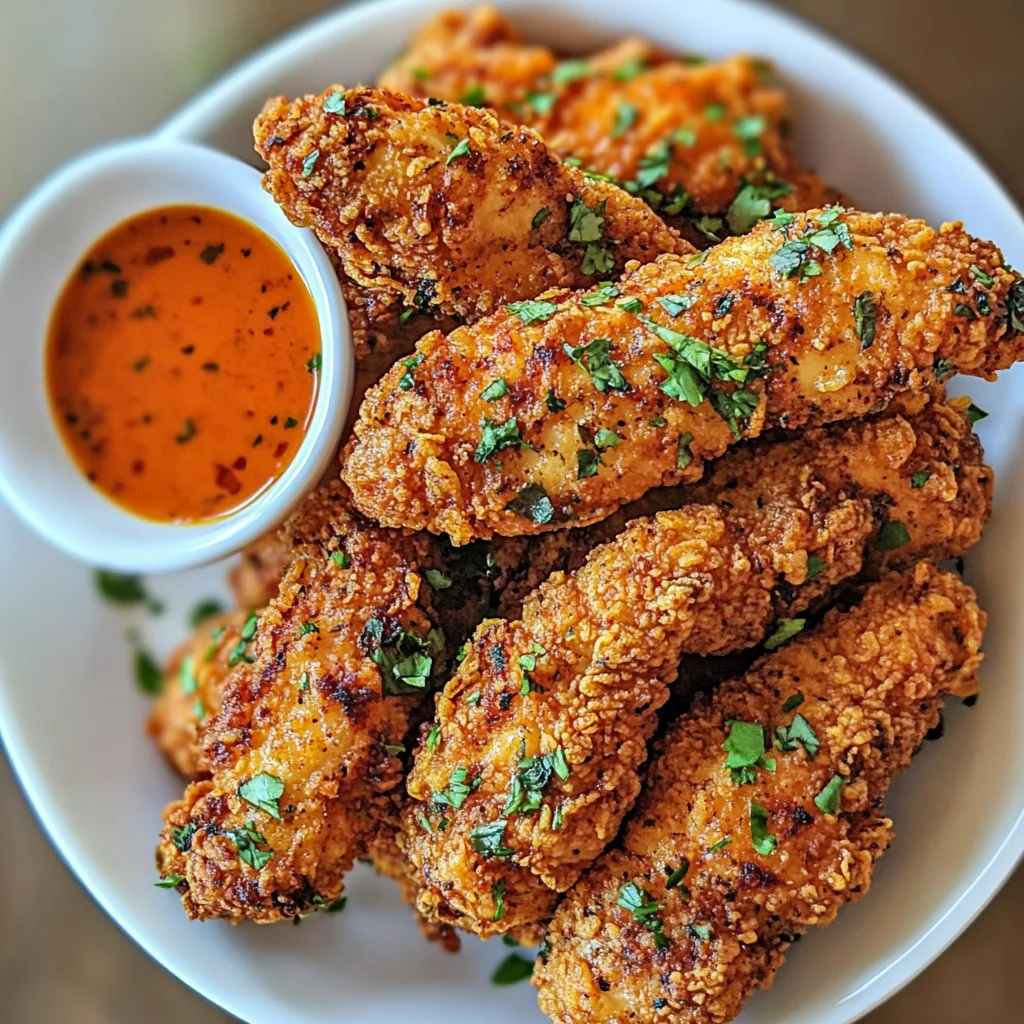
Buttermilk Fried Chicken Tenders: Crispy and Juicy Delight
It all started with my insatiable craving for the crispy, juicy chicken tenders I once devoured at a little diner in town. You know the one—where you can almost hear the sizzle of the fryer from blocks away and the aroma wafts through the air like a siren’s song? I just had to recreate that magic at home. Not only was it a challenge to whip up something that could rival those golden tenders, but it also felt like a cost-effective way to indulge without breaking the bank! Plus, let’s be real—there’s something incredibly satisfying about nailing a dish you love in your own kitchen.
After several attempts (okay, more like a small mountain of chicken), I finally got my Buttermilk Fried Chicken Tenders just right. I lost count after five batches, and trust me, my family had their fair share of “chicken experiments” during that time. Each round was a lesson learned—whether it was adjusting the marinade, perfecting the breading, or mastering the frying technique. There were some questionable moments, like when I accidentally turned my kitchen into a grease slip-and-slide, but hey, that’s how you learn!
But let me tell you, all that trial and error was absolutely worth it! The final result? Crispy on the outside and juicy on the inside, these tenders are marinated in buttermilk for that unbeatable flavor and tenderness. With each bite, you’ll experience that satisfying crunch followed by an explosion of savory goodness—it’s pure bliss! So grab your frying pan and get ready to dive into these Buttermilk Fried Chicken Tenders; I promise they’ll have you dancing in your kitchen!
These Buttermilk Fried Chicken Tenders are….
…hands down the ultimate comfort food that takes your taste buds on a joyride!
1. They deliver an irresistibly tangy flavor that comes from the buttermilk marinade. This not only infuses the chicken with a delightful acidity but also tenderizes it, resulting in juicy tenders that explode with flavor in every bite.
2. Crisp, golden crust – each tender is enveloped in a perfectly seasoned breading that achieves that satisfying crunch we all crave. The combination of flour and spices creates a beautiful texture contrast against the juicy chicken, making every bite an adventure for your palate.
3. Marination magic – using buttermilk as a marinade elevates these tenders above ordinary fried chicken. The longer you let the chicken soak, the more flavor it absorbs, ensuring a depth of taste that’s hard to beat and keeping the meat tender and moist throughout cooking.
4. Cost-effective goodness – making Buttermilk Fried Chicken Tenders at home is not only fun but also far more economical than takeout or restaurant versions. You can whip up a batch for a fraction of the cost while enjoying fresher, tastier tenders right out of your kitchen.
PS These tenders are perfect for sharing! A double batch is ideal for family dinners or gatherings, promising everyone will be coming back for seconds!
Ingredients for the Buttermilk Fried Chicken Tenders
Each ingredient in this dish plays an essential role in flavor and texture. Here’s what you’ll need:
1 cup buttermilk: Tenderizes the chicken and infuses it with rich flavor.
1 teaspoon salt: Enhances the overall taste of the marinade.
1 teaspoon black pepper: Adds a subtle heat that complements the chicken.
1 teaspoon garlic powder: Imparts a savory depth to the marinade.
1 teaspoon paprika: Contributes a mild sweetness and vibrant color.
1 cup all-purpose flour: Creates a crispy coating that seals in moisture.
1 teaspoon salt: Seasoning enhances the breading’s flavor.
1 teaspoon black pepper: Provides a hint of spice to the crispy crust.
1 teaspoon paprika: Adds color and enhances the visual appeal of the tenders.
1 teaspoon onion powder: Delivers an aromatic sweetness to the breading.
- 4 cups vegetable oil: Essential for frying, ensuring a golden, crispy exterior.
You MUST Marinate the Chicken! No shortcuts here!
I know, I know—waiting for chicken to marinate feels like torture when you’re craving crispy fried goodness. Believe me, I tried to find a shortcut, but every time I did, my chicken tenders ended up lacking that juicy tenderness and flavor punch. So trust me when I say that this step is non-negotiable; you’ll thank me later!
So why is marinating the chicken in buttermilk so crucial? Think of it as giving your chicken a spa day! The buttermilk not only tenderizes the meat, breaking down those tough fibers, but it also infuses it with flavor from the salt, garlic powder, and paprika. It’s like a flavor bath that results in juicy chicken tenders that stand out from the ordinary!
What does marinating do?
- Flavor: The buttermilk soak allows the chicken to absorb all those delicious spices—salt, garlic powder, and paprika—creating a deeply seasoned base that you just can’t rush.
- Texture: Marinating helps break down proteins in the chicken, resulting in a more tender bite. Skipping this means risking dry or chewy tenders!
- Moisture: The acidity in buttermilk helps retain moisture during frying, ensuring your tenders stay juicy even after cooking.
- Color: The spices in the marinade contribute to achieving that beautiful golden-brown crust once fried—a feast for both the eyes and stomach!
- Crispiness: A well-marinated chicken tends to hold onto its breading better during frying, leading to that satisfying crunch we crave with every bite.
Different marinating times
- 30 minutes (good) — This is the bare minimum if you’re in a rush. Your chicken will taste decent but won’t have fully absorbed all the flavors.
- 1 hour (better) — A noticeable improvement in flavor and tenderness; still not quite optimal.
- 2 hours (great) — Perfectly balanced flavor infusion and improved texture; you’ll start to see real magic happening!
- Overnight (⭐️ best ⭐️) — This is where tender perfection meets flavor nirvana. The chicken becomes incredibly juicy and flavorful, with an unparalleled texture.
Be warned: skipping or shortening the marination time will leave you with bland and dry chicken tenders. Don’t let impatience ruin what could be an incredible meal!
How to make Buttermilk Fried Chicken Tenders

Are you ready to see how straightforward it is to make the Buttermilk Fried Chicken Tenders of your dreams??
1. MARINATE THE CHICKEN
Start your journey to crispy perfection by marinating the chicken!
Bold action label – Whisk – In a large bowl, whisk together 1 cup buttermilk, 1 teaspoon salt, 1 teaspoon black pepper, 1 teaspoon garlic powder, and 1 teaspoon paprika until well combined. This marinade not only adds flavor but also tenderizes the chicken, making it juicy and delicious. Bold action label – Submerge – Add the chicken tenders to the marinade, ensuring they are fully submerged. Cover the bowl with plastic wrap or a lid and refrigerate for at least 30 minutes. The longer you marinate, the more flavorful your tenders will be!
HANDY TIPS
- For maximum flavor, marinate for up to 12 hours if time allows!
- Use bone-in chicken pieces for even juicier results – just adjust cooking time accordingly.
2. PREPARE THE BREADING
Now that your chicken is marinated, it’s time to create that irresistible crunch!
Bold action label – Combine – In another bowl, combine 1 cup all-purpose flour with 1 teaspoon salt, 1 teaspoon black pepper, 1 teaspoon paprika, and 1 teaspoon onion powder. Mix well until all ingredients are evenly distributed. This seasoned flour will create a beautiful golden crust on your fried chicken.
HANDY TIPS
- Sift the flour mixture for an extra light coating!
- Feel free to add spices like cayenne pepper if you like it spicy!
3. BREAD THE CHICKEN
Let’s coat those tenders for that crispy goodness!
Bold action label – Remove – Take the chicken tenders out of the marinade and allow excess buttermilk to drip off. This helps the breading stick better! Bold action label – Dredge – Dredge each tender in the flour mixture, pressing lightly to ensure a good coating adheres. Shake off any excess flour – we want them coated but not overloaded!
HANDY TIPS
- If you want thicker breading, dip in the buttermilk again before dredging!
- Double-dipping is a great trick for extra crunchiness!
4. FRY THE CHICKEN
It’s time for that sizzling magic in the pan!
Bold action label – Heat oil – In a frying pan, heat 4 cups vegetable oil over medium-high heat until it reaches about 350°F (175°C). You can test if it’s ready by dropping a small bit of batter in; it should sizzle immediately! ⚠️ Critical warning – Be cautious not to overcrowd the pan; this can lower the oil temperature and lead to soggy tenders. Bold action label – Fry – Carefully add your chicken tenders in batches, frying for about 5-7 minutes on each side or until golden brown and cooked through (the internal temperature should reach at least 165°F or 74°C).
HANDY TIPS
- Keep an eye on your oil temperature; too low means greasy chicken!
- I like to use a thermometer for accuracy — trust me, it’s worth it!
DRAIN AND SERVE
You’re almost there—let’s finish strong!
Bold action label – Remove – Once golden brown and cooked through, carefully remove chicken from the oil using tongs or a slotted spoon. Place them on paper towels to drain excess oil. This step ensures your tenders stay crispy without being overly greasy! Serve hot with your favorite dipping sauce – enjoy every bite!
Make these once, and I wager they will invade your dreams every night too! – Nagi x
FAQ – Buttermilk Fried Chicken Tenders
🥡 How long will these chicken tenders keep in the fridge?
These Buttermilk Fried Chicken Tenders will stay fresh in the fridge for up to 3 days. After that, their quality can deteriorate quite a bit—I’d say they’re about 85% as good on day 4 and drop to around 70% by day 5. If you want to retain that crispy texture, it’s best to consume them within the first couple of days. To reheat, pop them in the oven for a few minutes instead of the microwave to help regain some crunch!
⏲️ Can I skip the marinating time?
No, you can’t skip it! The marinade is crucial for achieving tender and flavorful chicken tenders. I recommend marinating for at least 30 minutes, but if you have time, letting them soak for 2-4 hours (or even overnight) will take the flavor and juiciness to another level. Trust me, your taste buds will thank you!
❄️ Can I freeze these chicken tenders?
Absolutely! You can freeze the uncooked chicken tenders after breading them. Just place them in a single layer on a baking sheet until frozen solid, then transfer them to an airtight container or freezer bag. They’ll keep well for up to 3 months. When you’re ready to cook, there’s no need to thaw—simply fry them directly from frozen! Just add a couple of extra minutes to your cooking time.
🌾 Are these chicken tenders gluten-free?
Yes, you can make these tenders gluten-free! Substitute regular all-purpose flour with a gluten-free flour blend, which works just as well in this recipe. Just be sure to check that your buttermilk is also certified gluten-free if you’re serving someone with severe allergies. It’s a delicious option that doesn’t compromise on flavor or texture!
🔄 Can I use something other than buttermilk for the marinade?
While buttermilk adds a unique tangy flavor and helps tenderize the chicken, you can substitute it with plain yogurt thinned out with water (about half and half) or even milk mixed with a tablespoon of vinegar or lemon juice. Just note that this might slightly alter the taste and tenderness—I’ve tested various options, and buttermilk really does deliver that classic fried chicken taste!
🔍 Why is it important to let excess marinade drip off before breading?
Letting excess marinade drip off is essential because it ensures that the breading adheres properly to the chicken tenders. If there’s too much liquid clinging to them, you’ll end up with soggy breading rather than that crispy coating we all love. I’ve learned this through many trials—trust me on this one!
🧂 Can I customize the seasoning in the breading?
Definitely! The beauty of this recipe is its versatility. Feel free to play around with different spices in your breading mix—try adding cayenne pepper for heat or Italian herbs for an herby twist. You could even use Parmesan cheese mixed into your flour for an extra cheesy flavor! Experimentation is half the fun in cooking; just don’t forget to jot down what you try so you can recreate your favorites later!
Troubleshooting
I will continue to add more to this Troubleshooting section as I start seeing questions coming through from people who have made the recipe.
Troubleshooting tips
“My chicken tenders came out too dry! 😭”
- This can happen if the chicken is marinated for too long. While buttermilk helps tenderize the meat, over-marinating can lead to a mushy texture. Aim for at least 30 minutes but no more than 2 hours.
- Another reason could be frying at too high of a temperature, which can quickly dry out the meat before it’s fully cooked. Keep your oil around 350°F (175°C) for best results.
I bet they were still YUM though!
“My breading didn’t stick and fell off! 😩”
- If you didn’t let the excess marinade drip off properly, the breading can turn soggy and fall off during frying. Make sure to shake off excess before dredging in flour.
- Alternatively, if your flour mixture was too dry or you didn’t press lightly when coating, it may not adhere well. A little moisture helps it stick!
I bet they were still YUM though!
“The coating turned out too dark and burnt! 🔥”
- This often happens if the oil is too hot when frying. If your oil exceeds 350°F (175°C), it can lead to burnt breading while the chicken remains undercooked inside. Use a thermometer to keep an eye on that temp!
- Additionally, if you fry in batches that are too large, it can lower the oil temperature drastically causing uneven cooking. Fry smaller batches for even results.
I bet they were still YUM though!
“My chicken tenders aren’t golden brown! 🤔”
- If your frying oil isn’t hot enough (below 350°F/175°C), the chicken will take longer to cook without browning properly. Make sure your oil is at the right temperature before adding chicken.
- Also, remember that if you’re overcrowding the pan, it can cause steaming rather than frying, leading to pale tenders instead of crispy ones.
I bet they were still YUM though!
Buttermilk Fried Chicken Tenders
Ingredients
Method
- In a large bowl, whisk together buttermilk, salt, black pepper, garlic powder, and paprika. Add chicken tenders and ensure they are fully submerged. Cover and refrigerate for at least 30 minutes.
- In another bowl, combine flour, salt, black pepper, paprika, and onion powder. Mix well.
- Remove chicken from the marinade, allowing excess to drip off. Dredge each tender in the flour mixture, pressing lightly to adhere. Shake off excess flour.
- In a frying pan, heat vegetable oil over medium-high heat until it reaches 350°F (175°C). Carefully add chicken tenders in batches, frying for about 5-7 minutes on each side or until golden brown and cooked through. Use a meat thermometer to ensure internal temperature reaches 165°F (74°C).
- Remove chicken from the oil and place on paper towels to drain excess oil. Serve hot with your favorite dipping sauce.