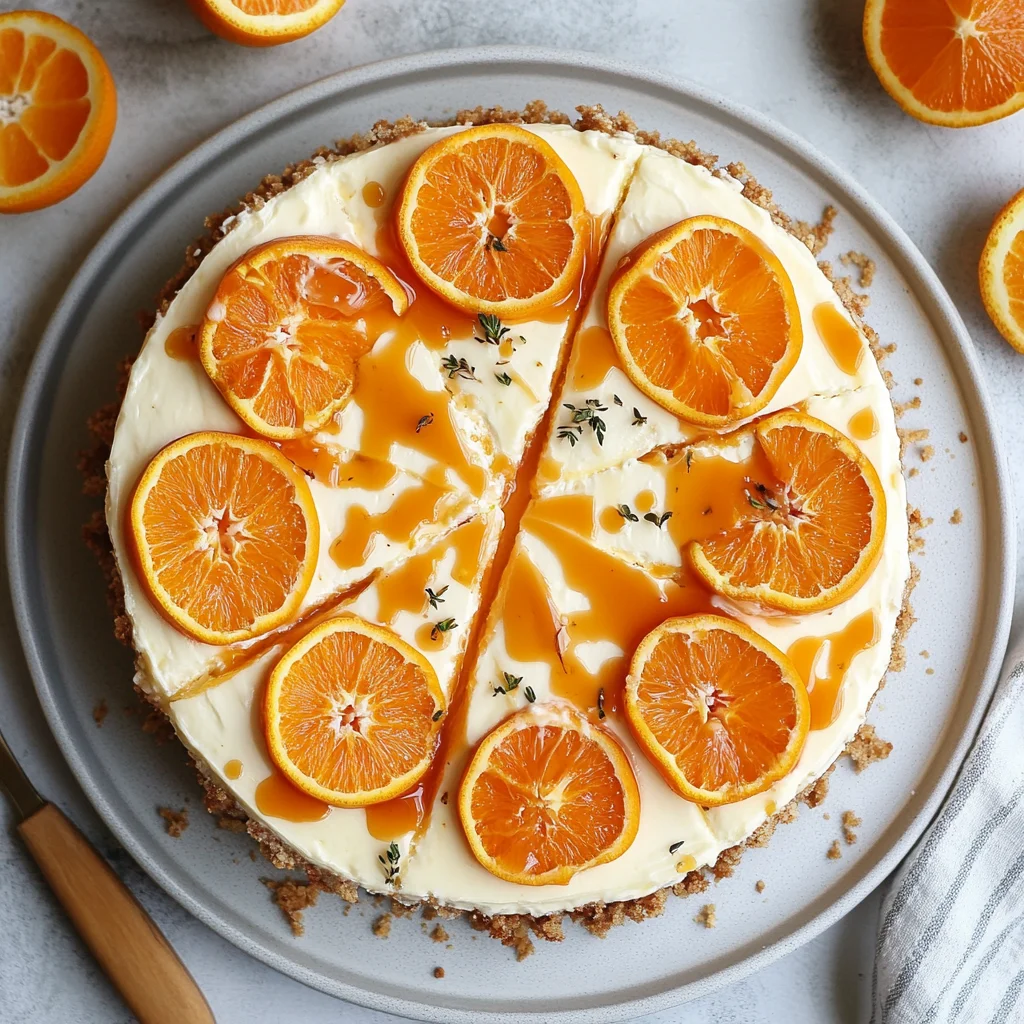
No-Bake Orange Creamsicle Cheesecake: Dreamy Delight Awaits
I still remember the first time I had a creamsicle-inspired dessert—it was this dreamy, refreshing cheesecake at a little café I stumbled into after a long day. The moment I took that first bite, I was transported back to my childhood, relishing the sweet tang of orange mingling with creamy goodness. It was one of those moments where you think, “I need to recreate this at home!” But let’s be honest; store-bought cheesecakes just don’t cut it for me anymore, and I knew I could whip up something even better (and way more affordable) than what they were serving.
After several attempts that ranged from slightly sad to completely disastrous (seriously, my kitchen looked like a cheesecake graveyard), I finally honed in on the perfect balance of flavors and textures for this No-Bake Orange Creamsicle Cheesecake. My mission was clear: capture all the nostalgic flavors without the hassle of baking. In one attempt, I accidentally used too much gelatine and ended up with a wobbly cheesecake that could double as an extra in a horror movie! But hey, every trial got me closer to the creamy, dreamy delight I envisioned.
And let me tell you, all those trials were worth it! The final result is an incredibly refreshing and creamy no-bake cheesecake that truly captures the flavor of a classic creamsicle—think velvety texture paired with that bright citrus zing. It’s light yet indulgent, perfect for warm days and special occasions alike. So grab your mixing bowl and prepare to wow your family and friends; I can’t wait for you to try this No-Bake Orange Creamsicle Cheesecake!
These No-Bake Orange Creamsicle Cheesecake are…
…a delightful escape into the refreshing world of summer flavors!
1. They deliver a burst of citrusy sweetness that takes you straight to a sunny day. The freshly squeezed orange juice and vibrant zest infuse each bite with an irresistible tang, making this cheesecake a nostalgic tribute to the classic creamsicle we all love.
2. Creamy, smooth texture – the filling is luxuriously soft yet stable enough to hold its shape. Thanks to the combination of softened cream cheese and whipped heavy cream, I achieved that perfect balance between rich decadence and lightness that makes every forkful a pleasure.
3. No-bake convenience – this recipe is brilliantly simple and requires no baking at all! By melting butter to bind the graham cracker crust, I created a foundation that is not only easy to assemble but also ensures an even, delectable crunch without the fuss of an oven.
4. Budget-friendly indulgence – making this No-Bake Orange Creamsicle Cheesecake at home saves you money compared to pricey store-bought options. With common pantry staples like graham crackers and cream cheese, you can whip up a crowd-pleasing dessert that feels special without stretching your wallet.
PS This cheesecake serves 8 generous slices, perfect for sharing at gatherings or enjoying as a sweet treat throughout the week!
Ingredients for the No-Bake Orange Creamsicle Cheesecake
Each ingredient in this dish plays an essential role in flavor and texture. Here’s what you’ll need:
- 1 cup graham cracker crumbs: Provides a sweet and crunchy base for the cheesecake.
- 1/4 cup granulated sugar: Enhances the sweetness of the crust for a balanced flavor.
- 1/2 cup unsalted butter (melted): Binds the crust ingredients together while adding richness.
- 16 oz cream cheese (softened): Forms the creamy foundation of the filling with a luscious texture.
- 1/2 cup powdered sugar: Sweetens the filling while ensuring a smooth consistency.
- 1 cup heavy whipping cream (chilled): Adds lightness and airy texture to the cheesecake.
- 1/4 cup orange juice (freshly squeezed): Infuses bright citrus flavor that mimics classic creamsicles.
- 1 tbsp orange zest: Intensifies the orange essence, giving depth to each bite.
- 1 tsp vanilla extract: Complements and enhances the overall flavor profile.
Pressing the Crust: Don’t Skip This Step!
I’ll be honest—I thought I could just sprinkle the graham cracker mixture into the pan and call it a day. After testing multiple methods, I realized that firmly pressing the crust is non-negotiable! Trust me, I’ve tried to shortcut this step, and every time, I regretted it.
So why is it so crucial? Think of it like building a solid foundation for a house. If you don’t pack that crust tightly, your cheesecake will crumble apart when you cut into it. We want a sturdy base that holds everything together, keeping those delicious creamy layers from falling apart like a sad, soggy sandwich.
What does pressing the crust do?
- Texture – A well-pressed crust creates a firm base that provides a satisfying crunch when you take a bite, preventing it from turning into mush.
- Structure – By compressing the crumbs, you form a cohesive barrier that supports the filling, allowing for clean slices without mess.
- Flavor – Firmly packing the mixture enhances caramelization during chilling (yes, even cold desserts can develop richness!), making each bite taste more intense.
- Shelf Life – A dense crust weathers moisture better, helping your cheesecake maintain its integrity and flavor for longer in the fridge.
- Even Distribution – Pressing ensures the mixture is evenly spread across the bottom of the pan, avoiding any thin spots that could result in crumbling.
Different pressing times
- 5 minutes (good) — You’ve compressed it somewhat but left air pockets; expect some crumble when slicing.
- 10 minutes (better) — A firmer base starts to form; it holds together but might still have soft spots if not pressed evenly.
- 15 minutes or more (best) — This is where the magic happens; every crumb is tightly packed and forms a resilient crust ready to support your luscious filling!
- Beyond 20 minutes — Diminishing returns; while it’s still good, you’re likely just wasting time at this point!
You need to be careful here: if you don’t press firmly enough, you’ll end up with a crumbly disaster when you serve your cheesecake. No one wants to see their beautiful creation fall apart right before their eyes! So get in there and really pack that crust down—your future self will thank you!
How to make No-Bake Orange Creamsicle Cheesecake

Are you ready to see how straightforward it is to make the No-Bake Orange Creamsicle Cheesecake of your dreams??
1. PREPARE THE CRUST
Let’s get that deliciously crunchy crust ready first!
1. COMBINE – In a mixing bowl, combine graham cracker crumbs, granulated sugar, and melted butter. Mix until well combined, ensuring there are no dry spots. The mixture should resemble wet sand when finished.
2. PRESS – Press the mixture firmly into the bottom of a 9-inch springform pan to form an even layer. Use the back of a measuring cup or your fingers to ensure it’s tightly packed for a sturdy base.
HANDY TIPS
- Using unsalted butter allows you to control the saltiness of the crust perfectly.
- If you prefer a sweeter crust, consider adding another tablespoon of sugar to enhance the flavor!
2. MAKE THE FILLING
Now for the creamy, dreamy filling that will bring this cheesecake to life!
3. BEAT – In a large mixing bowl, beat the softened cream cheese with an electric mixer until smooth and free of lumps. This should take about 1-2 minutes on medium speed.
4. ADD – Gradually add powdered sugar, orange juice, orange zest, and vanilla extract. Mix until well combined; you want everything blended seamlessly so each bite bursts with flavor!
5. WHIP – In another bowl, whip the heavy cream until stiff peaks form, which usually takes around 3-4 minutes on high speed. Look for glossy peaks that hold their shape when you lift the beaters out!
6. FOLD – Gently fold the whipped cream into the cream cheese mixture until fully incorporated. Be careful not to deflate the whipped cream too much; this is what gives your cheesecake its light texture!
HANDY TIPS
- Ensure your heavy cream is chilled as this helps achieve better volume when whipping.
- If you want an extra tangy flavor in your cheesecake, consider using a mixture of half cream cheese and half sour cream!
3. ASSEMBLE THE CHEESECAKE
Time to layer that luscious filling over our crust!
7. POUR – Pour the filling over the prepared crust and spread it evenly using a spatula or back of a spoon for smoothness. Take your time; an even layer makes for beautiful slices later!
8. REFRIGERATE – Cover and refrigerate for at least 4 hours or until set—this allows all those amazing flavors to meld together beautifully!
HANDY TIPS
- For best results, let your cheesecake chill overnight if you can; trust me, it’s worth it!
- Consider adding a few drops of food coloring to enhance that vibrant orange hue if desired—just don’t go overboard!
4. SERVE
The best part: enjoying your homemade cheesecake!
9. REMOVE – Once set, carefully remove the cheesecake from the springform pan by unclasping it gently at the side; run a knife around the edge if needed to loosen it up first!
10. GARNISH – Garnish with additional orange zest if desired and serve chilled for an optimal refreshing experience.
Make this No-Bake Orange Creamsicle Cheesecake once, and I wager it will invade your dreams every night too! – Nagi x
FAQ – No-Bake Orange Creamsicle Cheesecake
🥤 How long can I store this cheesecake?
You can store the No-Bake Orange Creamsicle Cheesecake in the refrigerator for up to 5 days. However, I recommend enjoying it within the first 3 days for optimal freshness and taste. After day 3, it still retains about 90% of its deliciousness, but you may notice a slight decline in texture as it continues to chill. Just make sure it’s well-covered to prevent drying out!
⏳ Can I skip the chilling time?
No, you cannot skip the chilling time! The cheesecake needs at least 4 hours to set properly; otherwise, you’ll end up with a soupy dessert that won’t hold its shape when sliced. Trust me, I tested this multiple times (yes, seriously!). If you’re short on time, I recommend preparing it the night before so it’s perfectly set by dessert time.
❄️ Can I freeze this cheesecake?
Yes! You can freeze this No-Bake Cheesecake for up to 2 months. To freeze, wrap it tightly in plastic wrap and then in aluminum foil to prevent freezer burn. When you’re ready to enjoy it again, simply thaw it in the refrigerator overnight. Just remember that the texture might change slightly after freezing, but it’ll still taste fantastic!
🌾 Is there a gluten-free option for the crust?
Absolutely! To make a gluten-free version of this cheesecake, you can substitute the graham cracker crumbs with gluten-free biscuit crumbs or almond flour mixed with a bit of coconut oil or melted butter. Just ensure that all other ingredients are also gluten-free. Personally, I’ve found that using almond flour gives a lovely nutty flavor that complements the orange beautifully!
🍬 Can I reduce the sugar in the filling?
Nope! I’ve tried reducing the sugar multiple times—trust me on this one—and it just doesn’t work! The balance of sweetness is crucial for getting that delightful creamsicle flavor. If you’re looking for alternatives, using a sugar substitute like erythritol could work; just make sure it’s suitable for baking and has similar sweetness levels.
🤔 Why do I need to whip the cream separately?
Whipping the heavy cream separately is essential because it creates air bubbles that give your cheesecake a light and fluffy texture. When folded into the cream cheese mixture, those air pockets help your cheesecake rise and set correctly. If you mix them together without whipping first, you’ll end up with a dense filling—yikes!
🍊 Can I add other flavors or ingredients?
Definitely! This cheesecake is quite versatile. You can add different extracts like lemon or almond for unique flavor twists or fold in some crushed pineapple or berries into the filling for added fruity goodness. Just keep in mind that any additional liquid ingredients might affect setting time slightly—so use sparingly if adding moisture-rich fruits!
Troubleshooting
I will continue to add more to this Troubleshooting section as I start seeing questions coming through from people who have made the recipe.
Troubleshooting tips
“My cheesecake is too soft and wobbly! 😱”
- You might not have whipped your heavy cream to stiff peaks. If the cream isn’t whipped enough, it won’t hold its structure when folded into the cream cheese mixture, resulting in a runny filling.
- Another possibility is that you didn’t let it chill long enough. The cheesecake needs at least 4 hours in the refrigerator to fully set, so if you cut into it too early, it may not hold its shape.
- I bet it still tasted like a creamsicle dream though!
“My crust is crumbling apart! 😩”
- You may not have used enough melted butter or didn’t mix it in thoroughly. The butter acts as a binder for the graham cracker crumbs; without enough, your crust will lack stability and fall apart easily.
- If you pressed the crust too lightly into the pan, it won’t hold together well after chilling. Make sure to press firmly and evenly for a solid base.
- I’m sure it still had that delicious flavor though!
“Why does my filling look grainy? 🤔”
- This usually happens if your cream cheese wasn’t softened enough before mixing. Cold cream cheese can lead to lumps and an uneven texture in the filling.
- If you added powdered sugar too quickly while mixing, it can also create a grainy texture as it doesn’t blend smoothly with the cream cheese.
- No worries; I’m sure it was still creamy and delightful!
“My cheesecake has cracks on top! 😢”
- Cracking can occur if the mixture was over-mixed after folding in the whipped cream. Overmixing introduces too much air, which expands during chilling and causes surface cracks.
- Using an overly warm or hot filling that’s poured onto a cold crust can also cause thermal shock, leading to cracks. Make sure your filling is at room temperature before pouring.
- I bet those cracks were just character marks of a homemade masterpiece!
No-Bake Orange Creamsicle Cheesecake
Ingredients
Method
- In a mixing bowl, combine graham cracker crumbs, granulated sugar, and melted butter. Mix until well combined.
- Press the mixture firmly into the bottom of a 9-inch springform pan to form an even layer.
- In a large mixing bowl, beat the softened cream cheese with an electric mixer until smooth.
- Gradually add powdered sugar, orange juice, orange zest, and vanilla extract. Mix until well combined.
- In another bowl, whip the heavy cream until stiff peaks form.
- Gently fold the whipped cream into the cream cheese mixture until fully incorporated.
- Pour the filling over the prepared crust and spread it evenly.
- Cover and refrigerate for at least 4 hours or until set.
- Once set, remove the cheesecake from the springform pan and slice into servings.
- Garnish with additional orange zest if desired and serve chilled.