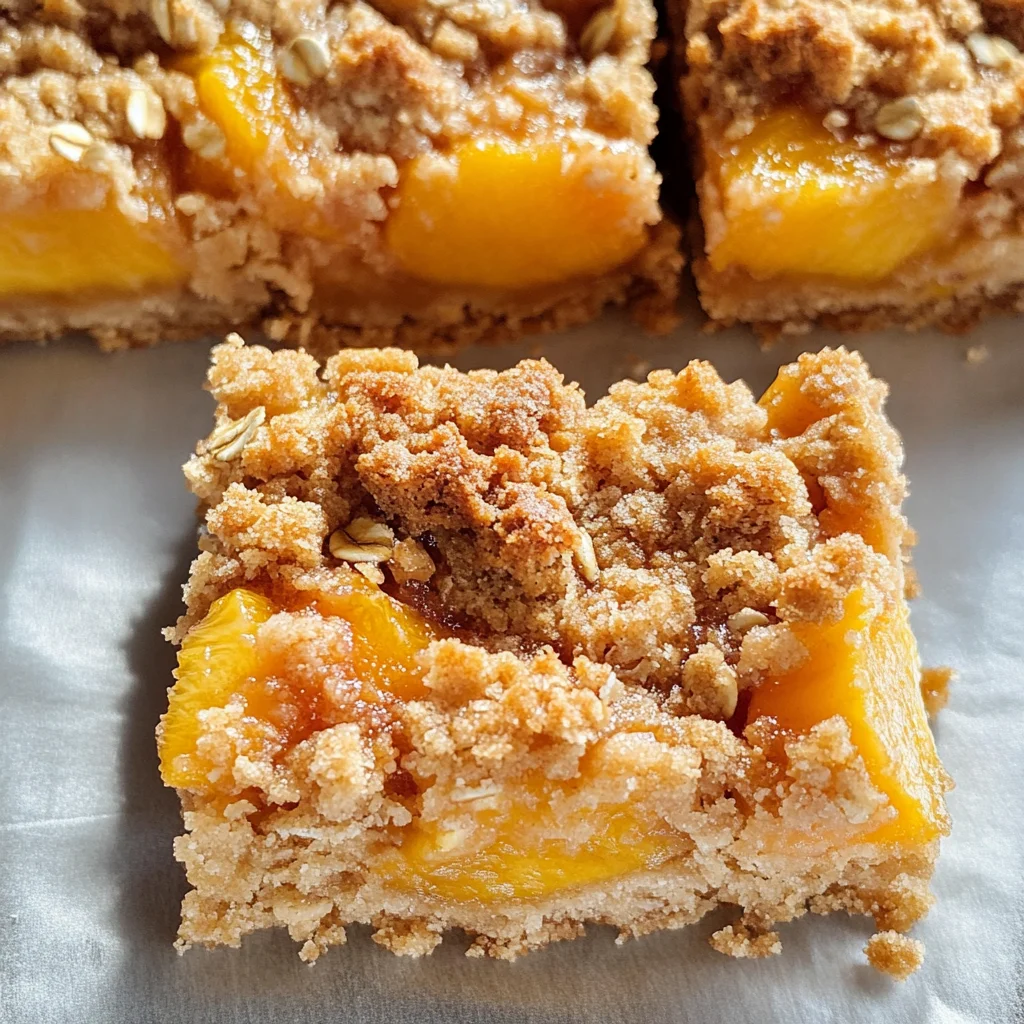
Peach Crumble Bars
There’s something profoundly magical about the first bite of a Peach Crumble Bar. It’s like summer itself has been captured in a sweet, chewy embrace, bursting with the warm essence of ripe peaches and the comforting crunch of oat crumble. As you take that bite, you’re enveloped in an experience that goes far beyond mere taste; it’s a celebration of simple pleasures and cherished memories. This recipe for Peach Crumble Bars isn’t just about satisfying your sweet tooth; it’s about connecting with the seasons, embracing the bounty of summer fruits, and creating something truly extraordinary that you can share with those you love. Trust me when I say, these bars will have you reminiscing about sun-soaked picnics and lazy afternoons spent under the shade of your favorite tree.
What makes these bars so special? It’s the harmonious combination of flavors and textures: soft, juicy peaches nestled beneath a golden crown of crunchy oat crumble that’s both satisfying and utterly addictive. With every bite, you’ll experience a delightful contrast—the sweetness of the fruit elevated by just a hint of tang from lemon juice and almond extract. This is not just dessert; it’s an expression of love, an invitation to slow down and savor life’s beautiful moments. Not to mention, they’re incredibly easy to make! So roll up your sleeves as we embark on this culinary journey together—I promise you’ll be rewarded with something that feels like a warm hug on a plate.
Peach Crumble Bars: A Sweet Symphony of Summer
These Peach Crumble Bars are my go-to dessert whenever summer’s bounty calls to me. They’re perfect for family gatherings, casual get-togethers with friends, or even just a cozy night in where you want to indulge a little without all the fuss. Plus, they’re incredibly versatile—feel free to swap out peaches for other seasonal fruits if you’re feeling adventurous! The joy in making these bars lies in their simplicity; you’ll find each step flows seamlessly into the next as you create something deliciously rewarding.
Ingredients:
As we dive into this recipe for Peach Crumble Bars, let me take a moment to highlight each ingredient and why they play such an important role in crafting these delightful treats.
- 140 grams (1 cup) all-purpose flour: All-purpose flour is the backbone of our crumble bars—it provides structure while maintaining that tender crumb we’re aiming for. When selecting flour, look for brands that are finely milled; this will give your bars a delicate texture rather than a dense one. If you’re curious about alternatives, you could experiment with whole wheat flour for added nutrition, but keep in mind it may alter the flavor slightly.
- 130 grams (1 cup and 1/3 cup) rolled oats: These oats bring not only texture but also heartiness to our recipe. They absorb some moisture during baking yet retain enough chewiness to balance out the softness of the peaches. Opt for old-fashioned rolled oats over quick oats as they hold their shape better during baking—plus, they add that lovely rustic feel we adore in desserts like this!
- 155 grams (3/4 cup) granulated sugar: Sugar is essential here—not only does it sweeten our bars but it also contributes to caramelization during baking, leading to that beautiful golden top layer. When measuring sugar, be sure to level off the cup instead of packing it down; too much sugar can lead to overly sticky bars.
- 1 teaspoon cinnamon: Ahh, cinnamon—the spice that transforms this dish from good to spectacular! Its warm notes pair perfectly with peaches and enhance their natural sweetness. Don’t rush past this ingredient; trust me on this one! If you’re feeling adventurous or want a unique twist, consider adding nutmeg or even cardamom for an aromatic surprise.
- 1/4 teaspoon salt (optional): Salt might seem unnecessary in sweet recipes, but it acts as a flavor enhancer here—balancing sweetness while bringing out all those lovely peachy notes. If you’re watching your sodium intake or prefer not to use salt at all, feel free to skip it without compromising too much on flavor.
- 150 g (⅔ cup) unsalted butter, melted and cooled: Butter is where magic happens! It adds richness while helping our crumble achieve its desirable texture—crisp on top yet slightly chewy underneath. Make sure your butter isn’t too hot when mixing it in; otherwise, it can melt away those precious oats instead of binding them beautifully together.
- 450 grams (2 cups) peaches, peeled and cut into small pieces*: Fresh peaches are undoubtedly the star of this show! Their juicy sweetness combined with just a hint of tartness creates layers upon layers of flavor within each bar. When selecting peaches at the market or grocery store, look for ones that yield slightly when pressed—this indicates ripeness—and remember always to peel them unless you’re going for an extra rustic touch!
- 30 grams (2 tablespoons) granulated sugar: This additional dose of sugar is crucial for drawing out moisture from our fresh peaches as they bake. It will transform into syrupy goodness while mingling with cornstarch and lemon juice—a non-negotiable step if you want that perfect peach filling!
- 2 teaspoons cornstarch: Cornstarch acts as our thickening agent here—it helps bind those lovely juices released by our peaches so we’re left with a cohesive filling instead of soggy bottoms. If you’re looking for alternatives due to dietary preferences or allergies, arrowroot powder would work beautifully as well.
- 1 teaspoon fresh lemon juice: A touch of acidity is vital in any fruit-based dessert—it brightens flavors and balances sweetness beautifully! Fresh lemon juice also prevents our peaches from browning before baking—a little care goes a long way!
- 1 teaspoon almond extract: Almond extract adds depth and complexity—its nutty essence complements peach magnificently while enhancing its natural flavor profile without overpowering it. Don’t be tempted to skip this step; I promise you’ll regret missing out on its utterly intoxicating aroma!
Equipment You’ll Need:
Having the right tools can make all the difference when creating your Peach Crumble Bars—it turns what could be a chaotic experience into something smooth and enjoyable! Here are some essential pieces you’ll want on hand:
- 8-inch square baking dish: A sturdy pan is crucial here since we’re layering ingredients before baking them into golden perfection! Glass or metal pans work well—just be sure to grease them properly so your bars don’t stick during removal.
- Parchment paper: Lining your baking dish with parchment paper creates handles once baked and cooled; you’ll be able to lift out your completed bars effortlessly! Use unbleached parchment if possible for minimal chemical interference.
- Mixing bowls: Having multiple mixing bowls will help keep things organized while preventing cross-contamination between dry ingredients and wet mixtures—trust me; it’s worth having an extra bowl handy!
- Spatula or wooden spoon: A sturdy spatula makes mixing everything together seamless while ensuring no ingredients get left behind at the bottom of your bowl!
With these tools ready at hand alongside our carefully chosen ingredients laid out before us like promises waiting to unfold—we’re perfectly positioned for success as we move forward into preparing these delightful Peach Crumble Bars!
Preparing the Peach Crumble Bars
Step 1: Preheat Your Oven
Let’s start by preheating our oven to 350°F (177°C). This step might seem mundane but trust me—it’s absolutely paramount because preheating ensures even cooking throughout your dessert! While that’s happening, grab an 8-inch square oven-proof dish—you’ll want to grease it lightly before lining it with parchment paper allowing approximately two inches overhang on each side. This overhang will act as handles later when lifting out those delectable bars post-baking—making cutting them into perfect squares oh-so-much easier!
Step 2: Prepare Your Peaches
Next up is prepping those gorgeous peaches! Start by peeling them—I find using a vegetable peeler works wonders here—but if you prefer keeping some skin on for added texture feel free! Once peeled slice each peach into small pieces roughly ½ – 1 inch (1.25 – 2.5 cm). In one bowl mix them gently with fresh lemon juice followed by almond extract which will amplify their natural flavors beautifully! Afterward toss everything together with sugar and cornstarch until evenly coated; set aside so those juices can mingle together while we mix up our crumble base.
Step 3: Create Your Oat Mixture
In another bowl combine all-purpose flour along with rolled oats along with granulated sugar plus cinnamon (and salt if using). Whisk together until everything’s well incorporated—it should smell heavenly by now! The purpose behind mixing dry ingredients separately first is twofold; firstly it allows any clumps in flour or sugar break apart easily ensuring uniform distribution throughout our final product—and secondly helps us avoid overmixing once wet ingredients are added which could lead us down unfortunate paths toward tough bars rather than tender ones packed full flavor!
Step 4: Combine Ingredients
Now comes one of my favorite parts—the merging magic begins! Pour melted butter directly into dry mixture then grab either spatula or spoon stirring until everything comes together resembling wet sand-like consistency—that’s what we’re after here folks! From there take about two-thirds portion placing evenly across bottom prepared dish pressing down gently so crust sets nicely during baking time ahead—we want good firm foundation under those luscious peach topping layers above after all!
This marks just the beginning stages toward creating unforgettable Peach Crumble Bars filled warmth joy summertime delights…but stay tuned because there’s more deliciousness coming soon—we’ll cover how assemble layer toppings bake cool slice serve shortly after this introduction wraps up…
Step 5: Layering the Peach Mixture Like a Pro
Now that you’ve lovingly prepared your crust, it’s time to add that luscious peach filling which is going to be the star of this show. Spread the peaches evenly over the crust you’ve just laid down, allowing their natural sweetness and juicy texture to take center stage. But here’s a little secret: remember that excess liquid we talked about? It’s crucial not to pour all of it onto your bars just yet. This step is absolutely paramount because too much moisture could lead to a soggy bottom—a fate no one wants for their beautiful bars! Instead, set that liquid aside for now. You can always create an incredible drizzle later by reducing it into a syrupy sauce, which will elevate your peach crumble bars to an even more delicious level.
As you arrange the peach mixture, don’t be afraid to get a little creative! Aim for an even distribution, ensuring every bite is packed with that delightful peach flavor. The peaches should be cut into small pieces, around half an inch in size, so they meld beautifully into the filling without overwhelming the crust. Allowing those pieces to mingle with the almond extract and lemon juice first was a genius move; it brightens up their flavor profile and enhances that sweet-tart balance that makes these bars truly extraordinary. Trust me on this—once baked, they’ll transform into a gooey, aromatic filling that permeates every corner of your kitchen and fills your heart with warmth.
Step 6: Crumble Time – Creating the Topping
Now comes one of my favorite parts—creating that crunchy topping! Take the remaining one-third of your oat mixture and sprinkle it generously over those succulent peaches. But here’s where you can really let your creativity shine: instead of just scattering it like confetti, why not take some clumps of the mixture in your hands and squeeze them together before letting them fall? This technique creates larger crumble pieces that will bake into beautiful golden nuggets of flavor and texture. As you do this, think about how each piece will contribute to that irresistible crunch when you take a bite; after all, we’re aiming for a symphony of flavors and textures here!
Pressing down gently on those crumbles helps them adhere to the peaches beneath. This is crucial; if they’re too loosely placed, they might fall off when you slice into your bars later on. You want them to stick together while still allowing space for air during baking so they can crisp up nicely—this is where patience pays off! As you look at your masterpiece before it goes into the oven, take a moment to appreciate how beautiful it looks—those golden oats against the vibrant peaches are simply stunning.
Step 7: Baking Your Peach Crumble Bars
Preheat your oven to 350°F (177°C) if you haven’t done so already—it’s time for this delightful creation to transform in the heat! Once everything is layered beautifully in your greased and parchment-lined dish, slide it gently into the oven and set your timer for 33-35 minutes. During this magical time in the oven, keep an eye on those bars as they bake; you’ll know they’re done when the top turns a lovely golden brown and starts emitting an utterly intoxicating aroma that will have everyone gathering around in anticipation.
As they bake, something marvelous happens: the butter melds with the oats creating a crispy topping while those juicy peaches bubble away underneath. The scent wafting through your home will be enough to make anyone’s mouth water! It’s important not to rush this step; every minute spent baking contributes invaluable depth of flavor and texture. If you’re unsure whether they’ve reached optimal doneness, use a toothpick or knife—insert it gently into one of those crumble areas and if it comes out clean or with just a few crumbs clinging to it, you’re good to go!
Step 8: Cooling Your Bars – The Patience Game
Once baked to perfection—the moment we’ve all been waiting for has arrived! Carefully remove your peach crumble bars from the oven and allow them to cool at room temperature for approximately one hour. I know waiting can be tough when something smells so divine! But trust me on this: allowing them to cool properly is essential for achieving those perfectly cut squares later on.
After they’ve cooled slightly, transfer them directly into your refrigerator for an additional hour and a half (yes—I promise it’s worth it). Chilling allows everything to set beautifully; as they cool down further, those layers meld together even more harmoniously. The cooling process also gives time for any residual juices from the peaches to thicken up just a bit more—resulting in less mess when cutting into those gorgeous bars! So resist diving right in! Think about how satisfying it’ll feel once you slice through them like butter—and don’t worry; I’ll guide you through getting those perfect cuts next.
Final Touches – Slicing & Serving Your Masterpiece
Step 9: The Moment of Truth – Cutting Into Perfection
The anticipation has been building, hasn’t it? You’ve put in love and effort into making these Peach Crumble Bars come alive! Now it’s finally time for cutting them into squares—which I must say is both thrilling and nerve-wracking at once! Using a sharp knife or bench scraper makes all the difference here—you want clean cuts without tearing apart all those delicious layers you’ve created. Start by lifting out each bar using the parchment paper overhang; this not only helps avoid damage but also adds a touch of finesse as you present them.
As you slice through these treats, you’ll notice how easily they hold their shape thanks to all that cooling time we allowed earlier—the reward for our patience is indeed sweet! Each square reveals layers upon layers—a golden crumble atop luscious peaches bursting with flavor that’s almost too good to resist. And if any juices have pooled at the bottom of your dish during baking? Don’t forget about that reserved liquid—we discussed transforming it into syrup earlier; drizzle that over each serving for added decadence!
This final touch elevates these bars from delightful homemade treat status right up into gourmet territory! Serve warm or chilled (I love them both ways), perhaps alongside some vanilla non-dairy ice cream or fresh whipped coconut cream if you’re feeling indulgent—trust me; it’s utterly divine either way. Gather around friends family—you’re about ready to share not just food but memories made around these Peach Crumble Bars—and there’s nothing quite like that connection through shared meals!
Now go forth and create magic in your kitchen—I promise you’ll cherish every bite! Enjoy every moment as much as I do!
Storage and Enjoyment Tips for Your Peach Crumble Bars
Oh, the moment has finally arrived! Your kitchen is filled with the intoxicating aroma of freshly baked peach crumble bars, and I can feel your anticipation bubbling over. Once you’ve let these delightful bars cool and set, they’re ready to be enjoyed in all their glory. But what do you do with any leftovers (if there are any!)? Let’s dive into how to store these treasures so you can enjoy them at their best for days to come.
Storing Leftover Peach Crumble Bars
To keep your Peach Crumble Bars fresh and delicious, I recommend transferring them to an airtight container. This will help lock in that scrumptious crumble texture while preventing them from drying out. If you happen to have a glass container, even better! The bars can be stored at room temperature for about three days, but trust me when I say they’ll taste even better if you pop them in the fridge where they can stay fresh for up to a week. An extra little tip: place a slice of bread in the container with the bars; this surprisingly effective trick helps retain moisture, keeping that lovely chewy texture intact! When you take them out after a few days, you’ll find they still hold onto that wonderful flavor and mouthfeel. For an indulgent treat any time of day, simply reheat them gently in the microwave for about 10 seconds—just enough to warm through without losing that delightful crunch.
Freezing Peach Crumble Bars for Later
If you’re looking to save some of that peachy goodness for later, freezing is a fantastic option! To do this properly, I recommend cutting your bars into individual portions before wrapping each piece tightly in plastic wrap or aluminum foil. Then, place them into a freezer-safe bag or container. These beauties can be frozen for up to three months without losing their signature charm! When you’re ready to indulge again, just take out a bar and let it thaw at room temperature or pop it into the microwave straight from the freezer for a quick warm-up. The joy of having these peach crumble bars stashed away for busy days or unexpected guests is truly unbeatable—you’ll be thanking yourself later!
Peach Crumble Bars
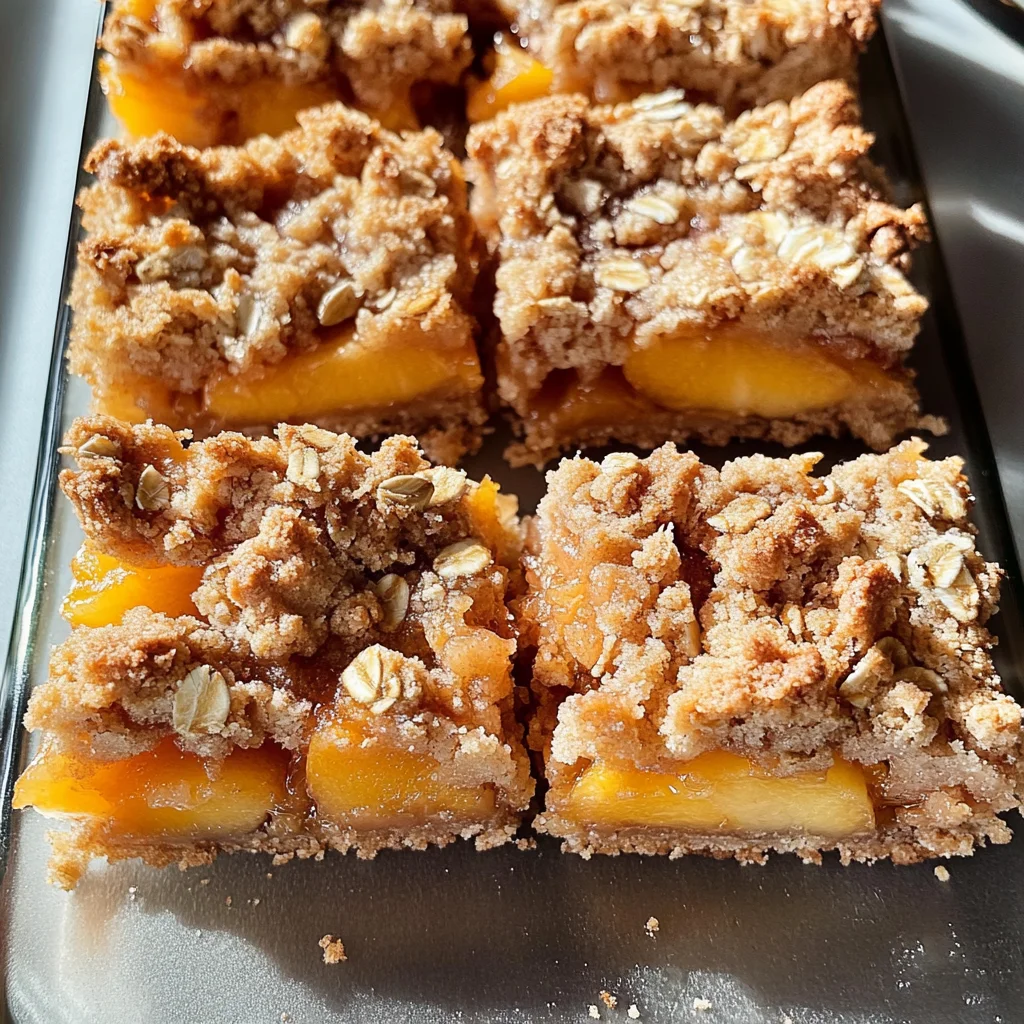
Peach Crumble Bars are a delightful summer treat that captures the essence of ripe peaches in every bite. With a buttery oat crust and a juicy peach filling, these bars offer the perfect balance of sweetness and texture. They’re easy to make and ideal for sharing at family gatherings or enjoying during casual get-togethers. The combination of fragrant almond extract and zesty lemon juice elevates the flavors, making each bar feel like a warm hug on a plate. Whether served chilled or warmed with a scoop of non-dairy ice cream, these bars promise to transport you to sun-soaked days filled with sweet memories.
- Prep Time: 15 minutes
- Cook Time: 35 minutes
- Total Time: 50 minutes
- Yield: Approximately 12 servings 1x
- Category: Dessert
- Method: Baking
- Cuisine: American
Ingredients
- 140 grams (1 cup) all-purpose flour
- 130 grams (1 cup and 1/3 cup) rolled oats
- 155 grams (3/4 cup) granulated sugar
- 1 teaspoon cinnamon
- 1/4 teaspoon salt (optional)
- 150 g (⅔ cup) unsalted butter, melted and cooled
- 450 grams (2 cups) peaches, peeled and cut into small pieces
- 30 grams (2 tablespoons) granulated sugar
- 2 teaspoons cornstarch
- 1 teaspoon fresh lemon juice
- 1 teaspoon almond extract
Instructions
- Preheat your oven to 350°F (177°C) and grease an 8-inch square baking dish lined with parchment paper.
- In a mixing bowl, combine flour, oats, sugar, cinnamon, and salt.
- Pour melted butter into the dry mixture until it resembles wet sand. Press two-thirds of this mixture into the bottom of your prepared baking dish.
- In another bowl, toss peach pieces with lemon juice, almond extract, sugar, and cornstarch. Spread evenly over the crust.
- Sprinkle the remaining oat mixture over the peaches, pressing down lightly.
- Bake for 33-35 minutes or until golden brown on top. Allow to cool before slicing.
Nutrition
- Serving Size: 1 bar (50g)
- Calories: 200
- Sugar: 12g
- Sodium: 50mg
- Fat: 9g
- Saturated Fat: 5g
- Unsaturated Fat: 4g
- Trans Fat: 0g
- Carbohydrates: 30g
- Fiber: 2g
- Protein: 3g
- Cholesterol: 15mg