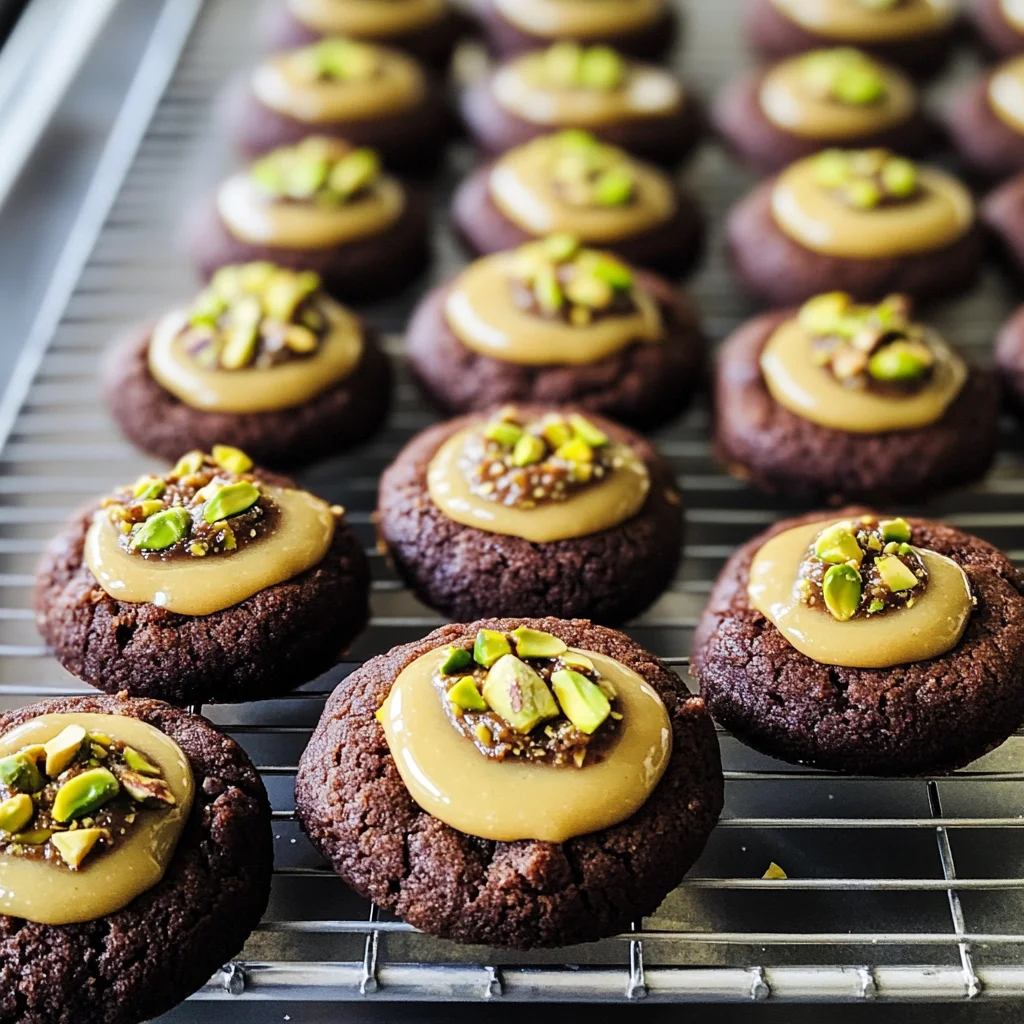
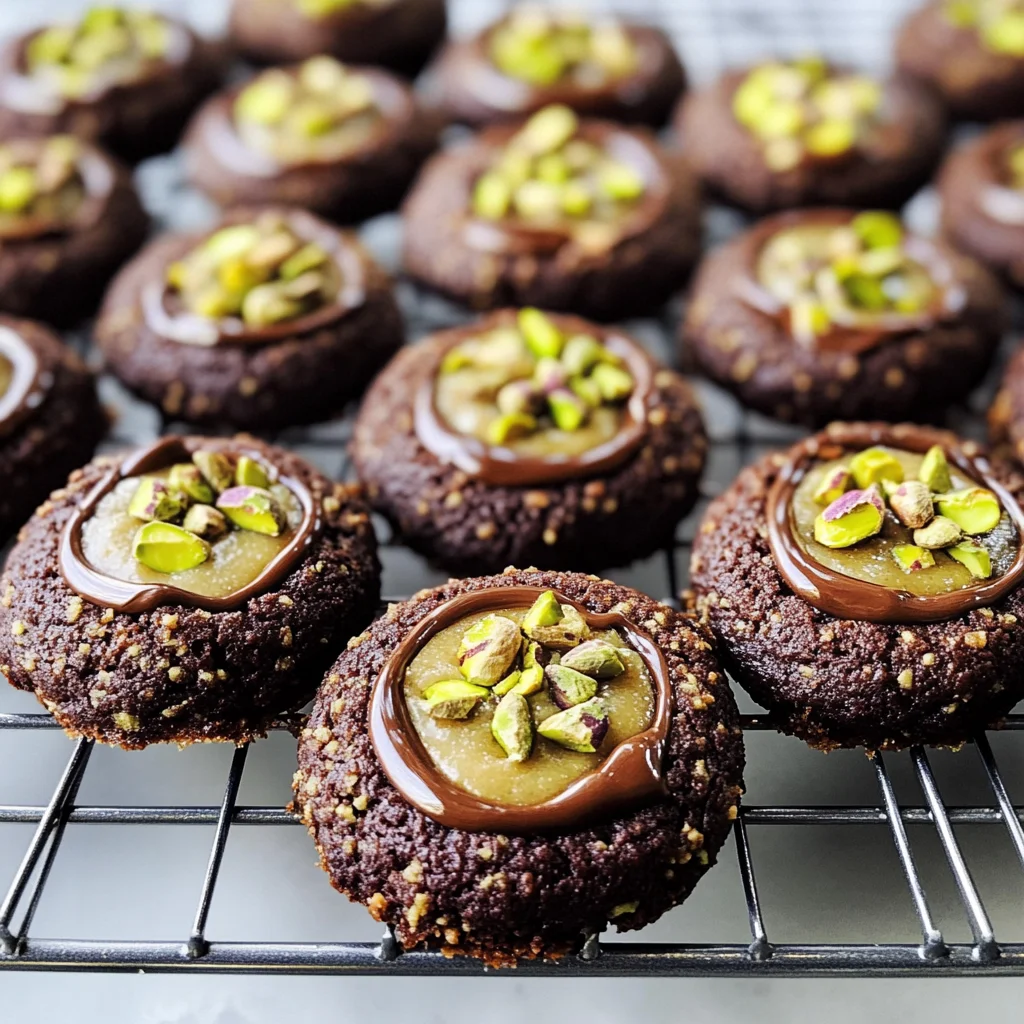
Chocolate Pistachio Cream Thumbprints
There’s something undeniably magical about the combination of chocolate and pistachio. The nutty, creamy essence of pistachios perfectly complements the deep, rich notes of chocolate, creating a delightful balance that is nothing short of a culinary hug. When I first made these Chocolate Pistachio Cream Thumbprints, it was like discovering a secret treasure—a recipe that not only tantalizes the taste buds but also brings warmth and joy to those who share them. Each bite is an experience, a moment that transports you to a cozy kitchen filled with laughter and sweet aromas. I promise you, once you take that first nibble, you’ll be swept away by the sheer delight of these cookies!
These thumbprints are more than just a treat; they embody the spirit of celebration and togetherness. Perfect for holiday gatherings or simply as an indulgent snack on a lazy afternoon, they offer a delightful contrast between the crispy exterior and the luxurious pistachio cream nestled within. As if that wasn’t enough, their charming little indents beckon for filling, making them not only visually appealing but also inviting to eat. So gather your ingredients, roll up your sleeves, and let’s embark on this delicious adventure together!
Chocolate Pistachio Cream Thumbprints: A Symphony of Flavor
These Chocolate Pistachio Cream Thumbprints are truly extraordinary! With their rich chocolate shortbread base complemented by nutty pistachios and an indulgent pistachio cream center, they represent everything wonderful about baking—comforting yet sophisticated flavors wrapped in a beautiful package. The combination offers both familiarity and surprise; just when you think you know what to expect from a cookie, it takes an exciting turn with its luscious filling.
Now that we’ve set the stage for our baking journey, let’s dive into the essential ingredients that will bring our Chocolate Pistachio Cream Thumbprints to life!
Ingredients:
Embarking on this culinary journey requires some key ingredients that work harmoniously together to create those delightful cookies. Let’s explore each one in depth so you’ll understand their roles and why they’re absolutely essential.
- 10 tablespoons unsalted butter (at room temperature): This is crucial for creaming properly and creating that light, airy texture we’re aiming for in our thumbprints. Room temperature butter allows air to incorporate into the mixture effectively during mixing. If your butter is too cold, it won’t cream well; too warm or melted will lead to overly greasy cookies. I encourage you to choose high-quality unsalted butter because its natural flavor enhances every component of this recipe beautifully.
- 2/3 cup granulated sugar: Sugar does more than just add sweetness; it plays a pivotal role in texture as well. It helps create that delicate crispiness around the edges while keeping the centers wonderfully chewy. When combined with butter through creaming, sugar crystals aerate the mixture further—a non-negotiable step for achieving cookies with just the right bite!
- 1 large egg yolk (reserve the white if you will be rolling in nuts): The yolk adds richness and moisture to our dough while also acting as an emulsifier—binding everything together beautifully. This step is important because it contributes to both flavor and texture, ensuring our cookies are decadently tender without being dry.
- 1 teaspoon vanilla extract: Vanilla extract is like magic in baking; it enhances other flavors without overpowering them. Using pure vanilla extract rather than imitation makes all the difference here—its fragrant notes are intoxicating and contribute significantly to that warm memory-inducing aroma wafting through your kitchen.
- 1/4 teaspoon pistachio extract (optional): While optional, this extract deepens the nutty flavor profile of your cookies, making them even more irresistible! Just a hint can transform your thumbprints into something special—I encourage you to give it a try if you’re a fan of pistachios!
- 1 1/4 cups all-purpose flour: Flour is one of those foundational ingredients without which we wouldn’t have cookies at all! It provides structure through gluten formation when mixed into dough—a balance is vital here since too much flour can lead to dense cookies while too little might result in spread-out messes.
- 1/3 cup dutch-processed cocoa powder (sifted): Dutch-processed cocoa gives our cookies that deep chocolate flavor we crave while lending them a beautifully dark color. Always sift your cocoa before adding it—this ensures any lumps are broken up so we’re left with smooth batter instead of gritty bits.
- 1/2 teaspoon fine sea salt: Salt may seem counterintuitive when baking sweets but trust me—it’s absolutely paramount! It enhances flavors across the board and balances sweetness beautifully; without it, your cookies could taste flat and one-dimensional.
- 1/2 cup coarsely chopped pistachios: These lovely green gems add crunch and bursts of nutty flavor throughout each cookie! Their vibrant color adds visual appeal as well—plus they provide healthy fats which elevate this treat from mere indulgence to something wholesome too!
- 1.5 ounces white chocolate (chopped): White chocolate serves as both sweetness and richness in our luscious filling while providing an elegant contrast against dark cocoa flavors from our cookie base—it melts beautifully into creamy perfection when warmed gently!
- 3 tablespoons pistachio butter: This ingredient is liquid gold—the embodiment of pure pistachio goodness! It creates an ultra-smooth filling that’s full of flavor while contributing creamy texture alongside white chocolate; it’s simply divine!
- 2 teaspoons powdered sugar (sifted): Powdered sugar sweetens our filling while ensuring smoothness without grittiness—it dissolves easily into mixtures due to its fine texture! Sifting avoids clumps which could disrupt our velvety consistency.
- 1/8 teaspoon fine sea salt: Yes! Another pinch of salt for good measure—but this time specifically for balancing out sweetness in our filling too! Just like before, it draws out flavors enhancing overall satisfaction with each decadent bite.
- 1/8 teaspoon pistachio extract (optional) & 1/8 teaspoon vanilla powder (optional): Both additional flavor enhancers—use them if you’re feeling adventurous or want extra depth in your fillings!
Now that we’ve gathered all these beautiful components let’s talk about how we’ll bring them together!
Equipment You’ll Need:
Having the right tools makes all the difference in creating something wonderful from scratch—and trust me when I say that investing time upfront into gathering these essentials will make your baking experience smoother and more enjoyable! Here’s what you’ll need:
- Mixing bowls – A good set of mixing bowls allows for easy combining of wet ingredients separately from dry ones—a key step toward achieving perfectly blended doughs! Opt for glass or stainless steel as they’re durable options which won’t absorb odors over time.
- Electric mixer – An electric mixer simplifies creaming butter with sugar significantly compared to hand mixing—giving you light textures faster! If you don’t have one available though don’t fret; elbow grease works wonders too!
- Measuring cups/spoons – Precise measurements matter immensely when baking; inaccurate amounts can lead to unexpected results—so invest in sturdy measuring cups/spoons marked clearly for ease during prep time.
- Sifter – Sifting flour/cocoa prevents clumping which aids uniformity within batters—it’s particularly useful here where dry goods need proper incorporation before combining with wet elements.
- Baking sheet(s) – Light or medium-colored heavy-weight sheets distribute heat evenly ensuring consistent baking outcomes—pair them up with parchment paper or silicone mats so nothing sticks during removal later on either!
With all these tools laid out ready at hand let’s start preparing those delectable Chocolate Pistachio Cream Thumbprints!
Step 1: Preheat Your Oven & Prepare Baking Sheets
Before diving into mixing those alluring ingredients together let’s prepare our workspace first! Preheating your oven ensures optimal conditions once we’re ready for baking—which means getting those delicious smells wafting about sooner rather than later! Set your oven temperature at 350 degrees Fahrenheit—it’s perfect for creating golden-brown edges around each cookie without burning them up entirely inside meanwhile prepping pans lined neatly beneath parchment paper provides easy cleanup afterward along with preventing any sticking mishaps during baking adventures ahead!
Step 2: Cream Butter & Sugar
Now comes one of my favorite parts—the creaming process! In a large mixing bowl combine softened unsalted butter along with granulated sugar using an electric mixer set on medium-high speed until light fluffy consistency forms after approximately two-three minutes’ worth of blending time passes by blissfully fast—you’ll know things are ready when mixture appears pale yellow instead darkish brown indicating successful incorporation has occurred here today folks! Don’t rush this step; allowing air bubbles into creamed mixture leads directly towards achieving lofty textured results down line so take pleasure knowing every second counts toward perfection ahead…
Step 3: Add Egg Yolk & Extracts
Next up—we’re adding richness via egg yolk along side fragrant extracts including vanilla plus optional pistachio kinds enhancing overall flavor profile further elevating sweet sensations awaiting us soon enough upon completion ahead… Mix thoroughly again until fully incorporated then scrape down sides gently using rubber spatula ensuring no remnants remain unblended within bowl before proceeding onto next stage where dry elements await eagerly outside patiently hoping join party soon enough themselves…
Step 4: Combine Dry Ingredients
Sifting together flour cocoa powder along fine sea salt brings harmony between dry components present thus eliminating potential lumps lurking about hiding dangerously nearby waiting cause chaos later down road if left unattended instead… Gently fold sifted mixture directly into creamed contents gradually mixing low speed until everything comes together forming stiff dough ball shape resembling soft play-dough consistency should arise before eyes revealing treasures awaiting discovery ahead… If dough appears crumbly fear not—you may add small teaspoons milk gradually until desired texture achieved but do note spreading might occur slightly due added moisture content levels afterward keeping mindful always aiming balance between tenderness firmness throughout entire process unfolding gracefully…
Step 5: Shaping the Cookies with Love
Now that you’ve rolled your delightful dough into perfect little balls, it’s time for one of my favorite moments in this baking adventure: shaping those cookie thumbprints. This step isn’t just about aesthetics; it’s where the magic begins. Gently press each ball with the back of a round measuring spoon or your thumb, creating an inviting little well in the center. You want to leave that delicate indentation without cracking the edges—think of it as giving each cookie a cozy little bed for its decadent filling. If you find that your dough is sticking to your fingers or the spoon, don’t fret! Just dip the spoon in a bit of flour first to ensure it glides smoothly over the dough, preventing any unwanted stickiness.
This process is crucial because that lovely indentation will hold our luxurious pistachio cream later on, which means we need to make sure it’s just right. Too deep, and you risk overfilling; too shallow, and you won’t have enough room for that scrumptious filling. Trust me on this: taking a moment to get this right will pay off immensely when you take your first bite and experience that heavenly combination of flavors and textures. So go ahead, embrace this step! Each press is like a promise of the goodness to come.
Step 6: Adding Texture with Nuts
For those who love a bit more crunch (and let’s be honest, who doesn’t?), we’re going to roll some of our cookies in chopped pistachios for an extra layer of flavor and texture. First, lightly dip the ball of dough into the reserved egg white—you want just enough to create a thin coat so that our nuts can stick beautifully. This step not only enhances the visual appeal but also adds an earthy nuance that complements our rich chocolate base perfectly. After coating them in egg white, roll each ball between your palms until they’re thinly covered before tossing them in a bowl filled with those coarsely chopped pistachios.
As you do this, take a moment to appreciate how vibrant those green nuts look against the dark chocolate dough; it’s like nature’s artwork on display! This rolling technique is non-negotiable if you want every bite to burst with flavor and crunch. Plus, when these beauties bake up golden and deliciously nutty, they’ll catch everyone’s attention at gatherings or even just during an afternoon snack at home. Remember, patience pays off here; make sure each cookie is evenly coated for that gorgeous finish.
Step 7: Baking Your Chocolate Pistachio Dreams
The time has finally come! Preheat your oven to a cozy 350 degrees F—this is where our cookies transform from mere dough balls into something utterly intoxicating. Once your oven is preheated and ready for action, carefully place your baking sheet filled with cookies into its warm embrace. Bake them for 10 to 12 minutes; keep an eye on them as they begin to puff slightly and turn ever so slightly darker around the edges—this visual cue tells you they’re nearing perfection.
Now here’s where things get exciting: as those cookies bake, your kitchen will fill with an aroma so heavenly you’ll find it hard not to sneak a taste before they’ve cooled! But I urge you—resist that temptation! When you pull them out of the oven, they should be set at the center and firm around the edges but still look soft enough that you could almost cradle them in your hands without breaking apart. If they seem overly puffy after baking (which can happen), don’t worry; simply redefine those indentations gently using the same measuring spoon you used earlier while they’re still warm. This will ensure ample space for our luscious filling later on!
Step 8: Perfecting Indentations
Once you’ve taken those beautiful cookies out of the oven and redefined their little wells while they’re still warm—a tip I can’t stress enough—you’ll need to let them cool down completely before we dive into creating our filling. Letting these cookies rest at room temperature allows all those flavors to settle beautifully together while ensuring they maintain their soft texture without becoming hard or crumbly.
It’s important not to rush this cooling period; give them about 10-15 minutes on the baking sheet before transferring them gently onto a wire rack if you have one handy (no worries if not!). Just let them sit there basking in their own glory—this resting time ensures they’ll maintain their shape while also allowing any residual heat to escape properly. The allure of freshly baked cookies doesn’t just stop at their beautiful appearance—it extends into how they feel when you finally take one from its resting place and pop it into your mouth! So breathe deeply; let yourself soak in this moment because soon you’ll be indulging in something incredibly special.
Conclusion:
As we wrap up our journey through this delightful recipe for Chocolate Pistachio Cream Thumbprints, I can’t help but feel giddy with excitement! Each step we took brought us closer to creating something truly extraordinary—a cookie that marries rich chocolate flavor with nutty pistachios and an utterly intoxicating cream filling. The way these flavors dance together creates a symphony that captivates every sense; it’s no wonder this recipe has found its way into my heart (and my kitchen) time and time again. I genuinely hope my enthusiasm has inspired you to embrace this delightful cooking adventure!
This recipe isn’t just about satisfying your sweet tooth; it’s about sharing joy and love through food. Imagine pulling these cookies from the oven and watching as everyone gathers around, drawn by their irresistible aroma. Whether you’re celebrating a special occasion or simply treating yourself after a long day, there’s something profoundly satisfying about making these thumbprints—and trust me when I say they’ll be gone before you know it! They are versatile enough to shine at holiday gatherings or casual coffee dates alike.
For serving suggestions, imagine savoring one of these cookies alongside a steaming cup of freshly brewed coffee or perhaps with a glass of cold almond milk—it’s like a match made in heaven! For an afternoon pick-me-up during your busy week or as part of an elegant dessert platter at your next gathering, these thumbprints are sure to impress. And let’s not forget how amazing they would taste paired with some fresh berries; their sweetness beautifully balances the rich chocolatey goodness!
Feeling adventurous? This recipe is wonderfully adaptable! You could experiment by swapping out pistachios for other nuts like hazelnuts or almonds—each will impart its unique essence into the cookie experience. Adding spices like cardamom could also elevate the flavors into exotic territories or even drizzling some melted dark chocolate on top would create an extra layer of richness that makes each bite even more decadent. I can’t wait for you to try this recipe and make it your own—so please share your journey with me! Let’s connect through our love for baking; I promise you won’t regret diving into this delicious adventure!
Chocolate Pistachio Cream Thumbprints

Indulge in the delightful world of Chocolate Pistachio Cream Thumbprints, where rich chocolate shortbread meets a luscious pistachio cream center. These cookies embody a perfect balance of nutty and creamy flavors that create a warm, inviting treat, ideal for sharing during festive gatherings or as a sweet afternoon pick-me-up. The crispy exterior contrasts beautifully with the velvety filling, making each bite a delightful experience. With their charming indents beckoning for filling, these thumbprints are not just visually appealing—they’re an irresistible culinary hug! Gather your ingredients and get ready to embark on this delicious baking adventure.
- Prep Time: 20 minutes
- Cook Time: 12 minutes
- Total Time: 32 minutes
- Yield: Approximately 24 cookies 1x
- Category: Dessert
- Method: Baking
- Cuisine: American
Ingredients
- 10 tablespoons unsalted butter (room temperature)
- 2/3 cup granulated sugar
- 1 large egg yolk
- 1 teaspoon vanilla extract
- 1 1/4 cups all-purpose flour
- 1/3 cup Dutch-processed cocoa powder (sifted)
- 1/2 cup coarsely chopped pistachios
- 1.5 ounces white chocolate (chopped)
- 3 tablespoons pistachio butter
- 2 teaspoons powdered sugar (sifted)
Instructions
- Preheat your oven to 350°F (175°C) and line baking sheets with parchment paper.
- In a mixing bowl, cream together room temperature butter and granulated sugar until light and fluffy.
- Add in the egg yolk and vanilla extract, mixing until well combined.
- Sift together flour and cocoa powder; gradually fold into the butter mixture until a soft dough forms.
- Shape the dough into small balls and press an indentation in the center of each.
- Roll cookies in chopped pistachios if desired.
- Bake for 10 to 12 minutes or until edges are set but centers remain soft.
- Let cool completely before filling with the pistachio cream mixture made from melted white chocolate, pistachio butter, powdered sugar, and salt.
Nutrition
- Serving Size: 1 cookie (30g)
- Calories: 120
- Sugar: 8g
- Sodium: 45mg
- Fat: 6g
- Saturated Fat: 3g
- Unsaturated Fat: 2g
- Trans Fat: 0g
- Carbohydrates: 14g
- Fiber: 1g
- Protein: 2g
- Cholesterol: 15mg