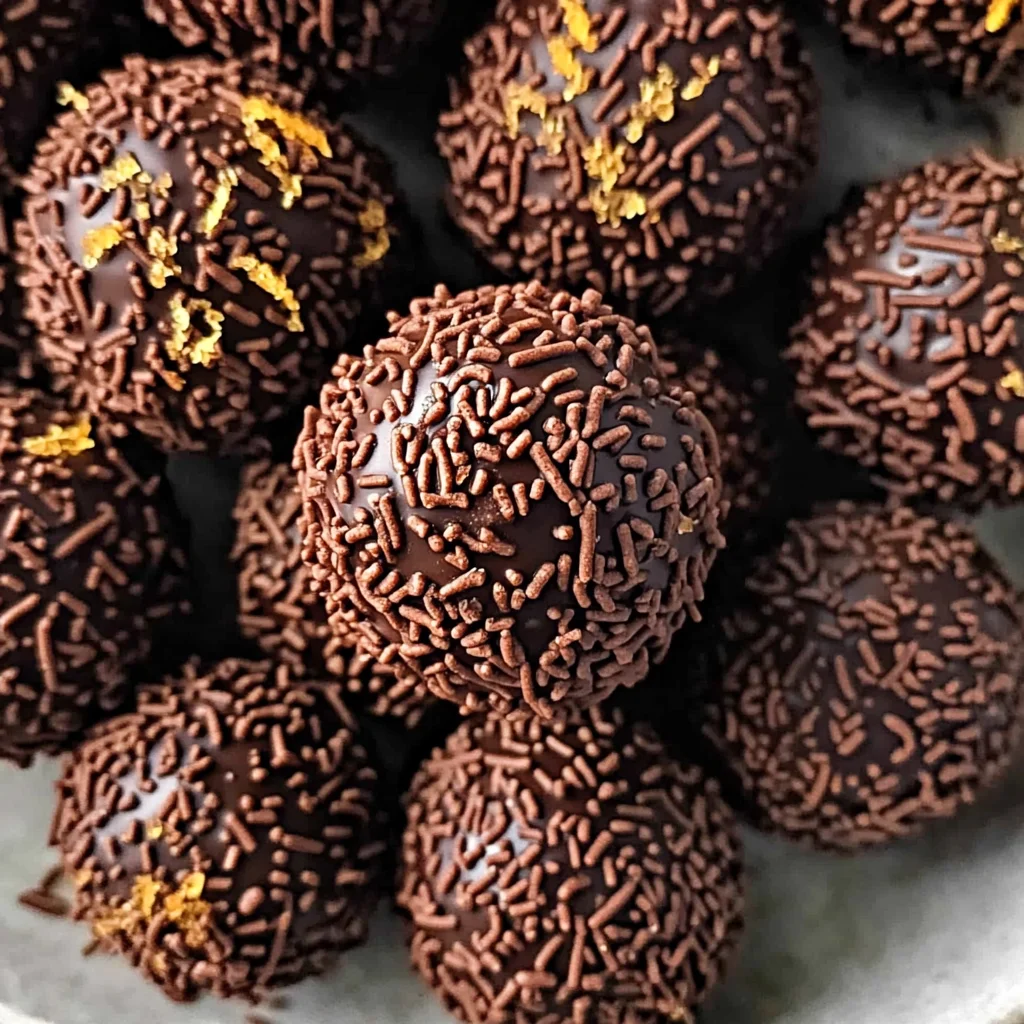
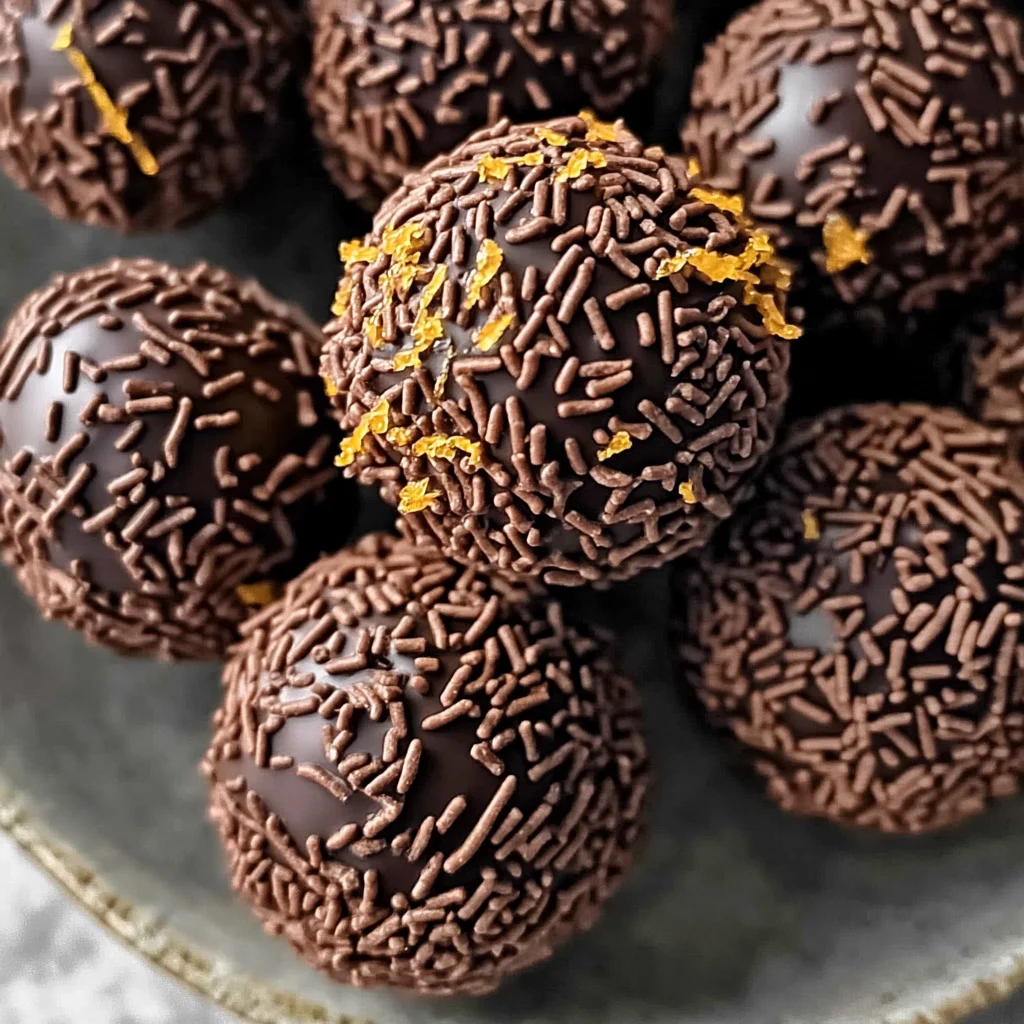
Juicy Orange Chocolate Christmas Truffles
There’s something profoundly magical about the holiday season, isn’t there? The air is filled with a symphony of scents—fresh pine, sweet spices, and that unmistakable aroma of chocolate wafting through the house. It’s during this time of year that we gather with loved ones, sharing not just meals but moments that linger long after the last bite has been savored. One of my absolute favorite treats to whip up during these festive gatherings is none other than Juicy Orange Chocolate Christmas Truffles. These delightful little morsels are more than just a dessert; they are an experience, a celebration of flavors that dance together in perfect harmony. The rich, velvety chocolate pairs beautifully with the vibrant zest of orange, creating an utterly intoxicating combination that will leave your taste buds singing.
I promise you, these truffles are not only incredibly easy to make but also impressively elegant. Whether you’re hosting a holiday soirée or simply indulging in some self-care at home while watching your favorite holiday movie, these little bites of joy are sure to bring a smile to your face and warmth to your heart. The beauty of this recipe lies in its simplicity and the way it effortlessly bridges the gap between traditional indulgence and modern flavor profiles. So grab your apron and let’s embark on this delicious journey together—it’s time to create something truly extraordinary!
Juicy Orange Chocolate Christmas Truffles: A Sweet Holiday Delight
These Juicy Orange Chocolate Christmas Truffles are a festive treat that embodies both creativity and tradition. They’re incredibly versatile too! Perfect for gifting, serving at parties, or even enjoying as a cozy evening snack by the fire. With just four simple ingredients, you’ll find yourself captivated by how something so straightforward can yield such luxurious results.
Ingredients:
As we dive into creating these delightful truffles, let’s take a moment to appreciate each ingredient’s role in our culinary adventure. Each one has its unique charm and contributes to building layers of flavor and texture that make these truffles unforgettable.
- 90 ml (around 1/3 cup plus 2 teaspoons) heavy cream. This creamy delight is absolutely paramount in achieving that luscious texture we crave in our Juicy Orange Chocolate Christmas Truffles. Heavy cream has a higher fat content than regular cream which translates into richness and depth of flavor; it helps our chocolate melt beautifully and creates that silky smooth ganache we’re aiming for. Always choose fresh cream for the best results—if it smells off or has changed color, it’s best left on the shelf!
- 200 g (7 oz) dark cooking chocolate (40% cocoa), finely chopped. Ah, chocolate—the star of our show! Selecting high-quality dark chocolate is crucial; it not only brings an intense cocoa flavor but also balances perfectly with the bright notes of orange peel we’ll add later. When chopping your chocolate, aim for small uniform pieces; this ensures it melts evenly when combined with the warm cream, resulting in that beautiful glossy finish we all adore.
- 1 teaspoon finely grated orange peel. This ingredient might seem small but trust me when I say it’s where the magic happens! The zest from fresh oranges adds brightness and complexity to our truffles, elevating them from simply chocolatey to something truly special. Make sure you use a microplane or fine grater to capture those aromatic oils without any bitter white pith—which can detract from our sweet creation.
- 1/3 cup chocolate sprinkles. These little gems serve two purposes: they add a delightful crunch to each bite while also making our truffles look irresistibly inviting! You can choose between classic chocolate sprinkles or even colorful ones for an extra festive flair. Just imagine how they catch the light when plated—absolutely stunning!
Equipment You’ll Need:
Before we dive into crafting these heavenly truffles, let’s make sure you have all the right tools at hand! Having the right equipment not only makes the process smoother but also enhances your overall experience in the kitchen.
- Heatproof bowl – This will be your melting sanctuary! A glass or ceramic bowl is perfect since it retains heat well and allows you to see when your chocolate is melting beautifully without burning.
- Whisk – A trusty whisk is essential for combining your warm cream with chopped chocolate seamlessly; it helps incorporate air and create that luscious ganache texture.
- Rubber spatula – You’ll want one on hand for scraping every last bit of ganache from your mixing bowl because no one should miss out on any deliciousness!
- Baking sheet lined with parchment paper – This will serve as your staging area while you roll those decadent balls of goodness; it keeps everything tidy and makes clean-up a breeze.
Now that we’ve gathered our ingredients and equipment, let’s roll up our sleeves and start preparing these delightful Juicy Orange Chocolate Christmas Truffles!
Step 1: Melting the Chocolate
Begin by placing your finely chopped dark cooking chocolate into a heatproof bowl set over a pot of simmering water—a technique known as double boiling. This gentle heat allows us to melt the chocolate without scorching it; trust me on this—it’s crucial! Stir occasionally with your whisk until it’s completely melted into a smooth liquid gold that’s utterly intoxicating in aroma alone. Once melted, remove from heat immediately but keep it over the warm water so it stays pliable while we prepare our next steps.
Step 2: Creating the Ganache
Next, pour your heavy cream into a small saucepan over medium heat—keep an eye on it as we don’t want it boiling! Let it heat until you see tiny bubbles forming around the edges; this signals that it’s ready for action! Carefully pour this hot cream over your melted chocolate while whisking gently but consistently—this step is where magic happens as they blend together into one silky-smooth mixture known as ganache! If you notice any lumps forming from unmelted chocolate bits (which might happen if we’re impatient), just keep whisking until everything comes together nicely—it should be glossy and inviting!
Step 3: Infusing Flavor
Now comes my favorite part—adding that vibrant orange peel zest into our ganache mixture! Stir it gently using your rubber spatula until evenly distributed throughout; you’ll immediately notice how aromatic this blend becomes—the citrus fragrance dances in harmony with rich chocolate notes creating an utterly extraordinary experience for both nose and palate alike! Cover this lovely concoction with plastic wrap directly on its surface (to prevent oxidation) before placing it in the refrigerator to chill for about two hours—or until firm enough to scoop.
Step 4: Rolling Your Truffles
Once chilled sufficiently—that glorious anticipation should have built up by now—it’s finally time to roll out those beautiful truffles! Using a melon baller or small spoon (about one tablespoon) scoop out portions of ganache and roll them quickly between your palms into smooth balls—don’t rush through this step because taking time ensures they hold their shape perfectly while avoiding any sticky messes along the way! Place each ball onto your prepared parchment-lined baking sheet as you go; then repeat until you’ve used up all of that luscious ganache.
There’s so much joy waiting ahead as we continue crafting these delightful Juicy Orange Chocolate Christmas Truffles! Stay tuned—I can’t wait to share more steps as we coat them beautifully and prepare them for their grand debut at your holiday celebrations!
Crafting Your Juicy Orange Chocolate Christmas Truffles
Step 5: The Magic of Heating the Cream
Now, let’s dive into the heart of our Juicy Orange Chocolate Christmas Truffles! Begin by pouring 90 ml of heavy cream into a small saucepan and place it over medium heat. This gentle warming is crucial because it allows us to coax out the rich flavors of the chocolate that we’re about to introduce. As the cream heats, you’ll want to stir it occasionally, keeping a watchful eye on it. You’re aiming for just before boiling—look for tiny bubbles forming around the edges. This stage is essential as it transforms our humble cream into a silky base that will meld beautifully with the chocolate.
Why is this step so important? The warmth enhances the cream’s natural sweetness and richness, making it an ideal companion for our dark chocolate. When you pour hot cream over chocolate, it creates an emulsion—think of it as a marriage where both ingredients come together to form something utterly intoxicating. If you allow the cream to boil too much, though, you risk scalding it, which can lead to a bitter taste that we definitely want to avoid! So remember, patience is key here; trust me on this one and keep your heat moderate.
Step 6: Infusing with Citrus Essence
Once your cream is heated just right, remove it from the heat and add in 1 teaspoon of finely grated orange peel. Ah, can you smell that? It’s like winter in a bowl! Allowing these vibrant citrus notes to infuse into your warm cream for about 5 minutes is non-negotiable. This infusion process not only elevates the flavor profile but also creates a beautiful aromatic experience that will linger in your kitchen. The zest releases essential oils that marry perfectly with our chocolate, creating an unforgettable depth of flavor.
After letting it steep, take a moment to enjoy those enchanting aromas wafting through your kitchen before moving on. It’s this attention to detail—the small things—that truly makes your truffles shine. The scent alone is enough to make anyone swoon in anticipation! Once you’re satisfied that the orange flavor has permeated beautifully into the cream, it’s time to move on to the next step.
Step 7: Melting Chocolate Perfection
Now comes the moment we’ve been waiting for—adding our finely chopped dark cooking chocolate! Carefully place your chocolate into a mixing bowl and then take your infused cream mixture and pour it over the chocolate pieces, ensuring all of them are covered. This step might seem straightforward, but it’s where magic happens! Allow this mixture to sit undisturbed for about 2-3 minutes. During this time, you’ll notice how the heat from the cream begins melting the chocolate into silky pools of liquid gold.
Why wait? This resting period allows for perfect melting without risk of overheating or seizing up those precious chocolate morsels. Stirring too soon can lead to uneven melting or even clumps of unmelted chocolate—yikes! After those few minutes are up, gently whisk everything together until you achieve a smooth ganache. The result should be glossy and luscious—a truly profound satisfaction when you see how beautifully they combine!
Step 8: Chilling – The Transformative Phase
Here comes perhaps one of the most critical steps in our journey: chilling our ganache mixture. Pour your velvety ganache into a shallow dish; spreading it out helps accelerate cooling time while giving you more surface area for easier scooping later on. Cover it tightly with plastic wrap (or a lid if you have one), making sure not to let any air get in there—it’s crucial we keep that lovely ganache protected while it chills.
Now pop this beauty into the refrigerator and let it rest for at least 2 hours—yes, I know waiting can be hard! But trust me; this chilling phase is absolutely paramount in developing both texture and flavor depth within your truffles. As they cool down, they transition from liquid luxury into a moldable consistency that’s still creamy but firm enough to scoop out without losing shape. While you’re waiting (impatiently!), why not put on some festive music or plan how you’ll present these little gems? Use this time wisely; great things come to those who wait!
Conclusion:
As we wrap up our journey through crafting these utterly intoxicating Juicy Orange Chocolate Christmas Truffles, I hope you’re feeling just as excited as I am! From the moment you first combine the silky cream with dark chocolate—a beautiful dance of flavor begins—it becomes clear why this recipe has captured my heart. The zesty brightness of orange peel intertwines seamlessly with the deep cocoa notes, creating a symphony of flavors that is nothing short of extraordinary. Each truffle is not just a treat; it’s a celebration of textures—the smooth ganache giving way to that delightful crunch from the sprinkles. This experience transforms ordinary moments into something profoundly special!
These truffles are undoubtedly a must-try. Not only do they tantalize your taste buds with every decadent bite, but making them is such an enjoyable process—a chance to engage all your senses and create something beautiful from scratch. Whether you’re preparing them for holiday gatherings or simply wanting to indulge yourself on a cozy evening at home, they shine brightly on any occasion. Just picture pulling out those beautifully crafted truffles from your fridge or freezer—the glossy finish catching the light just right—and watching as everyone gathers around eagerly.
Imagine savoring one with a steaming cup of herbal tea after dinner; the contrast between the warm beverage and cool truffle brings out layers of flavor that are simply divine. Or perhaps for an afternoon pick-me-up where each bite rejuvenates your spirit! For an even more decadent experience, try pairing these beauties with some fresh strawberries or fragrant citrus slices—their brightness complements the chocolate so wonderfully! The possibilities are endless.
Feeling adventurous? This recipe is wonderfully adaptable too! You could experiment by adding different citrus zests like lemon or lime for new dimensions of flavor, or even rolling some in finely chopped nuts for added crunch and complexity. If you’re looking for something unique yet familiar during festive gatherings, consider using flavored extracts like almond or hazelnut instead of orange zest—a simple twist can elevate this recipe even further! I encourage you to get creative and make this recipe truly yours. So go ahead—dive into this delicious adventure, share your experiences with me, and let’s connect over our love for cooking together!
Juicy Orange Chocolate Christmas Truffles
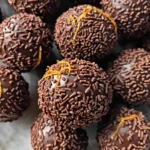
Juicy Orange Chocolate Christmas Truffles are a delightful fusion of rich dark chocolate and vibrant orange zest, creating a festive treat perfect for any holiday gathering. These truffles are not only easy to make but also elegant in appearance, making them ideal for gifting or serving at celebrations. Each bite offers a creamy, smooth ganache wrapped in a crunchy chocolate sprinkle coating, delivering an indulgent experience that is sure to impress friends and family alike. With just four simple ingredients, you can whip up this luxurious dessert in no time and enjoy the magic of the holiday season with every mouthful!
- Prep Time: 15 minutes
- Cook Time: 5 minutes
- Total Time: 20 minutes
- Yield: Approximately 12 truffles 1x
- Category: Dessert
- Method: No-Bake
- Cuisine: American
Ingredients
- 90 ml heavy cream
- 200 g dark cooking chocolate (40% cocoa), finely chopped
- 1 teaspoon finely grated orange peel
- 1/3 cup chocolate sprinkles
Instructions
- Heat the heavy cream in a saucepan over medium heat until bubbles form around the edges, then remove from heat.
- Add the finely chopped dark chocolate to a mixing bowl and pour the hot cream over it. Let sit for 2-3 minutes before whisking until smooth.
- Stir in the grated orange peel until evenly combined.
- Cover the ganache with plastic wrap and refrigerate for about 2 hours or until firm.
- Once firm, scoop out portions of ganache and roll into smooth balls using your hands.
- Roll each truffle in chocolate sprinkles until fully coated, then place on a parchment-lined baking sheet.
Nutrition
- Serving Size: 1 truffle (20g)
- Calories: 100
- Sugar: 8g
- Sodium: 10mg
- Fat: 7g
- Saturated Fat: 4g
- Unsaturated Fat: 3g
- Trans Fat: 0g
- Carbohydrates: 9g
- Fiber: 1g
- Protein: 1g
- Cholesterol: 0mg