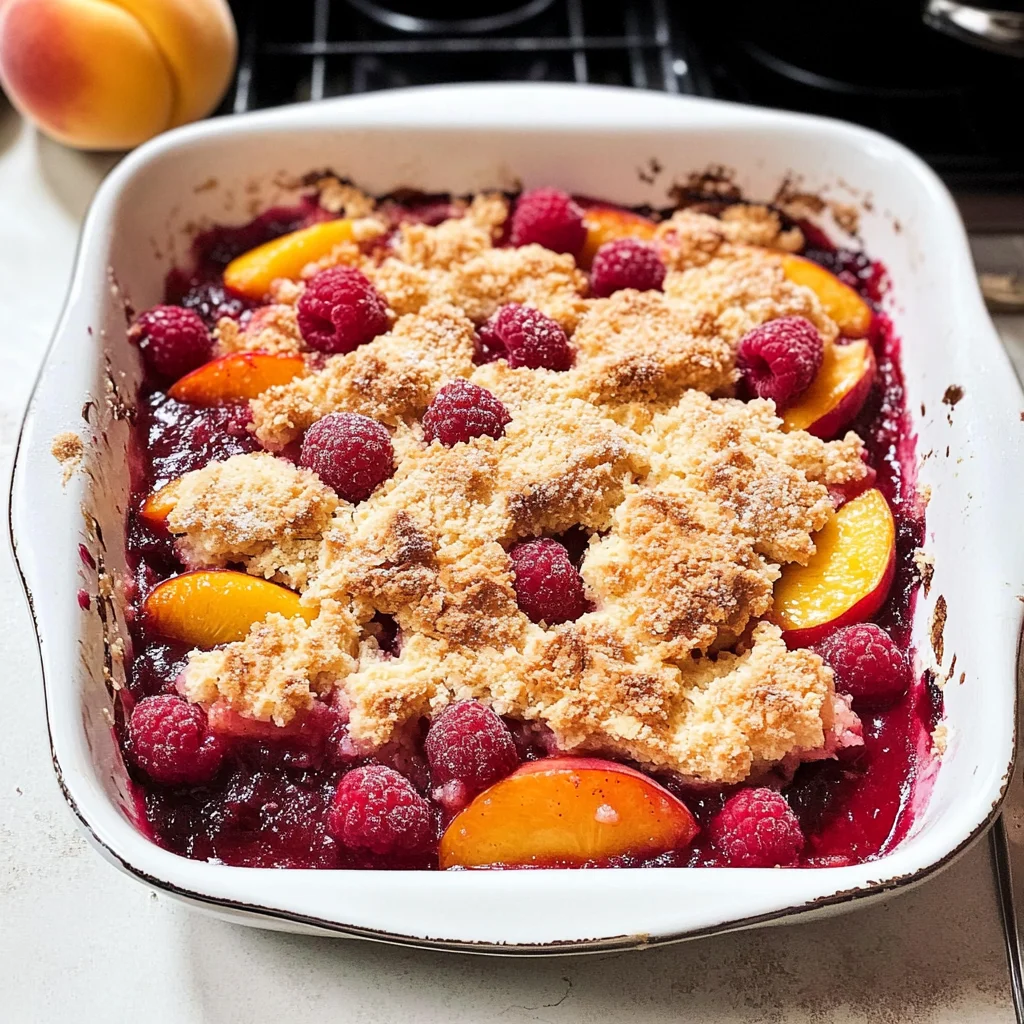
Easy Peach and Raspberry Cobbler
There’s something profoundly satisfying about creating a dish that feels like a warm embrace, don’t you think? The moment I take a bite of this Easy Peach and Raspberry Cobbler, I’m transported back to sun-drenched summer afternoons spent picking fruit with my family. It’s not just about the sweet, juicy peaches or the tart raspberries; it’s about the memories woven into each bite, the laughter shared, and the love poured into every step of the cooking process. This cobbler is more than just a dessert; it’s an experience that brings people together, celebrating the beauty of fresh ingredients and simple pleasures. I promise you, once you try this recipe, it will become a cherished part of your culinary repertoire—one that you’ll turn to time and again when you want to impress friends or simply treat yourself.
What makes this Easy Peach and Raspberry Cobbler so special is its ability to showcase seasonal fruit at its best. The luscious peaches meld beautifully with vibrant raspberries, creating a symphony of flavors that dance on your palate. As it bakes in the oven, your kitchen will be filled with an utterly intoxicating aroma that hints at the deliciousness to come—sweetness mingling with a hint of citrus from the lemon zest. What’s truly extraordinary is how this dessert effortlessly straddles both British and American culinary traditions, making it perfect for any occasion—from casual family dinners to festive gatherings. Trust me when I say that each scoop is like a little piece of summer captured in a bowl!
Easy Peach and Raspberry Cobbler: A Sweet Summer Delight
Are you ready to embark on this delightful culinary journey? This Easy Peach and Raspberry Cobbler is incredibly simple to make yet yields results that are nothing short of spectacular. With its golden-brown topping contrasting against the vibrant fruit filling, it’s as visually appealing as it is delicious. You’ll find that even novice bakers will shine in this endeavor—so let’s get started!
Ingredients:
As we dive into our ingredient list, remember that each component plays an integral role in crafting our cobbler masterpiece. The beauty lies not only in their individual contributions but also in how they harmonize together.
- 5 peaches (cut into wedges). Peaches are the star of this show! When selecting peaches, look for ones that yield slightly to pressure—this indicates ripeness. Their sweet, juicy flesh will create a syrupy filling that becomes utterly divine as it bakes. If peaches are out of season or not available, feel free to substitute with nectarines or even canned peaches (just ensure they are well-drained). The key here is to embrace the sweetness of fresh fruit while allowing their natural flavors to shine through.
- 125 g fresh raspberries. These little gems add a tart contrast to the sweetness of our peaches and elevate our cobbler from good to extraordinary! Fresh raspberries should be plump and vibrant in color; avoid any with mushy spots or mold. If fresh isn’t an option, frozen raspberries can work wonders too—just remember they may release more moisture during baking, so adjust your sugar accordingly.
- 75 g caster sugar. Caster sugar dissolves quickly thanks to its fine texture, which makes it ideal for our fruit filling as well as our topping. While we’re using sugar here primarily for sweetness, it also helps create that syrupy goodness when combined with the juices from our peaches and raspberries during baking. If you’d like a less sweet option, consider reducing this amount slightly or using coconut sugar for a different flavor profile.
- 90 g cold butter (salted or unsalted). Cold butter is absolutely paramount when making our cobbler topping! It creates those lovely flaky layers by preventing gluten formation during mixing—it literally creates pockets of steam as it melts in the oven! If you have unsalted butter on hand, go ahead and use it; just taste your final product before serving to determine if additional salt might be needed.
- 90 g caster sugar (for topping). Yes, we’re using sugar again! In addition to providing sweetness for our topping dough itself, this sugar caramelizes slightly during baking for an enticing golden color and delicious crunch on top—a textural contrast that makes each bite more enjoyable.
- 140 g plain flour. This ingredient serves as the backbone of our topping—the base from which all those fluffy layers will rise! Be sure not to overmix when combining your dry ingredients; too much gluten development will yield a dense result instead of light and airy crumbs. For gluten-free options, consider substituting with almond flour or oat flour!
- 1 teaspoon baking powder. This is crucial for achieving lift within our cobbler topping—without it, we’d end up with what could only be described as peach soup instead! Baking powder acts as a leavening agent by producing carbon dioxide gas when mixed with moisture and heat; it’s essential for creating that delightful texture we’re aiming for.
- 2 teaspoons milk (see notes). Milk adds moisture without overwhelming our mixture—it’s one secret weapon for achieving just the right consistency in our batter! If you prefer non-dairy options or need substitutions due to dietary restrictions, almond milk works wonderfully here without compromising flavor.
- 2 tablespoons flaked almonds. These toasted beauties provide an extra layer of nutty flavor and crunch atop our cobbler before baking! You can choose whether or not to include them based on personal preference—I find they enhance both taste and presentation beautifully without being overpowering.
- Zest of 1 lemon. This little addition brightens everything up! The zest releases aromatic oils that complement both peach and raspberry fantastically while cutting through their inherent sweetness—trust me when I say it’s non-negotiable if you want depth in flavor!
Equipment You’ll Need:
Before we jump into assembling this glorious treat together, let’s chat about some essential tools you’ll want on hand—a few trusty partners in crime that make whipping up this cobbler even smoother!
- Mixing bowls (various sizes). Having multiple bowls allows us flexibility while prepping ingredients separately before combining them seamlessly later on—this prevents chaos in your kitchen space! Choose glass or ceramic ones whenever possible since they hold temperature better than plastic.
- Measuring cups & spoons. Accurate measurements are vital in baking because even slight variations can affect outcomes dramatically! Invest in good quality measuring tools; they’ll be indispensable not just today but every time you step into your kitchen.
- Pastry cutter or fork. To achieve those flaky layers we adore so much within our cobbler topping—and avoid overworking dough—we’ll need something sturdy yet flexible enough for cutting cold butter into flour mixture efficiently (as if we’re doing some pastry magic!).
- Baking dish (approximately 9×9 inches). A square baking dish provides ample room for spreading out layers evenly while allowing edges crisp up nicely during baking—a critical factor if you’re looking for perfect texture contrast across all bites.
- Spatula or wooden spoon. These handy tools help combine ingredients gently without deflating air bubbles created earlier through creaming methods—keeping everything light while ensuring consistency throughout dough mixtures!
Now that we have all our ingredients gathered and equipment ready let’s move forward into action mode: preparing our Easy Peach and Raspberry Cobbler!
Step 1: Prepping Your Fruit
The first thing we want to do is prepare those beautiful peaches and raspberries because they’re going to be the stars of our dish—their natural sweetness needs just a little coaxing out! Start by washing your peaches thoroughly under cool running water; then slice them into wedges after removing their pits—you want pieces big enough so they can hold their shape during baking yet small enough to cook evenly throughout without turning mushy later on! Next comes those vibrant raspberries—their delicate nature means gentle handling is crucial here; simply rinse them briefly—not long enough for excess water pooling around—but just enough so they’re clean since we want them bursting with flavor rather than soggy!
Once you’ve got everything prepped beautifully together—toss these fruity treasures into your mixing bowl along with 75 g caster sugar (remember how we said earlier about coaxing out sweetness?). Gently fold everything together until combined yet still maintaining integrity—it should look like joy itself right now! Letting these sit aside allows flavors meld beautifully while releasing juices necessary for creating syrupy goodness later on during bake time—it may seem small now but trust me: patience pays off immensely here!
Step 2: Making Your Topping Dough
Now let’s talk about creating that dreamy topping dough which will crown your peach-and-raspberry filling gloriously once baked—a true delight awaited by all who get served at your table tonight! In another mixing bowl combine 140 g plain flour along with 90 g caster sugar plus 1 teaspoon baking powder—it’s important each ingredient gets evenly distributed throughout before moving onto next steps because uneven distribution leads us down paths where some bites lack desired flavor profiles entirely… no thanks!
Next comes cold butter—which should’ve been cubed beforehand—to join forces with dry ingredients awaiting union inside bowl we’re working within right now… Grab either pastry cutter or fork mentioned earlier then begin cutting through butter pieces until mixture resembles coarse crumbs resembling sand-like texture only found near ocean shores… It’s crucial not rush this step since over-mixing leads us away from achieving desired flakiness later upon baking time arrives—we want lightness achieved here above anything else!
Afterward pour two teaspoons milk directly over crumbly mixture then gently fold everything together until cohesive dough forms without overworking—we’re talking about just bringing together ingredients long enough so no dry patches remain visible anymore… Once done set aside momentarily while waiting patiently till fruit has released juices necessary allowing symphony playfully unfold within oven shortly thereafter…
Step 3: Bringing It All Together
Here comes one of my favorite parts—the moment where everything comes together like magic unfolding right before us! Preheat your oven at this stage too since having hot environment ensures swift cooking once dish enters confines shortly thereafter—aiming towards lovely golden-brown crust atop bubbling fruits below… Grab prepared baking dish previously set aside then pour juicy peach-and-raspberry filling evenly spread across bottom surface followed closely by generous dollops atop fluffy topping dough created moments ago—don’t worry if some fruit peeks through—that’s perfectly alright—they deserve their spotlight too after all!
Sprinkle those flaked almonds across top generously now as well; each bite will get amplified due crunchiness provided by them once baked off beautifully… Now carefully slide entire assembly into preheated oven letting glorious aromas dance around kitchen space while allowing patience reign supreme… Bake for approximately thirty minutes total keeping watchful eye ensuring edges brown nicely without burning—as soon as filling bubbles joyously through cracks formed between toppings indicating readiness voilà moment begins approaching ever closer…
Step 4: Cooling Down Before Serving
Once timer goes off signaling completion don’t rush immediate slicing action though—I understand enthusiasm can tempt us—but allow cooling period instead where patience rewards further enhancing flavors melding inside heavenly creation made collectively over past hour… Perfectly letting rest between ten-fifteen minutes guarantees setting up desired sliceability whilst ensuring nobody burns hands trying reach directly onto hot surface plates meanwhile… Plus those lingering aromas wafting around home become irresistible invitation beckoning guests gather round kitchen area eagerly anticipating scrumptious treats awaiting them shortly thereafter…
With every step completed successfully thus far leading towards triumphal fruition—the heartfelt satisfaction gained upon serving slices garnished freshly whipped cream alongside perhaps scoop vanilla ice cream elevates experience beyond ordinary realm altogether truly showcasing feelings expressed wholeheartedly throughout creation journey taken today culminating at last…
And there you have it—the love-infused story behind my Easy Peach and Raspberry Cobbler recipe laid bare before us all invitingly ready share among friends family alike…
Enjoy every bite—and don’t forget save me some leftovers too please!?
Step 5: A Symphony of Sweetness – Preparing the Fruit Filling
Now that your oven is preheating, let’s dive into the heart of this Easy Peach and Raspberry Cobbler—the filling! Start by taking those beautiful, ripe peaches you’ve sliced into wedges. It’s important to use fresh peaches, as they offer a sweetness and juiciness that frozen ones simply can’t match. The moment you slice into them, take a moment to inhale their intoxicating aroma; there’s something so nostalgic about the scent of summer fruit, isn’t there? Combine those peach wedges in a mixing bowl with the fresh raspberries and 75 grams of caster sugar. This sugar will not only add sweetness but also draws out the natural juices from the fruit, creating a luscious, syrupy filling that’s utterly irresistible. As you gently toss the fruit and sugar together, feel free to channel your inner artist—this is the canvas for your cobbler!
What makes this step so crucial is the marriage of flavors that occurs here. Letting the sugar sit with the fruits for about 10 minutes allows them to macerate—a fancy term for letting them mingle until they create a sweet sauce. You’ll notice that after this time, the sugar has dissolved slightly and created a beautiful pool of liquid at the bottom of your bowl. This is exactly what you want; it’s like nature’s way of giving you a head start on that amazing filling! Don’t rush through this step; patience here pays dividends in flavor. Once you’ve allowed those fruits to soak up the sugar goodness, pour everything into your baking dish, spreading it out evenly to ensure every spoonful is bursting with flavor.
Step 6: Creating Cloud-Like Topping – Mixing the Batter
Now onto one of my favorite parts—the topping! In another bowl, combine 90 grams of cold butter (it can be salted or unsalted depending on your preference), 90 grams of caster sugar, 140 grams of plain flour, and 1 teaspoon of baking powder. I absolutely love using cold butter for this recipe because it creates those fluffy pockets throughout your cobbler topping as it melts in the oven. Trust me on this; nothing beats biting into a warm cobbler and finding tender bits interspersed within! Using your fingertips or a pastry cutter (if you have one), work the butter into the dry ingredients until it resembles coarse breadcrumbs. This process is known as cutting in, and it’s vital for achieving that delightful texture we crave in desserts.
As you work through this step, keep an eye on how your mixture transforms; you’ll want small pea-sized pieces of butter throughout. They will melt during baking and create steam pockets—this is what gives your topping its lightness and fluffiness. Once you reach that crumbly state, add in 2 teaspoons of milk along with some zest from one lemon. The acidity from the lemon zest brightens the flavors remarkably—don’t skip it! Stir until just combined; overmixing can lead to a dense topping instead of that airy cloud-like consistency we desire. It’s perfectly fine if there are still some lumps; they’ll bake out beautifully!
Step 7: Marrying Flavors – Spoon on That Topping
With both components ready, it’s time for the pièce de résistance—putting them together! Carefully spoon dollops of your batter over the fruit filling in your baking dish. Don’t worry about covering every inch completely; leaving some gaps allows for those irresistible juices to bubble up through the topping during baking, creating an enticing contrast between sweet fruit and soft dough. It’s like nature intended this dessert to be a beautiful juxtaposition! Use a spatula or even just your hands to spread it out gently if needed; again, don’t rush—be mindful as you do this.
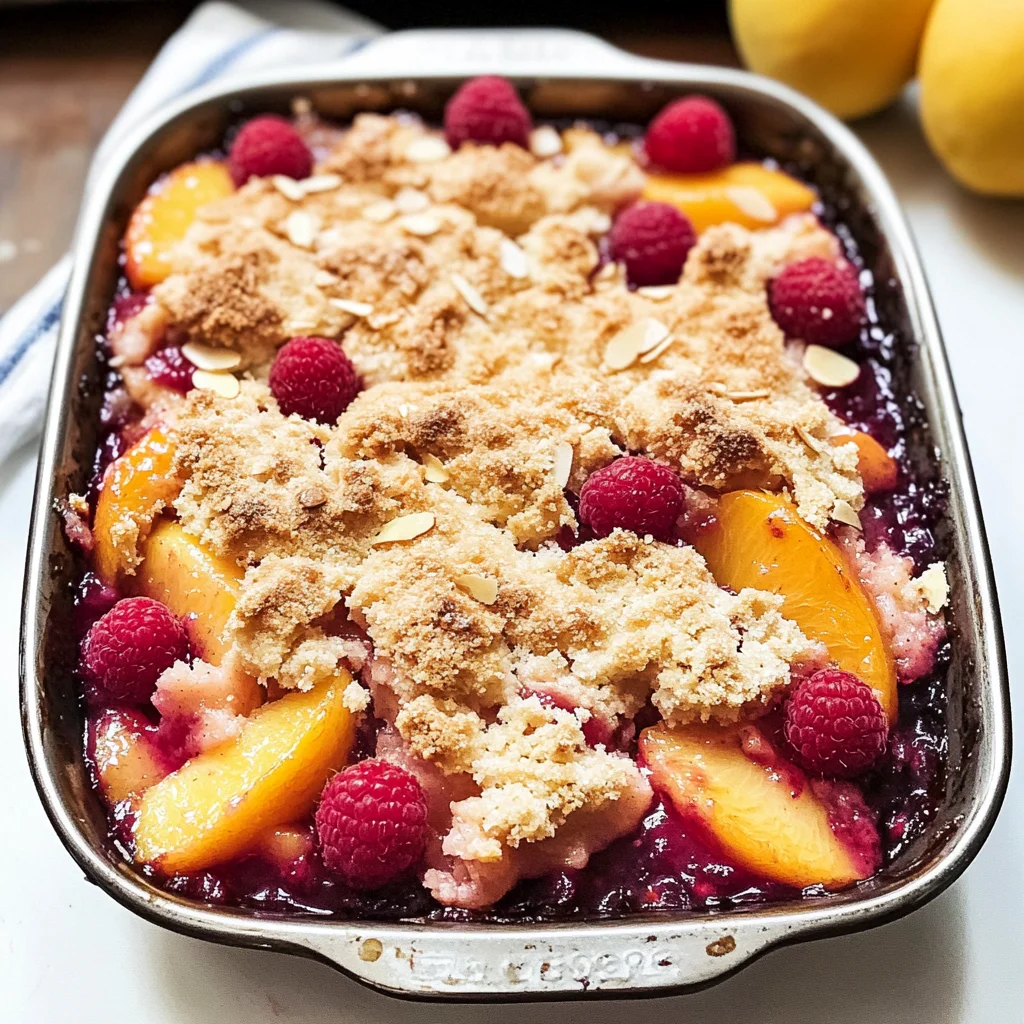
Once you’ve added all that fluffy goodness on top, sprinkle about two tablespoons of flaked almonds across the surface as a final touch before popping it into the oven. These almonds will toast wonderfully during baking and provide an extra layer of texture and nutty flavor that complements both fruits beautifully—trust me when I say they elevate this cobbler from ordinary to extraordinary! Now it’s time for patience again; slide your dish into that preheated oven and let it bake for approximately 30 minutes or until golden brown on top and bubbling around the edges—a visual cue that’s simply mouthwatering!
Step 8: The Art of Baking – Achieving Perfection
Baking is truly an art form, isn’t it? While our Easy Peach and Raspberry Cobbler bakes away happily in its warm cocoon, take this time to reflect on how magical cooking can be—it transforms simple ingredients into something profoundly satisfying! Keep an eye on its progress during those last few minutes. You’re looking for two key indicators: first, a lovely golden-brown crust should form on top—this means our buttery batter has risen perfectly over our juicy filling—and second, watch for little bubbles peeking through around the edges as those delicious fruit juices begin to break free.
When you remove it from the oven after about 30 minutes (or when it looks like heaven itself), allow it to rest at room temperature for at least 10-15 minutes before diving in. I know waiting feels impossible when such delightful aromas waft through your kitchen—but trust me on this one! Resting allows all those layers to settle down just enough so each serving remains intact when you scoop into it later; nobody wants mushy cobbler! Plus, allowing flavors to meld even further only enhances every bite you take—it’s truly non-negotiable if you want that perfect experience!
Final Touches: Serving Your Masterpiece
Step 9: A Warm Welcome – The Big Reveal
After what feels like an eternity (but really was just enough time), it’s finally time for one of life’s sweetest rewards—serving up slices of your Easy Peach and Raspberry Cobbler! Grab yourself a large spoon—you’ll need it—and prepare to dig deep into that golden crust where warmth meets vibrant fruit beneath. As you serve each portion onto plates or bowls (I personally recommend bowls with plenty of space!), consider adding an extra touch with a scoop of dairy-free ice cream or whipped coconut cream if desired—it adds another layer of creamy richness that’s simply divine!
The moment you take your first bite will be nothing short of magical—the combination of sweet peaches melting effortlessly against tart raspberries beneath a fluffy crust dances together like poetry on your palate. Each forkful captures not just flavor but also memories—perhaps bringing back thoughts of summer picnics or family gatherings filled with laughter over shared servings.
So there you have it—your very own masterpiece baked right from scratch! I can’t wait for you to share this Easy Peach and Raspberry Cobbler with friends and family alike because I promise you—it will be met with applause every single time! Enjoy every blissful bite knowing you’ve created something truly extraordinary right from your kitchen.
Storage and Enjoyment Tips for Your Easy Peach and Raspberry Cobbler
Now that your kitchen is filled with the tantalizing aroma of baked peaches and raspberries, it’s time to dive into enjoying this delightful dessert! I can hardly contain my excitement as I think about the first bite of that warm, gooey filling beneath a fluffy, golden topping. But what happens if you have leftovers? Fear not! Storing your Easy Peach and Raspberry Cobbler is just as simple as making it, ensuring you can savor every last morsel well after the first serving.
Storing Leftover Easy Peach and Raspberry Cobbler
To preserve your masterpiece, let it cool completely before transferring it to an airtight container. This is crucial! You want to avoid condensation that could make the topping soggy. If you have a glass dish with a lid, that’s perfect; it allows for easy reheating later. Your cobbler will keep beautifully in the fridge for about 3-4 days, maintaining its sweet charm. For those looking to keep things fresher longer, consider placing a slice of bread in with the cobbler—this little trick helps absorb excess moisture. Trust me on this one; it keeps the topping from turning too soft and maintains that lovely texture. When you’re ready to indulge again, simply pop it in the oven at 350°F (about 175°C) until warmed through, or enjoy it cold for a refreshing treat! The flavors meld beautifully even after storage, creating a profoundly satisfying experience that makes each bite feel like a warm hug.
Freezing Easy Peach and Raspberry Cobbler for Later
If you’ve made a big batch or simply want to plan ahead for dessert cravings down the road, freezing your Easy Peach and Raspberry Cobbler is an amazing option! To do this properly, allow the cobbler to cool completely before wrapping individual portions tightly in plastic wrap or aluminum foil. Then place them in a freezer-safe bag or container—this double layer ensures no freezer burn will spoil your delicious creation. It can last up to three months frozen without losing its charm. When you’re ready to enjoy it again, you can bake straight from frozen or let it thaw overnight in the refrigerator before reheating in the oven. The convenience factor here is absolutely paramount; having this gorgeous dessert ready at your fingertips makes any ordinary day feel extraordinary!
Easy Peach and Raspberry Cobbler
There’s nothing quite like the comforting embrace of a homemade dessert, and this Easy Peach and Raspberry Cobbler encapsulates that feeling perfectly. Bursting with the sweet juiciness of ripe peaches and the tartness of fresh raspberries, this cobbler is a celebration of summer flavors. The golden, flaky topping contrasts beautifully with the vibrant fruit filling, creating a delightful symphony of taste and texture in every bite. Perfect for family gatherings or a cozy dessert night at home, this recipe is not only simple to prepare but also incredibly satisfying. Whether served warm with a scoop of dairy-free ice cream or enjoyed on its own, this cobbler promises to be a cherished addition to your dessert repertoire.
- Prep Time: 20 minutes
- Cook Time: 30 minutes
- Total Time: 50 minutes
- Yield: Serves approximately 8 people 1x
- Category: Dessert
- Method: Baking
- Cuisine: American
Ingredients
- 5 ripe peaches (cut into wedges)
- 125 g fresh raspberries
- 75 g caster sugar (for fruit filling)
- 90 g cold butter (salted or unsalted)
- 90 g caster sugar (for topping)
- 140 g plain flour
- 1 teaspoon baking powder
- 2 teaspoons milk
- Zest of 1 lemon
- 2 tablespoons flaked almonds
Instructions
- Preheat your oven to 350°F (175°C).
- In a mixing bowl, combine peach wedges, raspberries, and 75 g caster sugar. Let sit for about 10 minutes to allow juices to release.
- In another bowl, mix together cold butter, 90 g sugar, plain flour, and baking powder until crumbly. Add milk and lemon zest; stir until just combined.
- Pour the fruit mixture into a baking dish and dollop the topping over it unevenly.
- Sprinkle flaked almonds on top.
- Bake for approximately 30 minutes or until golden brown and bubbly.
- Allow to cool for 10-15 minutes before serving.
Nutrition
- Serving Size: 1 slice (approx. 150g)
- Calories: 210
- Sugar: 18g
- Sodium: 120mg
- Fat: 9g
- Saturated Fat: 5g
- Unsaturated Fat: 3g
- Trans Fat: 0g
- Carbohydrates: 30g
- Fiber: 2g
- Protein: 3g
- Cholesterol: 20mg