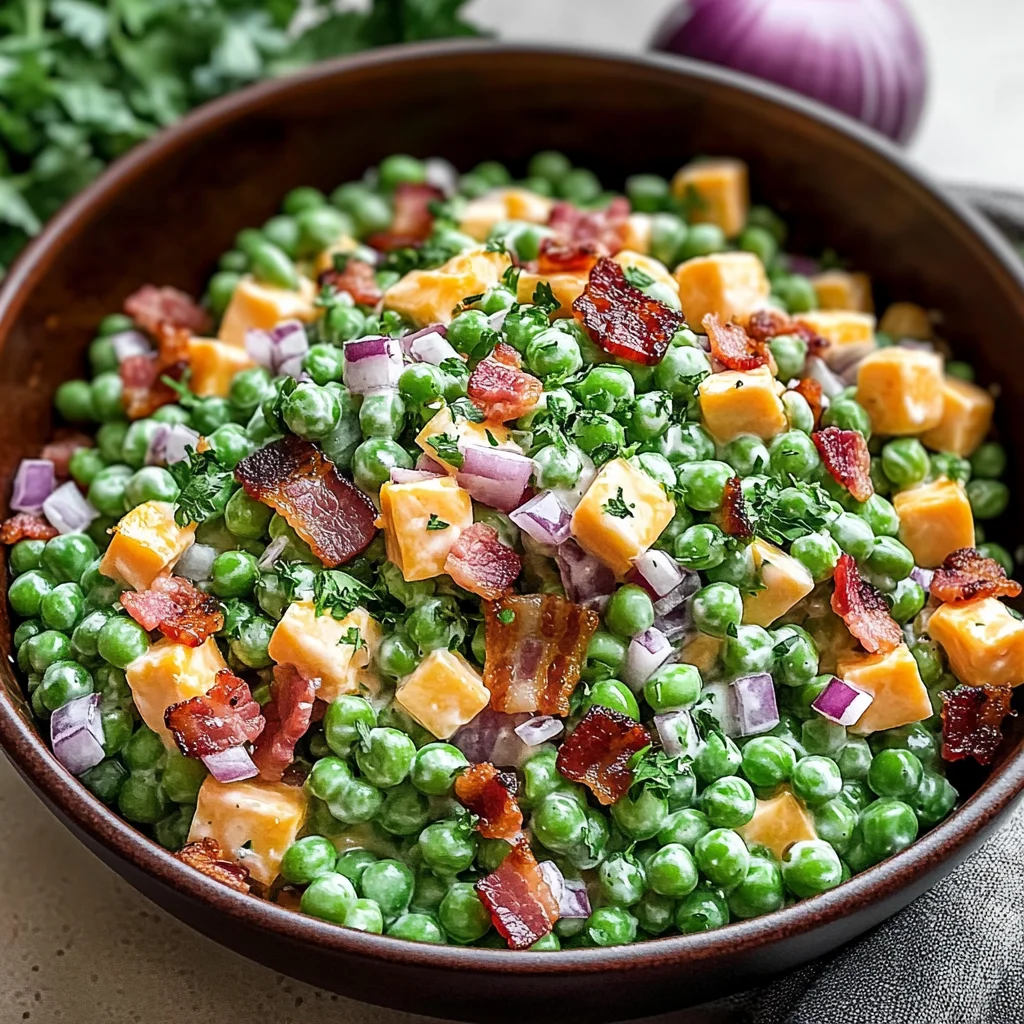
Classic Pea Salad
There’s something undeniably magical about a dish that can transport you back to sun-drenched picnics and family gatherings, where laughter fills the air and the simple act of sharing food becomes a cherished memory. This Classic Pea Salad is precisely that—a vibrant, creamy delight that not only graces our tables but also warms our hearts. The sweet pop of thawed peas, the rich creaminess of dressing, and the crunch of fresh ingredients create a symphony of flavors that celebrate the essence of spring and summer. It’s an experience, a revelation, and a bridge between tradition and innovation—all wrapped up in one beautiful bowl! As we dive into this recipe together, I promise you’ll feel the love woven into each step.
What makes this Classic Pea Salad truly special is its versatility. Whether you’re preparing for a laid-back barbecue or an elegant brunch with friends, this dish fits seamlessly into any occasion. It’s not just about eating; it’s about gathering—bringing together those we love around a table filled with laughter and joy. I’ve always been captivated by the balance of textures and flavors in this salad—the sweetness of peas complemented by the sharpness of cheddar, all brought together with a tangy dressing that pulls it all in harmony. So grab your favorite apron, turn on some music, and let’s create something extraordinary together!
Classic Pea Salad: A Creamy Delight for Every Gathering
This Classic Pea Salad is my go-to side for potlucks and summer gatherings because it encapsulates everything wonderful about seasonal cooking—it’s bright, refreshing, and utterly delightful! The ingredients are simple yet transformative when combined with care. Let’s embark on this delicious culinary journey together!
Ingredients:
As we prepare to dive into making this creamy pea salad, let’s take a moment to appreciate each ingredient that brings this dish to life. Each component plays a vital role in creating that perfect blend of flavors and textures.
- ¼ cup mayonnaise. This creamy staple serves as the base for our dressing, providing richness without overpowering the other flavors. When selecting mayonnaise, look for brands made with high-quality oils; they will lend a smoother texture and more robust flavor. If you’re feeling adventurous or health-conscious, consider using an avocado-based mayo for an extra layer of creaminess that’s both nutritious and delicious.
- ¼ cup sour cream (or Greek yogurt). Adding sour cream—or Greek yogurt if you prefer—is non-negotiable for achieving that tangy depth in our dressing. It not only enhances the creaminess but also adds a delightful twist that balances out the sweetness of the peas perfectly. Choose full-fat versions for maximum flavor; trust me, it makes a world of difference! If you opt for Greek yogurt, you’ll also boost your protein intake while keeping things light.
- 1 tablespoon apple cider vinegar. This small but mighty ingredient brings brightness to our salad with its sharp acidity—a crucial element for cutting through the richness of the mayo and sour cream. It adds complexity to the flavor profile that makes every bite compelling. When choosing apple cider vinegar, aim for organic varieties if possible; they often have more depth and less processing.
- 1 teaspoon honey. Just a touch of honey rounds out the dressing’s flavor by adding subtle sweetness that complements the peas without overwhelming them. It’s important to use raw honey if you can find it; its floral notes elevate this dish from ordinary to extraordinary while offering health benefits too!
- Kosher salt and ground black pepper (to taste). This duo is essential in elevating all the other flavors within our salad—never underestimate their power! Salt enhances sweetness while pepper brings warmth; they are truly best friends in seasoning! Taste as you go along: everyone has different preferences when it comes to seasoning levels.
- 1 pound frozen peas (thawed and patted dry). Ah, sweet green peas—the star of our show! They provide not just beautiful color but also a fresh burst of sweetness in each bite. Make sure your peas are thawed properly (you can run them under cold water if needed) and patted dry; excess moisture can dilute our dressing’s creamy consistency.
- 6 slices bacon (sliced into ½-inch pieces). Now here’s where we add some crunch! Although traditional recipes often include bacon for its smoky flavor profile, if you’d like to keep things vegetarian or vegan-friendly, feel free to swap it out for crispy roasted chickpeas or even toasted nuts! Both options give you that satisfying crunch without compromising on taste.
- ⅓ cup diced red onion. The sharpness of red onion is key here—it adds both color and crunch while providing an aromatic depth that’s simply irresistible against the backdrop of sweet peas. When dicing your onion, go slowly to ensure uniform pieces so every bite is consistent!
- 4 ounces sharp cheddar cheese (cut into cubes about the size of the peas). Cheddar adds another layer of flavor with its nutty character—sharpness cuts through richness beautifully here! Opting for block cheese over pre-shredded varieties ensures you’re getting fresher cheese with better meltability which is crucial when mixing into our salad.
- 2 to 3 tablespoons finely chopped fresh parsley. Not only does parsley bring vibrant color but it also imparts freshness—a herbaceous note that ties everything together harmoniously! Always use fresh herbs when possible; dried herbs simply cannot replicate their zestiness.
Equipment You’ll Need:
Before we get started cooking up this delicious Classic Pea Salad, let’s gather some essential tools that will make our cooking experience smooth sailing! Having these right instruments at hand will help us navigate through each step easily.
- Skillet: A versatile piece essential for cooking bacon until crispy; choose one with good heat retention such as cast iron or stainless steel so it cooks evenly without burning.
- Mixing bowls: Different sizes serve various purposes throughout preparation—from whisking together dressings in smaller bowls to combining larger quantities later on!
- Measuring cups & spoons: Precision matters! Accurate measurements ensure consistency every time you make this salad—after all, we want those flavors just right!
- Slotted spoon: Ideal for transferring crispy bacon from skillet to paper towel-lined plate without excess grease sneaking back into your dish!
Now we’re ready to create something truly special together that speaks volumes about love through food—let’s dive into preparing your Classic Pea Salad!
Step 1: Cooking Up Crunchy Bacon Goodness
To start off on a flavorful note, place your sliced bacon into a skillet set over medium heat. Watch closely as it begins to sizzle—this sound alone is music to any food lover’s ears! The key here is patience: allow it around 6 to 8 minutes until those glorious pieces transform into crispy golden morsels. Pay attention during this process; if your bacon starts curling too much or turning dark too soon, reduce heat slightly—it should be sizzling gently rather than aggressively popping away from you! Once they reach perfection (and trust me—you’ll know when!), use a slotted spoon to transfer them onto paper towels—a step that’s absolutely paramount as it absorbs excess grease without sacrificing texture.
Step 2: Whisking Together Our Creamy Dressing
While our bacon cools down beautifully on those towels (and your kitchen fills with an irresistible aroma), let’s move onto creating our creamy dressing—the heart of this Classic Pea Salad! In a small bowl—perhaps one you’ve reserved just for dressings—combine mayonnaise and sour cream (or Greek yogurt) until smooth blends harmoniously together like old friends meeting again after years apart! Next comes apple cider vinegar followed by honey—all these elements unite creating liquid gold worthy enough to coat each pea perfectly before assembly begins! Take care here: whisk gently yet thoroughly until every ingredient dances around nicely—this unity creates balance ensuring no single flavor overpowers another within final dish!
Step 3: Assembling Our Colorful Salad
Now arrives my favorite part: assembling everything into one glorious bowl brimming with color & texture galore! In medium-sized mixing bowl (the ones you’ll use often!), toss together thawed green peas alongside diced red onion & cubes of sharp cheddar cheese along with those gloriously crispy bacon pieces we worked so hard on earlier—they’re like little nuggets waiting eagerly amidst brighter hues… how exciting is that?! Drizzle prepared dressing over top—you’ll see how beautifully creamy it envelops everything instantly upon contact—but don’t rush this step either—take time folding gently rather than stirring furiously—you want every ingredient coated delicately without bruising them unnecessarily—it makes such difference!
Step 4: Chilling Out Before Serving
Patience pays off handsomely at this stage… while it may be tempting dig right in now (believe me—I understand!), covering & refrigerating salad allows flavors meld wonderfully together during brief chill time—which takes us around 30 minutes minimum… but longer could yield even better results where taste deepens further still allowing sweet notes shine brighter than before while balancing against savory goodness waiting ahead!! What happens if you skip chilling? Well—not much other than missing out on enhanced overall experience enjoying outcome later down line… trust me—you’ll thank yourself once taste buds explode joyfully upon first bite savoring masterpiece created lovingly from scratch today!
And there you have it—the steps toward making an unforgettable Classic Pea Salad bursting with flavor ready share among loved ones gathered around table again… Enjoy every moment spent prepping & serving; remember—it’s more than just food—it’s community built through shared experiences celebrating lives lived fully together over meals crafted from heart❤️
Step 5: The Art of Assembling Your Salad
Now that your dressing is made, it’s time to bring this delightful dish together! In a medium-sized bowl, gently combine the thawed and patted dry peas, diced red onion, sharp cheddar cheese cubes, and those crispy bacon bits you’ve lovingly prepared. Let’s talk about texture for a moment—this is where magic truly happens! The bright green peas will serve as the vibrant canvas of your salad, while the crunchy red onions add a lovely bite, and the cheddar brings a creamy richness that elevates every mouthful. Trust me when I say that each ingredient plays an essential role in creating this harmonious blend of flavors.
As you mix these ingredients together, be gentle but deliberate. Use a large spoon or spatula to fold everything with care; you want to ensure that every pea is coated with that luscious dressing without mashing any of them into oblivion. Feel free to take a moment to admire the colorful medley before moving on. You’ll notice how the deep green of the peas contrasts beautifully with the vivid red of the onion and the golden hues of cheese and bacon—this visual appeal is absolutely paramount because we eat with our eyes first!
Step 6: Dressing It All Up
Once your salad base is ready, it’s time to introduce our creamy dressing into the mix. Pour that velvety mayonnaise-sour cream concoction all over your beautiful blend of peas, onions, cheese, and bacon. A gentle folding motion here is crucial; you want to create a uniform coating without crushing your precious peas. This step not only enhances flavor but also ensures every bite bursts with that creamy goodness we’ve been dreaming about!
The combination of acidity from the apple cider vinegar and sweetness from the honey in your dressing introduces layers of taste that elevate this salad from ordinary to extraordinary. Don’t be shy about tasting at this stage! Grab a tiny spoonful and see if you need more salt or pepper—seasoning is like the final brush stroke on an artist’s canvas; it completes your masterpiece. Remember, flavors deepen as they sit together, so don’t hesitate to make adjustments until it sings just right for you.
Step 7: The Essential Chilling Time
Now comes one of my favorite parts—the chilling process! Cover your salad with plastic wrap or transfer it into an airtight container and pop it into the refrigerator for at least 30 minutes (though if you can wait an hour or two, even better!). Why chill? This step allows all the flavors to meld together beautifully; think of it as letting your ingredients have a cozy little gathering before they meet everyone else at the potluck or dinner table.
During this time in the fridge, you’ll find that those bold flavors begin to soften and intertwine; each bite will be profoundly satisfying as they come together in perfect harmony. And let’s not forget about texture—the chill also firms up those creamy elements just enough to give each forkful a delightful heft without feeling overly rich. When you’re finally ready to serve, you’ll notice how fresh and inviting your Classic Pea Salad looks—a true showstopper!
Step 8: Serving Up with Style
When it’s time to unveil your Classic Pea Salad, remove it from its cool sanctuary in the fridge and take a moment to admire your creation—it’s a vibrant testament to simple ingredients coming together into something truly special! Before serving, I often like to give it one last gentle stir; just enough to redistribute any settled dressing at the bottom while keeping those glorious peas intact.
Consider garnishing with an extra sprinkle of finely chopped fresh parsley for that added pop of color and freshness right before presenting it on the table. This tiny touch can make all the difference in terms of presentation—it transforms an already lovely dish into something that feels celebratory! Plus, fresh herbs lend an aromatic quality that invites everyone closer for a taste.
And there you have it—a Classic Pea Salad that’s not only easy to whip up but is also guaranteed to become a staple in your culinary repertoire! I promise you’ll want to share this gem at every gathering—it’s always met with smiles and compliments galore. Enjoy each bite as laughter fills the room; after all, nothing brings people together quite like good food shared among friends!
Storage and Enjoyment Tips for Your Classic Pea Salad
Now that your Classic Pea Salad is beautifully assembled and bursting with vibrant flavors, it’s the perfect moment to dive in and enjoy! However, if you’re not serving it all at once (which can be a real challenge!), let’s talk about how to keep this delightful dish fresh and delicious for as long as possible. Trust me, the joy of savoring leftovers on a sunny day is a treasure you’ll want to hold onto!
Storing Leftover Classic Pea Salad
To ensure your Classic Pea Salad remains as fresh as the moment it was made, I recommend transferring any leftovers into an airtight container. This helps seal in the flavors and keeps the salad from drying out. You can store it in the refrigerator for up to 3 days without losing its delightful charm. If you’re keen on maintaining the quality, consider placing a paper towel inside the container to absorb any excess moisture; this little trick works wonders! While the taste may mellow slightly after storage, it will still provide that comforting creamy texture and vibrant taste that we all love. When you’re ready to indulge again, simply give it a gentle stir before serving—no need to reheat; this salad is best enjoyed chilled!
Freezing Ingredients for Later
If you find yourself with an abundance of peas or simply want to prepare ahead of time, freezing some components of your Classic Pea Salad can be a game-changer! While I recommend enjoying this salad fresh for maximum flavor, you can freeze thawed peas before adding them to your mix. Just spread them on a baking sheet in a single layer until fully frozen, then transfer them into freezer-safe bags. They can last up to 6 months in the freezer! When you’re ready to whip up your salad again, simply thaw them in cold water or overnight in the fridge. This method not only saves time but also ensures that you have those delicious peas ready whenever inspiration strikes. The convenience of having key ingredients prepped and ready makes cooking so much more enjoyable!
Classic Pea Salad
Classic Pea Salad is a delightful and refreshing dish that captures the essence of spring and summer gatherings. This creamy salad features sweet, thawed peas combined with crunchy red onions and sharp cheddar cheese, all enveloped in a tangy dressing. Perfect for potlucks, barbecues, or brunches, this vibrant salad not only pleases the palate but also brings friends and family together around the table. With its colorful presentation and harmonious balance of flavors, Classic Pea Salad is more than just food; it’s a celebration of community and joy.
- Prep Time: 15 minutes
- Cook Time: None
- Total Time: 0 hours
- Yield: Serves about 6 people 1x
- Category: Salad
- Method: Mixing
- Cuisine: American
Ingredients
- ¼ cup mayonnaise
- ¼ cup sour cream (or Greek yogurt)
- 1 tablespoon apple cider vinegar
- 1 teaspoon honey
- Kosher salt and ground black pepper (to taste)
- 1 pound frozen peas (thawed and patted dry)
- ⅓ cup diced red onion
- 4 ounces sharp cheddar cheese (cut into cubes)
- 2 to 3 tablespoons finely chopped fresh parsley
Instructions
- In a mixing bowl, combine mayonnaise, sour cream (or Greek yogurt), apple cider vinegar, honey, salt, and pepper. Whisk until smooth.
- In a large bowl, gently mix thawed peas, diced red onion, cheddar cheese cubes, and any crispy bacon alternatives you prefer.
- Drizzle the dressing over the pea mixture and fold gently to coat all ingredients evenly.
- Cover and refrigerate for at least 30 minutes to allow flavors to meld before serving.
Nutrition
- Serving Size: 1 serving
- Calories: 210
- Sugar: 3g
- Sodium: 300mg
- Fat: 14g
- Saturated Fat: 3g
- Unsaturated Fat: 10g
- Trans Fat: 0g
- Carbohydrates: 18g
- Fiber: 5g
- Protein: 6g
- Cholesterol: 15mg