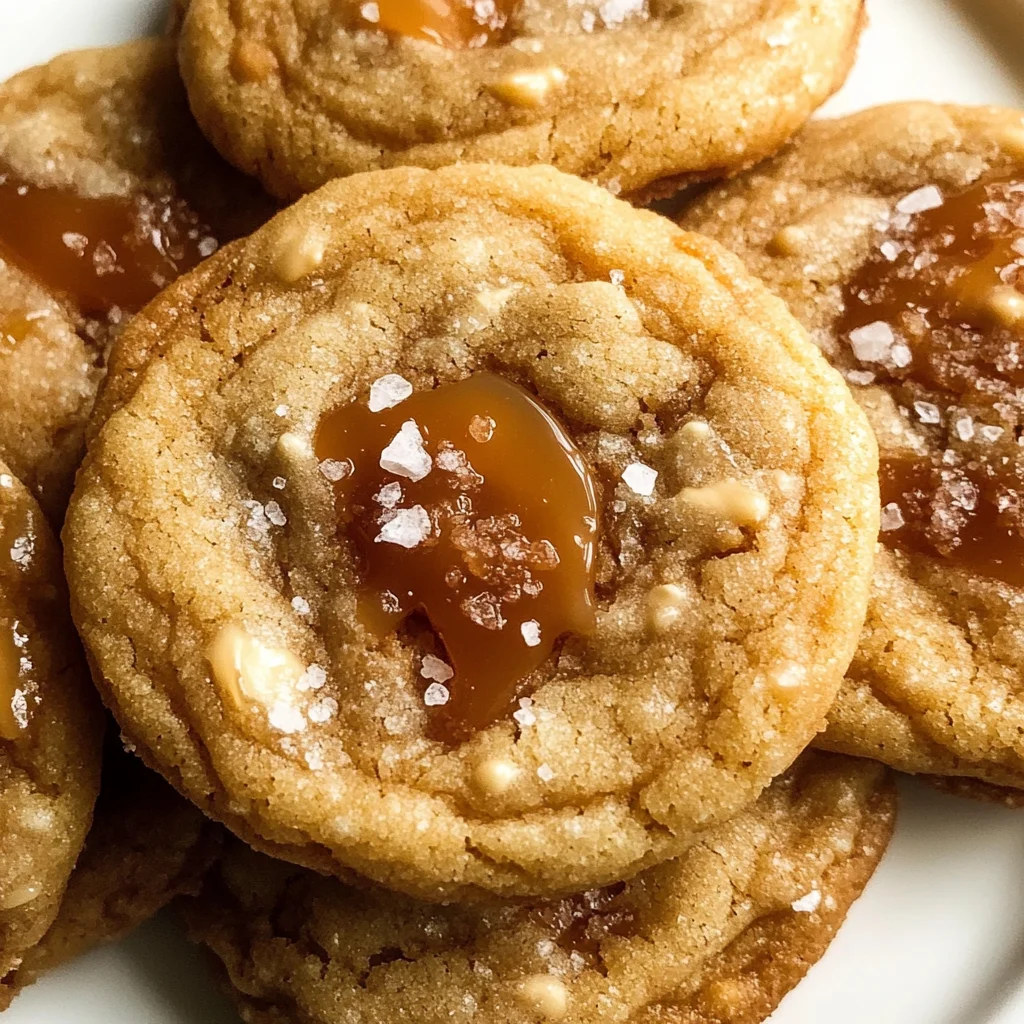
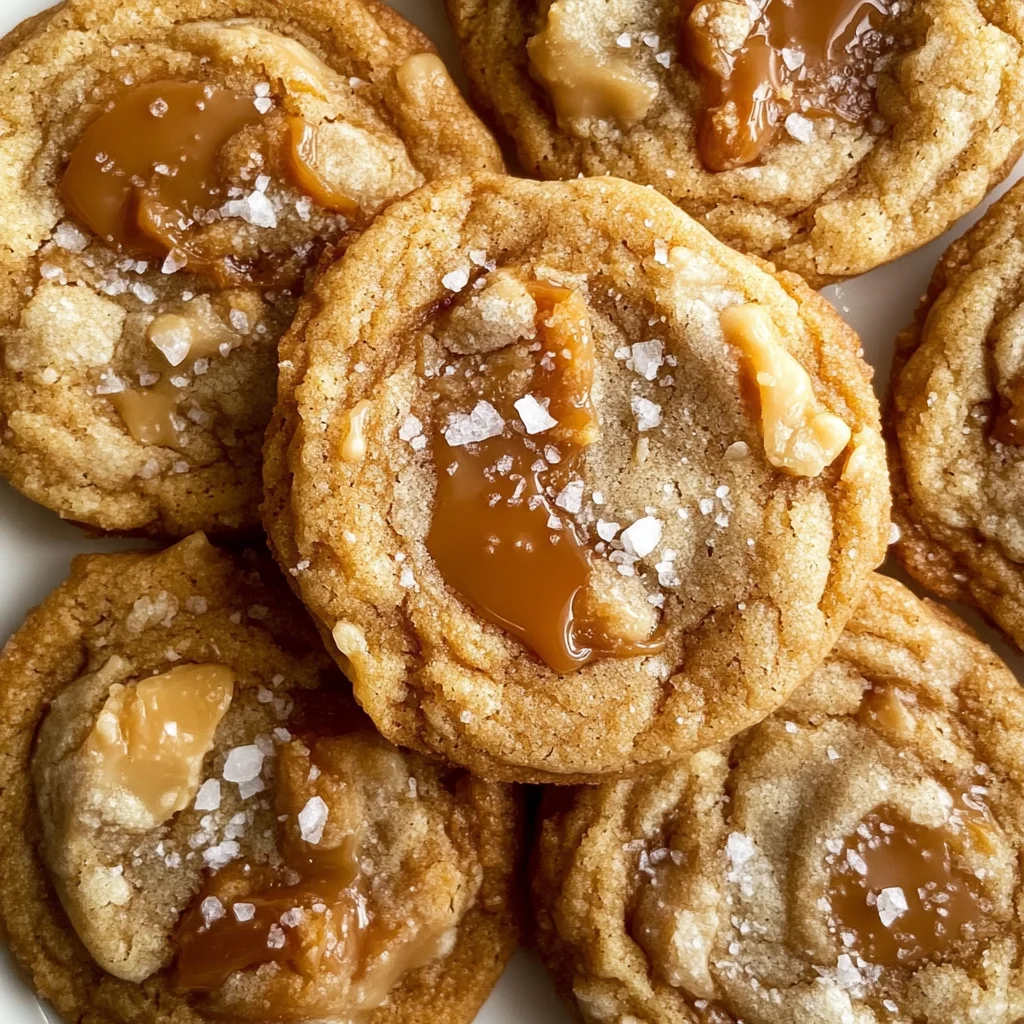
Sea Salt Caramel Cookies
It’s funny how a simple cookie can evoke such deep emotions and sweet memories. The moment you take a bite of these Sea Salt Caramel Cookies, it’s as if you’re wrapped in a warm hug, surrounded by laughter and the delightful aroma of freshly baked goodness. The buttery richness mingles with pockets of soft caramel that melt into a blissful sweetness, while the finishing touch of flaky sea salt elevates each bite into something truly extraordinary. This recipe is not just about creating cookies; it’s about bringing people together, sharing smiles, and indulging in a treat that feels like home. I promise you, once you take that first bite, you’ll understand why these cookies have become a beloved favorite in my household.
Cookies have this magical ability to transform an ordinary day into something special. They’re perfect for any occasion—be it a cozy afternoon at home or a gathering among friends. And let me tell you, the combination of sweet and salty is simply irresistible! There’s something wonderfully balanced about how the rich caramel plays against the brightness of flaky sea salt; it’s like a symphony of flavors dancing on your palate. This recipe has been passed down through generations, but with each new batch I bake, I find myself adding little touches that make it uniquely mine—a sprinkle here, a new technique there. So grab your apron and let’s dive into making these Sea Salt Caramel Cookies together!
Sea Salt Caramel Cookies: A Sweet Symphony of Flavor
These Sea Salt Caramel Cookies are not just your average dessert; they embody the perfect blend of buttery texture and sweet-salty pleasure. Imagine biting into a cookie that’s crispy on the edges yet chewy in the center, bursting with molten caramel goodness and topped with just the right amount of sea salt to awaken your taste buds. Whether you’re looking to impress guests or simply indulge yourself—which we all deserve from time to time—this recipe is sure to leave everyone asking for seconds.
Ingredients:
As we embark on this culinary journey, let’s gather our ingredients with care and purpose. Each component plays an integral role in crafting these cookies into something truly special.
- 2 1/4 cups all-purpose flour: Flour is the backbone of our cookies; it provides structure and stability. The all-purpose variety is perfect since it offers just the right balance of protein content for chewy cookies without being too dense. When measuring flour, spoon it lightly into your measuring cup instead of scooping directly from the bag—this prevents packing too much flour which can lead to dry cookies!
- 1/2 teaspoon baking soda: Baking soda acts as our leavening agent here; it helps create those delightful airy pockets that make our cookies rise beautifully while baking. It also enhances browning, contributing to that lovely golden color we all crave. Make sure your baking soda is fresh; old leavening agents can lose their potency and affect the outcome dramatically.
- 1/2 teaspoon fine sea salt: While we will sprinkle some flaky sea salt on top later, incorporating fine sea salt into the dough itself is crucial for balancing flavors. Salt amplifies sweetness—a fundamental rule in baking! Opting for fine sea salt allows for even distribution throughout your dough without leaving gritty bits behind.
- 1 cup unsalted butter, softened: Butter is where the magic begins! Using unsalted butter gives you complete control over the saltiness of your cookies, allowing us to adjust as needed based on personal taste preferences. Softened butter creams beautifully with sugars to create a light texture—this step is absolutely paramount! If your butter isn’t softened enough, you won’t achieve that airy quality; conversely, if it’s too melted, your cookies could spread too much.
- 1 cup packed light brown sugar: Brown sugar adds moisture and depth to our cookies thanks to its molasses content. This not only keeps them chewy but also imparts a rich flavor profile that pairs perfectly with caramel. Be sure to pack it firmly when measuring—it should hold its shape when removed from the cup!
- 1/2 cup granulated sugar: Granulated sugar contributes crispness along with sweetness; together with brown sugar, they create a wonderful balance between textures and flavors in our cookie dough. It also aids in browning during baking! If you’re ever out of granulated sugar (oh no!), consider using coconut sugar as an alternative—it will add an intriguing flavor twist!
- 2 large eggs: Eggs provide structure and moisture while acting as binding agents for our dough. They contribute richness as well which enhances flavor and texture significantly! I always recommend using eggs at room temperature unless specified otherwise; this allows them to emulsify better into your batter.
- 2 teaspoons pure vanilla extract: Vanilla extract brings warmth and depth to these cookies—it’s like a comforting hug in every bite! Always choose pure vanilla extract over imitation for richer flavor; trust me on this one! If you’re feeling adventurous or want an added layer of complexity, try infusing your vanilla by steeping some vanilla beans in warm liquid before incorporating them.
- 1 1/2 cups soft caramel candies, chopped into small pieces: Caramel candies are what makes these cookies sing! They melt beautifully during baking, creating gooey pockets within each cookie that are utterly intoxicating. When selecting caramel candies, go for high-quality brands—your taste buds will thank you! If you’re feeling ambitious (and have some extra time), making homemade caramels can elevate this recipe even further!
- Flaky sea salt, for sprinkling: The finishing touch—a sprinkle of flaky sea salt atop warm cookies creates an unforgettable contrast against sweetness that leaves everyone wanting more! I prefer using Maldon or fleur de sel varieties due to their delicate texture and flavor profile.
Equipment You’ll Need:
Having the right tools makes all the difference when diving into this baking adventure! While they may not be ingredients themselves, these essential partners will help ensure our cookies turn out perfectly every time.
- Mixing bowls – A good set of mixing bowls in various sizes allows you flexibility while preparing ingredients separately before combining them seamlessly later on.
- Electric mixer (handheld or stand) – This trusty tool takes away any elbow grease required for creaming butter smoothly with sugars—a non-negotiable step towards achieving light fluffy results!
- Measuring cups & spoons – Accurate measurements are essential in baking since even slight variances can shift outcomes dramatically; having both dry measuring cups alongside liquid ones will keep everything precise!
- Baking sheets – Sturdy baking sheets provide even heat distribution which helps promote uniform cooking throughout each batch so there are no burnt edges or gooey centers!
- Parchment paper – Lining your baking sheets with parchment paper prevents sticking while making cleanup effortless—a win-win situation if you ask me!
Now that we’ve gathered everything we need both ingredient-wise and tool-wise let’s get started on preparing our Sea Salt Caramel Cookies!
Step 1: Prepping Your Kitchen
Before we dive headfirst into mixing up cookie magic, let’s set ourselves up for success by preheating our oven! Start by cranking it up to 350°F (175°C). Next comes lining two baking sheets with parchment paper—this simple act ensures our delicious creations won’t stick after they’ve baked up nicely. Parchment paper creates an easy-release surface while promoting even browning underneath those lovely little bites!
Step 2: Whisking Together Dry Ingredients
In a medium bowl—preferably one that’s large enough so things don’t get too cramped—whisk together 2 1/4 cups all-purpose flour along with half a teaspoon each of baking soda and fine sea salt until they’re fully combined—it should resemble silky snowflakes drifting through air! This step ensures that leaveners are evenly distributed throughout flour rather than clumping together which might lead some areas rising more than others during baking time later down line…trust me—you want uniformity here!
Step 3: Creaming Butter & Sugars
Now onto one of my favorite parts—the creaming process! In another mixing bowl (or use a stand mixer fitted with paddle attachment), combine 1 cup softened unsalted butter along with 1 cup packed light brown sugar plus ½ cup granulated sugar until mixture becomes light-colored fluffy clouds after approximately two minutes’ worth beating at medium speed—isn’t there something magical about watching those transformations happen? This fundamental technique known as creaming incorporates air bubbles allowing baked goods rise beautifully when heated up—they’re going to be gloriously puffy once they hit oven heat thanks greatly due diligence now!
Step 4: Incorporating Eggs & Vanilla
Once you’ve reached peak fluffiness—like clouds floating above—you’ll want those two large eggs added next one at time; beat well after each addition until fully incorporated before moving forward adding two teaspoons pure vanilla extract stirring gently until fragrant wafts fill kitchen air surrounding us like embrace from loved ones long gone home… Oh yes—that aroma tells us we’re getting closer every minute toward deliciousness waiting around corner ahead so don’t rush this step—it sets tone flavor-wise throughout entire batch coming soon enough too…
Creating Your Sea Salt Caramel Cookies: A Journey of Flavor and Texture
Step 5: Incorporating the Dry Ingredients
Now that we have our wet ingredients—those luscious, fluffy elements that promise to create a tender cookie—it’s time to bring them together with the dry ingredients. This step is crucial because it harmonizes the flavors and textures, ensuring every bite of your Sea Salt Caramel Cookies is a delightful experience. You’ll want to gradually add the flour mixture into your butter-sugar-egg concoction. I suggest doing this in three additions, gently mixing after each addition until just combined. This is where the magic happens! You’re creating a dough that will hold its shape while still being soft enough for those glorious caramel pieces to nestle in.
As you mix, be cautious not to overdo it; overmixing can lead to tough cookies due to gluten development. Instead, use a spatula or a wooden spoon for this part if you prefer a more controlled approach. The goal here is to see no flour streaks while keeping that dough beautifully thick and indulgent. You want it to feel like a cozy embrace as you scoop it out later—thick enough to hold those chunks of caramel but light enough that it melts in your mouth when baked. Trust me on this; taking care during this step will lead to cookies that are profoundly satisfying, with a texture you’ll crave again and again.
Step 6: Folding in the Caramel Magic
Let’s get to the good part—the caramel! Gently fold in those chopped soft caramel candies until they are evenly distributed throughout the dough. This step is like tucking little treasures into each cookie, ensuring that every bite has that rich, buttery sweetness we all adore. I recommend using kitchen scissors or a sharp knife to chop your caramels into small pieces; they should be about the size of chocolate chips. This makes sure they melt beautifully without overpowering the cookie itself.
As you fold, take your time and be gentle! You want those pieces to be evenly spread throughout without breaking apart too much. The key here is to create pockets of gooey goodness that will ooze slightly when baked, giving each cookie an utterly intoxicating allure. The contrast between the sweet caramel and the slight crunch from the flaky sea salt will elevate these cookies from ordinary to extraordinary. It’s like creating tiny moments of bliss with every scoop!
Step 7: Shaping Your Cookie Dough
Now comes one of my favorite parts: shaping your dough into beautiful little balls! Using a medium-sized cookie scoop or simply your hands, portion out about 1 1/2 tablespoons of dough for each cookie. As you roll them into balls, feel free to give them a little extra love by rolling them tight; this helps them maintain their shape while baking. Place these delightful mounds about two inches apart on your prepared baking sheets; this spacing allows for even spreading as they bake—an essential factor for achieving that perfect golden edge while keeping a soft center.
While you’re at it, take a moment to admire how lovely they look before they go into the oven! Visual cues are important here; you want them looking plump and inviting, ready for their transformation in the oven’s heat. Don’t rush this step; allow yourself this small moment of joy as you prepare these bites of happiness. Each ball represents not just an ingredient but an experience waiting to happen—a taste sensation filled with warmth and love.
Step 8: Baking Your Perfect Sea Salt Caramel Cookies
Ah, now we enter the heart of our journey—the baking stage! Preheat your oven to 350°F (175°C), which is crucial for properly developing those beautiful flavors and textures we’ve worked so hard on so far. When placing your trays in the oven, look for an even distribution of heat; if you have multiple racks, consider rotating them halfway through baking for consistent results—this ensures that every cookie bakes evenly and achieves that gorgeous golden brown edge.
You’ll want to keep an eye on them during those precious 10–12 minutes in the oven. Watch for those edges turning golden brown while the centers remain just slightly soft—that’s exactly what we’re aiming for! It’s almost magical how they puff up ever so gently and start releasing that intoxicating aroma—a scent so warm and inviting it feels like a hug from your grandma’s kitchen on a chilly day. If you’re unsure about doneness, gently press down on one cookie with a spatula or fingertip—if it springs back slightly but still feels soft in the center, it’s perfect!
The science behind this timing is paramount; underbaking just slightly ensures that chewy texture we all crave while avoiding cookies that are overly crispy or dry—a common pitfall many encounter during baking adventures. Remember, they continue cooking even after being removed from the oven due to residual heat!
Conclusion:
As we wrap up this delicious journey through the world of Sea Salt Caramel Cookies, I can’t help but feel that sense of excitement bubbling within me—much like when I first discovered this recipe! The combination of rich butteriness from the dough, the sublime sweetness of caramel pieces melting into every mouthful, and that final sprinkle of flaky sea salt create an absolutely extraordinary treat that dances on your taste buds. It’s not merely about baking; it’s about crafting moments of joy and sharing warmth with those we love.
This recipe is not just another entry in your baking repertoire; it’s a true “must-try” because it embodies everything wonderful about homemade treats. The process is accessible enough for bakers of all skill levels yet rewarding enough to make seasoned pros swoon. Imagine pulling dozens of these golden-brown beauties from the oven—your friends and family gathering around as they catch that sweet scent wafting through your home. It’s pure magic when these cookies grace any occasion—from cozy family gatherings to casual coffee dates or even simple afternoons where you need a little pick-me-up.
Pair these cookies with a steaming cup of coffee or a glass of cold almond milk; each bite complements beautifully with either option! Imagine savoring one while watching your favorite movie or enjoying it as an afternoon treat while reading a good book—it makes everything feel just right. And for those who might want something extra decadent? Crumble one over vanilla ice cream, letting those warm caramel morsels melt slightly into creamy bliss.
Feeling adventurous? This recipe is wonderfully adaptable! You could swap out sea salt for fancy flavored salts or even try adding different mix-ins like dark chocolate chips or chopped nuts to give each batch its own unique twist. Want more caramel? Drizzle some melted caramel on top before serving—the possibilities are endless! So go ahead—dive into this delightful baking adventure and share your experience with me! I can’t wait to hear how your Sea Salt Caramel Cookies turn out!
Sea Salt Caramel Cookies
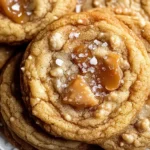
Indulge in the delightful experience of baking Sea Salt Caramel Cookies, where each bite transports you to a world of buttery goodness and sweet-salty bliss. These cookies boast a crispy edge and a chewy center, filled with melted caramel pieces that create pockets of heavenly sweetness. Topped with a sprinkle of flaky sea salt, this classic treat is perfect for any occasion—whether you’re cozying up at home or entertaining friends. With an easy-to-follow recipe, you’ll soon discover why these cookies have become a beloved favorite in households everywhere!
- Prep Time: 15 minutes
- Cook Time: 12 minutes
- Total Time: 27 minutes
- Yield: Approximately 24 cookies 1x
- Category: Dessert
- Method: Baking
- Cuisine: American
Ingredients
- 2 1/4 cups all-purpose flour
- 1/2 teaspoon baking soda
- 1/2 teaspoon fine sea salt
- 1 cup unsalted butter, softened
- 1 cup packed light brown sugar
- 1/2 cup granulated sugar
- 2 large eggs
- 2 teaspoons pure vanilla extract
- 1 1/2 cups soft caramel candies, chopped
- Flaky sea salt for sprinkling
Instructions
- Preheat your oven to 350°F (175°C) and line two baking sheets with parchment paper.
- In a medium bowl, whisk together flour, baking soda, and fine sea salt.
- In a separate bowl, cream softened butter with brown sugar and granulated sugar until fluffy.
- Beat in the eggs one at a time and add vanilla extract.
- Gradually mix in the dry ingredients until just combined.
- Fold in the chopped caramel candies gently.
- Scoop dough onto prepared baking sheets and space them two inches apart.
- Sprinkle flaky sea salt on top before baking for 10-12 minutes or until edges are golden.
Nutrition
- Serving Size: 1 cookie (30g)
- Calories: 150
- Sugar: 10g
- Sodium: 90mg
- Fat: 7g
- Saturated Fat: 4g
- Unsaturated Fat: 3g
- Trans Fat: 0g
- Carbohydrates: 20g
- Fiber: <1g
- Protein: 2g
- Cholesterol: 20mg