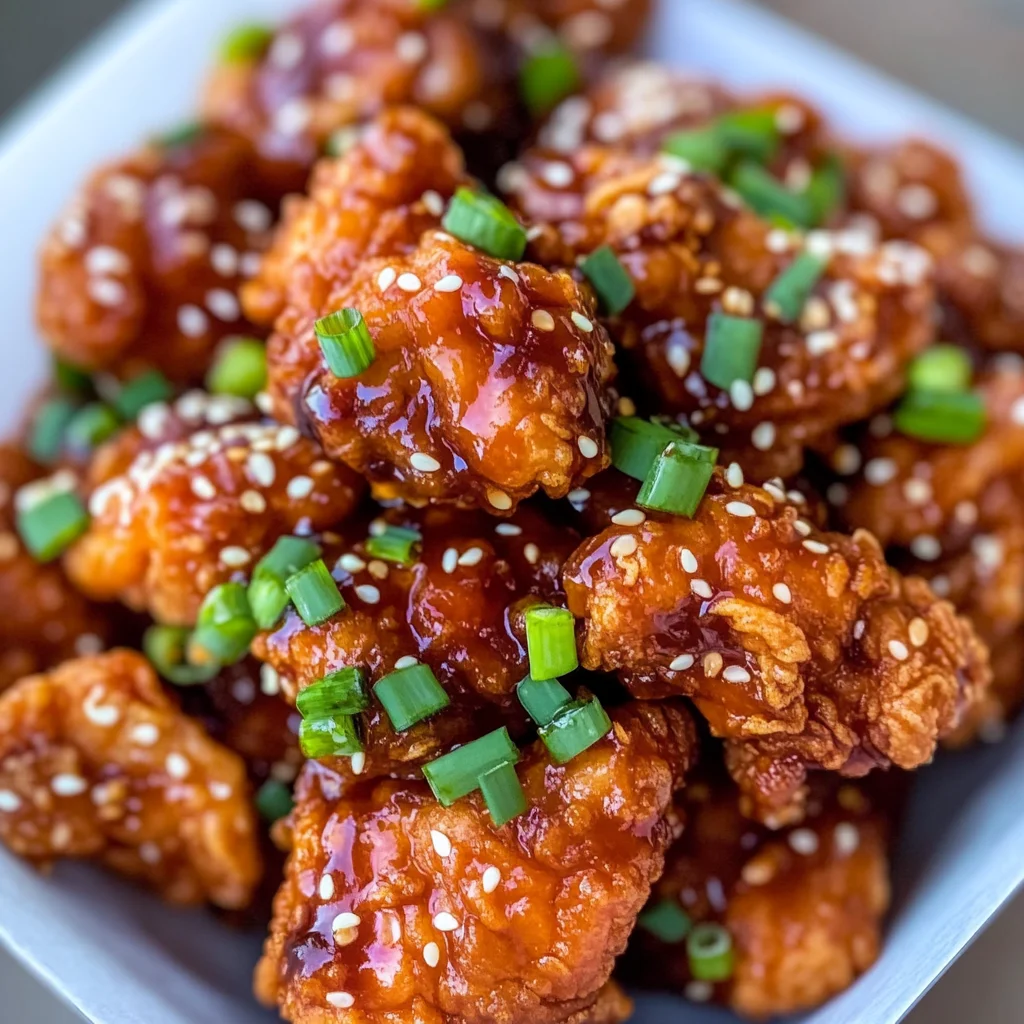
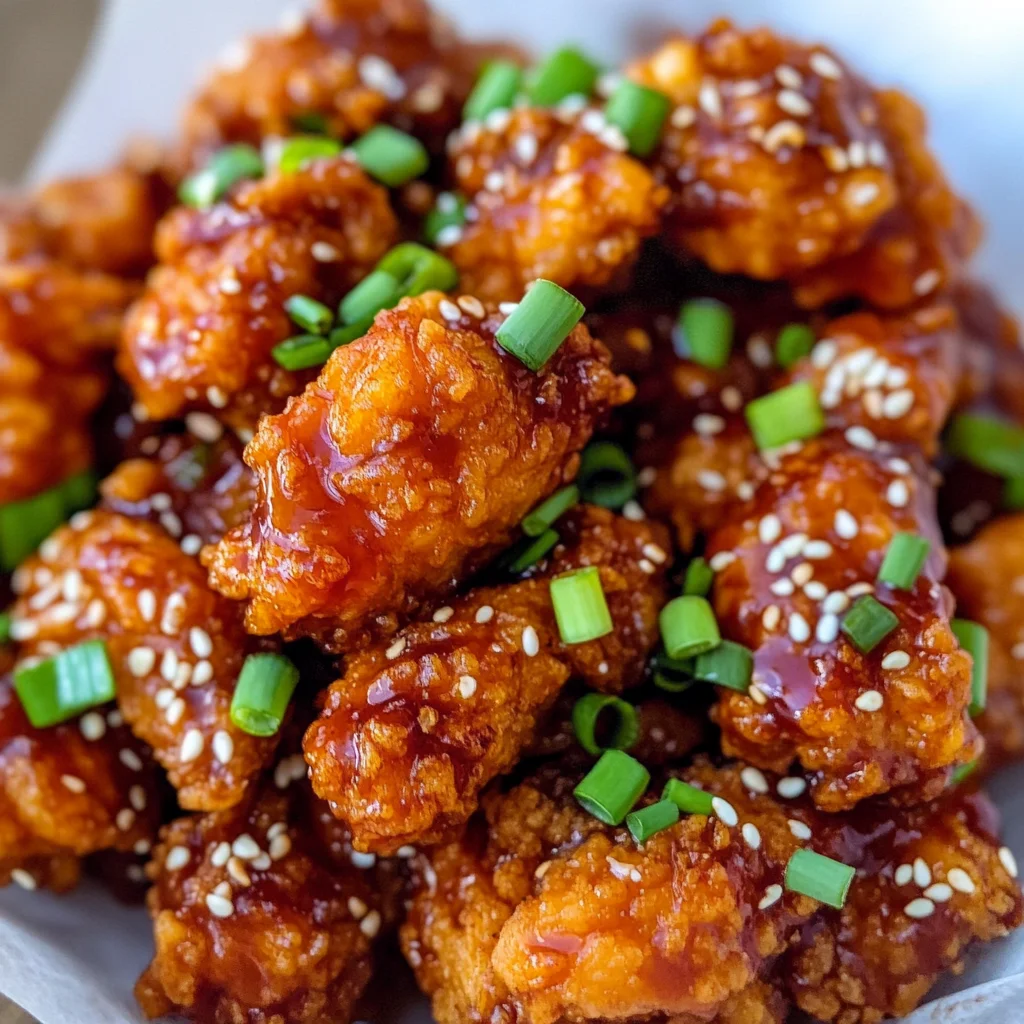
Korean Fried Chicken
There’s something truly magical about the experience of cooking, especially when it comes to a dish as delightful and comforting as Korean Fried Chicken. Imagine the aroma wafting through your kitchen, that unmistakable scent of crispy, golden chicken mingling with notes of garlic and sweet-spicy sauce. This recipe isn’t just about food; it’s an invitation to create a moment—a moment that can whisk you away to bustling streets in Seoul, where vendors serve up this beloved delicacy with joy and pride. As you take the first bite, the crunch gives way to juicy chicken enveloped in a symphony of flavors that dance on your palate—sweetness from honey, heat from gochujang, and a dash of umami from soy sauce. I promise you, this isn’t just dinner; it’s an experience that brings happiness to the table.
Korean Fried Chicken has such rich cultural significance that goes beyond mere sustenance; it symbolizes celebration and togetherness. Whether it’s a casual weeknight meal or a gathering with friends over some drinks (non-alcoholic for us!), this dish is meant to be shared. The double-frying technique used here ensures that each piece is super crispy, creating that addictive texture we all crave. What makes it even more special is how customizable it is—you can adjust the spice level to suit your taste or swap ingredients to make it your own. So grab your apron, let’s dive into this culinary adventure together!
Korean Fried Chicken: An Irresistible Crunch with a Kick
I’ve always been captivated by the way food can bring people together, and there are few dishes as universally loved as Korean Fried Chicken. With its addictively crunchy exterior and sticky-sweet sauce, it’s no wonder that this dish has taken the world by storm. When you make this at home following my foolproof recipe, you’ll never want to order out again!
Ingredients:
As we embark on this culinary journey together, let’s talk about what makes each ingredient so vital for our Korean Fried Chicken. Each component plays a role in achieving that authentic taste and mouthwatering texture.
- 2 pounds chicken breast (cut into 1-inch chunks). The star of our show! Chicken breast is leaner than other cuts, which means it’s perfect for frying without becoming too greasy. By cutting them into 1-inch chunks, we ensure even cooking; each piece will get beautifully crispy while remaining tender inside. If you’re looking for extra juiciness, you could also use thighs instead—they have more fat content but still fry up perfectly delicious.
- 1 cup cornstarch. This ingredient is absolutely paramount for achieving that signature crunch we all love in Korean Fried Chicken. Cornstarch creates an ultra-crispy coating when fried because it doesn’t absorb moisture like flour does. It forms a light barrier around the chicken which locks in juices while creating a satisfying crunch on each bite—the kind that makes you want to go back for seconds!
- 1/4 cup flour (gluten-free works as well). While cornstarch does most of the heavy lifting in creating crunchiness, adding flour helps with adhesion and structure in our batter mix. It provides a nice balance between texture and flavor—almost like a supportive friend who stands by while you take center stage! If you’re gluten-sensitive or prefer gluten-free options, feel free to swap in a gluten-free blend.
- 1/2 teaspoon salt. Salt is crucial in amplifying flavors throughout our dish—it brings out the natural tastes of our ingredients and enhances overall deliciousness! A little salt can make all the difference between good food and great food; don’t skimp on this step!
- 1/4 teaspoon ground black pepper. This little wonder adds depth and warmth to our seasoning mix without overwhelming the flavor profile of our chicken. It’s subtle but essential; just enough heat to keep things interesting while allowing other flavors to shine through.
- 2 eggs (beaten). The egg wash serves two important purposes: first, it acts as glue so our dry coating sticks properly to the chicken pieces; second, it adds richness which contributes to both flavor and moisture during frying. Beating them well ensures they coat evenly—trust me on this one!
- Canola oil for frying. Choosing the right oil is non-negotiable when frying—canola oil has a high smoke point which means we can get our oil hot enough for optimal frying without burning anything! It’s also neutral in flavor so it won’t compete with our delicious seasonings and sauces.
- 1/4 cup ketchup. Ever thought ketchup could take your fried chicken up a notch? This classic condiment adds tanginess and sweetness that balances out spicier elements of our sauce beautifully! It lends itself well to creating that sticky glaze we’re after.
- 3 tablespoons gochujang paste (or chili sauce). Gochujang is liquid gold—a fermented chili paste that contributes not just heat but also depth of flavor thanks to its umami qualities! If spice isn’t your thing or if you’re feeling adventurous, feel free to adjust how much you use—start small and build up according to your preference.
- 1/4 cup honey. Honey brings sweetness along with an incredible stickiness that clings to our crispy chicken pieces like a warm hug! Plus, it balances out those spicy notes from gochujang perfectly—think of it as harmony in liquid form.
- 3 tablespoons brown sugar. Brown sugar complements honey by adding another layer of sweetness along with slight caramel notes due its molasses content—it enhances color too! Together with honey, they form an irresistible glaze you won’t be able to resist licking off your fingers!
- 1/3 cup soy sauce. Soy sauce imparts savory richness that’s simply irreplaceable—it infuses everything with umami goodness while blending beautifully with other ingredients giving us depth without overpowering them!
- 1/2 cup water. Water helps achieve just the right consistency for our sauce—it thins down thicker elements like honey and ketchup while allowing everything else meld together nicely without losing any flavor intensity.
- 3 cloves garlic (minced). Garlic elevates every dish it’s added into—it provides aromatic essence that’ll fill your kitchen with mouth-watering scents while complementing both sweet & savory components harmoniously—use fresh garlic whenever possible for best results!
- 1/4 teaspoon red pepper flakes. These little flakes add lovely pops of color while kicking up heat levels ever so slightly—if you’re cautious about spice but still want some kick then start small here too!
- 1 tablespoon cornstarch (for thickening). Adding cornstarch at this stage will help thicken our sauce so it’ll cling perfectly onto those crispy bites—we want every piece coated thoroughly after all!
- 2 teaspoons sesame oil. This fragrant oil rounds out flavors beautifully—its nutty aroma takes every bite over-the-top delicious! Just remember: less is more here since sesame oil can be quite strong; focus on quality over quantity!
Equipment You’ll Need:
Now that we’ve gathered all these fantastic ingredients let’s ensure we have the right tools at hand because having quality equipment makes cooking smoother—and who doesn’t want an enjoyable experience? Think of these items as your trusty companions on this culinary adventure!
- Deep frying pan or Dutch oven – This will be your best friend during frying sessions! A deep pan allows ample space for chicken pieces while retaining heat effectively ensuring even cooking and preventing overcrowding—all critical factors in achieving crisp perfection without sogginess!
- Tongs or slotted spoon – Essential for flipping chicken safely during cooking without risking burns! Tongs give you better control over moving those hot morsels around so they cook evenly on all sides ensuring they stay juicy within their golden crusts outside.
- Large shallow bowls – You’ll need these for prepping coatings before dredging chicken pieces properly—you’ll want one bowl for egg wash & another bowl filled with cornstarch mixture making transferring easier!
- Wire rack or paper towels – After frying each batch let them rest on wire racks if possible—they allow excess oil drainage while keeping coating crisp instead of steaming against surfaces like plates would do otherwise!
Preparing the Korean Fried Chicken
Step 1: Crafting That Irresistible Sauce
Let’s kick things off by preparing our sauce first because trust me—it builds anticipation! In a medium bowl combine ketchup, gochujang paste (or chili sauce), honey, brown sugar, soy sauce along with water before adding minced garlic & red pepper flakes next stirring until everything blends beautifully together into one luscious mixture! This step sets us up for success later when glazing fried pieces before serving—you’ll see how effortlessly each bite becomes more flavorful thanks its delightful combination working wonders behind scenes enhancing overall taste experience significantly later down line.
Step 2: Perfecting Your Coating
Now onto one of my favorite parts—the coating process! Grab yourself another large shallow bowl where you’ll whisk together cornstarch flour followed by salt & black pepper until evenly combined ensuring seasoning reaches every nook & cranny once applied onto chicken chunks later down road giving maximum impact towards final result—this part matters immensely since coatings dictate how crispy everything turns out post-frying! Then set aside beaten eggs into separate bowl readying yourself next step ahead…
Step 3: Getting Ready To Fry
Next comes heating up canola oil within deep frying pan positioned over medium-high heat until shimmering lightly—this indicates it’s hot enough now time dive into dipping action ahead reminding myself never rush this step patience pays off handsomely during final moments leading towards ultimate satisfaction achieved once crispy treasures emerge from bubbling cauldron below waiting eagerly upon plates soon enough after rigorous processes undertaken beforehand making sure don’t skip anything lest regret arise later down road…
Step 4: Coating Those Chicken Chunks
At last—the moment has arrived where we get hands-on fun involved! Taking each chunk gently dip into beaten egg mixture before rolling around thoroughly within seasoned cornstarch blend ensuring full coverage achieved perfect balance straddling line between adhering properly yet still maintaining lightness desired throughout entire journey leading towards heavenly bites experienced shortly thereafter post-frying session completed successfully yielding golden beauties awaiting attention soon…
Stay tuned as we continue transforming these simple ingredients into something extraordinarily delicious—the journey has only just begun!
Step 5: The Art of Coating Your Chicken
Now that you have your chicken chunks prepped and ready, it’s time to dive into one of the most satisfying aspects of making Korean Fried Chicken—the coating! This step is absolutely crucial because it creates that delightful, crunchy exterior we all crave. Start by taking each piece of chicken and dipping it into the beaten eggs. This egg bath serves as an adhesive, ensuring that the cornstarch mixture sticks beautifully to the chicken. Trust me on this; without this step, you risk losing that coveted crunch when frying.
Once you’ve dipped the chicken in the eggs, it’s time for the cornstarch mixture. Grab a handful of those egg-coated pieces and toss them into your bowl filled with cornstarch, flour, salt, and pepper. Make sure each piece is thoroughly coated—this is what will give your fried chicken its signature texture and flavor. The cornstarch is particularly important here; it absorbs moisture which leads to a crispier finish when fried. Don’t rush this step; let the coated chicken rest on a plate for about 10 minutes if you can; this allows the coating to adhere properly and prevents it from falling off during frying.
Step 6: Heating Up for Perfection
Next up is heating your oil—a step that might seem simple but is vital for achieving that crispy outer layer without soaking your chicken in grease. Pour about two inches of canola oil into a deep frying pan or pot (make sure it’s large enough to allow space for frying). Heat it over medium-high heat until it reaches around 350°F (175°C). A handy trick is to drop a small piece of bread into the oil; if it browns within about 60 seconds, you’re good to go!
Why is the temperature so important? If your oil isn’t hot enough, the chicken will absorb too much oil and become greasy instead of crispy. Conversely, if it’s too hot, your coating may burn before the chicken cooks through. Keep a close eye on your oil during this process—you want a steady sizzle when adding your chicken pieces. This sound is music to my ears and signifies that you’re on your way to fried perfection!
Step 7: Frying with Love
With your oil at just the right temperature, it’s showtime! Carefully lower several pieces of coated chicken into the hot oil, making sure not to overcrowd the pan. Overcrowding can cause a temperature drop in the oil, leading to uneven cooking and less crispy results—absolutely non-negotiable! I recommend working in batches; this way, each piece gets its moment in the spotlight.
Fry each batch for about 8-10 minutes until they turn golden brown and develop that alluring crunch we associate with Korean Fried Chicken. As you fry, resist the urge to move them around too much initially; let them sear beautifully before flipping them over halfway through cooking. You’ll know they’re done when they float to the top and are gloriously golden brown—this visual cue is truly satisfying! Use a slotted spoon or tongs to remove them from the oil and let them drain on paper towels while you continue with other batches.
Step 8: Transformative Sauce Tossing
Once all your beautiful batches of fried chicken are done and resting comfortably aside, it’s time for one of my favorite parts—the sauce tossing! Discard most of the frying oil but leave just enough in the pan so that you can reintroduce those crispy nuggets back into their sizzling home. Turn down the heat slightly so that everything stays warm but doesn’t burn.
Take those fragrant sauce ingredients you’ve set aside—the ketchup, gochujang paste, honey, brown sugar, soy sauce, water, minced garlic, red pepper flakes, cornstarch, and sesame oil—and pour them directly into your pan. Stir everything together until well combined over medium heat. The moment these elements hit that residual heat from frying is nothing short of magical; aromas wafting through your kitchen will make you feel like a professional chef!
Now add back in those crispy chicken pieces! Toss everything together gently but thoroughly so every bite gets coated in that sweet-spicy-savoury sauce—this is where flavors meld beautifully! You’ll see how quickly they absorb all those wonderful flavors; this step transforms simple fried chicken into something utterly intoxicating and profoundly satisfying.
Final Touches: A Beautiful Presentation
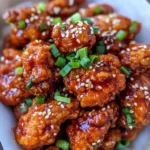
As you plate up this mouthwatering creation, consider sprinkling some sliced green onions and sesame seeds over your Korean Fried Chicken for an added crunch and pop of color. These garnishes not only elevate presentation but also introduce layers of flavor—a fresh brightness from the green onions complements the rich sauce perfectly.
When serving this dish—whether it’s for friends gathered around your table or just yourself on a cozy night—take a moment to appreciate what you’ve created: crispy bites enveloped in a deliciously sticky sauce bursting with character. I promise you’ll feel proud knowing you didn’t have to order takeout for such restaurant-quality fare at home!
Remember to savor each bite slowly; enjoy how every crunch gives way to tender meat beneath—a true symphony of textures and flavors that dances on your palate. I hope you find as much joy in making this Korean Fried Chicken as I do; it’s more than just a meal—it’s a comforting hug served on a plate!
Storage and Enjoyment Tips for Your Korean Fried Chicken
Oh, the moment has finally arrived! You’ve labored over this delightful Korean Fried Chicken, and now it’s time to revel in its crispy, sweet-spicy glory. I can almost hear the crunch as you take that first bite! But wait—what happens if there are leftovers? Not to worry! With a few simple steps, you can savor this dish even days later, keeping that signature flavor alive.
Storing Leftover Korean Fried Chicken
To ensure your leftover Korean Fried Chicken maintains its irresistible quality, I recommend using an airtight container. This will keep the chicken juicy while protecting it from any unwanted odors in your fridge. Properly stored, your delicious creation should keep well for about 3 to 4 days. If you really want to go the extra mile to maintain that fabulous crunch, consider placing a slice of bread inside the container with the chicken. Believe me; this little trick helps absorb moisture and keeps everything nice and crispy! When you’re ready to indulge again, just remember that reheating can be done in an oven or an air fryer rather than a microwave—trust me on this one! It will help restore that wonderful crispiness that makes this dish so special.
Freezing Korean Fried Chicken for Later
If you find yourself with more of this amazing fried chicken than you can handle (which is a delightful problem!), freezing is an excellent option. Just let the chicken cool completely before transferring it into a freezer-safe bag or container—removing as much air as possible will prevent freezer burn. When stored correctly, your Korean Fried Chicken can last for up to three months in the freezer. When you’re ready for a quick meal, simply thaw it overnight in the fridge and then reheat it in an oven until it’s hot and crispy again! This is such a convenient way to have gourmet comfort food ready at a moment’s notice—perfect for busy weeknights or impromptu gatherings with friends!
Korean Fried Chicken
Experience homemade Korean Fried Chicken that’s crispy and flavorful! Try my easy recipe today for an unforgettable meal.
- Prep Time: 20 minutes
- Cook Time: 30 minutes
- Total Time: 50 minutes
- Yield: About 6 servings 1x
- Category: Dinner
- Method: Frying
- Cuisine: Korean
Ingredients
- 2 pounds chicken breast (cut into 1-inch chunks)
- 1 cup cornstarch
- 1/4 cup flour (gluten-free works as well)
- 2 eggs (beaten)
- Canola oil (for frying)
- 1/4 cup ketchup
- 3 tablespoons gochujang paste (or chili sauce)
- 1/4 cup honey
- 3 tablespoons brown sugar
- 1/3 cup soy sauce
- 3 cloves garlic (minced)
- 1/2 teaspoon salt
- 1/4 teaspoon ground black pepper
- 1/2 cup water
- 1/4 teaspoon red pepper flakes
- 1 tablespoon cornstarch (for thickening)
- 2 teaspoons sesame oil
Instructions
- Prepare the sauce by mixing ketchup, gochujang, honey, brown sugar, soy sauce, minced garlic, and water in a bowl until well combined.
- In another bowl, whisk together cornstarch, flour, salt, and black pepper for coating.
- Heat canola oil in a deep frying pan over medium-high heat until shimmering.
- Dip each chicken piece into beaten eggs and then coat thoroughly in the cornstarch mixture.
- Fry the coated chicken pieces in batches for about 8-10 minutes or until golden brown and crispy. Drain on paper towels.
- Toss fried chicken in the prepared sauce until evenly coated.
Nutrition
- Serving Size: Approximately 5 pieces (150g)
- Calories: 370
- Sugar: 20g
- Sodium: 720mg
- Fat: 16g
- Saturated Fat: 2g
- Unsaturated Fat: 12g
- Trans Fat: 0g
- Carbohydrates: 34g
- Fiber: 1g
- Protein: 28g
- Cholesterol: 120mg