4th of July Snack Mix
When I think about the 4th of July, my heart swells with nostalgia. It’s not just a day; it’s a celebration that brings together friends and family, laughter ringing through the air, and the tantalizing aroma of summer foods sizzling on the grill. As the fireworks light up the night sky, there’s something deeply satisfying about sharing delicious treats that reflect the spirit of this festive occasion. That’s where my beloved 4th of July Snack Mix comes into play. This delightful blend of textures and flavors—think crispy cereal, salty pretzels, and sweet chocolate—creates a symphony that dances on your taste buds. Each bite is an explosion of joy, capturing the essence of summer in a bowl.
What I adore most about this snack mix is its versatility; it can easily be tailored to your liking or whatever you have on hand. It’s a recipe born from creativity, a bridge between tradition and innovation that lets you express yourself in the kitchen. Whether you’re hosting a barbecue, attending a picnic, or simply enjoying a quiet evening at home while watching fireworks, this snack mix is guaranteed to be a crowd-pleaser. I promise you, once you make it for your loved ones, they’ll be begging you for the recipe! So let’s dive in and create something truly extraordinary together with this 4th of July Snack Mix!
Ingredients:
As we embark on this culinary journey together, let me tell you—it’s all about selecting quality ingredients that will elevate our creation from ordinary to extraordinary. Each element plays a vital role in crafting this delightful mix.
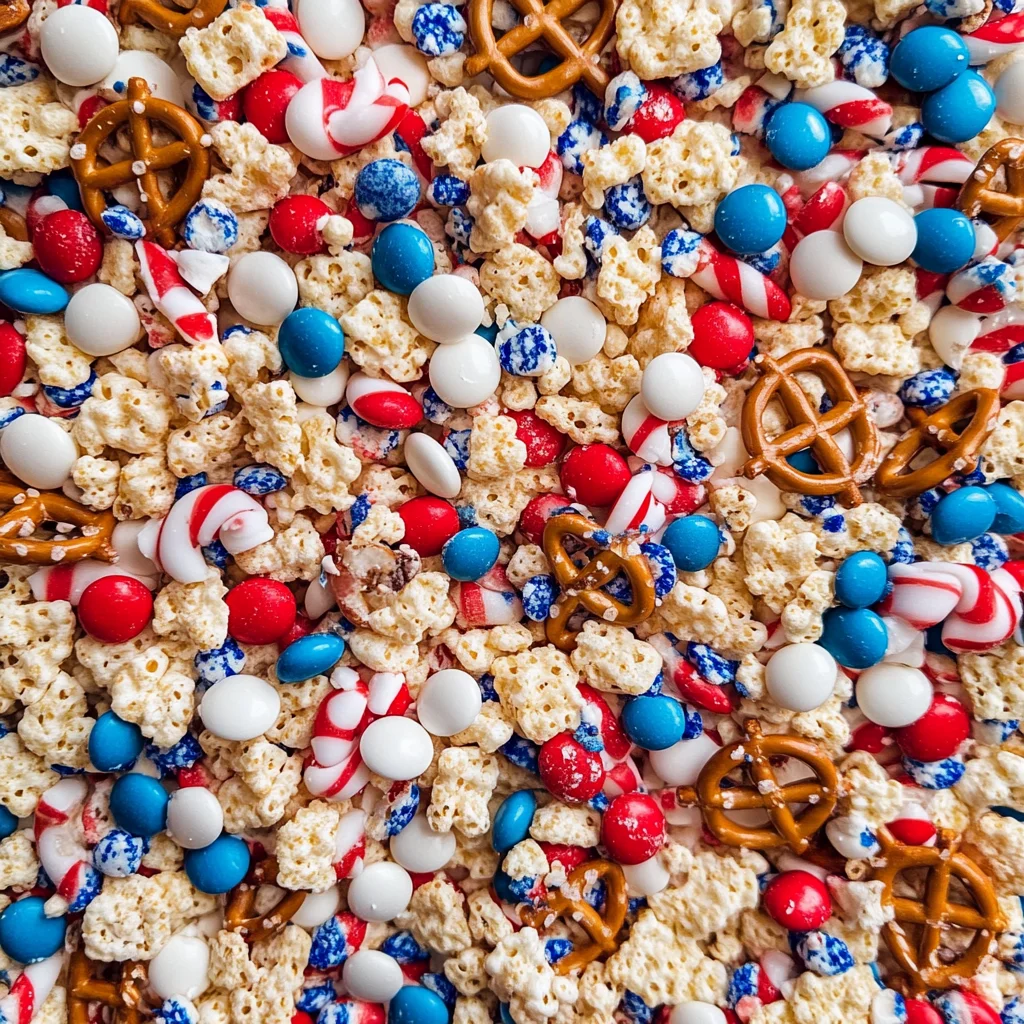
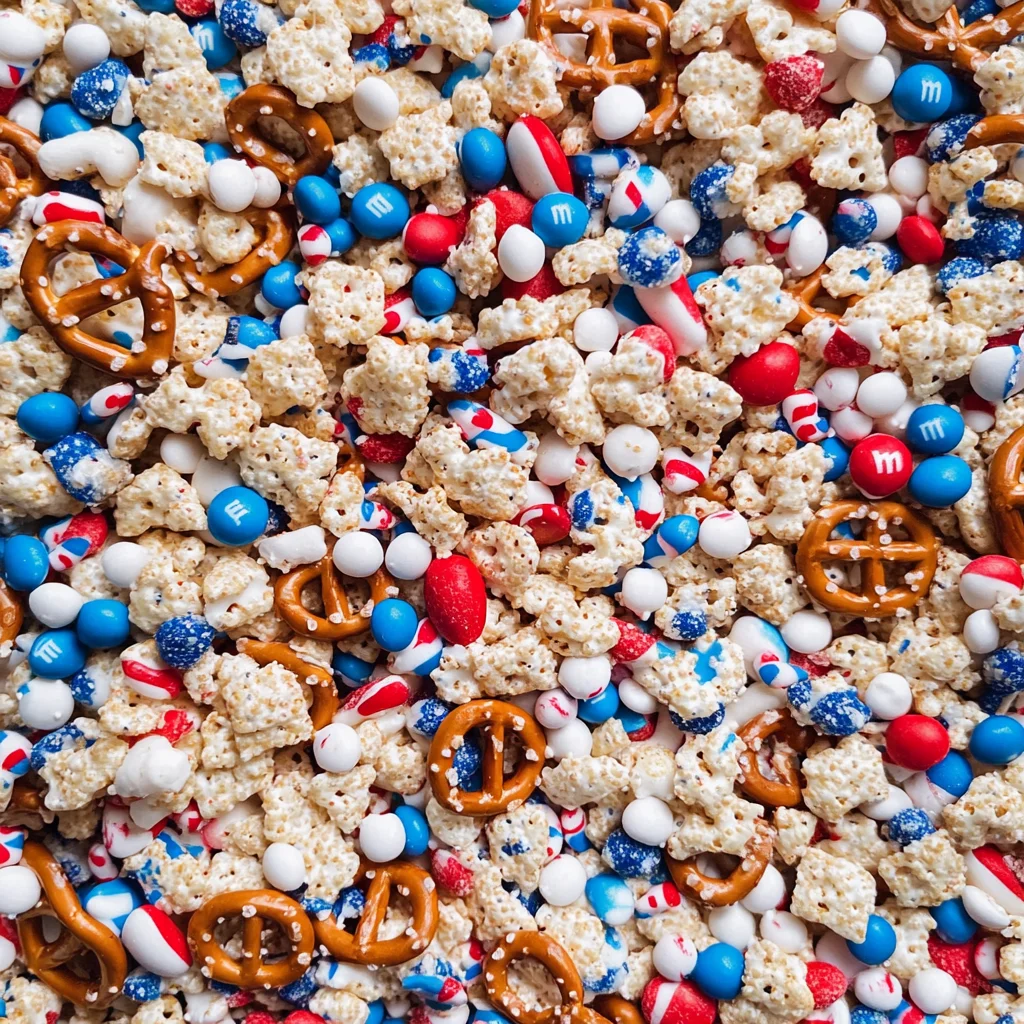
- 2 cups Chex cereal (corn or rice) – The Chex cereal serves as the foundational crunch for our snack mix. It offers an irresistible base that’s not overly sweet but perfectly complements the other flavors we’re adding. Look for fresh Chex that has retained its crispness; stale cereal just won’t do! If you’re feeling adventurous, consider using different varieties like Wheat Chex for added flavor complexity.
- 1 cup mini pretzel twists (or mini pretzel rods, broken in half) – These little gems bring in that salty crunch we all crave! The pretzels are essential because they add balance against the sweetness of the chocolate and candies. Plus, their shape makes them easy to grab by hand—perfect for parties! If you’re unable to find mini pretzels, breaking larger rods into pieces works beautifully too.
- 2 cups Cap’n Crunch cereal (without berries) – Ahh, Cap’n Crunch—this childhood favorite adds an element of nostalgia and sweetness to our mix. Its unique texture creates a delightful contrast against the other crunchy components. Ensure you’re getting the classic version without berries so we can keep our colors consistent; remember, presentation matters!
- 2 cups Honey Nut Cheerios cereal – These are like little honey-kissed pillows that introduce a subtle sweetness along with their crunchiness. They harmonize beautifully with both salty and sweet elements in our snack mix. Opt for Honey Nut Cheerios instead of plain ones—they bring an unmistakable warmth to every handful.
- 1 cup red, white, and blue M&M’s (or regular M&M’s if desired) – The M&M’s are where we really get to shine with color! Not only do they add vibrant pops of red and blue for that festive flair, but they also introduce delightful moments of chocolatey goodness. Feel free to use regular M&M’s mixed with some extra reds and blues if you can’t find themed ones—they’ll still look fantastic and taste divine.
- 1-1/2 bags (16 ounces total) white chocolate chips (2-3/4 cups) – This is where our mix gets its luscious coating! White chocolate chips melt down into liquid gold that binds everything together while adding creamy sweetness. Choose high-quality chips without any artificial ingredients for richer flavor; trust me—it makes all the difference when you indulge in those first bites!
- 1-1/2 teaspoons vegetable oil (or canola oil, or shortening) – A small amount of oil is crucial here; it helps achieve that silky smooth melted chocolate consistency we want when coating our snack mix. You can substitute with canola oil if that’s what you have on hand—both work wonderfully well!
- 2 tablespoons festive sprinkles (optional) – Here’s where we can go wild with creativity! Sprinkles are optional but highly recommended if you want your snack mix to look as fun as it tastes. They add personality and cheerfulness that perfectly fits into any celebration or gathering!
Equipment You’ll Need:
Now that we’ve gathered our ingredients like excited little soldiers ready for action, let’s talk about the equipment you’ll need to make this process smooth sailing! Having the right tools makes everything easier—and more enjoyable—so let’s make sure you’re set up for success.
- Large sheet pan – This will be your canvas! A large sheet pan lined with parchment paper ensures easy cleanup while providing enough space to spread out your snack mix evenly for optimal cooling later on.
- Very large mixing bowl – You’ll need ample room here because we’re combining several ingredients together! A large mixing bowl allows you to gently fold everything without worrying about spills or messes—a must-have when working with multiple cereals and candy.
- Medium microwave-safe bowl – This will be used specifically for melting your white chocolate chips along with oil. Using glass or ceramic is ideal since they can withstand heat well; avoid plastic bowls which may warp in the microwave!
- Spatula – A good rubber spatula is essential for scraping down every last bit of melted chocolate from your bowl into the mix itself—it ensures nothing goes wasted! Plus, it’s great for gently folding ingredients without crushing them.
Preparing the 4th of July Snack Mix
Step 1: Get Your Workspace Ready
Before diving right into mixing up this delightful concoction, take a moment to prepare your workspace by lining your large sheet pan with parchment paper. This step might seem mundane but trust me—it sets up an organized environment where creativity flourishes! The parchment paper not only prevents sticking but also provides an easy way to transfer your beautiful creation later on without any fuss or mess.
Step 2: Combine Cereal Bliss
In your very large mixing bowl—this part should feel exciting—combine your Chex cereal, mini pretzels, Cap’n Crunch cereal, Honey Nut Cheerios, and those stunning M&M’s you’ve been waiting to toss in there! Gently fold them together using your spatula until every piece is coated in love and joyfully intermingled. This step is important because it creates an even distribution of flavors throughout each bite; don’t rush it! Take time ensuring each ingredient feels welcome among its delicious companions.
Step 3: Melt That Chocolate Magic
Now onto one of my favorite parts: melting those white chocolate chips! In a medium microwave-safe bowl combine them with vegetable oil before placing them in the microwave at full power for 30 seconds initially—then stir vigorously after each interval until they’re smoothly melted down into what I like to call liquid gold! This process ensures even melting while preventing scorching or burning—which would ruin our silky texture. If necessary return them back into short bursts until fully combined; patience here pays off big time!
Step 4: Coat Your Snack Mix
Once you’ve achieved that glossy melted perfection with no lumps left behind (do we hear angels singing?), pour it over your beautifully prepared snack mixture in one swift motion using your spatula to scrape out every last drop—you want all that lusciousness coating every piece possible! Working quickly now—as white chocolate hardens fast—you’ll gently stir everything together until all components are generously enveloped by chocolaty goodness before transferring it onto your prepared sheet pan evenly spread out across its surface area like spreading sunshine on a lovely day ahead.
With these foundational steps laid out before us filled with excitement bubbling beneath—we’re making great progress toward creating this fabulous 4th of July Snack Mix! Trust me when I say everyone will be reaching back again and again for more once it’s served up at festivities near you…stay tuned as I share how simple finishing touches elevate things even further next time around!
Bringing It All Together – Celebrate With Your Creation!
Now that you’ve crafted this stunning 4th of July Snack Mix, it’s time to celebrate! Whether you’re hosting friends at a backyard barbecue or simply enjoying some quiet moments indoors while watching fireworks light up the sky outside your window, remember that every handful represents love poured into creating something extraordinary from simple ingredients. Each bite tells a story—a narrative woven from shared moments around food that brings people together.
So go ahead—serve it up proudly alongside other festive treats or simply enjoy it as is while reflecting on all those wonderful summer memories yet to come! And don’t forget—every time someone reaches for another handful or compliments its charm, know that you’ve shared not just food but joy itself through every delicious morsel you’ve created with care. Happy Fourth of July snacking!
Storage and Enjoyment Tips for Your 4th of July Snack Mix
Now that your kitchen is filled with the delightful aroma of melted white chocolate and sweet cereals, it’s time to revel in the joy of your freshly made 4th of July Snack Mix! This festive treat is not just a recipe; it’s an experience that brings together family and friends in the warm embrace of summer celebrations. But what happens when you have leftovers? Don’t worry; I’ve got you covered with some useful tips to keep your snack mix fresh and scrumptious for days to come!
Storing Leftover 4th of July Snack Mix
To ensure your 4th of July Snack Mix stays as delightful as the moment you made it, store it in an airtight container at room temperature. Glass or plastic containers work beautifully, but if you want to take extra precautions, consider using a resealable bag with the air pressed out. It can last up to two weeks, but trust me, it rarely lasts that long—everyone will be reaching for more! For a little extra freshness, try placing a slice of bread inside the container; this nifty trick helps absorb moisture and keeps your snack mix crispy and delectable. The flavors meld even more beautifully after a day or two, creating a symphony of sweetness that is simply irresistible! When you’re ready to dig in again, just pour yourself a generous handful and enjoy; there’s no need for reheating since it’s perfect at room temperature.
Freezing Your 4th of July Snack Mix for Later
If you find yourself with an abundance of this crowd-pleasing delight, freezing is another fantastic option! Simply spread the snack mix out on a baking sheet lined with parchment paper and place it in the freezer until frozen solid—about an hour should do it. Once frozen, transfer it into an airtight freezer-safe bag or container. It can keep well for up to three months without sacrificing flavor or texture! When you’re ready to use it, simply remove the desired amount from the freezer and let it thaw at room temperature for about 30 minutes. This is such a convenient way to have a delicious snack mix on hand whenever those cravings hit! Just imagine pulling out a bag during a cozy movie night or summer gathering—it’s like having a secret stash of joy waiting for you.
4th of July Snack Mix
Celebrate the 4th of July with a delightful homemade snack that embodies the joy of summer gatherings—our vibrant 4th of July Snack Mix! This easy-to-make treat combines crunchy cereals, salty pretzels, and sweet chocolate to create a symphony of flavors and textures that everyone will love. Perfect for barbecues, picnics, or as a festive centerpiece during fireworks, this mix is not only delicious but also customizable to suit your taste. Each handful bursts with joy, making it the ultimate crowd-pleaser.
- Prep Time: 15 minutes
- Cook Time: None
- Total Time: 0 hours
- Yield: Approximately 8 servings 1x
- Category: Dessert
- Method: No-Bake
- Cuisine: American
Ingredients
- 2 cups Chex cereal (corn or rice)
- 1 cup mini pretzel twists
- 2 cups Cap’n Crunch cereal (without berries)
- 2 cups Honey Nut Cheerios cereal
- 1 cup red, white, and blue M&M’s
- 1–1/2 bags (16 ounces total) white chocolate chips
- 1–1/2 teaspoons vegetable oil
- 2 tablespoons festive sprinkles (optional)
Instructions
- Prepare your workspace by lining a large sheet pan with parchment paper.
- In a large mixing bowl, combine Chex cereal, pretzels, Cap’n Crunch, Honey Nut Cheerios, and M&M’s.
- In a medium microwave-safe bowl, melt white chocolate chips with vegetable oil in intervals until smooth.
- Pour melted chocolate over the cereal mixture and gently fold until evenly coated.
- Spread the snack mix onto the prepared sheet pan and sprinkle with additional M&M’s and sprinkles if desired.
- Allow to cool at room temperature until set, then break into pieces for serving.
Nutrition
- Serving Size: 1/2 cup (60g)
- Calories: 280
- Sugar: 23g
- Sodium: 90mg
- Fat: 12g
- Saturated Fat: 7g
- Unsaturated Fat: 4g
- Trans Fat: 0g
- Carbohydrates: 42g
- Fiber: 2g
- Protein: 3g
- Cholesterol: 0mg