Homemade Apple Pie
There’s something timeless and utterly magical about a homemade apple pie. The moment you walk into a kitchen where this beauty is being baked, you’re enveloped by the warm, sweet aroma of apples mingling with just a hint of spice. It’s like a warm hug on a chilly autumn day, a comforting reminder of family gatherings and cozy evenings spent with loved ones. You see, this Homemade Apple Pie isn’t just about the ingredients or the recipe; it’s an experience that stitches together memories, love, and tradition. When I share this recipe with you, I’m inviting you into my heart—a heartfelt gesture filled with nostalgia and warmth that only a slice of pie can provide.
As we embark on this culinary adventure together, let’s celebrate the diverse beauty of apples—those crisp, juicy gems that come in so many colors and flavors! Each bite of this pie is a symphony of textures and tastes: the tender apples softened by gentle heat, the flaky crust that crumbles beautifully at first touch, and that sweet aroma wafting through your home like liquid gold. Baking an apple pie is more than simply following a recipe; it’s about creating something profoundly satisfying that connects us to our roots while allowing us to innovate and personalize. So gather your loved ones around as we prepare to create a dessert that’s truly extraordinary—one that’s sure to bring smiles and joy to your table.
Homemade Apple Pie: A Slice of Tradition
This Homemade Apple Pie is not just a dessert; it’s an age-old recipe passed down through generations, lovingly crafted each time it graces our table. The beauty lies in its simplicity—a handful of wholesome ingredients coming together in harmony to create something delightful. Whether it’s for Thanksgiving dinner or just because you feel like treating yourself (and trust me, you deserve it!), this pie shines as the star of any gathering. Let me guide you through every step of this journey to ensure your pie turns out perfectly every single time!

Ingredients:
As we dive into this fabulous adventure of baking, let’s take a moment to appreciate each ingredient that plays its unique role in crafting our delicious apple pie.
- 6 cups apples (about 6 medium peeled, cored and cut into 1/4 inch thick slices). Choosing the right apples is paramount because they are truly the stars of the show! Varieties such as Granny Smith bring tartness and firmness, while Honeycrisp offers sweetness and juiciness—each contributing uniquely to the pie’s flavor profile. Mixing different types can yield an even more complex taste; I often like to blend tart and sweet apples for balance. Make sure they are fresh—look for firm fruits without blemishes or soft spots—because nothing compares to freshly harvested apples bursting with flavor.
- 3/4 cup sugar. Ahh, sugar—the sweet companion that enhances everything it touches! In our apple pie, sugar not only adds sweetness but also helps draw out the natural juices from the apples during baking. This creates that delightful syrupy filling we all crave. If you’re looking for alternatives or want to reduce refined sugar intake, consider using maple syrup or coconut sugar; both will add their own lovely notes while still ensuring your pie remains delectable.
- 2 tablespoons all-purpose flour. This humble ingredient plays a crucial role in thickening our apple filling as it bakes. It allows those delicious juices released from the apples to meld together beautifully without making everything too runny—a non-negotiable aspect of any great apple pie! Be mindful when measuring flour; too much can lead to a dry filling while too little might leave you with a soupy mess.
- 3/4 teaspoon ground cinnamon. Cinnamon is basically autumn in spice form! Its warm, aromatic notes complement apples perfectly and elevate their natural sweetness without overpowering them. This spice has been celebrated for centuries—not only does it taste incredible, but it also brings warmth and comfort to every bite. If you’re feeling adventurous, toss in some cardamom or ginger for an unexpected twist!
- 1/4 teaspoon salt. While salt may seem counterintuitive in something sweet like apple pie, it serves an essential purpose by enhancing flavors across the board—from making those apples pop even more vibrantly to balancing out sugars seamlessly.
- 1/8 teaspoon ground nutmeg. Nutmeg adds depth and warmth reminiscent of cozy family gatherings around the table during cooler months—a subtle but profound addition that rounds out our flavor profile beautifully.
- 1 tablespoon lemon juice. A splash of lemon juice works wonders here! Not only does it brighten up the flavors within our filling but also helps prevent those precious sliced apples from browning prematurely while we prepare our masterpiece.
- 1 pastry for double pie crust. There’s nothing quite like homemade crusts made with love! They’re flaky yet tender with just enough structure to hold all that luscious filling within—if you’re short on time (or just feeling adventurous), store-bought versions can work too! Just be sure to choose one made without animal-derived gelatin if you want a truly amazing experience.
- 2-3 tablespoons butter (cut into small pieces). Butter adds richness and flavor like no other ingredient can! Dotting these tiny pieces over our apple filling before sealing everything with another crust ensures that every bite remains moist and flavorful as it bakes away into perfection.
Equipment You’ll Need:
Before we get started on preparing our enticing apple pie, let’s gather some essential tools that’ll make our baking experience smoother! Having the right equipment at hand can significantly enhance your cooking journey—we’re crafting art here!
- 9-inch pie plate – This trusty dish is specifically designed for baking pies evenly while providing ample space for all those delicious fillings we’re about to create together! You could use glass or ceramic; just ensure it’s deep enough to hold all those beautiful layers without spilling over during baking!
- Mixing bowl – A large mixing bowl will be your best friend during this process—it allows ample space for tossing those sliced apples with sugar and spices without creating chaos in your kitchen!
- Rolling pin – A good rolling pin will help you achieve an even thickness when rolling out your dough. The balance between pressure applied and speed is key here—take your time rolling out until you’ve got perfect rounds ready for layering!
- Pastry brush – Essential for applying egg washes onto crusts before baking; this brush will ensure even coverage leading us toward golden-brown perfection!
- Knife or apple slicer – For peeling/coring/slicing those gorgeous fruits efficiently—a sharp knife ensures clean cuts while preserving texture inside each slice!
Now that we’ve got everything lined up perfectly let’s roll up our sleeves because it’s time to prepare this mouthwatering Homemade Apple Pie step-by-step!
Step 1: Preheat That Oven!
Before we delve into slicing those lovely apples, let’s set things in motion by preheating our oven to 425°F (220°C). Preheating is crucial because starting off at high heat helps create steam within our crust quickly once we pop everything inside—resulting in that delightful flaky texture we adore so much! As you wait patiently for your oven’s warmth to build up (trust me on this), go ahead and line your 9-incher with one half of your double crust pastry—trim along edges so they fit snugly against sides while leaving enough overhang for crimping later on.
Step 2: Create Your Filling
Now comes one of my favorite parts: preparing our heavenly filling! In your large mixing bowl, combine those freshly sliced apples with sugar (remember how vital its role was?), flour (to thicken), cinnamon (for warmth), salt (to enhance flavors), nutmeg (for depth), and lemon juice (to keep everything fresh). Mix gently until each slice glistens under its sugary coat—don’t rush this step! Taking care now means we’ll have well-distributed flavors once baked—allowing every bite to sing harmoniously together instead of having pockets where one element overwhelms another.
Step 3: Assemble Your Masterpiece
Next up is spooning all those yumminess-laden apple slices into our prepared bottom crust like they’re being cradled gently by their protective layer! Once you’ve layered them generously inside (don’t skimp!), scatter those buttery pieces evenly atop before rolling out second half from earlier—you’ll want this top crust rolled thinly enough so there are no thick patches but thick enough not too tear easily either! Place gently atop filled dish then press edges together firmly yet delicately—it’s all about sealing goodness inside here!
Step 4: Crimp Edges & Prepare For Baking
Take a moment now—to admire what you’ve created so far because soon it’ll bake into something transcendentally satisfying! Crimping edges isn’t just decorative—it helps seal any potential leaks from escaping during baking which would otherwise leave us disappointed come dinner time when cutting slices reveals puddles rather than firm fillings… Cut slits across top as well; allowing steam release ensures perfect cooking throughout without risking sogginess anywhere underneath!
With these steps complete we’re almost there—the anticipation builds as we prepare ourselves for glorious scents wafting through kitchen moments away… Stay tuned because next we’ll bask in golden-brown glory together!
Step 5: Rolling Out the Top Crust – A Dance of Dough
Now, it’s time to roll out that second pie crust, which is not only a crucial step but also a moment where you can truly let your creativity shine! Begin by generously flouring your work surface to prevent any sticking and to give your dough a perfect canvas. Gently place your chilled dough in the center and start rolling from the center outward, applying even pressure as you go. You want to aim for a circle that’s about 1/8 inch thick—this thickness is non-negotiable, as it ensures that your crust will be both flaky and sturdy enough to cradle all those tender, spiced apples.
As you roll, don’t forget to rotate the dough occasionally; this helps maintain that lovely circular shape and prevents it from sticking. Keep an eye on the edges too—if they seem thicker than the center, just gently push them back towards the middle with your rolling pin. I promise you, this part is like an art form! Once you have your dough rolled out beautifully, carefully lift it with a rolling pin and place it over the apple mixture in your pie plate. The moment the crust touches those sweet apples is pure magic; it’s like tucking them into a cozy blanket before they bake into something utterly intoxicating!
Step 6: Sealing It All Together – Crimping with Love
With the top crust resting on your apple filling, it’s time to seal everything together lovingly. This step isn’t just about aesthetics; sealing properly ensures that all those luscious juices from the apples stay tucked inside during baking instead of spilling over onto your oven floor—trust me, no one wants a smoky kitchen! To do this, take a fork or use your fingers to crimp the edges of both crusts together firmly. This creates not only a beautiful border but also helps trap all that flavor within.
As you crimp, take a moment to appreciate how each twist and pinch adds character to your pie; think of it as giving it a personality! If you notice any cracks or gaps in the crust while crimping, don’t stress—simply patch them up with small pieces of dough. Remember, this pie is meant to be shared among friends or family who’ll appreciate every imperfectly perfect detail about it. After sealing up those edges like a loving hug around the filling, make sure to cut slits in several places across the top crust. This is absolutely paramount because these vents allow steam to escape while baking, preventing any unsightly explosions of filling that could ruin your masterpiece!
Step 7: Preparing for Baking – The Egg Wash Elegance
Now we come to one of my favorite finishing touches—the egg wash! This glossy glaze not only enhances the visual appeal of your Homemade Apple Pie but also contributes wonderfully to that elusive golden-brown color we all crave when we think of pies fresh from Grandma’s oven. For this recipe, whisk together an egg with a teaspoon of water until well combined; this simple mixture will become liquid gold once brushed onto our crust.
Using a pastry brush—a handy tool in every baker’s arsenal—gently apply this egg wash over the entire surface of the top crust. Be sure not to drench it; just a light coat will do wonders! As you brush away, imagine how this little step transforms your pie into something extraordinary—a true showstopper at any gathering. And if you want to elevate things further (because why not?), sprinkle some additional sugar atop that egg wash for an extra touch of sweetness and delightful crunch once baked. It’s these little details that create profound satisfaction when someone takes their first bite!
Step 8: The Baking Symphony – Timing and Technique
Ahh, now comes perhaps the most exciting part—the baking! Preheat your oven to 425°F (220°C), allowing it to reach its full heat potential before our pie begins its transformation. Once heated, carefully place your beautifully prepared pie into the oven on the middle rack—it’s essential for even cooking! Bake at this higher temperature for 15 minutes; during this time, watch as those lovely edges begin to puff up and turn golden brown—a sight so mesmerizing it’ll make your heart sing!
After those initial moments of excitement (and maybe some anxious pacing around the kitchen), lower the oven temperature down to 375°F (190°C) and let it continue baking for another 30 minutes or until those apples are tender and bubbling joyfully beneath that crisp crust. Keep an eye on things during this phase; if at any point you notice excessive browning on top before finishing time is up, feel free to cover it loosely with aluminum foil—this way you protect that lovely golden hue while ensuring everything bakes evenly.
And here’s where patience plays its key role: once baked perfectly, allow your masterpiece to cool on a wire rack for at least 30 minutes before slicing into it. I know waiting can feel torturous when there’s an intoxicating aroma wafting through your home—but trust me on this one! Allowing it some cooling time lets those delicious flavors meld beautifully while helping prevent potential filling eruptions when served warm.
Next Major Phase – Savoring Your Homemade Apple Pie
With each step taken carefully and lovingly thus far, you’re almost there! As we move towards serving our Homemade Apple Pie, let’s talk about how best to enjoy this labor of love—and maybe even share some tips for pairing it with delightful accompaniments like vanilla ice cream or whipped coconut cream for added indulgence. Get ready for compliments galore as friends and family gather around for slices of pure bliss!
Storage and Enjoyment Tips for Your Homemade Apple Pie
Now that you’ve lovingly crafted your Homemade Apple Pie, it’s time to enjoy the fruits of your labor! The aroma wafting through your kitchen is enough to make anyone weak at the knees. But, let’s be honest—sometimes a pie is just too beautiful to devour in one sitting, and that’s perfectly okay! Learning how to store your masterpiece will ensure it maintains its delightful charm and flavors for days to come.
Storing Leftover Homemade Apple Pie
To keep your Homemade Apple Pie as fresh as when it first came out of the oven, I recommend storing it in an airtight container. If you don’t have one handy, you can simply cover it tightly with plastic wrap or aluminum foil. This step is crucial because exposure to air can cause the crust to lose its delightful crunch and become soggy. When stored correctly at room temperature, your pie will stay delicious for about 2-3 days. However, if you want to stretch its life a little longer, consider moving it to the refrigerator where it can last up to a week. Pro tip: place a slice of bread in the container with the pie; this little trick helps maintain moisture without compromising on that stunning crust! After storage, you’ll find that the flavors meld beautifully, creating an even more intense apple experience. To reheat, simply pop individual slices in a microwave for about 30 seconds or warm them gently in an oven set at 350°F until heated through—trust me, nothing beats that fresh-baked taste!
Freezing Your Homemade Apple Pie for Later
If you’re like me and love having homemade treats on hand, freezing your pie is a fantastic option! To freeze your Homemade Apple Pie properly, let it cool completely first; this prevents ice crystals from forming inside. Then wrap it tightly in plastic wrap followed by aluminum foil or store it in a suitable freezer-safe container. This method keeps the pie fresh for about 3 months in the freezer. The convenience of pulling out a slice of homemade goodness whenever you crave something sweet is absolutely divine! When ready to enjoy again, simply thaw it overnight in the refrigerator before reheating as mentioned earlier—or you could bake from frozen at 425°F until golden brown and bubbly for a lovely surprise! Just imagine that comforting warmth filling your kitchen once more!
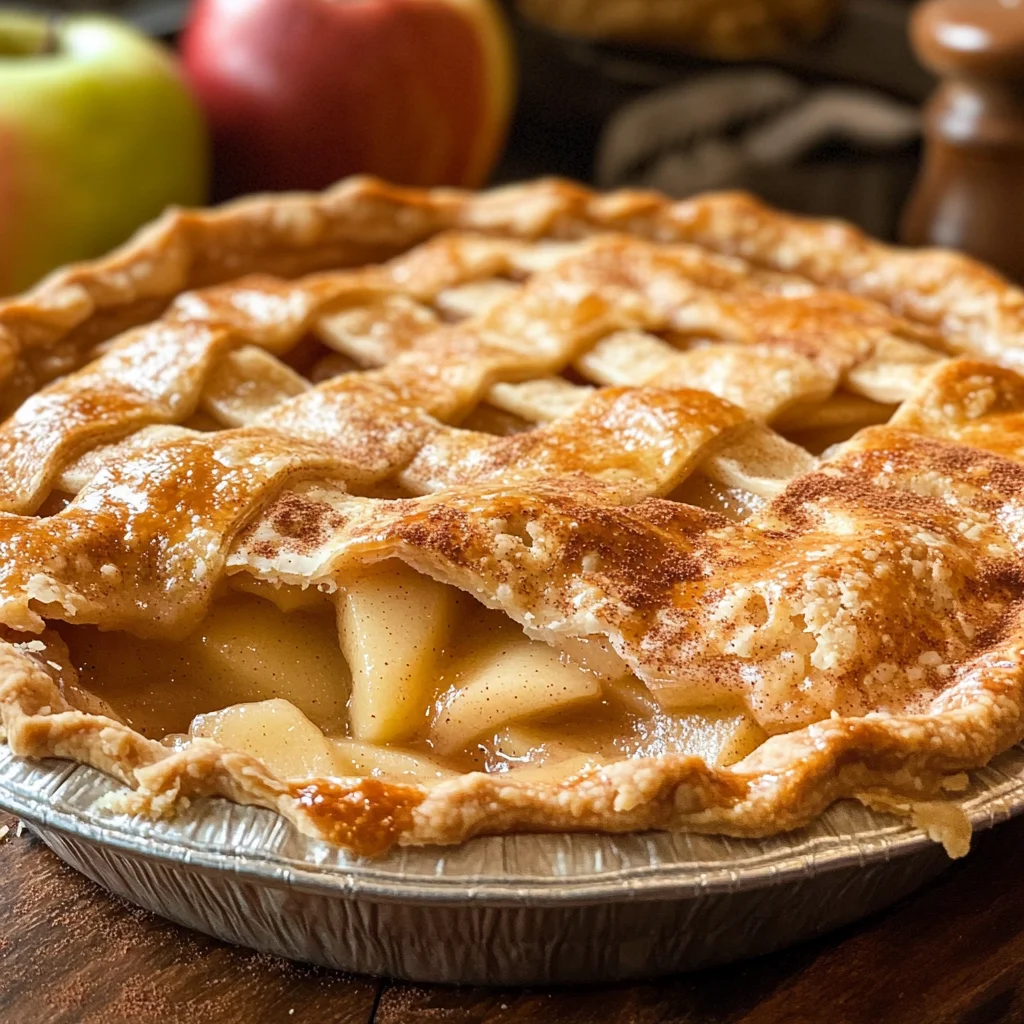
Homemade Apple Pie

There’s nothing quite like the comforting aroma of a freshly baked Homemade Apple Pie wafting through your kitchen. This classic dessert is a heartwarming blend of tender, spiced apples enveloped in a flaky, buttery crust that brings back memories of family gatherings and cozy evenings.
- Prep Time: 30 minutes
- Cook Time: 45 minutes
- Total Time: 1 hour 15 minutes
- Yield: About 8 servings 1x
- Category: Dessert
- Method: Baking
- Cuisine: American
Ingredients
- 6 cups apples (peeled, cored, sliced)
- 3/4 cup sugar
- 2 tablespoons all-purpose flour
- 3/4 teaspoon ground cinnamon
- 1/4 teaspoon salt
- 1/8 teaspoon ground nutmeg
- 1 tablespoon lemon juice
- 1 pastry for double pie crust
- 2–3 tablespoons butter (cut into small pieces)
Instructions
- Preheat the oven to 425°F (220°C) and line a pie plate with one half of the pie crust.
- In a large mixing bowl, combine sliced apples, sugar, flour, cinnamon, salt, nutmeg, and lemon juice. Toss gently to coat.
- Spoon the apple mixture into the prepared crust and dot with small pieces of butter.
- Roll out the second crust and place it over the filling. Crimp the edges to seal and cut slits in the top for steam to escape.
- Brush with an egg wash if desired and sprinkle with sugar for added crunch.
- Bake for 15 minutes at 425°F, then reduce heat to 375°F (190°C) and bake for an additional 30 minutes until golden brown.
Nutrition
- Serving Size: 1 slice (112g)
- Calories: 230
- Sugar: 22g
- Sodium: 150mg
- Fat: 10g
- Saturated Fat: 5g
- Unsaturated Fat: 5g
- Trans Fat: 0g
- Carbohydrates: 35g
- Fiber: 3g
- Protein: 2g
- Cholesterol: 20mg