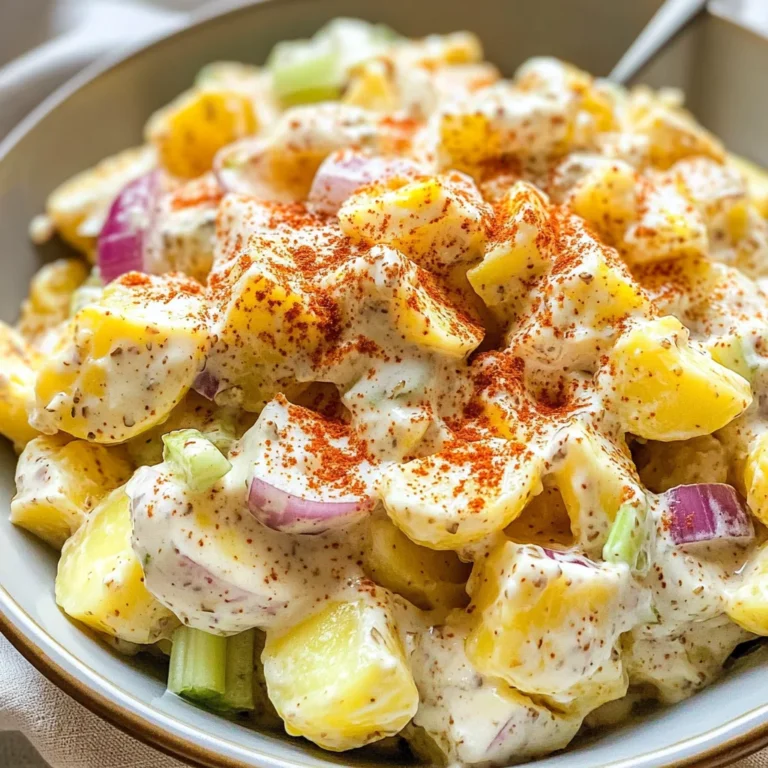
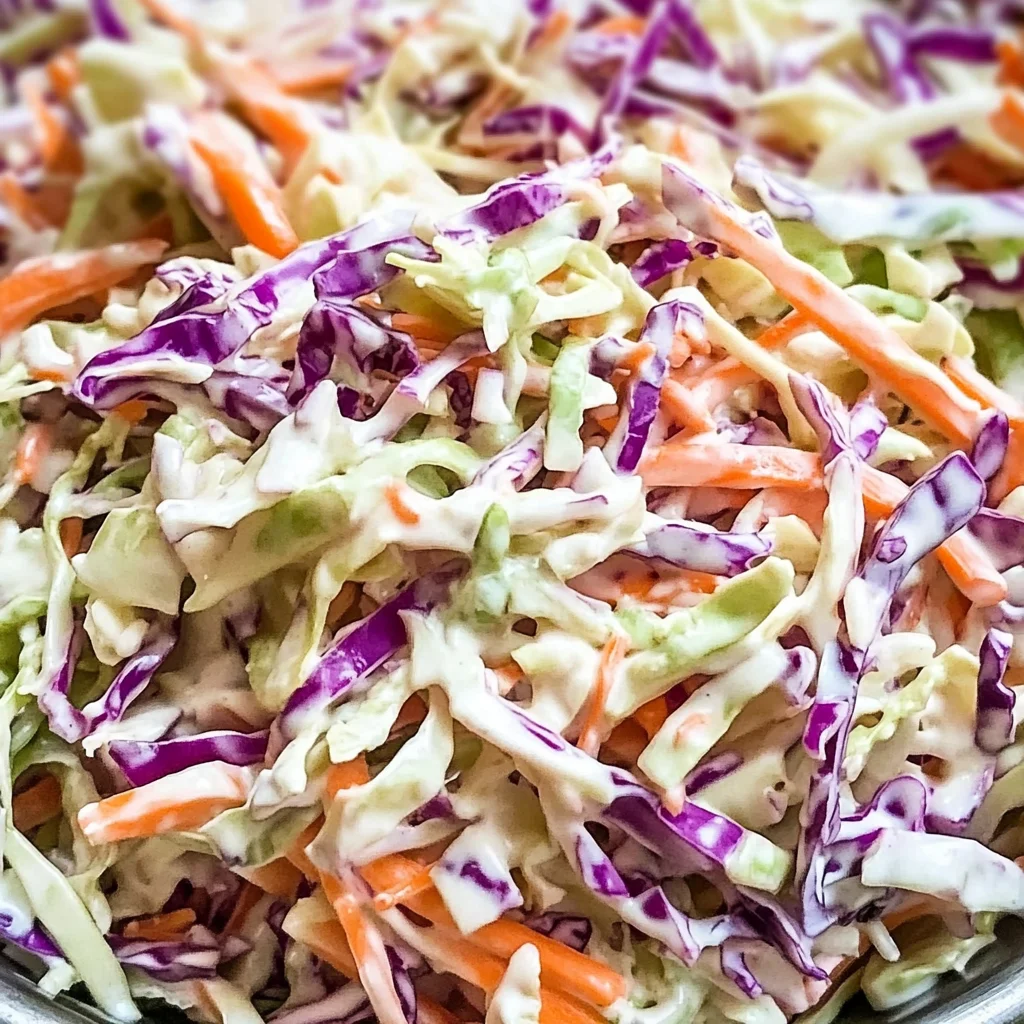
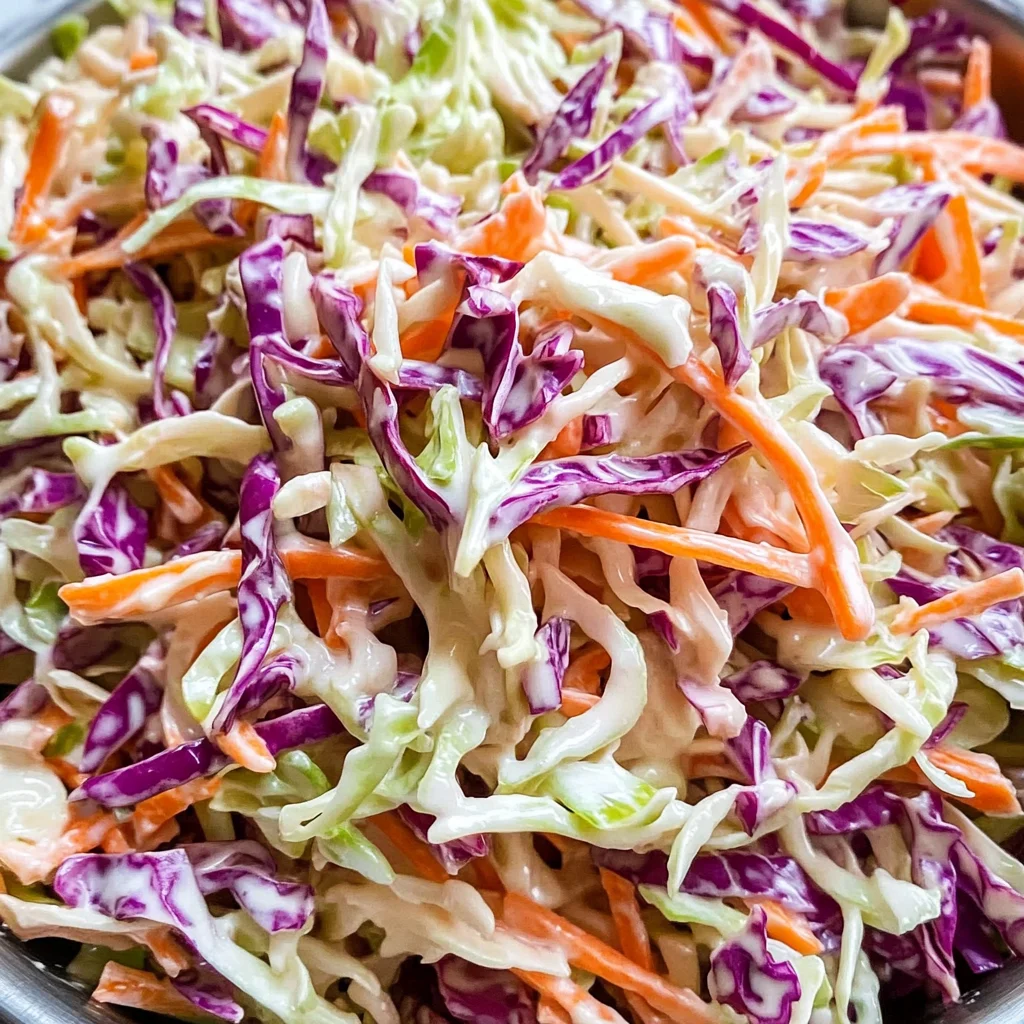
Keto Coleslaw Recipe
There’s something truly magical about a well-prepared coleslaw. It’s not just a side dish; it’s a burst of summer, a medley of textures and flavors that can elevate any meal or gathering. I remember the first time I tasted a creamy, tangy coleslaw at a backyard barbecue—it was like a revelation! The crunch of crisp cabbage paired with that signature zesty dressing created an experience that danced on my palate. Now, as I share this Keto Coleslaw Recipe, I promise you’ll find it just as delightful. With only 2g net carbs, this is not just another salad; it’s a celebration of taste that showcases how healthy eating can be both satisfying and indulgent.
What makes this coleslaw particularly special is its versatility—it fits in seamlessly at picnics, barbecues, or even as a refreshing side to your weeknight dinners. And trust me when I say that even those who are not following a keto lifestyle won’t be able to tell it’s sugar-free! The balance of sweet and tangy flavors mingling together creates an utterly intoxicating experience that beckons you back for more. As you gather your ingredients and prepare to embark on this culinary journey, think of it not just as cooking but as crafting something extraordinary. This coleslaw is a bridge between tradition and innovation, where health-conscious choices meet delightful flavors.
Keto Coleslaw Recipe: A Refreshing Summer Delight
Now let’s dive into making this beautiful Keto Coleslaw Recipe! It’s incredibly straightforward and can be whipped up in no time, making it perfect for those spontaneous summer gatherings or planned picnics. Grab your ingredients and let’s get started!
Ingredients:
Embarking on this culinary adventure begins with selecting fresh ingredients that bring vibrant flavor and crunch to our coleslaw. Each component plays an essential role in creating the symphony of flavors we’re aiming for.
- 14 ounces shredded coleslaw mix (or shred green cabbage, red cabbage, and carrots). This pre-packaged mix is a fantastic shortcut for busy cooks like us! However, if you’re feeling adventurous, shredding your own cabbage allows you to control the freshness and texture. Green cabbage offers a crisp crunch while red cabbage adds beautiful color and slightly more sweetness, creating visual appeal on your plate. The carrots contribute their natural sweetness—a perfect balance against the tangy dressing we’ll create!
- 1/4 cup mayo. Mayonnaise acts as the creamy base for our dressing and adds richness that coats each bite beautifully. Opt for quality mayonnaise made with wholesome ingredients; it truly makes a difference in flavor. If you’re looking for alternatives due to dietary preferences or restrictions, avocado mayo can add an amazing depth while keeping things light!
- 2 tablespoons granulated sweetener. Here’s where we work our magic—this ingredient adds that lovely touch of sweetness without the carbs! Choose your favorite keto-friendly sweetener; stevia, erythritol, or monk fruit all work beautifully here. The key is to find one that balances well without overpowering the other flavors.
- 2 tablespoons white vinegar. This sharp yet refreshing component brightens up our coleslaw like nothing else! The acidity cuts through the creaminess of the mayo and enhances the overall flavor profile. If you’re looking for variations or have apple cider vinegar on hand, don’t hesitate to use it; it’ll impart its unique fruity notes.
- 2 tablespoons lemon juice. Freshly squeezed lemon juice adds brightness and zing—an absolute must in our dressing! It keeps the flavors lively and ensures every bite feels refreshing on those hot summer days.
- 1/2 teaspoon salt. Salt may seem simple but it’s absolutely paramount in bringing out all those intricate flavors in our dish. Don’t skip this step—the right amount will enhance everything from the vegetables to the dressing itself.
- 1/2 teaspoon black pepper. A sprinkle of freshly cracked black pepper adds just enough heat to balance out the sweetness from the carrots and sweetener while giving depth to our coleslaw’s flavor profile.
This combination of ingredients will come together harmoniously to create a Keto Coleslaw Recipe that is refreshingly satisfying!
Equipment You’ll Need:
Having the right tools at your disposal makes all the difference when creating something wonderful in the kitchen! While they may not be ingredients themselves, these essential partners ensure your cooking experience is smooth sailing from start to finish.
- Large mixing bowl – This roomy vessel is where all the magic happens! A large bowl gives you plenty of space to combine your ingredients without any mess—trust me; nobody wants mayo splatters decorating their kitchen!
- Whisk or spatula – Whether you choose to whisk your dressing by hand or opt for a sturdy spatula to fold everything together, having one (or both!) handy will help ensure you achieve that perfectly creamy consistency we’re after.
- Sharp knife & cutting board – If you’re opting for fresh cabbage instead of pre-shredded mix, you’ll want a good sharp knife for slicing through those dense leaves easily. A sturdy cutting board will keep things safe while protecting your counters too!
- Measuring spoons – Precision matters when it comes to creating balanced flavors in any recipe! Measuring spoons ensure we’re adding just the right amounts of vinegar, lemon juice, and seasonings—no guesswork needed here!
With these trusty tools by your side, we’re ready to prepare this Keto Coleslaw Recipe and take our taste buds on an unforgettable journey!
Step 1: Prep Your Cabbage Mix
Start by deciding whether you’re using pre-packaged shredded coleslaw mix or fresh cabbage—both options are fantastic but will yield slightly different results! If opting for fresh veggies, slice your green cabbage into thin strips while also including some vibrant red cabbage for color contrast along with grated carrots for added sweetness and crunch—this combination will create an irresistible texture in our salad! Aim for roughly 14 ounces total; if you’re feeling creative or want something unique, feel free to adjust according to personal preference or what you have on hand.
Step 2: Combine Your Creamy Base
In your large mixing bowl, add 1/4 cup mayo (don’t skimp here; we want maximum creaminess!), then sprinkle in those 2 tablespoons of granulated sweetener next! Using either a whisk or spatula—whichever feels more comfortable—mix them together until they form a luscious creaminess reminiscent of liquid gold! This step is crucial because blending these two ingredients thoroughly ensures every bite later has that decadent mouthfeel we’re craving while balancing out all other elements beautifully.
Step 3: Add Your Zesty Kick
Once you’ve achieved creamy perfection with the mayo-sweetener blend, it’s time to brighten things up by incorporating lemon juice (2 tbsp) followed closely by white vinegar (also 2 tbsp). As you pour them into the mix, notice how they instantly lift everything—it’s like sunshine pouring into our bowl! Gently stir until fully combined; embrace this moment because these acids are essential—they make sure our coleslaw remains lively rather than heavy while enhancing every flavor present throughout!
Step 4: Season It Up
Next comes seasoning—add 1/2 teaspoon salt along with 1/2 teaspoon freshly cracked black pepper into your mixture before giving everything another good stir until well incorporated again! This step ties everything together perfectly; believe me when I say skipping salt would mean missing out on maximizing flavor potential—and no one wants bland food around here! Take a taste test at this stage (and don’t forget about adjusting those seasonings if necessary) before moving onto assembling everything together with veggies shortly after.
Keep going strong—I promise we’re almost there! Let’s dive deeper into assembling this Keto Coleslaw Recipe so we can unveil those delicious results soon…
Step 5: Mix It All Together with Love
Now that you’ve prepped your beautiful cabbage mix, it’s time for the magic to happen. In a large mixing bowl, take your 14 ounces of shredded coleslaw mix and pour in the creamy goodness of 1/4 cup of mayo. This is where the richness begins to shine through—mayo not only adds creaminess but acts as a binding agent, ensuring each shred of cabbage is enveloped in that luscious sauce. Next, reach for your granulated sweetener (2 tablespoons) and sprinkle it over the mayo. The sweetness will balance out the tangy notes from the vinegar and lemon juice later, creating a symphony of flavors that dances on your palate.
Now comes the fun part! Using a spatula or even your hands (trust me, this makes it feel more personal), mix everything together until every shred is coated with that dreamy mayo-sweetener concoction. You want to see a glossy sheen on your coleslaw; if it looks a bit dry, don’t be shy to add a smidge more mayo. Remember, this step isn’t just about combining ingredients—it’s about creating an experience that feels cohesive and satisfying. When you take that first bite later on, you’ll want each texture and flavor to meld beautifully together.
Step 6: Add the Zing!
Next up, we’re going to elevate our coleslaw with some zesty accents! Pour in the 2 tablespoons of white vinegar and the fresh juice of half a lemon (that’s about 2 tablespoons as well). This might seem like just a splash here and there, but oh my goodness—this addition is absolutely paramount! The acidity from both the vinegar and lemon juice not only cuts through the richness of the mayo but also brings out the natural sweetness of the cabbage; it’s like adding sunshine into a summer dish!
As you add these liquids, feel free to taste as you go—you’ll notice how they brighten up all those flavors. I promise you; this step transforms your coleslaw from good to utterly extraordinary. Make sure to give everything another gentle toss so that every bit gets its fair share of this delightful zing. The colors should start popping even more at this stage, which is always such an encouraging sign that you’re on the right track!
Step 7: Seasoning for Perfection
With your mixture now bursting with flavor thanks to those zesty additions, it’s time to season things up. Sprinkle in 1/2 teaspoon of salt and 1/2 teaspoon of black pepper into your bowl. Seasoning is one element in cooking that can truly make or break a dish; think of it as an artist adding final touches to their masterpiece. Salt enhances flavors—it draws out sweetness from vegetables while balancing any bitterness—and black pepper adds just enough heat to keep things interesting without overwhelming your taste buds.
Stir gently yet thoroughly again, ensuring those seasonings are evenly distributed throughout. This is a moment where patience pays off; give yourself time here because perfectly seasoned food sings with flavor! If you feel adventurous—go ahead and tweak these amounts based on your personal palate preferences; after all, this recipe is yours now! Trust me on this one—if you can find that perfect balance between sweet, tangy, and savory now, you’ll be left with something profoundly satisfying when it’s finally served.
Step 8: Chill Out for Best Results
Here comes one of my favorite parts—the chilling process! Cover your mixing bowl tightly with plastic wrap or transfer your coleslaw into an airtight container before placing it in the refrigerator for at least two hours (but ideally overnight if time allows). I know waiting can be tough when you’re excited about what’s coming next; however, I assure you that this step is non-negotiable if you want truly harmonious flavors! Chilling allows all those vibrant ingredients time to mingle and deepen their relationship—a little culinary romance happening right in your fridge!
While chilling, think about how those flavors are getting acquainted with one another—each ingredient taking its turn at being highlighted in every delectable bite you’ll soon enjoy together! When you’re ready to serve it up later on, you’ll notice how much creamier and more flavorful everything has become—the transformation will leave you amazed! Keep an eye on it during its chill time; if it’s been sitting for too long without being touched, give it a gentle stir before serving so that everything remains evenly mixed.
Final Touches: Serve Up Your Keto Coleslaw Recipe!
Step 9: Presenting Your Masterpiece
Finally! The moment has arrived where we unveil our glorious Keto Coleslaw Recipe masterpiece! Once chilled adequately (or whenever you’re ready), remove it from the refrigerator and give it one last gentle stir—this ensures any settled ingredients are brought back into play beautifully. Now grab a lovely serving bowl or individual dishes because we’re ready to impress!
As you scoop out portions onto plates or into small bowls, take a moment to appreciate those vibrant colors—a medley of greens alongside pops of orange from carrots—how utterly intoxicating does that look? Feel free to garnish with some additional freshly chopped herbs like parsley or dill if desired; these little touches can elevate presentation while enhancing flavor profiles further!
Now gather around your loved ones or friends because sharing food creates memories like nothing else does. When they take their first bite into this creamy dreaminess packed full of flavor without any guilt whatsoever—you’ll see smiles all around as they dig in eagerly! So there you have it: A deliciously refreshing Keto Coleslaw Recipe that’s perfect for summer BBQs or picnics without compromising health! Enjoy every single bite because I promise you—this dish isn’t just nutritious; it’s joy served in every crunchy morsel!
Storage and Enjoyment Tips for Your Keto Coleslaw Recipe
Now that you’ve whipped up this delightful Keto Coleslaw Recipe, it’s time to dive into the joy of enjoying it! Whether you’re serving it at a summer barbecue or packing it for a picnic, this dish is sure to please. But what if you have leftovers? Don’t worry; I’ve got you covered with some fantastic tips to ensure your coleslaw remains as fresh and vibrant as the day you made it!
Storing Leftover Keto Coleslaw Recipe
To keep your incredible coleslaw in tip-top shape, transfer any leftovers into an airtight container. Glass containers are my personal favorite because they don’t retain odors and keep everything crisp. If stored properly in the refrigerator, your keto coleslaw can last about 3 to 5 days. However, here’s a pro tip: if you want to maintain that delightful crunch, consider placing a piece of paper towel on top before sealing the container. This little trick absorbs excess moisture, which is absolutely paramount for preserving texture. And let me tell you, even after a few days in the fridge, the flavors will meld beautifully together, creating an even more profound taste experience. When you’re ready to enjoy it again, just give it a gentle stir and maybe a sprinkle of fresh pepper – trust me, your taste buds will thank you!
Freezing Keto Coleslaw for Later
If you find yourself with an abundance of coleslaw and want to savor it later, freezing is a fabulous option! To freeze your keto coleslaw properly, simply place it in a freezer-safe container or zip-lock bag after ensuring all the air is removed – this prevents freezer burn from ruining its vibrant flavor and texture. It can keep frozen for about 1-2 months without losing its charm. When you’re ready to use your frozen coleslaw, just transfer it to the fridge to thaw overnight. While I recommend enjoying coleslaw fresh due to its crispy nature, having a frozen stash means you always have a quick and healthy side dish ready for impromptu gatherings or busy weeknights. How convenient is that? The idea of having homemade goodness at your fingertips is utterly intoxicating!
Keto Coleslaw Recipe

Indulge in this refreshing Keto Coleslaw Recipe that brings the perfect balance of creamy, tangy, and crunchy elements to your table! This vibrant dish is not just low in carbs but also sugar-free, making it an ideal side for summer barbecues or picnics.
- Prep Time: 15 minutes
- Cook Time: None
- Total Time: 0 hours
- Yield: Serves 6
- Category: Side Dish
- Method: Mixing
- Cuisine: American
Ingredients
- 14 ounces shredded coleslaw mix (or shredded green cabbage, red cabbage, and carrots)
- 1/4 cup mayonnaise
- 2 tablespoons granulated sweetener
- 2 tablespoons white vinegar
- 2 tablespoons lemon juice
- 1/2 teaspoon salt
- 1/2 teaspoon black pepper
Instructions
- If using fresh cabbage, shred it into thin strips along with grated carrots.
- In a large mixing bowl, combine mayonnaise and sweetener until smooth.
- Add white vinegar and lemon juice; stir until well mixed.
- Season with salt and black pepper; mix thoroughly.
- Fold in the cabbage mixture until evenly coated.
- Cover and refrigerate for at least two hours before serving.
Nutrition
- Serving Size: 1 cup (150g)
- Calories: 130
- Sugar: 2g
- Sodium: 230mg
- Fat: 11g
- Saturated Fat: 1g
- Unsaturated Fat: 9g
- Trans Fat: 0g
- Carbohydrates: 6g
- Fiber: 3g
- Protein: 1g
- Cholesterol: 10mg