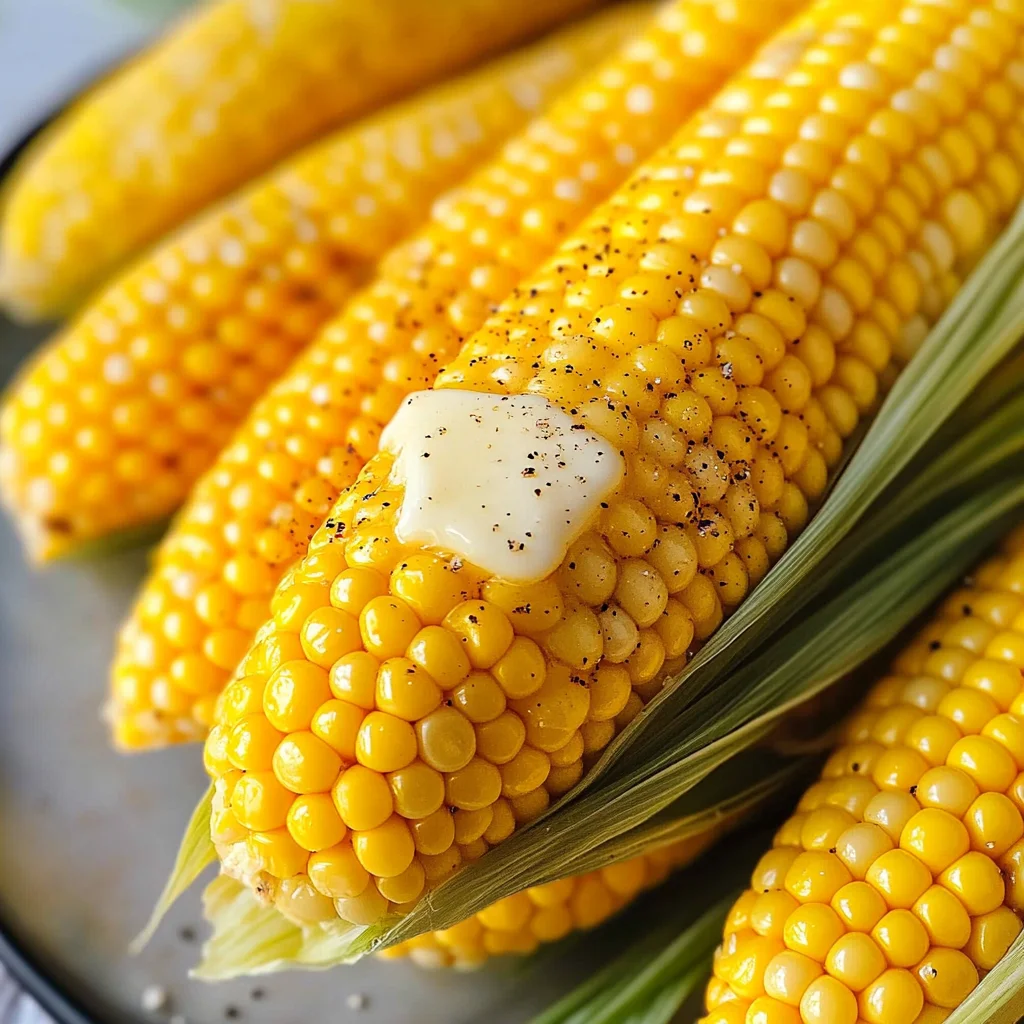
Easy Boiled Corn On The Cob
There’s something utterly magical about corn on the cob, isn’t there? The moment you sink your teeth into a perfectly boiled ear, that sweet, milky kernel bursts forth like a little flavor explosion—a summer symphony of taste that dances across your palate. I’ve always been captivated by how something as simple as corn can evoke such joy and nostalgia. It’s not just food; it’s an experience that brings back memories of sun-soaked picnics and laughter-filled barbecues with family and friends. My heart swells just thinking about it! This Easy Boiled Corn On The Cob recipe is a revelation, bringing together tradition and innovation in the most delightful way. In just 15 minutes, you’ll have succulent, buttery corn ready to grace your table—trust me, this will quickly become your go-to side dish.
Now, let’s take a moment to appreciate the beauty of this humble vegetable. Corn on the cob is not only delicious but also versatile enough to shine in various settings—from casual backyard cookouts to elegant dinner parties. It holds a special place in countless American homes, often served at summer gatherings or around holiday tables. And while it’s easy to overlook its significance amid more elaborate dishes, I promise you: this is one recipe that will elevate your meal with minimal effort! Picture it now: golden-yellow cobs, steaming softly beside grilled veggies or sizzling steaks (or any delicious vegetarian options!), ready to be slathered in butter and sprinkled with salt—a true celebration of summer flavors.
Easy Boiled Corn On The Cob: A Taste of Summer Bliss
Let’s dive right into this cherished recipe! Nothing quite beats the simplicity and satisfaction of boiling corn on the cob. This method allows you to keep things straightforward while showcasing the corn’s natural sweetness and tenderness. You’ll find that each bite is infused with buttery richness, complemented perfectly by a sprinkle of salt or fresh herbs if you choose to jazz things up a bit!
Ingredients:
Embarking on this culinary journey requires just a handful of ingredients, each playing a vital role in creating that unforgettable taste experience.
- 6 corn on the cob (peeled). The star of our show! When selecting corn for boiling, look for ears that are plump with tightly packed kernels and bright green husks. Freshness is key here; if you can get them from a local farmer’s market, even better! The natural sugars in fresh corn convert to starch over time, so aim to cook them shortly after purchase for maximum sweetness. Peeling them beforehand ensures they’re ready for the pot without any fuss.
- 1 – 2 tsp sugar (optional). This little touch might seem insignificant at first glance, but adding sugar to the boiling water can enhance the natural sweetness of the corn even further. It’s truly optional; however, if you’re using slightly older corn or want that extra boost of flavor, I wholeheartedly recommend it! Just remember—this isn’t mandatory; fresh sweet corn might not need any help at all!
- 2 tbsp butter. Ahh, butter—the liquid gold that transforms our boiled corn into something extraordinary! Using high-quality unsalted butter allows you to control the saltiness of your dish while still imparting that rich creaminess we crave. As it melts over the hot kernels after cooking, it creates an irresistibly lush coating that clings lovingly to every bite.
- Salt and black pepper to taste. These classic seasonings are essential for enhancing flavors without overpowering them. Salt boosts sweetness while black pepper adds warmth and depth—together they create harmony on your plate. Go ahead and adjust these according to your preference; after all, cooking should feel personal!
- Fresh dill (optional). If you’re feeling adventurous or simply love herbaceous flavors like I do, consider adding fresh dill as a finishing touch! It adds a lovely brightness and aromatic element that pairs beautifully with buttery corn. Just chop some finely before serving—it’s like a burst of garden freshness atop each tender kernel!
Equipment You’ll Need:
Having the right tools makes this cooking experience smoother and more enjoyable! While these aren’t ingredients per se, they are essential partners in creating something wonderful.
- Large pot: A sturdy large pot is crucial for boiling multiple ears of corn at once without overcrowding them—this ensures even cooking throughout. Look for pots made from heavy materials like stainless steel or enamel-coated cast iron for optimal heat retention.
- Tongs: A good pair of tongs will be your best friend when it’s time to retrieve those hot cobs from boiling water! They provide grip without squishing the kernels—a non-negotiable in preserving their juicy integrity.
- Cutting board: While peeling may seem straightforward enough, having a dedicated cutting board allows you to work efficiently without making a mess in your kitchen!
Now that we’ve gathered our ingredients and equipment let’s jump into preparing this delightful dish!
Step 1: Preparing Your Corn
First things first: we need those gorgeous ears ready for their hot bath! Start by removing the husks and silk from each ear of corn—this step can feel therapeutic as you peel away those layers revealing nature’s beautiful golden gems underneath. Trust me when I say taking care during this process is absolutely paramount; any remaining silk can stick stubbornly to cooked kernels! Make sure each ear is completely clean before moving forward.
Step 2: Boiling Water
Next up is filling your large pot with water—enough so that all six ears can fit comfortably inside without overflowing when they’re added later on. Turn up your heat until it reaches a rolling boil; this will ensure our corn cooks quickly and evenly once submerged. At this point, feel free to add sugar and butter directly into the water—this infusion will set us up for flavorful success right from the get-go!
Step 3: Cooking Time
Once you’ve reached that beautiful boil (and trust me—you’ll know when!), carefully drop in your prepared cobs using tongs—you want them fully submerged but not crammed together too tightly! Reduce heat slightly so it’s simmering rather than violently bubbling away; cover with a lid while they cook undisturbed for about 10–15 minutes depending upon desired tenderness. I encourage you not to rush through this step—allowing time lets those lovely flavors meld beautifully!
Step 4: Finishing Touches
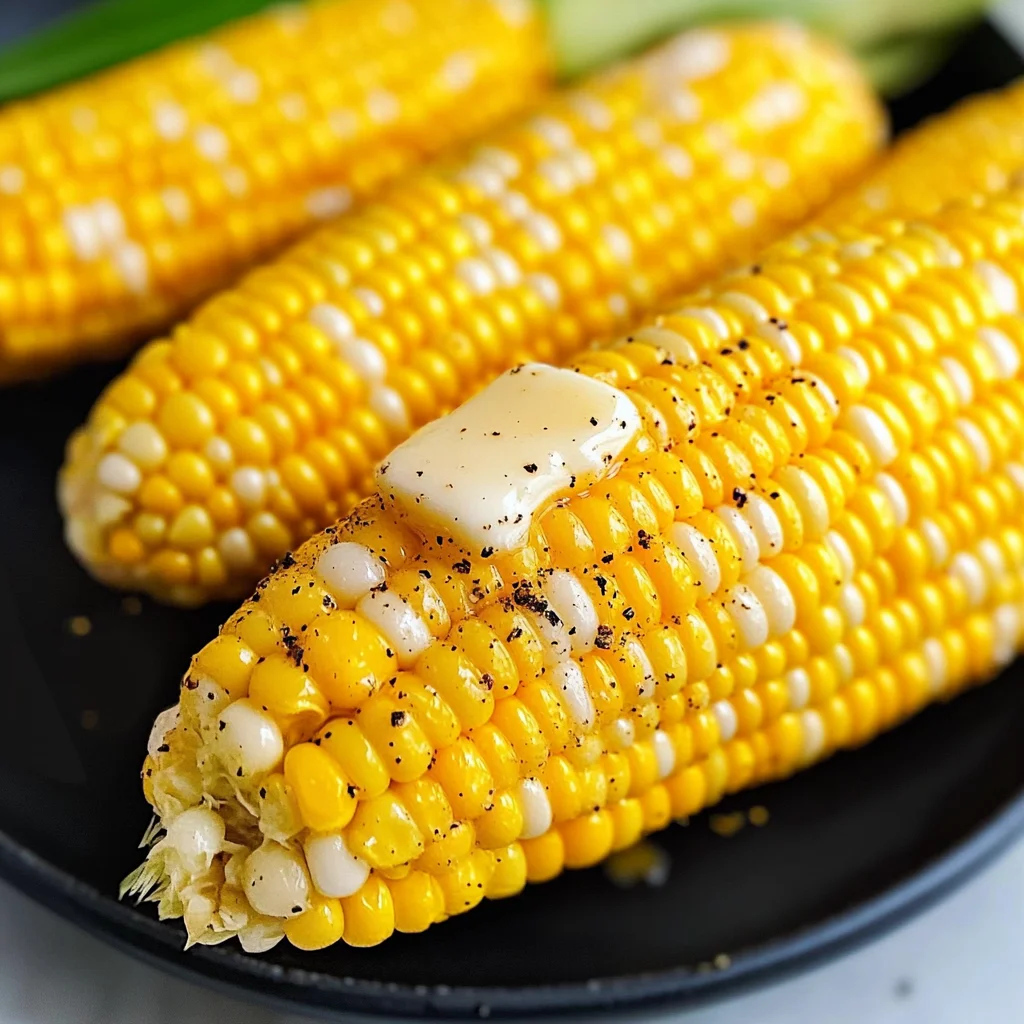
After patiently waiting (it’ll be worth it!), lift out those glorious cobs using tongs—they should be bright yellow and fragrant! Brush each one generously with melted butter while they’re still warm—the aroma alone will fill your kitchen with utter intoxicating delight! Season generously with salt and pepper before deciding whether or not you’ll sprinkle fresh dill atop as well—it truly elevates every bite if you’re keen on herbal notes!
And there you have it—a simple yet profoundly satisfying way to enjoy Easy Boiled Corn On The Cob that’s perfect for any occasion! Serve them warm alongside grilled meats or veggie platters at BBQs—or simply indulge solo because trust me—you deserve every delicious morsel on its own too! Enjoy every blissful bite—I promise it’ll be extraordinary each time!
Step 5: The Sweet Symphony of Boiling Corn
Now that your pot of water is bubbling away like a lively cauldron, it’s time to add the star of our show: the corn! Carefully place the freshly husked corn into the boiling water. I can’t stress enough how important it is to handle the corn gently; this isn’t just any vegetable, this is a treasure from nature! Be sure to reduce the heat to medium after adding the corn, as you want to maintain a steady simmer rather than a furious boil. This gentle cooking allows the kernels to tenderize evenly while preventing them from bursting. You’ll start to see steam rise and bubbles dance around the ears—this is when the magic begins!
As you cover the pot, let your senses guide you; inhale deeply and savor that sweet aroma wafting up. This process will take about 10 to 15 minutes, but here’s where patience plays a crucial role. Trust me on this one: if you rush it, you’ll miss out on that tantalizing sweetness that only comes from allowing those kernels to soak up all that boiling goodness! Around the 10-minute mark, it’s a great idea to sneak a peek. Use tongs to gently pull an ear out and take a tiny bite; you’re looking for that tender yet firm texture—a true indicator that your corn is ready for its grand debut.
Step 6: The Art of Flavor Infusion
While your corn is dancing in that hot bath, let’s talk about flavor infusion—an utterly intoxicating part of this recipe! If you chose to add sugar and butter earlier (which I highly recommend), now’s your chance to appreciate why these ingredients are non-negotiable in this dish. The sugar not only enhances the natural sweetness of the corn but also helps caramelize its outer layer slightly as it cooks, creating an even richer flavor profile. Similarly, butter melts into the water, transforming it into liquid gold that coats every kernel with creamy goodness. This combination results in an extraordinary taste experience that’s simply unforgettable.
If you’re feeling adventurous—or if your taste buds are begging for something more—consider adding milk (up to one cup) into your boiling water during this step. The milk infuses each ear with an additional layer of creaminess and sweetness, making every bite feel like a warm hug from Grandma herself! But be careful here; avoid salt in the water as it can toughen those precious kernels, which we certainly don’t want. Instead, save that delightful seasoning for after cooking when each cob can be adorned with just enough salt and pepper to enhance its natural flavors without overpowering them.
Step 7: The Great Reveal
Ahh, it’s almost time for the grand reveal! Once you’ve boiled your corn for that perfect 10–15 minutes—depending on how tender you like it—it’s time to remove it from its steamy sanctuary. Using tongs, carefully lift each ear out of the pot and let any excess water drip off. Here’s where visual cues come into play; look for bright yellow kernels glistening with moisture—that’s what we want! Allowing them to rest momentarily on a plate or cutting board means they won’t become soggy under their own weight.
Now comes my favorite part—brushing on that melted butter! I promise you’ll want every kernel drenched in this rich buttery goodness because it elevates our humble boiled corn on the cob into something truly special. Go ahead and brush liberally; let those golden drops rain down like sunshine on each ear! Afterward, season generously with salt and black pepper; these simple touches will bring out every nuance in flavor while keeping things beautifully balanced.
Step 8: Serving Suggestions That Sing
Your Easy Boiled Corn On The Cob deserves nothing less than a standing ovation at your dining table! Serve warm immediately after preparing—not just because it’s delicious hot but because that’s when all those flavors are singing their sweetest symphony together. Whether you’re hosting friends for a summer barbecue or enjoying a cozy family dinner indoors during those chilly months, corn on the cob brings everyone together in pure joy.
For added flair and freshness, consider garnishing with fresh dill or even crumbled cheese if you’re feeling fancy! These final touches brighten up each bite while offering contrasting flavors—imagine biting into sweet corn followed by herby notes or creamy richness. You can also make things fun by setting up a topping station where guests can add their preferred seasonings or toppings right at their seats; trust me when I say this will spark delightful conversations about everyone’s personal preferences!
Now take a moment before diving in—enjoy looking over what you’ve created! When you share these tender cobs with loved ones, prepare yourself for smiles of pure bliss as they experience this beautiful dish made from such simple ingredients yet bursting with love and flavor.
Final Touches: Embrace Your Creation
In conclusion, remember this Easy Boiled Corn On The Cob recipe isn’t just about following steps but embracing tradition while infusing your unique touch along the way. Each bite carries memories waiting to be created—from backyard barbecues filled laughter echoing through summer nights to quiet evenings spent savoring sweet bites while cozied up at home.
So gather those ears of corn next time you’re at the market (or better yet—visit local farms!), and don’t hesitate to whip up this delightful dish again and again throughout summer or anytime cravings strike. Trust me when I say there’s something profoundly satisfying about sharing something so simple yet so utterly extraordinary with those we cherish most! Happy cooking—and may every kernel bring joy!
Storage and Enjoyment Tips for Your Easy Boiled Corn On The Cob
Now that you’ve mastered the art of creating Easy Boiled Corn On The Cob, it’s time to revel in the joy of savoring this sweet, buttery delight! But what happens if you find yourself with leftovers? Fear not, my friend! There are so many ways to preserve that incredible flavor and texture for another day. Whether you’re planning a picnic or simply want to enjoy a taste of summer later on, I’m here to guide you through some fantastic storage options.
Storing Leftover Easy Boiled Corn On The Cob
To keep your corn at its peak freshness, it’s essential to store it properly. After letting the corn cool down to room temperature, I recommend placing it in an airtight container or wrapping it tightly in plastic wrap. This method is crucial because it locks in moisture and prevents that dreaded staleness. You can keep your leftover corn in the refrigerator for up to 3 days without losing its delightful sweetness. For those who want to take things a step further, consider placing a slice of bread in the container with the corn; this little trick helps maintain moisture levels beautifully. When you’re ready to indulge again, just reheat your corn either in the microwave for about 30 seconds or warm it gently on a stovetop with a touch of butter – trust me, it’ll taste just as good as when it was freshly made!
Freezing Easy Boiled Corn On The Cob for Later
If you’re looking for a way to enjoy your Easy Boiled Corn On The Cob long after summer has faded into fall, freezing is an excellent option! Begin by cutting the kernels off the cob (if you prefer) or leaving them intact for an impressive presentation. Wrap each cob tightly in plastic wrap or aluminum foil – ensuring there’s no air trapped inside is absolutely paramount. Once sealed, place them in a freezer-safe bag labeled with the date. You can keep frozen corn on the cob for about 6-12 months! Whenever you’re ready to enjoy that taste of summer again, you can simply thaw it overnight in the refrigerator or boil straight from frozen—just add a few extra minutes to your cooking time. It’s such a convenient way to bring back memories of sunny picnics and backyard barbecues any time you crave that sweet crunch!
Easy Boiled Corn On The Cob

Enjoy sweet and buttery Easy Boiled Corn On The Cob ready in just 15 minutes! Discover tips and serving ideas now!
- Prep Time: 5 minutes
- Cook Time: 15 minutes
- Total Time: 20 minutes
- Yield: Serves 6
- Category: Side Dish
- Method: Boiling
- Cuisine: American
Ingredients
- 6 ears of corn on the cob (peeled)
- 1–2 teaspoons sugar (optional)
- 2 tablespoons unsalted butter
- Salt and black pepper to taste
- Fresh dill (optional)
Instructions
- Remove husks and silk from each ear of corn, ensuring they are clean.
- Fill a large pot with water, enough to cover all ears, and bring it to a rolling boil. Optionally, add sugar and butter at this stage.
- Carefully place the corn into the boiling water and reduce heat to medium. Cover and simmer for about 10–15 minutes until tender.
- Using tongs, remove the corn from the water and let excess water drip off. Brush generously with melted butter and season with salt and pepper. Add fresh dill if desired.
Nutrition
- Serving Size: 1 ear of corn (120g)
- Calories: 120
- Sugar: 5g
- Sodium: 0mg
- Fat: 5g
- Saturated Fat: 3g
- Unsaturated Fat: 2g
- Trans Fat: 0g
- Carbohydrates: 20g
- Fiber: 2g
- Protein: 4g
- Cholesterol: 10mg