Crispy Hawaiian Garlic Chicken: A Spicy Island-Inspired Delight
There’s something truly enchanting about cooking that goes beyond simply preparing a meal; it’s about creating experiences that weave together flavors, aromas, and memories. When I think of Crispy Hawaiian Garlic Chicken: A Spicy Island-Inspired Delight, I can almost hear the waves crashing against the shore and feel the warm breeze brushing against my skin. This dish is not just food; it’s a passport to paradise, where sweet and savory dance in harmony, and a hint of spice ignites your taste buds. Every bite transports you to sun-kissed beaches, wrapped in the warmth of island hospitality. I promise you, once you try this recipe, you’ll be hooked on its utterly intoxicating combination of flavors.
Cooking this dish feels like an adventure—each step unveils a new layer of flavor that contributes to a symphony of tastes on your palate. The crispy chicken thighs are enveloped in a luscious soy garlic sauce that brings a depth of umami to the table, while the fried jalapeño rings add a delightful crunch and heat that makes your mouth sing. It’s truly extraordinary how simple ingredients can come together to create such magic! Whether you’re hosting friends or enjoying a cozy dinner at home, this Crispy Hawaiian Garlic Chicken will be the star of the show. So let’s dive into this culinary journey together!
Crispy Hawaiian Garlic Chicken: A Spicy Island-Inspired Delight: Flavorful Fusion Awaits
Welcome to a delightful culinary escapade! In this recipe for Crispy Hawaiian Garlic Chicken, we’ll explore how to achieve that perfect golden crispiness on succulent chicken thighs while bathing them in a wonderfully aromatic soy garlic sauce—an experience you won’t forget!
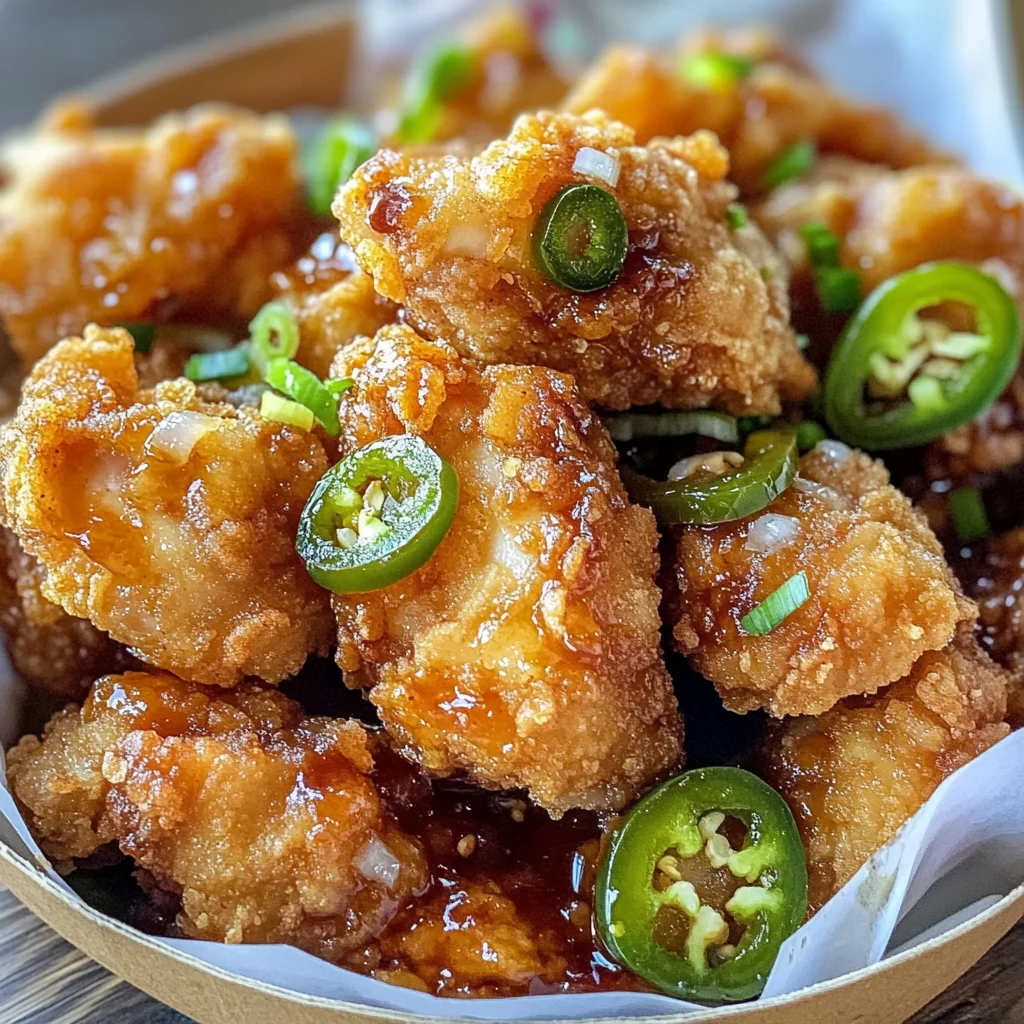
Ingredients:
As we embark on this culinary journey together, let’s take a moment to appreciate each ingredient that will play a pivotal role in crafting our Crispy Hawaiian Garlic Chicken. Each item brings something special to the table!
-
1 ½ pounds boneless, skinless chicken thighs. These are my go-to choice for this recipe because they stay wonderfully moist and tender during cooking. Unlike chicken breasts, which can dry out easily, thighs provide rich flavor and juiciness that make every bite satisfying. When selecting chicken thighs at the market, look for pieces with firm texture and no discoloration; freshness is key! If you prefer white meat, feel free to substitute with boneless chicken breasts but keep an eye on cooking time as they may cook faster.
-
1 jalapeño (optional), sliced into ¼-inch thick slices. Ah, the jalapeño—a gem of spiciness! It adds an exciting kick that beautifully complements the sweetness of our sauce. If you’re like me and enjoy some heat, leave those seeds in; however, if you’re sensitive to spice, consider removing them or opting for a milder pepper like a bell pepper for added crunch without overwhelming heat. The vibrant green color also makes your dish pop visually!
-
½ teaspoon salt. Salt is absolutely paramount in enhancing flavors—it acts as an amplifier for all the other ingredients involved! This small but mighty seasoning will help draw out moisture from our chicken while adding depth to every component of our dish. Be sure to sprinkle it evenly over your chicken so every piece gets its fair share of flavor.
-
½ cup flour. Flour serves as one half of our crispy coating duo—it provides structure and helps create that gorgeous golden crust when fried! Make sure you use all-purpose flour here; it has just the right amount of protein content for achieving crispiness without being too heavy or dense.
-
¼ cup cornstarch. Now here’s where we elevate our coating game! Cornstarch is crucial because it absorbs moisture better than flour alone, resulting in an ultra-crispy exterior when fried—trust me on this one! Mixing it with flour gives us that lightness we crave in fried foods without compromising texture.
-
¼ teaspoon coarse ground black pepper. This seasoning introduces subtle heat and complexity to our dish without overwhelming the other flavors. Freshly ground black pepper is preferred here; it releases more oils when freshly ground compared to pre-ground varieties—this means more flavor in every bite!
-
Oil for frying. The type of oil you choose plays an important role in frying—opt for oils with high smoke points like vegetable or canola oil since they help achieve that perfect crispy texture without burning your food before it’s cooked through.
-
¼ cup soy sauce. Soy sauce is liquid gold when it comes to flavoring dishes! It brings an earthy umami essence that’s hard to replicate with anything else—it balances beautifully against the sweetness from sugar later on in our sauce.
-
¼ cup sugar. Here’s where we find harmony between sweet and salty—the sugar not only balances out the saltiness from soy sauce but also contributes to caramelization during cooking which enhances overall flavor complexity.
-
3 tablespoons water. Water serves as a bridge between our ingredients in the sauce; it helps dissolve sugar completely while ensuring everything combines smoothly—don’t skip this step!
-
½ teaspoon ground ginger. Ground ginger adds warmth and slight spiciness—perfectly complementing garlic throughout our dish! Fresh ginger is fantastic if available but ground works beautifully too; just remember it’s more concentrated so adjust according to taste preference.
-
2 tablespoons garlic, minced. Garlic is perhaps one of my favorite ingredients ever—it infuses everything with its aromatic allure! Minced garlic forms part of both our frying technique and sauce mixture—its pungency mellows beautifully when cooked down yet remains present enough for delicious impact.
Equipment You’ll Need:
Having the right tools at hand makes cooking not only easier but much more enjoyable! Think of these pieces as essential partners helping us create something wonderful together.
-
Deep frying pan or wok: A deep frying pan or wok allows ample space for oil which guarantees even frying without overcrowding—this means getting perfectly crispy chicken instead of soggy bites! If using a smaller pot isn’t avoidable then fry smaller batches at once; patience pays off!
-
Slotted spoon: This handy tool serves two purposes: first, it’s perfect for lifting fried chicken out while allowing excess oil to drain away; second, it’s great for maneuvering those fragile jalapeño slices once they’re crisped up just right!
-
Mixing bowls: A couple of mixing bowls are necessary—not only do they help combine dry coatings effectively but they’re also useful when tossing fried chicken with sauces later on!
-
Saucepan: We need something sturdy yet manageable where we’ll prepare our luscious soy garlic sauce—a saucepan should suffice perfectly here since we’re not simmering anything long-term.
Now that we have gathered all our ingredients and equipment together…
Preparing the Crispy Hawaiian Garlic Chicken: Perfecting Our Technique
Step 1: Cutting & Seasoning Your Chicken
To start off on the right foot with your Crispy Hawaiian Garlic Chicken, let’s cut those beautiful boneless skinless chicken thighs into 1-inch pieces—a size just perfect for frying! By cutting them into bite-sized chunks rather than leaving them whole, each piece has more surface area exposed which allows them to cook evenly while developing that coveted crispy exterior we crave so dearly. Once cut up nicely (and trust me—you’ll want sharp knives!), sprinkle them generously with salt and coarse black pepper; these seasonings serve as foundational layers bringing out their natural flavors before any coating happens—and believe me when I say this first layer matters immensely!
Step 2: Preparing Your Jalapeños (Optional)
If you’ve chosen to add jalapeños (and I wholeheartedly encourage it if you’re adventurous), grab one fresh pepper now! Slice it into ¼-inch thick rings carefully; these delightful gems will add not only spice but also texture contrast once fried up later on—they’re truly irresistible! If you’re worried about heat levels creeping too high for comfort though? No problem at all—feel free either remove seeds before slicing or replace them entirely with milder peppers such as bell peppers instead—they’ll still give lovely crunch without overpowering flavor balance!
Step 3: Creating Our Crunchy Coating Mixture
Next up comes one of my favorite steps—the creation of our crunchy coating mixture by combining flour with cornstarch alongside additional salt & black pepper in a bowl until well blended together—that’s right folks; we’re setting ourselves up here for success by ensuring even distribution throughout all future bites served later on down this journey ahead! Cornstarch plays such an important role—it helps keep things light yet crispy during frying so don’t skimp out here either—every little detail counts toward achieving perfection after all…
Step 4: Heating Oil For Frying
With all preparations made thus far leading us towards ultimate satisfaction ahead—we’re ready now heating oil over high heat within either deep-frying pan/wok until reaching around 350°F (175°C). An instant-read thermometer works wonders here but if lacking one handy? Just drop small amounts from earlier coating mixture into hot oil watching closely until sizzling ensues—that’s how you’ll know things are ready finally! Patience is key here again folks—as rushing could result in greasy results instead rather than glorious golden-brown perfection…
And there we have it friends—the beginning stages laid out beautifully before us as we build toward creating something utterly magical within each bite enjoyed later down line! Stay tuned because moving forward through following steps will lead us closer toward tasting those tropical delights soon enough…
Step 5: Frying to Golden Perfection
Now that your oil is sizzling and inviting, it’s time to dive into the frying process. This step is where the magic happens, transforming those seasoned chicken pieces into crispy, mouthwatering morsels that will have everyone clamoring for seconds. As you gently lower the chicken into the hot oil, make sure not to overcrowd the pan. This is absolutely paramount—if you toss in too many pieces at once, you’ll lower the oil’s temperature and end up with greasy, soggy chicken instead of that coveted crispiness! Fry each batch for about 4-5 minutes, turning them occasionally with a pair of tongs to ensure even cooking. You’re looking for that beautiful golden brown color, which signals that they are perfectly cooked through and ready to be removed.
The science behind frying is fascinating; the high heat instantly creates a crust on the chicken, sealing in moisture and flavor while keeping the outside delightfully crunchy. I promise you, this is where patience pays off—resist the urge to poke and prod at them too soon. Once they reach that golden hue, use a slotted spoon to lift them out of the oil and transfer them onto a plate lined with paper towels. This simple yet essential step allows any excess oil to drain away, ensuring your chicken remains crispy rather than oily. And trust me, there’s nothing quite like biting into a piece of chicken that shatters perfectly under your teeth!
Step 6: Bringing on the Heat – Frying Jalapeños
With your deliciously crispy chicken waiting in anticipation, it’s time to turn our attention to those jalapeño rings that will add an irresistible layer of spice and crunch. Just imagine how delightful it will be to bite into these little nuggets of heat! Carefully drop your sliced jalapeños into the same hot oil you used for frying the chicken; they only need about 30 seconds or so until they become crispy and slightly blistered. Keep a close eye on them because they can go from perfect to burnt in a flash! The sizzling sound is music to my ears—it means you’re on your way to creating something truly extraordinary.
Frying jalapeños not only intensifies their flavor but also mellows out some of their raw heat while infusing that lovely smoky profile we adore in dishes like this one. Remember, if you opted to remove seeds earlier for a milder taste, now’s when you’ll appreciate your choice; these fried rings should complement rather than overwhelm your dish. Once they’re golden and crispy, fish them out with a slotted spoon just like you did with the chicken and place them on a paper towel-lined plate next to your fried delights—they’ll be ready for their big debut shortly!
Step 7: Crafting Your Irresistible Sauce
Now, let’s create a sauce that ties everything together beautifully—a sauce so good you’ll want to drizzle it over everything! In a medium saucepan set over medium-high heat, combine ¼ cup soy sauce, ¼ cup sugar, 3 tablespoons water, ½ teaspoon ground ginger, and 2 tablespoons minced garlic. As soon as you blend these ingredients together in the pan, you’ll notice how they begin forming a harmonious mixture—this is where all those tantalizing flavors come alive! The soy sauce brings forth its rich umami essence while sugar balances it with sweetness; together they create an utterly intoxicating base.
As you bring this mixture up to a gentle boil while whisking continuously (this step ensures even distribution of flavors), take note of how quickly things transform—the sugar dissolves beautifully and melds together with garlic and ginger’s aromatic charm. You’ll know it’s ready when it reaches a soft boil; this usually takes just a few minutes. Once boiling begins, reduce the heat and let it simmer briefly before turning off the stove—it should have thickened slightly and taken on that glossy finish we all adore in sauces! This flavorful concoction will coat your crispy chicken like liquid gold—trust me; this final touch makes all the difference between good and absolutely sensational.
Step 8: Tossing Together for Flavor Harmony
The moment has finally arrived—the grand assembly of all our delicious components! In an oversized mixing bowl (because we want room to toss without any flying debris), place your beautifully fried chicken pieces first. Now, it’s time for that glorious sauce we just crafted—you’re going to pour it over your crispy delights like icing on a cake! Using gentle motions with tongs or a spatula, carefully toss everything together until each piece is generously coated in that sweet-savory goodness. It’s crucial not to over-mix here; we want those crispy exteriors intact so every bite remains delightfully crunchy.
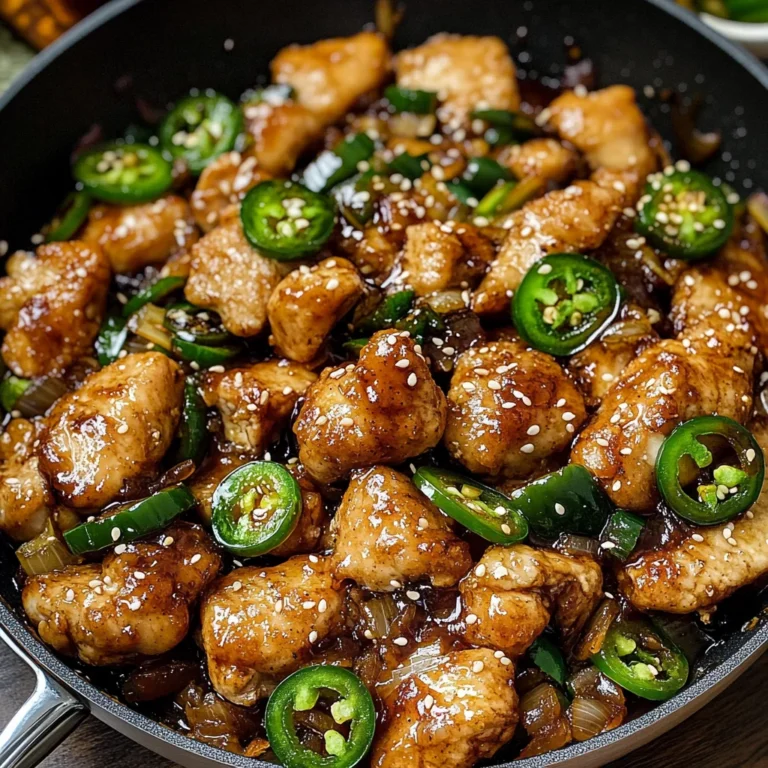
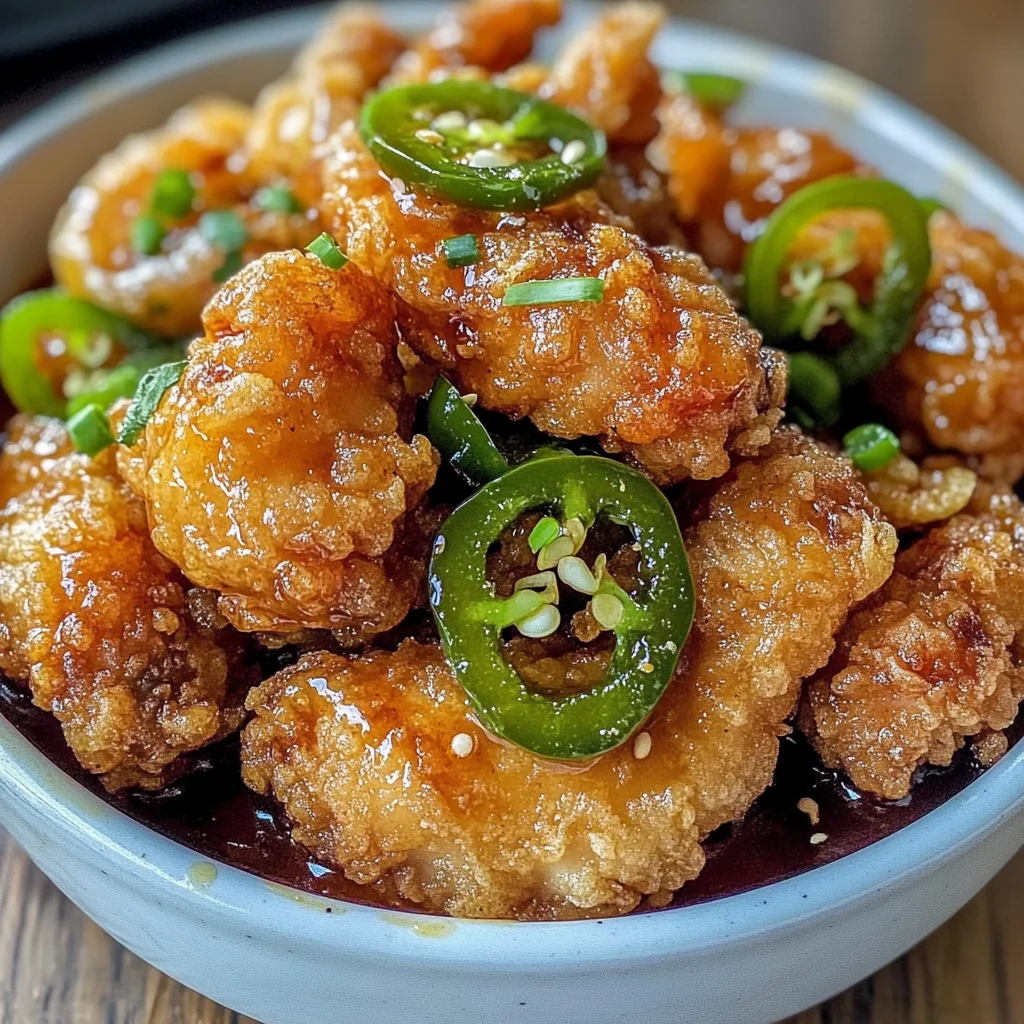
As you combine these elements, take a moment to appreciate how gorgeous this dish looks—the contrast between shiny sauce-covered chicken pieces and bright green jalapeño rings adds visual appeal that’ll impress anyone fortunate enough to join you at dinner tonight! If you’ve been careful during frying (and I know you have), this final step will yield perfectly balanced flavors—sweetness from sugar dancing alongside savory notes from soy sauce complemented by aromatic garlic and ginger warmth. Serve immediately after tossing so everyone gets an unforgettable experience right from first bite!
Final Touches: Adding Freshness & Presentation
To elevate your Crispy Hawaiian Garlic Chicken even further—and trust me; it’s worth it—let’s not forget about garnishing! Moving swiftly towards serving time (because who can wait?), transfer your coated treasures onto an elegant serving platter or individual bowls if you’re feeling fancy. Now comes one of my favorite parts: topping off this masterpiece with those glorious crispy jalapeño rings! Their vibrant green color pops against the golden chicken while promising an extra kick of flavor with every forkful.
But we’re not done yet—add some finely chopped cilantro or green onions for freshness. This touch not only enhances presentation but also adds herbaceous brightness that cuts through richness beautifully. And if you’re feeling adventurous (and I always encourage such whimsy!), squeeze fresh lime juice over everything just before serving—it transforms each bite into an explosion of flavors that’ll leave everyone raving about this dish long after dinner concludes! Trust me when I say that every element here works tirelessly together like best friends at a luau—creating memories everyone will cherish around their dining table!
Enjoy sharing this delightful creation reminiscent of sunny beaches and island vibes—your friends will thank you for introducing them to such profound satisfaction served on their plates!
Storage and Enjoyment Tips for Your Crispy Hawaiian Garlic Chicken: A Spicy Island-Inspired Delight
Now that you’ve crafted your Crispy Hawaiian Garlic Chicken, it’s time to dig in and enjoy every bite! But what about those delightful leftovers? Fear not! This dish not only shines on the first day but also keeps well for future feasts. You can savor those island-inspired flavors again by following a few simple storage tips that will help maintain its crispy allure.
Storing Leftover Crispy Hawaiian Garlic Chicken: A Spicy Island-Inspired Delight
To ensure your leftover Crispy Hawaiian Garlic Chicken stays as delicious as the day it was made, store it in an airtight container. I prefer a glass container because it doesn’t absorb odors and allows you to see what’s inside—keeping everything fresh and appealing! Place the container in the refrigerator where it will stay good for about 3-4 days. For added freshness, you might consider placing a slice of bread in with the chicken; this little trick helps absorb moisture and keeps your crispy coating intact. While reheating, I recommend using an oven rather than a microwave to restore that glorious crunch—just pop it in at 350°F (175°C) for about 10-15 minutes until heated through and crisped up again. Trust me, you’ll be amazed at how close it tastes to freshly made!
Freezing Crispy Hawaiian Garlic Chicken for Later
If you’re looking to savor this dish even further down the line, freezing is a fantastic option! To freeze your Crispy Hawaiian Garlic Chicken, allow it to cool completely before transferring it to a freezer-safe bag or airtight container. Make sure to remove as much air as possible from the bag before sealing—this helps prevent freezer burn and preserves flavor beautifully. Properly stored, your chicken can last up to 2 months in the freezer without losing its deliciousness. When you’re ready to indulge again, simply thaw it overnight in the fridge, then reheat in the oven just like you would with leftovers. The beauty of having this scrumptious dish ready to go makes weeknight dinners a breeze; imagine pulling out a taste of Hawaii whenever you need a quick meal!
Dinner
Crispy Hawaiian Garlic Chicken: A Spicy Island-Inspired Delight
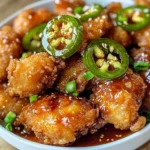
Discover Crispy Hawaiian Garlic Chicken: A Spicy Island-Inspired Delight bursting with flavor! Try this easy recipe today for an unforgettable meal!
- Prep Time: 20 minutes
- Cook Time: 15 minutes
- Total Time: 35 minutes
- Yield: Serves approximately 4 people 1x
- Category: Main
- Method: Frying
- Cuisine: Hawaiian
Ingredients
- 1 ½ pounds boneless, skinless chicken thighs
- 1 jalapeño (optional), sliced into ¼-inch thick slices
- ½ teaspoon salt
- ½ cup flour
- ¼ cup cornstarch
- ¼ teaspoon coarse ground black pepper
- Oil for frying
- ¼ cup soy sauce
- ¼ cup sugar
- 3 tablespoons water
- ½ teaspoon ground ginger
- 2 tablespoons garlic, minced
Instructions
- Cut chicken thighs into 1-inch pieces and season with salt and black pepper.
- In a bowl, combine flour, cornstarch, and additional seasoning. Dredge chicken pieces in the mixture.
- Heat oil in a deep frying pan or wok until it reaches about 350°F (175°C).
- Fry chicken in batches for 4-5 minutes until golden brown; drain on paper towels.
- Fry jalapeño rings for about 30 seconds until crispy; set aside on paper towels.
- In a saucepan, combine soy sauce, sugar, water, ground ginger, and minced garlic over medium heat. Bring to a gentle boil while whisking until thickened.
- Toss fried chicken in the sauce until well-coated; serve topped with crispy jalapeños.
Nutrition
- Serving Size: 1 piece (80g)
- Calories: 280
- Sugar: 6g
- Sodium: 600mg
- Fat: 15g
- Saturated Fat: 3g
- Unsaturated Fat: 10g
- Trans Fat: 0g
- Carbohydrates: 20g
- Fiber: 1g
- Protein: 20g
- Cholesterol: 85mg