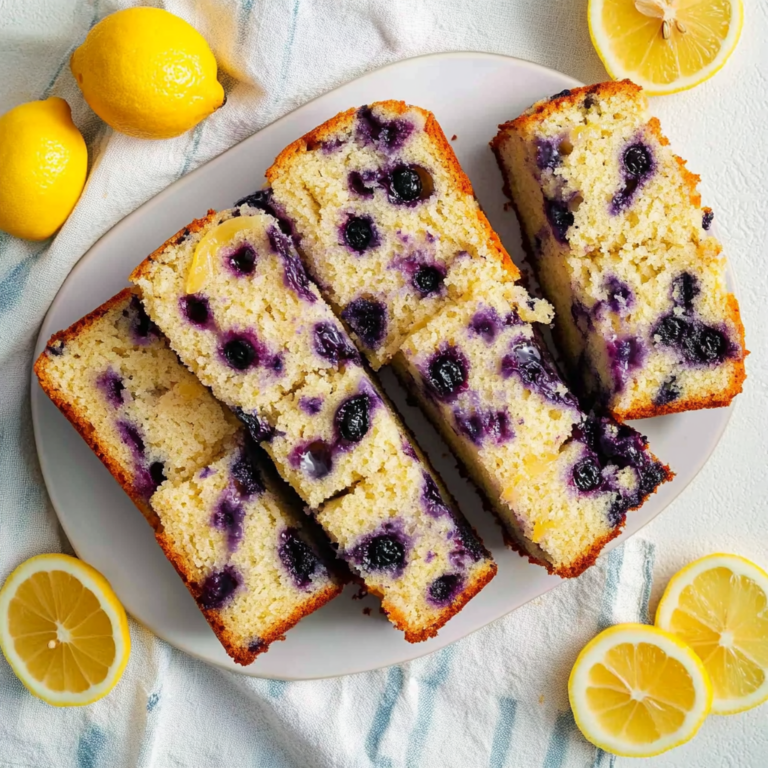
Blueberry Peach Sour Cream Cake
There’s something profoundly magical about a cake that captures the essence of summer and the warmth of fall in every bite. When I think of my Blueberry Peach Sour Cream Cake, I’m transported to sun-drenched orchards, where the sweet scent of ripe peaches mingles with the tartness of freshly picked blueberries. This isn’t just a recipe; it’s a celebration of life’s fleeting moments, where each slice tells a story filled with laughter, love, and shared memories. The beauty of this cake lies in its balance – the soft, tender crumb enveloping pockets of juicy fruit creates an experience that is utterly intoxicating. Trust me when I say that baking this cake will wrap you in a warm embrace, making your kitchen feel like home.
This Blueberry Peach Sour Cream Cake brings together two beloved fruits in a way that feels both nostalgic and innovative. The sour cream adds a delightful richness and moisture that elevates it beyond ordinary cakes. As the seasons shift, so do our cravings; this cake embodies that transition beautifully. Imagine serving it warm from the oven on a lazy Sunday brunch or sharing it at a picnic as the leaves begin to turn. It’s perfect for any gathering or simply as a treat for yourself because sometimes we need to indulge our own hearts too.
Blueberry Peach Sour Cream Cake: A Slice of Summer Bliss
If there’s one cake that encapsulates everything beautiful about seasonal baking, it’s this one. With hints of sweetness from blueberries and peaches dancing through each forkful, this cake is not just food; it’s an experience waiting to happen.
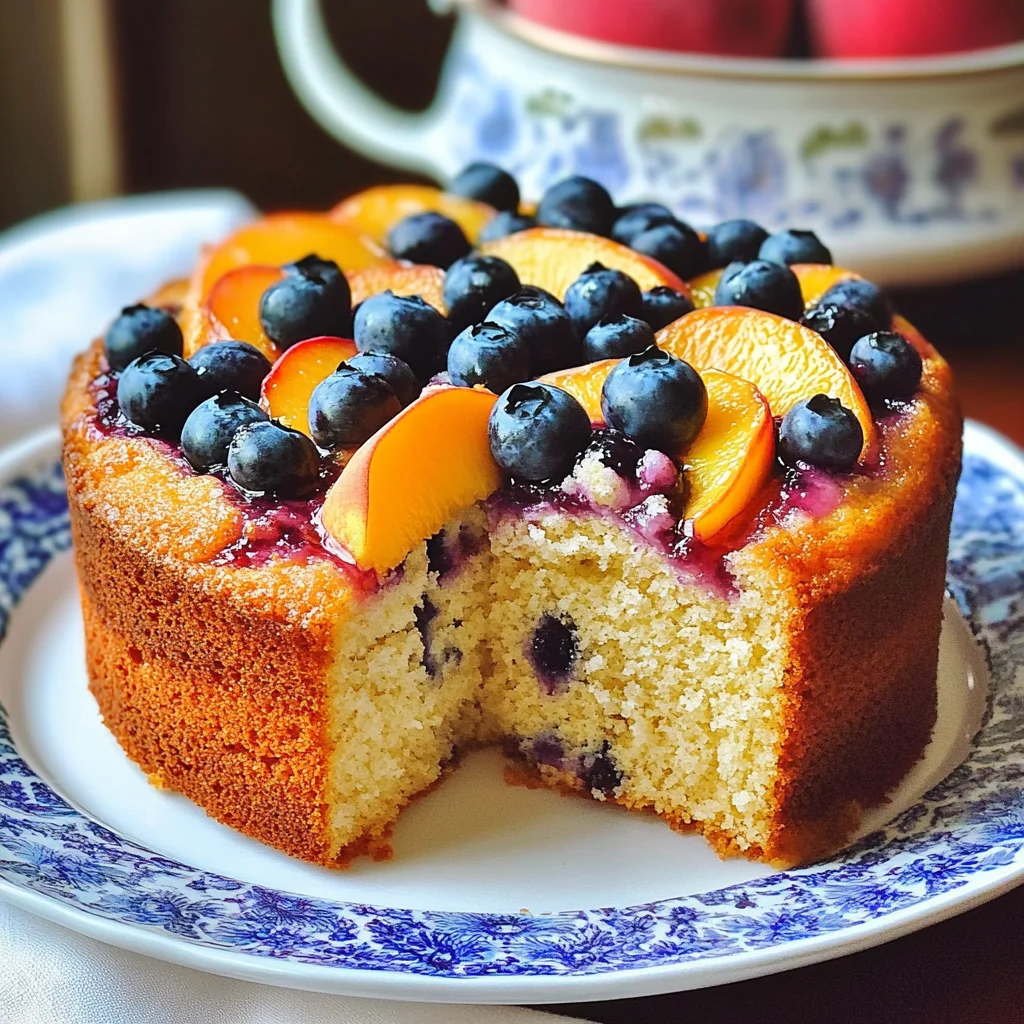
Ingredients:
As we embark on this culinary journey together, let me share why each ingredient plays a vital role in creating our masterpiece. Each component contributes not only to flavor but also to texture and overall success.
- 2 cups all-purpose flour. This is the foundation of our cake, providing structure while allowing for that tender crumb we crave. It’s crucial to use all-purpose flour here rather than bread or cake flour because it strikes the perfect balance between protein content and lightness, ensuring your cake has enough backbone without becoming too dense. When measuring your flour, avoid packing it down; instead, spoon it into your measuring cup and level it off for accuracy.
- 1/4 teaspoon baking soda. While often overlooked, this little leavening agent helps balance acidity in our recipe, especially from the sour cream. It plays nicely with baking powder to create a lovely rise in our cake while contributing to that desirable moist texture we’re aiming for. Just remember that freshness matters—check your baking soda’s expiration date before using!
- 1 1/2 teaspoons baking powder. This is essential for giving our Blueberry Peach Sour Cream Cake its lift and lightness! The combination of baking powder with sour cream creates an airy structure that lets all those delicious fruits nestle throughout the batter beautifully without weighing things down.
- 3/4 cup unsalted butter, softened to room temperature. Ahh, butter—the liquid gold of baking! This rich ingredient not only contributes incredible flavor but also creates a tender crumb through the creaming process we’ll be employing later on. Make sure it’s at room temperature so it incorporates evenly into your batter; cold butter won’t blend well and could lead to uneven textures.
- 1 1/3 cups granulated sugar. Sugar isn’t just sweet—it plays multiple roles in our cake! It helps create moisture retention and enhances browning during baking while balancing out the tartness from our fruits beautifully. When you cream sugar with butter until light and fluffy, you’re also incorporating air into your batter—a key step for achieving that airy finish.
- 2 teaspoons vanilla extract. Vanilla is like an old friend who knows exactly how to enhance flavors without stealing the spotlight! This fragrant addition will evoke warmth throughout your cake while complementing both blueberries and peaches perfectly—making them sing harmoniously on your palate!
- 3 large eggs. Eggs are vital for structure as they coagulate during baking and help bind all our ingredients together beautifully while adding richness as well! Room temperature eggs incorporate more easily into batters compared to cold ones—so don’t skip letting them sit out beforehand!
- 2/3 cup sour cream. The secret weapon that brings moisture and tanginess directly into this delectable dessert! Its acidity activates both our baking soda and powder while making every bite melt-in-your-mouth tender—what could be better? If you don’t have sour cream on hand, Greek yogurt is an excellent substitute!
- 3/4 cup fresh blueberries. These juicy gems are what make this recipe truly shine! Their burst of flavor contrasts perfectly with the sweetness of peaches while providing vibrant color throughout each slice—a feast for both eyes and taste buds alike! Look for plump berries when purchasing; frozen can work too but may alter texture slightly.
- 2 or 3 medium peaches, unpeeled & sliced (enough to cover the surface). Oh my goodness—the sweet aroma alone will have you swooning! Using unpeeled peaches adds texture and substance while allowing their natural sweetness to shine through against those luscious blueberries—creating harmony in every bite!
- 3 tablespoons turbinado sugar, demerara or brown sugar (optional). While optional, sprinkling some sugar on top before baking gives us an enticing golden crust with added crunch—a delightful finishing touch if you want extra indulgence!
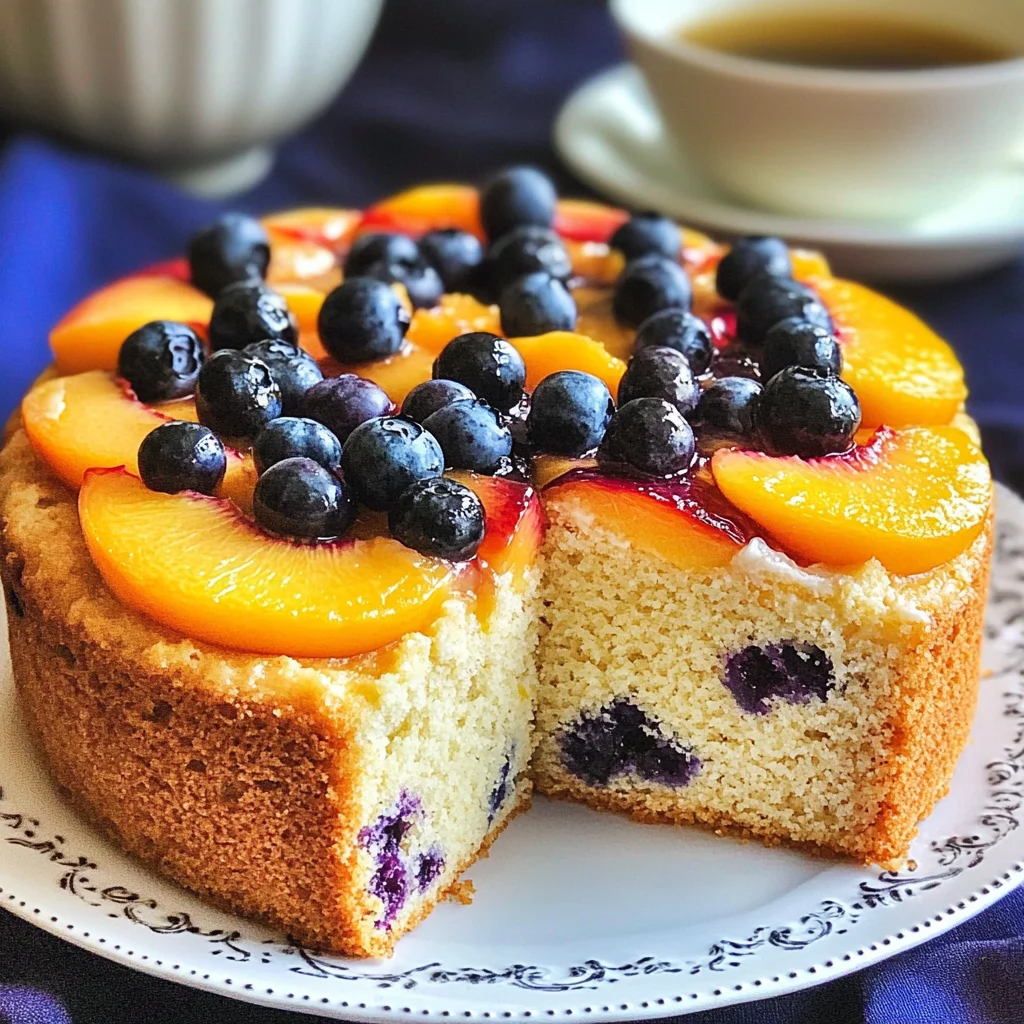
Equipment You’ll Need:
Having the right tools can make all the difference when creating culinary magic in your kitchen! Think of these pieces as essential partners in crafting something wonderful together.
- 9 or 10-inch springform pan – This type of pan allows easy removal after baking without damaging your delicate creation inside! The sides pop off effortlessly once cooled—perfect if you want clean edges for presentation.
- Mixing bowls – A set of various sizes will serve multiple purposes from mixing batters to holding dry ingredients separately before combining them later on—organization is key here!
- Electric mixer (handheld or stand) – While mixing by hand is certainly possible (and can be quite therapeutic), an electric mixer will save time and energy when creaming butter & sugar together until light & fluffy—trust me; you’ll appreciate this tool’s efficiency!
- Sifter – Sifting dry ingredients ensures even distribution throughout batter while aerating flour which helps achieve desired fluffiness—we want no lumps here!
With these ingredients neatly lined up and equipment ready at hand, you’re now set on an exciting path towards creating one unforgettable dessert full of seasonal joy!
Preparing the Blueberry Peach Sour Cream Cake
Step 1: Greasing Up Your Springform Pan
Let’s kick things off by preparing our springform pan because trust me—it’ll make all the difference when it comes time to release our beautiful cake after baking! Take some softened butter or cooking spray and generously coat both the bottom and sides thoroughly; then sprinkle with flour gently tapping out any excess bits left behind afterward—the goal is an effortless release so you don’t lose any precious crumbs when cutting into slices later on! Preheat your oven now as well at 350°F (175°C)—this way we’re ready once we’ve got everything mixed up nicely together.
Step 2: Sift Your Dry Ingredients
Next up? Time to sift those dry ingredients! In a medium bowl, whisk together 2 cups flour along with 1/4 teaspoon baking soda & 1 1/2 teaspoons baking powder until combined evenly—this step might seem small but serves significant purpose by aerating these components ensuring they mix seamlessly within batter leading ultimately toward loftier rise later during cooking process—don’t skip this part! Set aside once finished—you’ll thank yourself later when achieving perfect results!
Step 3: Cream Butter And Sugar
Now comes perhaps my favorite part—the creaming stage! In another large mixing bowl using either handheld or stand mixer fitted with paddle attachment blend together three-fourths cup softened unsalted butter alongside one-and-a-third cups granulated sugar until mixture becomes pale yellow & fluffy taking about three minutes total—this incorporation truly makes magic happen by introducing air bubbles into mix which translates directly toward lighter textured final product once baked off beautifully golden brown atop crispy crust…can you smell it already? Add two teaspoons pure vanilla extract next then beat again briefly just long enough until fully incorporated—it should smell heavenly already!
Step 4: Add Eggs One At A Time
Now let’s bring some structure back into play by adding those large eggs one at a time incorporating each thoroughly after addition before proceeding next—I usually count slowly like “One Mississippi” then “Two Mississippi” just so I know they’re blended well enough before moving ahead—it’s crucial not rushing here since eggs also provide moisture binding elements keeping everything cohesive throughout final bake resulting ultimately toward deliciously moist interior texture yielding perfect harmony among flavors present…oh just wait till you taste!!
With these first steps completed successfully paving way towards delectable Blueberry Peach Sour Cream Cake ahead—we’re well on track enjoying every moment spent within kitchen crafting something special indeed…stay tuned for more scrumptious details coming right up soon enough!
The Journey to Your Blueberry Peach Sour Cream Cake
Alright, my friend, let’s dive into the heart and soul of this delightful Blueberry Peach Sour Cream Cake! This cake is not just a dessert; it’s a celebration of summer transitioning into fall. Each bite bursts with juicy fruit and creamy richness that’s simply irresistible. So, grab your apron and let’s continue crafting this beautiful creation together!
Step 5: Incorporating the Dry Ingredients with Care
Now that you’ve creamed the butter, sugar, and eggs into a fluffy, joyous mixture, it’s time to fold in those dry ingredients. This step is crucial because it combines everything into a cohesive batter while maintaining that luscious texture we all adore. You’ll want to take your sifted flour mixture—consisting of flour, baking soda, and baking powder—and add it in portions to your creamy mix. Start by adding about a third of the dry ingredients to the bowl on low speed. This gentle mixing ensures that you’re not overworking the gluten in the flour, which can lead to a dense cake rather than the light and tender crumb we desire.
As you mix, alternate with half of the sour cream. Why sour cream? It brings moisture and a slight tanginess that beautifully balances the sweetness of our fruits later on. Trust me on this; it makes all the difference! Continue this back-and-forth until all ingredients are combined—beginning and ending with the dry ingredients. This method is known as ‘alternating additions’ and is essential for achieving that perfect cake batter consistency. By doing this, you allow each component to integrate smoothly without overmixing. Keep an eye out for any lumps; they should be minimal but may occur around your fruit pieces or at the bottom of your bowl. Just a gentle fold with a spatula will remedy this!
Step 6: Spreading the Batter with Love
Once your batter is beautifully mixed—a little thick but perfectly smooth—it’s time to transfer it into your prepared springform pan. As you pour in this luscious concoction, take a moment to appreciate its texture; it should feel rich and creamy like liquid gold! Use an offset spatula or even the back of a spoon to spread it evenly across the bottom of your pan, gently coaxing it into every corner so that every slice gets its fair share of deliciousness.
Why is an even spread so important? Well, when baked evenly, every piece will rise uniformly, ensuring that each bite delivers that heavenly combination of flavors and textures we crave. Don’t rush through this step! Take your time spreading out the batter; it’s like laying down a foundation for a masterpiece. Once it’s smooth and even, we can move on to adorning our cake with those stunning seasonal fruits!
Step 7: Decorating with Nature’s Bounty
Now comes one of my favorite parts—arranging those glorious peach slices and plump blueberries on top of our cake! Lay down those peach slices first; they should cover as much surface area as possible without overcrowding each other—like jewels gleaming against the golden batter below. The aroma alone from these peaches will start dancing through your kitchen!
Once you’ve nestled those peaches in their cozy little spots, sprinkle blueberries between them like confetti at a celebration! These tiny gems not only add vibrant color but also pack an extra punch of flavor that complements our cake beautifully. The sweet-tart balance from both fruits creates an utterly intoxicating experience when you take your first bite! Don’t worry if some blueberries roll off; just scoop them back up—it adds character to our lovely creation!
Step 8: The Sweet Finale Before Baking
Now that we’ve adorned our cake with nature’s bounty, let’s add one last touch before it heads into the oven—the sugar sprinkle! Here’s where you can really amp up that sweet crusty topping by sprinkling demerara or turbinado sugar over everything. This step may seem simple but trust me—it creates an exquisite caramelized layer as the cake bakes, elevating its presentation and flavor profile tremendously.
Once you’ve added this final touch, it’s time to slide it into your preheated oven set at 350°F (about 175°C). Baking typically takes about an hour but remember—ovens can be quirky little creatures! If you’re using deeper pans or different sizes, keep an eye out for doneness after around 50 minutes. You’ll know it’s ready when golden brown edges form and a wooden toothpick inserted in the center comes out clean—but make sure you avoid piercing any fruit during this test; we don’t want to mess up those beautiful layers!
As it bakes away, you’ll be enveloped in aromas so divine they’ll have everyone gathering in curiosity around your kitchen! Allow yourself some patience here; resist opening that oven door too soon because every moment counts toward creating that perfectly risen cake.
The Final Touches
Let’s wrap up our delightful journey towards creating this Blueberry Peach Sour Cream Cake! Now we’re nearing completion—don’t worry; there are just two more steps standing between you and serving this gorgeous treat.
Step 9: Cooling Down Before Serving
When your kitchen smells like heaven and you’ve got golden perfection peeking out at you from inside the oven, carefully remove your cake once done baking—it deserves a gentle touch after all its hard work! Allow it to cool in its springform pan for about 15 minutes; this resting period allows any residual heat to finish setting up those delicate layers while also making sure it releases easily later on.
After this initial cooling time has passed, run a knife around the edge before gently removing the sides of the springform pan—you’ll feel like an artist unveiling their masterpiece at this moment! Transfer it onto a wire rack for further cooling until room temperature if you can resist temptation (I often can’t!). Serving warm after about half an hour out of the oven is absolutely paramount for brunch gatherings or cozy evenings at home with loved ones. Each slice will melt in their mouths as they revel in flavors brought together so harmoniously!
Remember—the beauty of this Blueberry Peach Sour Cream Cake lies not just in how scrumptious it tastes but also in how deeply satisfying making it becomes when shared with friends and family around joyful occasions.
So there you have it—the entire journey laid bare before us—a labor of love transformed into something truly extraordinary! I promise you’ll find joy not only in baking but also in indulging every last crumb alongside those who matter most. Happy baking!
Storage and Enjoyment Tips for Your Blueberry Peach Sour Cream Cake
Oh, the moment has finally arrived! Your Blueberry Peach Sour Cream Cake is cooling, and I can almost see the joy on your face as you anticipate that first delightful slice. This cake isn’t just a treat; it’s a celebration of summer and fall, where juicy peaches meet luscious blueberries in a sweet embrace. But before you dive in, let’s talk about how to store any leftovers (if there are any!) so that every bite stays just as enchanting as the first.
Storing Leftover Blueberry Peach Sour Cream Cake
To ensure your Blueberry Peach Sour Cream Cake remains fresh and delicious for days to come, you’ll want to store it in an airtight container at room temperature if you’re planning to enjoy it within two days. For longer storage, pop it into the refrigerator, where it will keep nicely for up to a week. Wrap it in plastic wrap or foil before placing it in your favorite container—this step is absolutely paramount for maintaining its moistness. If you’re worried about the cake drying out, consider placing a slice of bread in with it; this little trick will help maintain that delightful texture. And let me tell you, when you take a bite after a day or two, you’ll find that the flavors have melded even more beautifully together, creating an utterly intoxicating experience! If you prefer warm servings, gently reheat individual slices in the microwave for about 15 seconds or pop them into the oven at 350°F until warmed through. The aroma that fills your kitchen will be nothing short of heavenly!
Freezing Blueberry Peach Sour Cream Cake for Later
If you’re looking to savor your Blueberry Peach Sour Cream Cake down the line—or if you simply want to bake ahead—freezing is a fantastic option! To freeze, slice the cake into individual portions and wrap each slice tightly in plastic wrap followed by aluminum foil to prevent freezer burn. Properly stored this way, your cake can last up to three months in the freezer while retaining its delightful taste and texture. When you’re ready for a treat, simply thaw at room temperature or reheat straight from frozen; just be sure to give it a few extra minutes in the oven if reheating. The convenience of having this cake ready at your fingertips makes it perfect for spontaneous gatherings or cozy evenings when you crave something sweet! Trust me—nothing beats pulling out a slice from your freezer on a chilly evening and treating yourself to that burst of flavor.
Blueberry Peach Sour Cream Cake

Experience pure bliss with our Blueberry Peach Sour Cream Cake—a delicious blend of flavors that’s perfect for any occasion. Try it today!
- Prep Time: 20 minutes
- Cook Time: 50 minutes
- Total Time: 1 hour 10 minutes
- Yield: Approximately 12 servings 1x
- Category: Dessert
- Method: Baking
- Cuisine: American
Ingredients
- 2 cups all-purpose flour
- 1/4 teaspoon baking soda
- 1 1/2 teaspoons baking powder
- 3/4 cup unsalted butter, softened
- 1 1/3 cups granulated sugar
- 2 teaspoons vanilla extract
- 3 large eggs
- 2/3 cup sour cream
- 3/4 cup fresh blueberries
- 2 to 3 medium peaches, unpeeled & sliced
- Optional: 3 tablespoons turbinado or brown sugar for topping
Instructions
- Preheat your oven to 350°F (175°C). Grease and flour a springform pan.
- Sift together the flour, baking soda, and baking powder in a bowl; set aside.
- In another bowl, cream together the softened butter and sugar until light and fluffy. Add vanilla extract and mix well.
- Incorporate the eggs one at a time into the mixture, ensuring each egg is blended in completely.
- Gradually add the dry ingredients to the creamed mixture alternately with the sour cream until fully combined.
- Spread the batter evenly in the prepared pan and arrange peach slices and blueberries on top.
- Sprinkle with turbinado or brown sugar if desired.
- Bake for approximately 50 minutes or until golden brown and a toothpick inserted comes out clean.
- Allow cooling before removing from the pan.
Nutrition
- Serving Size: 1 slice (80g)
- Calories: 310
- Sugar: 20g
- Sodium: 150mg
- Fat: 15g
- Saturated Fat: 9g
- Unsaturated Fat: 5g
- Trans Fat: 0g
- Carbohydrates: 40g
- Fiber: 1g
- Protein: 4g
- Cholesterol: 75mg