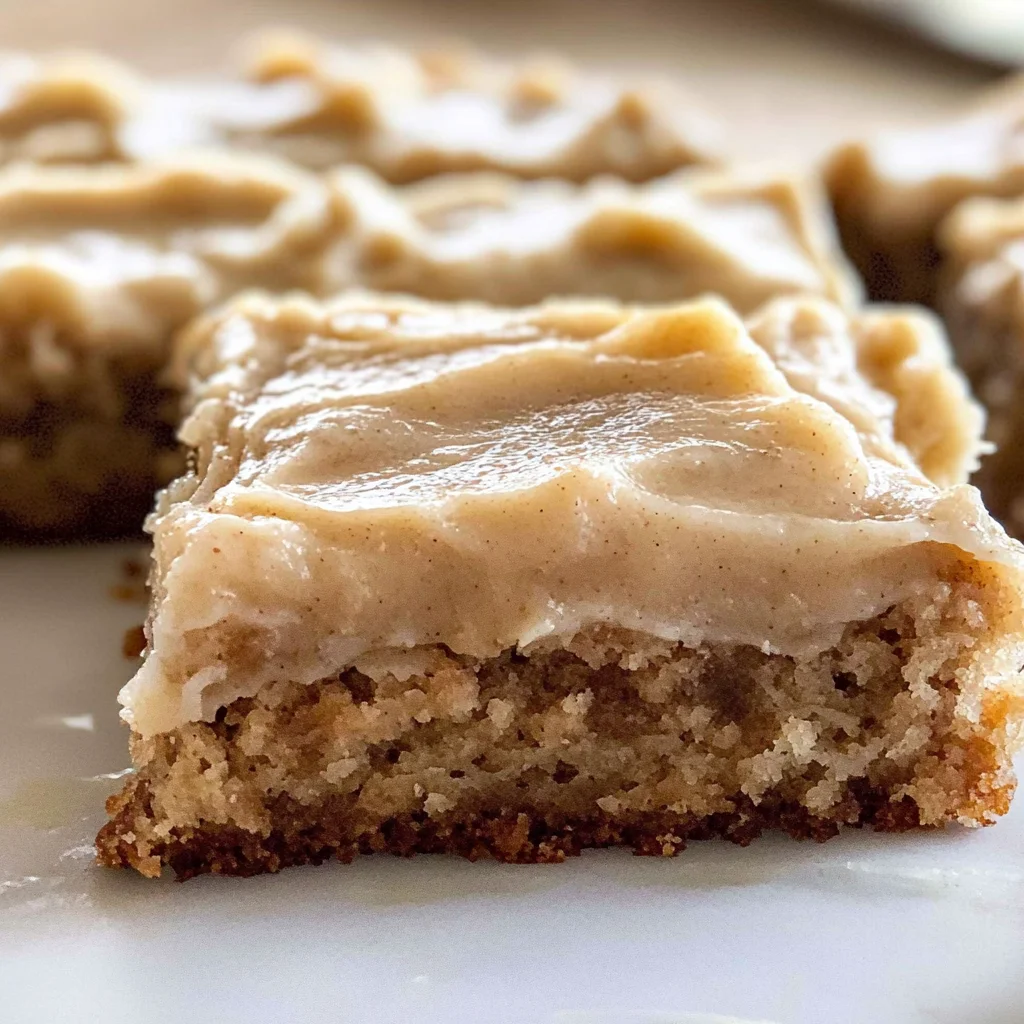
Banana Bars with Brown Butter Icing
There’s something profoundly comforting about the aroma of ripe bananas wafting through your kitchen, blending seamlessly with the rich, nutty scent of brown butter. It’s a sensory experience that beckons memories of cozy gatherings and shared laughter. When I make these Banana Bars with Brown Butter Icing, I’m not just baking; I’m crafting a piece of nostalgia wrapped in sweetness. With each bite, you’re met with a symphony of flavors that dance on your palate—a delightful juxtaposition of moist banana goodness topped with a luscious icing that’s both creamy and slightly caramelized. Trust me when I say this recipe is more than just food; it’s an invitation to relish life’s simple pleasures.
As you gather your ingredients and prepare to embark on this culinary adventure, remember that cooking is as much about the journey as it is about the destination. Each step in this recipe serves a purpose, building layers of flavor and texture that culminate in an utterly intoxicating treat. Whether you’re baking for a special occasion or simply indulging yourself on a quiet afternoon, these bars promise to be a crowd-pleaser. So, let’s dive into the world of Banana Bars with Brown Butter Icing—an experience waiting to unfold right in your own kitchen.
Banana Bars with Brown Butter Icing: A Sweet Escape
These Banana Bars with Brown Butter Icing are the perfect way to use up those ripe bananas sitting on your counter. They are incredibly easy to whip up and are guaranteed to bring smiles all around. The combination of soft banana cake paired with the nutty richness of brown butter icing creates an extraordinary treat that feels both indulgent and homey. If you’ve ever been captivated by the charm of banana desserts, this recipe will surely become one of your favorites!
Ingredients:
As we set out on this delightful journey together, let’s take a moment to appreciate each ingredient that makes these Banana Bars so special. Every component plays an essential role in creating the deliciousness you’ll soon be savoring.
- 1/2 cup (1 stick) unsalted butter: This is crucial for creating a rich base in our bars. The butter adds moisture and contributes to that delightful tender crumb we all crave. Make sure your butter is softened to room temperature so it can cream perfectly with sugar—this process aerates the mixture, resulting in lighter bars. If you’re looking for a slightly different flavor profile, consider using European-style butter which has a higher fat content for even richer results.
- 2 cups powdered sugar: This sweet ingredient is what transforms our brown butter into an irresistible icing that glazes our bars beautifully. The fine texture allows for easy incorporation into the melted butter without clumps, creating that silky finish that melts in your mouth. When purchasing powdered sugar, look out for brands that have no added cornstarch if you’re aiming for pure sweetness without any off-flavors.
- 1 tsp vanilla extract: A non-negotiable addition that elevates every dessert! Vanilla extract brings warmth and depth to our bars—its aromatic qualities enhance the overall flavor profile beautifully. Always opt for pure vanilla extract over imitation; it makes such a difference in taste!
- 1½ tbsp milk: This small but mighty ingredient helps thin out our icing just enough to achieve that luscious consistency we desire when spreading it over our bars. Whole milk works best here due to its fat content, which adds creaminess; however, any dairy or plant-based milk will do if you need substitutes.
- ¾ cup granulated sugar: This is where we add sweetness and help achieve a lovely caramelization during baking. Besides flavoring our bars, sugar also affects texture—too little can lead to dry results while too much may make them overly gooey! Be sure to measure accurately.
- ½ cup sour cream: A secret weapon in many baking recipes! Sour cream keeps our bars moist and tender while adding a subtle tanginess that perfectly complements the sweetness of bananas. If sour cream isn’t available or if you’re looking for alternatives, plain yogurt works wonderfully too!
- ¼ cup unsalted butter, softened: In addition to the butter used earlier, this extra bit helps enrich our batter further. Its softness ensures it incorporates smoothly into the mixture without leaving lumps behind—this can make all the difference in achieving that flawless texture we’re after.
- 1 large egg: An essential binder that contributes structure and richness to our bars while aiding in leavening as they bake. Make sure it’s at room temperature so it mixes evenly into our batter; cold eggs can cause lumpy mixtures.
- 1 cup (about 2) very ripe bananas, mashed: Bananas are indeed the stars of this show! Their natural sugars caramelize during baking providing moisture and flavor—a banana’s ripeness enhances sweetness dramatically so don’t hesitate to use those speckled ones you might be tempted to toss!
- 1 tsp vanilla extract (again): Yes! We’re doubling down on vanilla because who wouldn’t want more depth? It’s truly paramount for enhancing every bite!
- 1 cup all-purpose flour: The backbone of any baked good! Flour provides structure and stability while allowing us to create those beautiful bars without crumbling apart—be sure not to overmix once added as this can develop gluten leading to dense results instead of tender ones.
- ½ tsp baking soda: Our leavening agent here! It reacts with acidic components (like sour cream) producing carbon dioxide which helps our batter rise beautifully during baking—it’s absolutely essential for achieving fluffy textures!
- ½ tsp salt: Salt enhances flavors throughout all dishes including desserts—it balances sweetness beautifully making every bite taste even better than expected!
Equipment You’ll Need:
Now that we have our ingredients lined up like eager soldiers ready for battle, let’s talk tools! Having the right equipment makes all the difference between stress and success in the kitchen—it’s like having dependable partners by your side as you navigate this culinary adventure together.
- 8×8-inch baking dish: This trusty companion shapes our bars perfectly! Using parchment paper allows easy removal post-baking while ensuring even cooking—trust me when I say lining your pan is non-negotiable here; no one wants sticky situations!
- Mixing bowls (large): Having ample space while mixing ensures everything blends uniformly—no one enjoys wrestling with cramped quarters when creaming butter and sugar together!
- Whisk or electric mixer: A whisk will work wonders for manual mixing but if you’re short on time or energy (we’ve all been there!), an electric mixer speeds things up nicely especially when beating eggs into submission—or rather until smooth!
- Rubber spatula: An absolute must-have tool when folding dry ingredients into wet mixtures gently without deflating air bubbles—that lightness is key! Plus it makes scraping every last bit from bowls effortless!
With these essentials lined up beside you, let’s dive into preparing these delectable Banana Bars with Brown Butter Icing.
Step 1: Prepping Your Pan & Oven
Begin by preheating your oven to 375°F (190°C). This step is crucial because starting off hot allows baked goods like ours to rise properly from the get-go—the warmth activates yeast or baking soda allowing delicious puffiness later on! While waiting for it heat up fully takes care of lining an 8×8-inch baking dish with parchment paper which guarantees easy lifting from pan post-bake—simply overlap two pieces letting them hang over edges as handles; you’ll thank yourself later when it’s time for serving!
Step 2: Creaming Together Base Ingredients
In a large bowl—which should feel spacious enough for some enthusiastic mixing—combine your granulated sugar alongside softened unsalted butter before adding sour cream too! Use either an electric mixer or sturdy whisk until everything merges beautifully into creamy perfection… don’t rush this step because it’s where aeration happens leading towards lightness within those bars we crave so dearly! Once smooth add egg followed by mashed bananas along with one teaspoon vanilla extract before giving another good mix—to ensure uniform distribution across entire batter mixture avoiding any rogue clumps hiding beneath surface layer later down line!
Step 3: Incorporating Dry Ingredients
Next comes one of my favorite moments—the addition of dry elements! Gently sift flour alongside baking soda & salt directly onto wet mix before using rubber spatula methodically folding everything together until just combined—it’s absolutely paramount not overwork at this stage otherwise gluten forms leading us astray towards dense outcomes instead fluffy ones desired here…so gentle movements only please friends! Once blended smoothly spread batter evenly across prepared pan ensuring corners receive love too; every inch counts here after all!
Step 4: Baking Magic Happens!
Now slide your masterpiece into preheated oven allowing it bake away blissfully between 20 -25 minutes until golden brown arises before us—a toothpick inserted should come out clean indicating readiness but if unsure trust visual cues first noticing edges pulling away from sides…that means success ahead folks! Once baked allow cooling slightly before attempting removal using parchment handles provided earlier; resist temptation diving straightaway though as patience rewards us tremendously later upon tasting warm vs cooled bites alike…
And there you have it—your foundation laid out beautifully ready for glorious brown butter icing next round… stay tuned as we transform simple melted goodness into irresistible topping soon enough!
Perfecting Your Banana Bars with Brown Butter Icing
Oh, my friends, we are truly on a journey toward something extraordinary here! These Banana Bars with Brown Butter Icing are not just any dessert; they’re a heartfelt blend of nostalgia and warmth, bringing together the sweetness of ripe bananas and the rich, nutty flavor of brown butter. As we delve deeper into this recipe, let’s embrace every step with enthusiasm and love, because each moment in the kitchen is an opportunity to create something magical. Let’s continue crafting these delicious bars together!
Step 5: Browning the Butter – The Heart of Flavor
Now we arrive at one of the most crucial steps in our endeavor, the browning of the butter. This process transforms ordinary butter into a rich, nutty liquid gold that will elevate your icing from simple to sublime. In a medium saucepan over medium-high heat, add that stick of butter and allow it to melt completely. Don’t rush this step; patience is key! As you watch it melt, keep a close eye – we want those beautiful brown bits to form at the bottom of the pan. Swirl it gently every now and then to ensure even cooking.
What you’re looking for is that deep golden color and a fragrant aroma that fills your kitchen like a warm hug. This transformation happens fairly quickly—usually within 5 to 7 minutes—but it can go from perfect to burnt in an instant if you’re not careful. Trust me on this: when it’s done right, those browned bits will add layers of flavor that make your icing utterly intoxicating. Once you see those crispy little flecks starting to form and smell that nutty aroma wafting through your space, it’s time to pour the butter into a heat-proof bowl. You’ll want to do this quickly but carefully to avoid any splashes—safety first!
Step 6: Whisking It All Together – Creating Creamy Perfection
With our brown butter safely nestled in its bowl, it’s time to bring everything together for our icing! Add in the two cups of powdered sugar along with that delightful teaspoon of vanilla extract. Now comes the fun part—whisking! Grab your whisk (or an electric mixer if you prefer) and begin mixing until everything is beautifully combined and smooth. This step is incredibly important because how well your icing comes together will determine its texture on top of those warm banana bars.
As you whisk away, pay attention to the consistency; it should be thick yet spreadable without being too runny or too firm—think luscious creaminess that glides effortlessly over your bars. If you find it’s too thick for your liking, don’t hesitate to add just a splash more milk—start with half a tablespoon at a time until you reach that perfect balance. Once everything is blended beautifully, set aside your bowl, allowing those flavors to marry while we finish up our banana bars.
Step 7: The Magic Moment – Spreading That Heavenly Icing
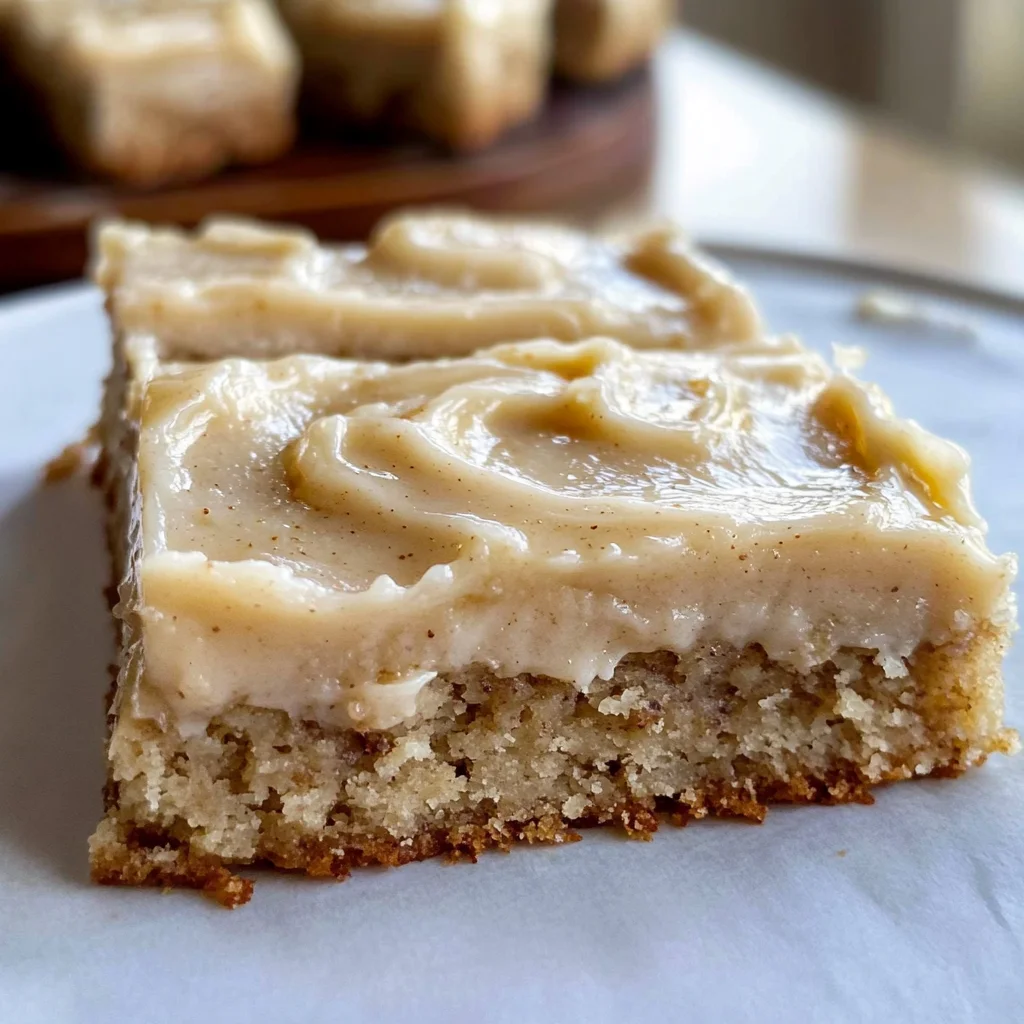
Now comes one of my favorite parts—the grand finale! After letting your banana bars cool for about 10-15 minutes (just enough time for them to be warm but not piping hot), it’s time to indulge in spreading that glorious brown butter icing across the surface. Using a spatula or even just a knife if that’s what you have handy, gently spread the icing over the slightly warm bars.
Why do we want them warm? Well, this is absolutely paramount because when they’re still warm from baking, the icing melts ever so slightly into the bars—a phenomenon that creates an irresistible gooey layer between each bite! Picture it: as you take your first taste, you’re met with soft banana goodness topped with this silky smooth icing that has just enough nutty richness to balance out all that sweetness. Don’t forget to let yourself enjoy this moment; after all your hard work, you’ve created something truly special!
Step 8: Allowing Time for Blissful Cooling
Once you’ve generously spread that divine frosting on top of your banana bars, resist the urge to dive right in! I know it’s tempting—believe me! However, allowing them some time to cool completely is essential if you want those flavors fully melded together without causing chaos as you slice into them later on. I recommend letting them sit at room temperature for at least another 30 minutes before cutting.
During this cooling period, something wonderful happens: not only does the icing firm up just enough so that each slice holds its shape beautifully, but all those flavors deepen and harmonize into something profoundly satisfying. Think about it—those bananas mingling with buttery goodness and sugary sweetness creating a symphony of flavors—which gets even better as they cool down! So sip on some tea or coffee while you wait; trust me—it’ll be worth every minute.
Conclusion:
As we wrap up this delightful journey through creating Banana Bars with Brown Butter Icing, I can hardly contain my excitement! From the moment those ripe bananas hit the mixing bowl to the enticing aroma wafting through my kitchen as they bake, every step is filled with anticipation and warmth. What truly makes this recipe special is how it celebrates simple ingredients—ripe bananas transformed into sumptuous bars topped with that utterly intoxicating brown butter icing. It’s a symphony of flavors that comes together seamlessly; each bite offers a tender texture complemented by a rich sweetness that lingers long after you’ve finished your last morsel.
If you haven’t tried making these yet, let me tell you—they are an absolute must-try! Imagine pulling them from the oven, golden brown and glossy from their icing, ready to impress family members or friends who drop by unexpectedly. It’s not just about taste; it’s about creating lasting memories around the kitchen table—perfect for birthday celebrations, afternoon tea gatherings, or even just because you deserve something delicious today. The joy of crafting these treats fills the heart; sharing them creates connections that last forever.
Now let’s talk pairings because while these banana bars shine on their own, there are so many ways to elevate your experience further! Imagine savoring one alongside a steaming cup of chai or perhaps nestled next to a scoop of vanilla ice cream—it would be like sunshine on your palate! For an afternoon pick-me-up while indulging in some downtime, pair it with your favorite herbal tea; trust me when I say that it transforms each bite into a moment of tranquility. And if you’re feeling extra decadent, try drizzling melted dark chocolate over the top before serving—it adds an exquisite depth that will leave everyone raving.
Feeling adventurous? This recipe is wonderfully adaptable! You could easily incorporate nuts like walnuts or pecans for a delightful crunch or use different fruits such as mashed apples instead of bananas for an entirely new flavor profile. Why not experiment with spices like cinnamon or cardamom? Each variation brings its own charm and opportunities for creativity in your baking adventures. So don’t hesitate; try this recipe out for yourself and share your experiences! I’d love to hear how it turns out—let’s connect over our shared love of baking!
Banana Bars with Brown Butter Icing
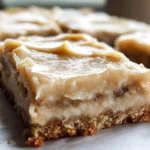
Indulge in the delightful flavors of Banana Bars with Brown Butter Icing, a comforting treat that transforms overripe bananas into a moist and sweet dessert. These bars feature a rich banana cake base topped with a luscious, nutty brown butter icing that adds an irresistible finish. Perfect for gatherings or cozy afternoons, this easy recipe promises to bring smiles to all who taste it. Each bite is a celebration of simple ingredients coming together to create something truly special.
- Prep Time: 15 minutes
- Cook Time: 25 minutes
- Total Time: 40 minutes
- Yield: Approximately 12 servings 1x
- Category: Dessert
- Method: Baking
- Cuisine: American
Ingredients
- 1/2 cup unsalted butter (softened)
- 3/4 cup granulated sugar
- 1/2 cup sour cream
- 1 large egg
- 1 cup mashed ripe bananas (about 2 bananas)
- 1 cup all-purpose flour
- 1 tsp baking soda
- 1/2 tsp salt
- 2 cups powdered sugar (for icing)
- 1 tsp vanilla extract
- 1½ tbsp milk
Instructions
- Preheat your oven to 375°F (190°C). Line an 8×8-inch baking dish with parchment paper.
- In a large bowl, cream together the softened butter and granulated sugar until light and fluffy. Mix in the sour cream, egg, and mashed bananas until well combined.
- In another bowl, whisk together the flour, baking soda, and salt. Gradually fold the dry ingredients into the wet mixture until just combined.
- Spread the batter evenly in the prepared baking dish. Bake for 20–25 minutes or until golden brown and a toothpick inserted comes out clean.
- While the bars cool slightly, prepare the icing by browning additional butter in a saucepan until golden and fragrant. Mix in powdered sugar, vanilla extract, and milk until smooth.
- Spread the brown butter icing over the warm bars and allow them to cool completely before slicing.
Nutrition
- Serving Size: 1 bar (50g)
- Calories: 180
- Sugar: 18g
- Sodium: 150mg
- Fat: 7g
- Saturated Fat: 4g
- Unsaturated Fat: 3g
- Trans Fat: 0g
- Carbohydrates: 27g
- Fiber: 1g
- Protein: 2g
- Cholesterol: 20mg