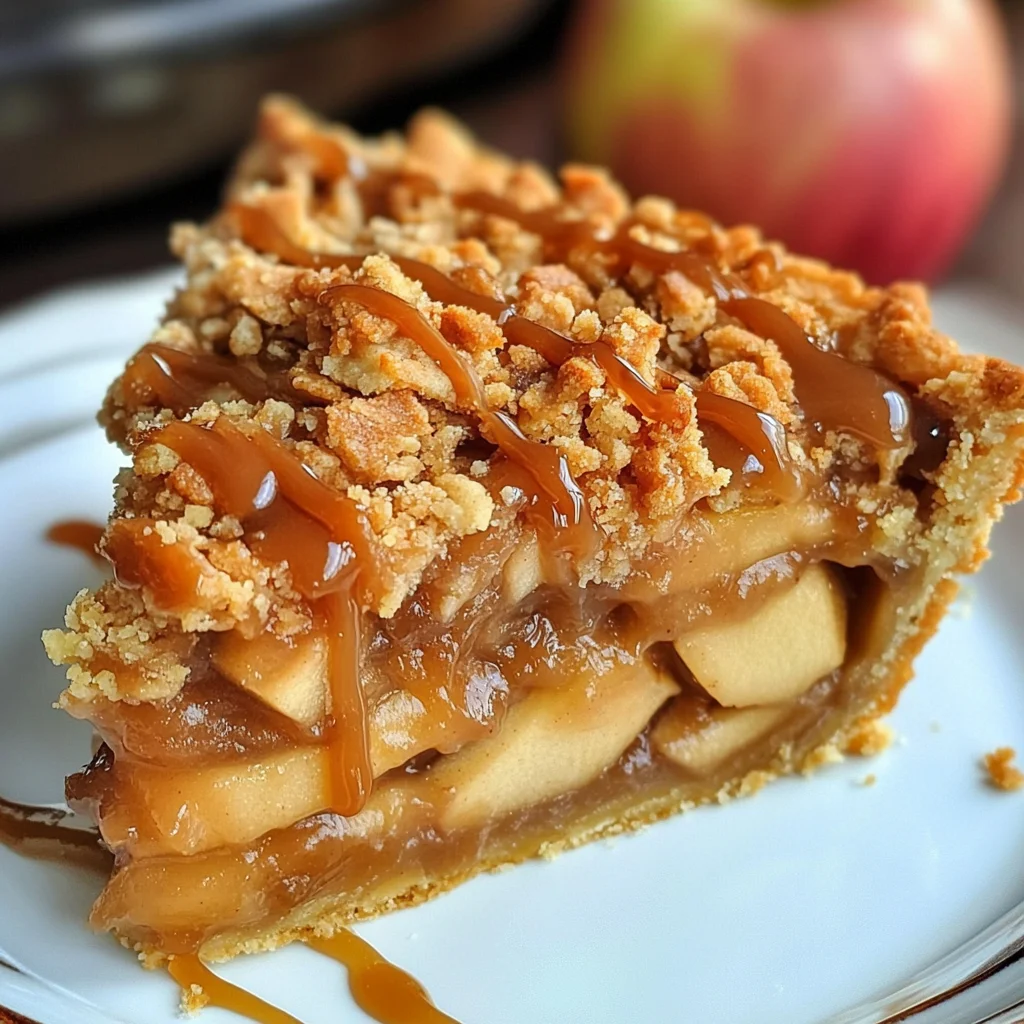
Caramel Apple Pie with Cookie Crust
There’s something truly magical about the aroma of a freshly baked pie wafting through your home, isn’t there? It’s a scent that whispers of warmth, comfort, and the promise of sweet indulgence. My heart races just thinking about it! Today, I’m thrilled to share with you my cherished recipe for Caramel Apple Pie with Cookie Crust—a dessert that effortlessly bridges nostalgia with a delightful twist. Imagine buttery apples simmering away in a sweet, spiced embrace, nestled in the most enchanting sugar cookie crust. And as if that weren’t enough, we’ll be layering in luscious dulce de leche that transforms this pie into a breathtaking fusion of flavors and textures. Trust me when I say this isn’t just another pie; it’s an experience waiting to happen.
As you embark on this culinary journey, allow yourself to get lost in the process—the peeling of apples, the gentle mixing of ingredients, and the anticipation as it bakes. This recipe is not just a collection of steps; it’s an invitation to create something deeply satisfying and utterly extraordinary. Whether you’re preparing for a family gathering or simply treating yourself (because you deserve it!), this Caramel Apple Pie with Cookie Crust will surely become a beloved addition to your dessert repertoire. So let’s dive into this delightful adventure together!
Caramel Apple Pie with Cookie Crust: A Sweet Symphony of Flavors
This Caramel Apple Pie with Cookie Crust is more than just dessert—it’s a celebration of flavors that dances on your palate. The soft sugar cookie crust cradles tender cinnamon-spiced apples while the rich layers of dulce de leche add a creamy sweetness that makes every bite feel like a warm hug. What makes this pie so special is not just its taste but its ability to evoke memories—perhaps of cozy family dinners or crisp autumn days spent picking apples at your local orchard. Each slice tells a story; each forkful evokes feelings of joy and love.
Imagine serving this pie at your next gathering—friends and family gathered around the table, their eyes lighting up as they take their first bite. The combination of buttery crust, caramel-like sweetness from the dulce de leche, and perfectly spiced apples creates an unforgettable experience that lingers long after the last crumb has been devoured. So let’s roll up our sleeves and prepare to create something magical together!
Ingredients:
Before we dive into baking bliss, let’s gather our ingredients! Each one plays a pivotal role in crafting our Caramel Apple Pie with Cookie Crust, enhancing flavor and texture in ways that are absolutely essential.
- 6 Tbsp. unsalted butter (softened): This ingredient is crucial for creating that light and tender crust we all crave. Softened butter allows for proper creaming with sugars, which helps develop air pockets in your dough—resulting in a beautifully fluffy texture. Always opt for unsalted butter so you can control the salt levels in your recipe; if you’re feeling adventurous, European-style butter adds an extra richness due to its higher fat content.
- 1/2 cup brown sugar: Brown sugar brings depth to our pie with its rich molasses undertones—it’s what gives our filling that warm, comforting sweetness reminiscent of homemade treats from childhood. When selecting brown sugar, look for one that’s moist and soft; if it feels hard, give it a little squeeze before using it.
- 1/4 cup white granulated sugar: This ingredient balances out the brown sugar’s richness while adding lightness to our batter. Granulated sugar also aids in browning during baking, resulting in those lovely caramelized edges on your crust.
- 1 egg (room temperature): Eggs are indispensable here as they bind everything together while providing moisture and richness. Using room-temperature eggs incorporates better into your mixture and ensures even baking—so don’t skip this step!
- 1 tsp. vanilla extract: A splash of vanilla enhances all other flavors in our pie—it adds warmth and depth that’s simply irreplaceable! Always choose pure vanilla extract over artificial options for the best flavor impact.
- 1 cup + 2 Tbsp all-purpose flour: Flour is the backbone of our cookie crust structure; it provides stability and texture to ensure each slice holds together beautifully when served. Keep an eye on how you measure flour—too much can lead to dry dough while too little could make it fall apart.
- 1/2 Tbsp apple pie spice: This blend typically includes cinnamon, nutmeg, and sometimes allspice or ginger—it captures all those warm autumnal flavors we adore! If you’re feeling adventurous or want something unique, consider making your own blend from fresh spices.
- ½ tsp baking soda: Baking soda is essential for leavening—you want your cookie crust to rise slightly as it bakes without becoming overly puffy or cake-like. Ensure it’s fresh by checking the expiration date on your package; old baking soda won’t give you those lovely results you’re aiming for.
- Pinch of salt: A small amount of salt balances sweetness beautifully—it enhances flavors across the board! This seemingly insignificant addition elevates every other ingredient within our pie itself.
- 3 Tbsp butter: We’ll melt this butter down for sautéing our apple filling—this step infuses flavor directly into our apple mixture while aiding in softening them perfectly during cooking.
- 2.5 lbs gala apples: Gala apples are my go-to choice because they strike that perfect balance between sweet and tart! Their natural sugars caramelize beautifully during baking without turning mushy—a true win-win situation! Feel free to mix varieties if you’re feeling inspired—Honeycrisp or Granny Smith can add exciting dimension too!
- 1 cup brown sugar (for filling): Just like before but used here specifically within our fruit filling! It amplifies sweetness while complementing those tart notes from apples superbly creating delectable layers throughout.
- 2 tsp vanilla (for filling): A dash more vanilla works wonders—it really pulls together all those lovely apple flavors harmoniously!
- 1/2 Tbsp apple pie spice (for filling): Because who doesn’t want more spice? It deepens everything further into cozy territory as those fragrances fill up every nook around us!
- 1/3 cup flour (for filling): Adding flour here helps thicken juices released during baking ensuring we don’t end up with soupy apple filling—a key trick worth remembering!
- 1/2 cup brown sugar (for streusel topping) & 1/4 cup white granulated sugar (for streusel topping): These two sugars mixed together create delightful caramel notes atop our finished product! The combination provides depth alongside sweetness while contrasting textures between crumbly topping versus smooth apple layer beneath!
- 1 tsp apple pie spice (for streusel topping) & 3/4 cup flour (for streusel topping): Just like before—more spice equals more joy! Flour binds everything nicely keeping crumbly goodness intact until served!
- 4½ Tbsp unsalted butter (melted for streusel topping): Melted butter here ensures it combines seamlessly holding onto its shape during baking whilst contributing extra richness too!
- 6-7 oz Dulce de leche (divided in two): Ahh…the star player! Dulce de leche adds an irresistibly creamy layer that elevates each bite beyond belief by wrapping everything together like liquid gold—not optional folks!
Equipment You’ll Need:
Before we start mixing bowls full of deliciousness, let’s talk tools! Having the right equipment makes all the difference between chaos and smooth sailing in any kitchen endeavor—and trust me when I say you’ll want these trusty companions at hand!
- Mixing bowls – Choose various sizes so you can comfortably combine wet ingredients separately from dry ones before integrating them later on—the key here lies within organization leading towards success without stress during preparation time!
- Measuring cups & spoons – Precision matters when baking; using proper measurements ensures every component plays its part beautifully within final dish so aim high folks—accurate tools make magic happen!
- Whisk & spatula – A good whisk helps aerate mixtures effectively whilst folding gently prevents deflation after incorporating air too fast—both equally important techniques worth mastering along journey ahead!
- Pie dish – Opt for glass or metal depending upon desired outcome; glass allows visual cues when checking doneness while metal tends towards crisper edges—it ultimately depends upon personal preference but either option works splendidly here overall!
Let’s dive deeper into making our Caramel Apple Pie with Cookie Crust where transformation begins…
Step 1: Crafting the Perfect Apple Filling
Creating your apple filling ahead of time allows those lovely flavors to meld beautifully—an essential tip I promise will elevate every bite! Begin by peeling, coring, and dicing your gala apples into uniform pieces; this consistency guarantees even cooking throughout as they soften beautifully under heat’s embrace later on. In a medium pot over medium heat, melt down three tablespoons of butter until shimmering invitingly—that’s when you know it’s ready for action! Add diced apples straightaway ensuring they’re coated evenly before sprinkling flour atop them as well; this crucial step thickens juices released during cooking preventing excess liquid pooling at base once baked.
Next comes sweetening magic time—add brown sugar alongside fragrant spices like apple pie spice plus pure vanilla extract stirring gently until everything feels harmonious together! Cover tightly with lid allowing steam inside which will coax out natural sugars allowing seasoning penetration deep down into each piece thus creating perfect symphony flavors emerging thereafter… Cook occasionally stirring gently until they’re tender yet still holding their shape somewhere between 10–15 minutes should suffice but keep watchful eye throughout process adjusting timings according personal preferences accordingly until satisfied completely set aside once done awaiting glorious assembly ahead later on…
Step 2: Creating Our Delightful Cookie Crust
Now onto building that dreamy cookie crust you’ve been longing for—the foundation where magic truly begins unfolding beneath fingertips! Preheat oven ahead to approximately 350°F ensuring optimal results when time comes placing assembled masterpiece inside later down line… Grease up pie dish generously using either butter or non-stick spray guaranteeing nothing sticks unto surface whilst achieving golden crispiness across edges once baked properly thereafter yielding beautiful results overall…
In large mixing bowl beat softened unsalted butter alongside both sugars vigorously over medium speed aiming towards light fluffy consistency achieved within couple minutes marks indicating success thus far—this process known as creaming incorporates air supporting rising dough whilst adding delightful taste depth throughout entire creation eventually coming forth afterwards once baked through completely achieving ideal outcome desired overall result wise! Follow suit next by beating room temperature egg followed closely behind by introducing pure vanilla extract alongside measured amounts flours plus spices adjusting accordingly based upon preferences personal choices made beforehand—we’re building layers upon layers folks don’t forget about excitement here along way!!
Spread dough evenly across bottom plus up sides gently patting down firmly ensuring even distribution achieved entirely around corners edges alike maintaining structural integrity throughout journey pending ahead prior pre-baking session lasting around 10 minutes total thus far revisiting surface post-bake pressing gently upwards if necessary accommodating settling naturally occurring whilst awaiting luscious delights already bubbling underneath waiting patiently beneath protective shell cradled lovingly guiding forth towards glorious completion soon enough…
Step 3: Layering On That Heavenly Dulce de Leche
Once base achieves slight golden hue remove from oven drizzling roughly three ounces delicious dulce de leche atop pre-baked cookie crust spreading evenly ensuring each corner covered thoroughly possibly swirling around might yield enticing visual appeal enhancing presentation dramatically later down road ahead indeed…it’s about enjoying every aspect including aesthetics folks!! Next comes pride momentarily showcasing glorious homemade apple filling prepared earlier laid gently within confines direct connection alongside pressing down lightly ensuring no gaps remain present thereby locking everything tightly together establishing firm foundation supporting final touches forthcoming thus far amongst excited anticipation building steadily growing exponentially leading forth toward effortless unfolding brilliance awaiting fruition…
Step 4: Combining All Elements Together With Streusel Topping
Ahhh…now comes irresistible streusel topping composed primarily from combining remaining brown plus white granulated sugars accompanied generously sprinkled apple pie spice alongside requisite amount flour bringing forth delightful crunch factor elevating overall experience beyond mere indulgence alone!!! In separate medium bowl mix dry components well until fully integrated then introduce melted golden goodness pouring inside carefully folding utilizing large fork noting desired texture should resemble coarse crumbs resembling sandy beach tones indirectly hinting surf crashing against shores nearby inviting joyous laughter echoing across horizons awaiting moments shared amongst loved ones gathered round henceforth…
Sprinkle this tantalizing mixture generously atop layered beauty previously established working towards heavenly perfection promised earlier drawing forth excited gasps undoubtedly heard rising upwards above joyful chatter emanating home kitchens everywhere resonating familiarity warmth beckoning connections forged through food shared freely amongst friends family alike forever cherishing moments celebrated wholeheartedly surrounding each occasion brought forth originally envisioned…
Now pop back into hot oven letting cook approximately twenty-five thirty minutes total duration watching closely till edges appear bubbly golden crisp hinting perfection nearing closeness approaching evermore rapidly culminating finale awaited eagerly finally complete fulfilling dreams long held dear indeed!!!
And there you have it—the first steps toward creating what will soon become one unforgettable dessert experience filled with love laughter cherished memories crafted exquisitely amidst heartfelt intentions woven intricately throughout entire journey undertaken patiently side-by-side encouraging one another always onward towards greatness realized ultimately…
Stay tuned dear friend because we’re only getting started here!
Creating the Perfect Caramel Apple Pie with Cookie Crust
Now that we’ve got our delicious apple filling simmering away, let’s move on to the cookie crust. Trust me when I say this is one of the most crucial parts of our Caramel Apple Pie with Cookie Crust. A perfectly made cookie crust not only cradles your scrumptious filling but also adds a delightful sweetness and texture that contrasts beautifully with the tender apples and creamy caramel. So, roll up your sleeves, and let’s dive into this step-by-step guide!
Step 5: Prepping the Cookie Crust – The Foundation of Flavor
To kick things off, preheat your oven to 350 degrees Fahrenheit. This is essential because a properly preheated oven ensures that your cookie crust bakes evenly from the get-go, resulting in a golden-brown base that won’t crumble under pressure. While the oven is warming up, take a moment to prepare your pie dish – it needs a little TLC too! Greasing it with either butter or a non-stick baking spray will prevent any sticky situations later on. You want to ensure that every delicious bite comes out cleanly, so don’t skip this step!
Next, grab a mixing bowl and start by beating together the softened butter and both sugars – brown and white – for about two minutes until the mixture becomes light and fluffy. This step is vital because incorporating air into your butter creates a tender texture that elevates your cookie crust from ordinary to extraordinary. You’ll know you’ve hit the right consistency when it looks pale in color and has an almost whipped appearance. Remember to scrape down the sides of your bowl occasionally; you want all those sugar granules fully incorporated for even sweetness throughout.
Once you’ve achieved that dreamy fluffiness, it’s time to add in an egg at room temperature and some vanilla extract. Beating these ingredients until just combined will further enhance the flavor profile of your crust, adding depth with every bite. Afterward, seamlessly blend in your dry ingredients: flour, apple pie spice, baking soda, and salt. Don’t rush this step! Mixing on low speed prevents overworking the dough which could lead to a tough crust—definitely not what we’re aiming for here! Once everything is incorporated, use a rubber spatula to gently fold through any remaining flour until it’s smooth; this guarantees that no pockets of dry flour are left behind.
Step 6: Forming Your Cookie Crust – The Art of Patience
Now comes one of my favorite parts: forming the cookie dough into its rightful place in the pie dish! Using your hands or a spatula (and ensuring they are slightly dusted with flour if needed), gently spread the cookie dough across the bottom of your greased pie dish while also pushing it up along the sides. It should be an even layer—about half an inch thick would be perfect—so keep an eye on that thickness as you go along. It’s important to remember that this crust needs to withstand all those delightful layers we’re going to add later.
Once you have your dough nicely patted down into position, it’s time for a quick pre-bake session! Slide your pie dish into the oven for about 10 minutes; this initial baking helps set the structure of our crust before we load it up with filling and toppings. Keep watch as it bakes—you want it just barely firmed up with a hint of golden color starting to appear around the edges. If you notice any areas where the dough seems to have settled slightly during baking (which can happen), feel free to gently push those back up using clean hands—just be careful as it will be hot!
Step 7: Building Flavors – Layering Dulce de Leche
Once you’ve pulled that beautiful cookie crust from the oven (oh my goodness, just wait until you smell it!), it’s time for one of my favorite elements—the dulce de leche drizzle! Drizzling about 3 ounces over the warm cookie crust is not just about adding sweetness; it’s about creating layers of flavor that harmonize beautifully with our apple filling later on. The warmth from both the crust and dulce de leche allows them to meld together perfectly, creating an irresistible base layer that’s oh-so-sweet yet wonderfully complex.
After you’ve drizzled on that luscious liquid gold, gently spread out our apple pie filling over this heavenly layer. Take care as you press down lightly; you want everything snugly packed without squishing all those wonderful apples too much! This gentle pressing ensures even distribution while maintaining some texture—those tender bits of apple are what make every slice so satisfying.
Step 8: Topping It Off – Creating Crunchy Crumble
Now onto one more exciting part—the streusel topping! In a medium bowl, combine brown sugar, granulated sugar, apple pie spice, and flour until they’re mixed together well; this simple combination creates an utterly intoxicating crumble topping that adds both crunch and sweetness atop our already delicious pie. When introducing melted butter into this mixture, take care not to over-mix—using a large fork instead will allow you to create those beautiful large crumbs which are essential for achieving that coveted streusel texture.
Carefully sprinkle this crumbly concoction evenly over your apple filling layer—you want each bite bursting with flavor! Once everything is topped off beautifully (and trust me; it will look absolutely stunning!), pop your masterpiece back into the oven for about 25-30 minutes or until both topping and apples are bubbling joyously beneath their crispy blanket.
As always when baking anything sweet like our Caramel Apple Pie with Cookie Crust, I recommend keeping an eye on how things are progressing in there—oven temperatures can vary widely! Look for lovely golden-brown tops alongside fragrant aromas wafting through your kitchen; these signs indicate we’re nearing readiness.
Final Touches: Drizzling Delight
After removing your pie from its hot cocoon in the oven (allow yourself a moment to bask in its glorious scent!), let it rest for about 30 minutes before serving. This resting period may seem like torture when faced with such temptation but trust me—it’s absolutely paramount! Allowing time for cooling helps solidify those layers together while enhancing flavors across every delectable inch.
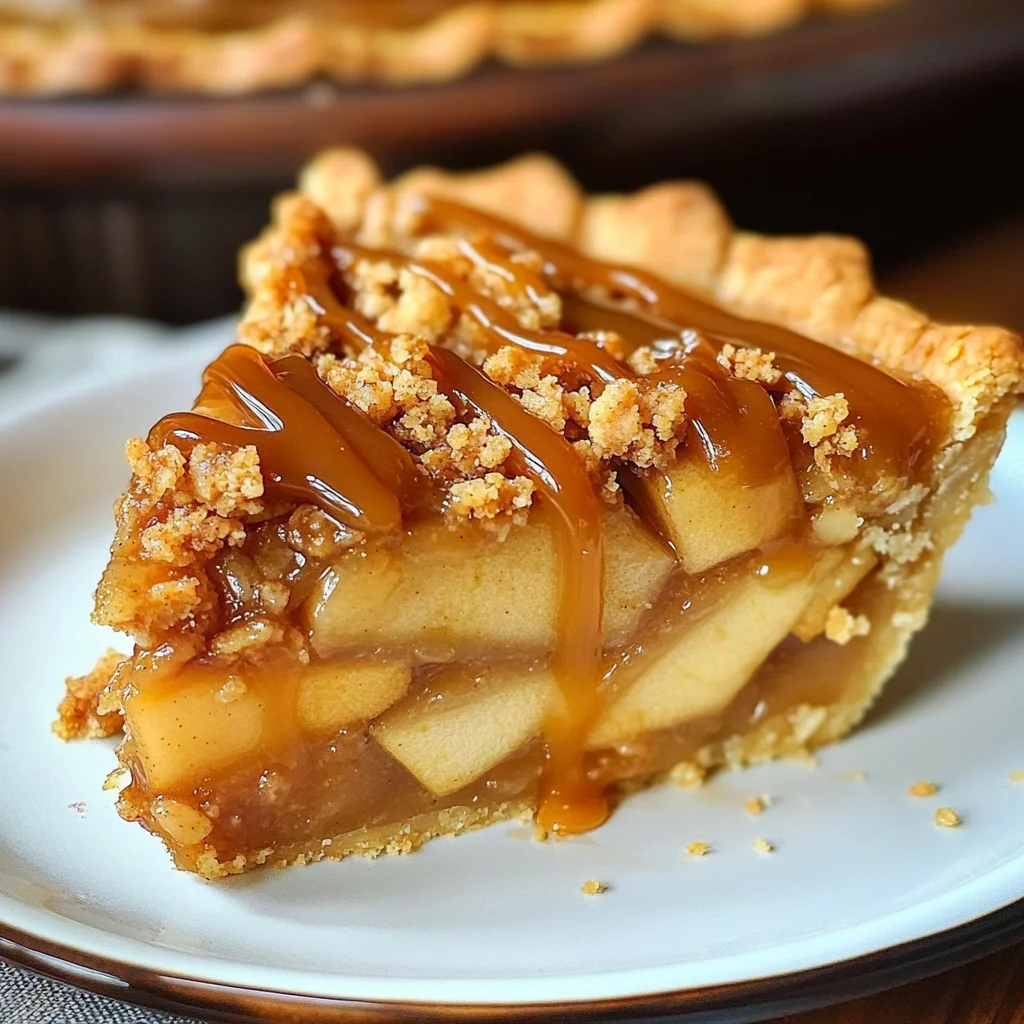
When you’re finally ready to indulge (and oh boy will you be ready!), drizzle any remaining dulce de leche over top just before slicing—it’s truly magical how much extra richness this adds! Each slice should showcase those beautiful layers—the soft apples peeking through their crunchy streusel crown—and I promise you won’t regret taking that extra time for cooling or drizzling!
In conclusion, when making this Caramel Apple Pie with Cookie Crust at home—or sharing slices with friends—you’re creating more than dessert; you’re crafting memories filled with warmth and joy around every shared bite. So gather around friends and family as you dig into each slice—a symphony of flavors awaits! Enjoy every moment of delight knowing you’ve created something truly extraordinary right from scratch.
Storage and Enjoyment Tips for Your Caramel Apple Pie with Cookie Crust
Now that your kitchen is filled with the intoxicating aroma of baked apples and sweet caramel, it’s time to savor the delightful masterpiece you’ve created! This Caramel Apple Pie with Cookie Crust is not just a treat for the taste buds; it’s a celebration of flavors that beckons you to share it with friends and family. However, should there be any leftovers—though I can’t imagine there will be!—let’s talk about how to store this beauty properly so you can enjoy it even longer.
Storing Leftover Caramel Apple Pie with Cookie Crust
To ensure your pie remains as delicious as the moment it was pulled from the oven, store any leftovers in an airtight container. If you don’t have one handy, wrapping it snugly in plastic wrap or aluminum foil can work wonders too. Place it in the refrigerator where it will keep fresh for about 3-4 days. To maintain that delightful texture and flavor, consider placing a slice of bread in the container; this non-negotiable trick will help absorb excess moisture while keeping that cookie crust soft and tender. Even after storage, each bite will still evoke that profound satisfaction of warm spices and rich caramel; trust me, it’s still utterly extraordinary! When you’re ready to indulge again, simply reheat individual slices in the microwave for about 20-30 seconds or pop them back into a warm oven at 350°F for about 10 minutes to bring back that freshly baked allure.
Freezing Components for Later
If you’re like me and love having a slice (or two) of this decadent pie on hand at all times, consider freezing components of the recipe. The cookie crust can be prepped ahead of time: just form it as instructed, wrap it tightly in plastic wrap or aluminum foil, and pop it into your freezer. It can stay frozen for up to three months! When you’re ready to bake, let it defrost in the refrigerator overnight before filling with your apple mixture. You’ll appreciate having this convenient option on hand when unexpected guests drop by or when those late-night cravings hit. Plus, knowing you have a homemade dessert waiting in the wings adds such joy to any busy week!
Caramel Apple Pie with Cookie Crust
Indulge in the warmth of homemade comfort with our Caramel Apple Pie with Cookie Crust, a delightful twist on a classic dessert. This enchanting pie features tender cinnamon-spiced apples nestled in a soft sugar cookie crust, all lovingly layered with luscious dulce de leche. Every slice offers a symphony of flavors that evoke nostalgia and joy, making it perfect for family gatherings or cozy evenings at home. The combination of buttery crust, sweet caramel, and spiced apples creates an unforgettable experience that will leave everyone asking for seconds.
- Prep Time: 30 minutes
- Cook Time: 45 minutes
- Total Time: 1 hour 15 minutes
- Yield: Serves approximately 8
- Category: Dessert
- Method: Baking
- Cuisine: American
Ingredients
- 6 Tbsp unsalted butter (softened)
- 1/2 cup brown sugar
- 1/4 cup white granulated sugar
- 1 egg (room temperature)
- 1 tsp vanilla extract
- 1 cup + 2 Tbsp all-purpose flour
- 1/2 Tbsp apple pie spice
- 3 Tbsp butter (for sautéing apples)
- 2.5 lbs gala apples (peeled, cored, and diced)
- 1 cup brown sugar (for filling)
- 1/3 cup flour (for filling)
- 6–7 oz dulce de leche (divided)
Instructions
- Preheat oven to 350°F. Grease a pie dish.
- In a mixing bowl, cream together the softened butter and sugars until light and fluffy. Add the egg and vanilla, mixing until combined.
- Gradually incorporate flour, apple pie spice, baking soda, and a pinch of salt until smooth.
- Press the dough into the prepared pie dish evenly across the bottom and up the sides. Pre-bake for about 10 minutes.
- While crust is baking, melt butter in a pot over medium heat. Add diced apples, brown sugar, spices, and cook until tender (10–15 minutes). Stir in flour to thicken.
- Spread dulce de leche over pre-baked crust, add apple filling on top.
- For streusel topping: Mix brown sugar, granulated sugar, flour, apple pie spice together; then add melted butter until crumbly.
- Sprinkle streusel over the apple layer and bake for another 25–30 minutes or until bubbly and golden.
Nutrition
- Serving Size: 1 serving
- Calories: 360
- Sugar: 28g
- Sodium: 150mg
- Fat: 16g
- Saturated Fat: 9g
- Unsaturated Fat: 5g
- Trans Fat: 0g
- Carbohydrates: 54g
- Fiber: 2g
- Protein: 3g
- Cholesterol: 35mg