Chicken Avocado Melt Sandwich
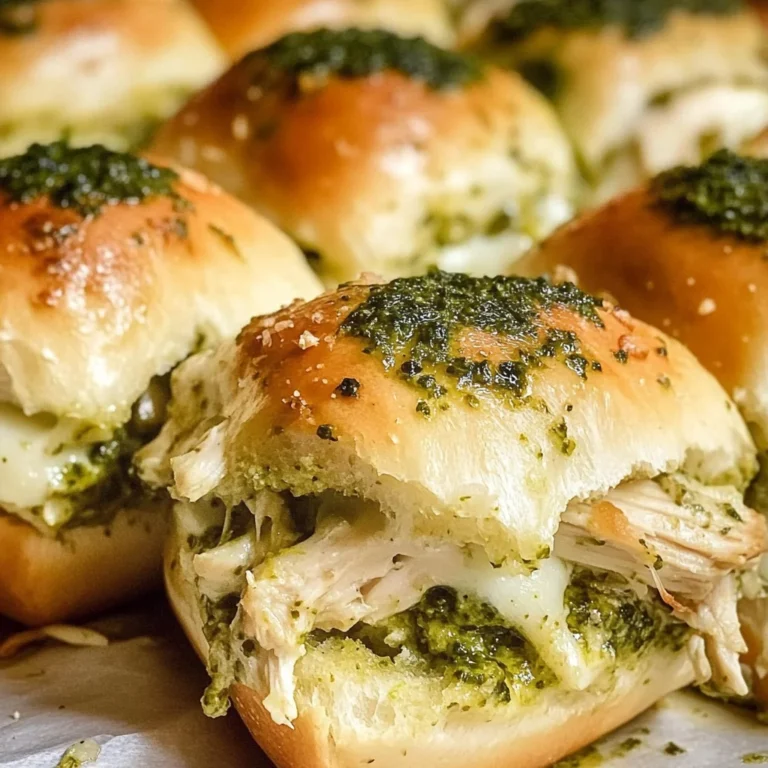
There’s something profoundly satisfying about the simple act of making a sandwich, isn’t there? It’s not just about slapping together a few ingredients; it’s a delightful ritual that can transport us back to cherished moments shared around the kitchen table. The Chicken Avocado Melt Sandwich is more than just a meal—it’s an experience. Picture this: tender chicken, perfectly seasoned and sautéed to golden perfection, nestled between slices of crusty bread, with creamy avocado and melted cheese oozing from every corner. This combination creates a symphony of flavors that dance on your palate and warms your heart. Every bite is like a warm hug on a plate, reminding you that good food is inherently tied to love and comfort.
As I think about this recipe, I remember the first time I crafted it for my friends during a casual brunch gathering. The kitchen filled with the intoxicating aroma of chicken sizzling away, mingling with the rich scent of melted cheese. It was one of those moments where everyone gathered around, laughter bubbling over as they took their first bites. This Chicken Avocado Melt Sandwich has since become a staple in my home—a go-to for impromptu lunches or cozy dinners. The beauty lies in its versatility; whether you’re serving it up for a leisurely weekend brunch or a quick weeknight dinner, it never fails to impress. Trust me on this one: once you’ve tasted it, you’ll find yourself reaching for this recipe time and again.
Chicken Avocado Melt Sandwich: A Comforting Delight
This Chicken Avocado Melt Sandwich is not only easy to prepare but also incredibly satisfying! The blend of tender chicken, creamy avocado, and gooey cheese makes each bite an indulgent treat. If you’re ever in need of a hearty yet healthy meal that can be prepared in no time at all, look no further! Gather your ingredients and let’s embark on this culinary journey together.
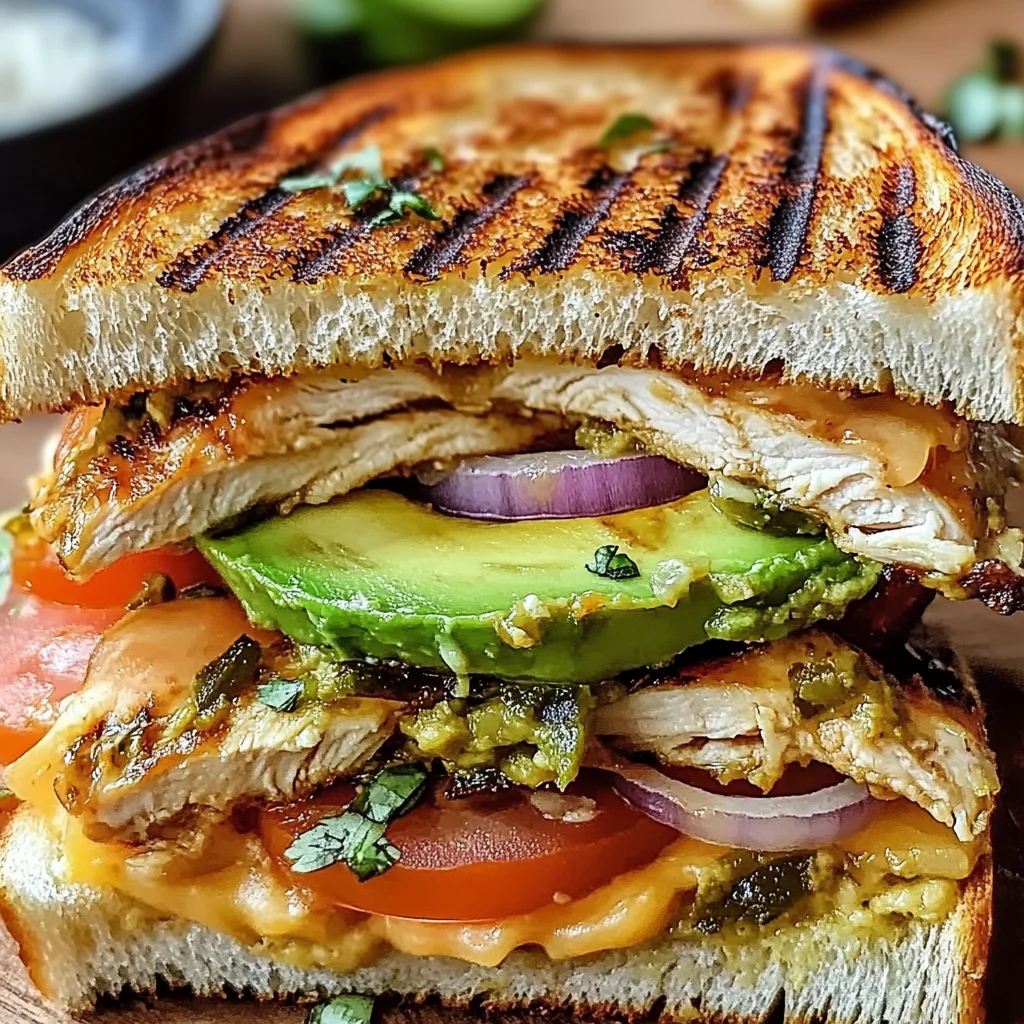
Ingredients:
Before diving into the cooking process, let’s take a moment to appreciate each ingredient that plays an essential role in crafting this delightful sandwich. Each element contributes its own unique flavor and texture that comes together beautifully.
- 2 boneless (skinless chicken breasts). The star of our Chicken Avocado Melt Sandwich! Boneless, skinless chicken breasts are not only easy to handle but also absorb flavors wonderfully, making them perfect for sautéing. When purchasing chicken, look for breasts that are firm and slightly pink; avoid any that have an unusual odor or discoloration. If you prefer a bit more flavor, marinating them ahead of time can add depth—think lemon juice or even some herbs—though it’s not necessary for this recipe.
- Salt and pepper to taste. These two humble ingredients are non-negotiable when it comes to seasoning your chicken properly. They enhance the natural flavors of the meat and help create that mouthwatering taste we all love. I often say that seasoning is an art; don’t be shy! A generous sprinkle will elevate your dish from good to unforgettable.
- 1 tablespoon olive oil. This liquid gold is essential for cooking our chicken beautifully while adding richness to the overall flavor profile of the sandwich. When heated correctly in our skillet or pan, olive oil helps create a lovely sear on the chicken while keeping it juicy inside—what’s not to love? For those who prefer other oils like avocado or even grapeseed oil due to their high smoke points and mild flavors, feel free to use them as substitutes!
- 1 avocado (sliced). Oh, the creamy goodness of avocado! Not only does it add an incredible texture contrast against the crispiness of the bread and the meltiness of the cheese, but it’s also packed with healthy fats that are beneficial for our bodies. When selecting avocados, gently squeeze without applying too much pressure; they should yield slightly if they’re ripe but still firm enough to hold their shape when sliced.
- 4 slices of your favorite cheese (Swiss, cheddar, or provolone work well). Cheese takes this sandwich over the top with its gooeyness! Each type has its charm: Swiss offers nutty undertones while cheddar brings sharpness; provolone provides a smokier flavor profile—choose based on your personal preference or what you have on hand! Make sure it’s fresh; aged cheeses melt better and bring more flavor.
- 4 slices of bread (sourdough, ciabatta, or your choice). The vessel for our delicious filling must not be overlooked! A robust bread like sourdough or ciabatta will provide structure while adding its own character with every bite—crunchy outside yet soft inside makes for perfect contrast! Opt for day-old bread if you have some; its staleness aids in achieving an excellent crispy crust during grilling.
- 2 tablespoons mayonnaise. This ingredient might seem trivial but trust me—it adds moisture and richness that beautifully complements our other fillings! Mayo acts as both glue and flavor enhancer here; feel free to mix in some herbs or spices if you’re feeling adventurous!
- 1 tablespoon Dijon mustard. Adding just enough tanginess without overwhelming other flavors is key here—the perfect partner alongside mayo! Mustard cuts through richness while elevating taste complexity; opt for whole grain if you enjoy texture!
- 1 small red onion (thinly sliced). Red onions bring sweetness when raw but mellow out nicely when grilled—perfectly balancing savory components in our sandwich! Thin slicing ensures they soften quickly during cooking without overpowering every bite’s flavor profile.
- 1 tomato (sliced). Juicy tomatoes offer freshness while adding color—a visual feast indeed! Choose ripe ones bursting with flavor; they’ll lend moisture without making things soggy when layered between other ingredients.
- Butter or olive oil for grilling the sandwiches. As we prepare to grill these beauties to perfection, using butter will give us that rich flavor we all adore while olive oil offers healthy benefits! Both options provide crispness so choose based on dietary preferences!
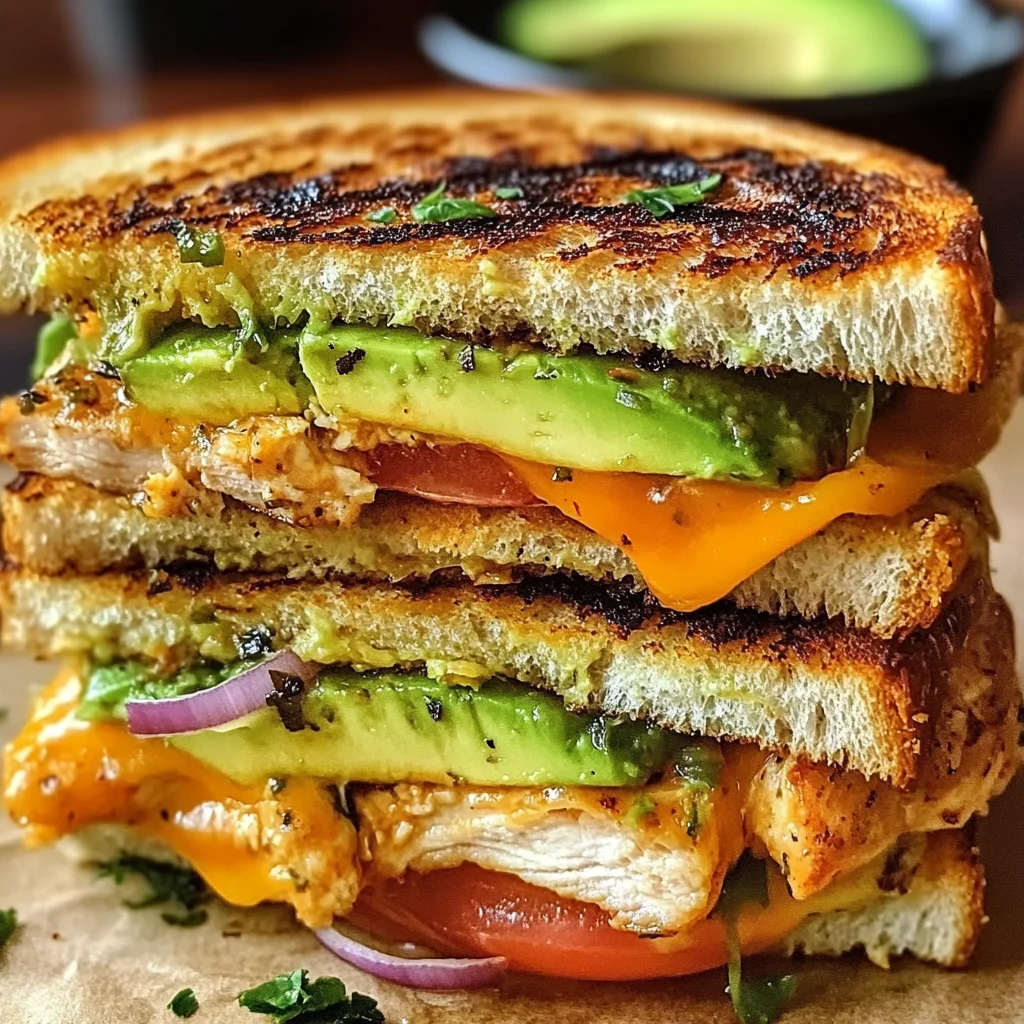
Equipment You’ll Need:
When diving into any recipe adventure like our Chicken Avocado Melt Sandwich creation process, having the right tools makes everything smoother! While they may not be ingredients, these trusty companions will ensure success every step along the way.
- Skillet or grill pan – This piece is absolutely paramount as it provides even heating essential for browning both sides of our sandwiches perfectly while allowing melt-in-your-mouth cheese goodness inside! Non-stick options simplify cleanup tremendously too!
- Spatula – A sturdy spatula helps flip those sandwiches with ease without losing precious fillings—you want everything neatly tucked inside so nothing spills out during cooking!
- Knife & cutting board – Sharp knives make slicing through vegetables effortless—and trust me when I say precision matters here since we want thin slices ensuring even cooking throughout!
- Meat thermometer (optional) – For those who love precision cooking techniques: using one ensures we reach safe internal temperatures without undercooking/overcooking poultry—around 165°F guarantees juicy results every time!
Now that we have everything prepped let’s get started on preparing our delicious Chicken Avocado Melt Sandwiches!
Step 1: Seasoning & Searing Perfection
To kick things off right away with flavor development begins by seasoning each boneless chicken breast generously with salt and pepper on both sides—this step sets up foundational flavors which infuse throughout every bite later on! Heat up olive oil in your skillet over medium-high heat until shimmering like liquid gold before carefully placing seasoned breasts inside—listen closely as they sizzle happily upon contact! Cook them undisturbed for about 6-7 minutes per side until golden brown develops visibly along edges indicating caramelization has occurred—that’s where real magic happens folks! Once done remove from heat allowing them rest briefly before slicing thinly across grain ensuring tenderness remains intact within final product… trust me when I say skipping resting leads tough textures which no one wants at their table!
Step 2: Preparing Toppings
With succulent pieces ready let’s move onto assembling glorious toppings starting off by slicing ripe avocados into delicate wedges alongside preparing chosen cheeses into manageable sizes—we want even distribution across all segments later after grilling so keep uniformity top-of-mind here whenever possible since uneven amounts may lead uneven melting results down line…and nobody wants half-melted patches right? Next rinse off those vibrant tomatoes under cold water giving them quick drying session before slicing evenly whilst thinly chopping beautiful red onions too—this combination creates wonderful contrasts bringing brightness alongside depth into overall experience making each mouthful interesting rather than monotonous!
Step 3: Assembling Layers
Now comes perhaps my favorite part—the assembly process where artistry meets functionality creating something truly extraordinary visually appealing too—that’s why I always recommend spreading mayonnaise mixed carefully with Dijon mustard across slices generously providing foundation layers topping holds onto tightly preventing potential slips later down line when grilling occurs… don’t rush this step because taking care here means less mess during cooking phase plus added complexity added onto already fabulous flavors waiting within layers beneath crusty exterior soon achieved post-grilling efforts… place down two pieces onto clean surface then start layering beginning first sliced chicken followed closely afterwards by luscious avocado wedges followed lastly by choice selection from array cheeses awaiting next moments fate come melting action fired up within dry heat enveloping surroundings soon enough…
Step 4: Grilling Glory
Ready for action? Heat skillet again over medium temperature melting butter/oil mixture until hot enough sizzles arise announcing readiness ahead… place assembled sandwiches gently into pan pressing slightly downwards utilizing spatula encouraging golden crust develop evenly across entire surface area whilst maintaining internal warmth throughout contents simultaneously—a must-follow technique ensuring satisfaction guaranteed upon biting through crispy exteriors yielding pure joy found hidden underneath layers held tightly together still intact thanks diligent effort put forth thus far leading directly towards ultimate goal achieved soon enough after approximately three-four minutes pass per side flip finishing touches remain crucial toward achieving perfect result desired every single time without fail promoting feelings elation stemming forth once served warm inviting guests gather eager partake joyous moment shared amongst loved ones around tables set beautifully awaiting delights served fresh hot directly out from kitchens built memories lived forever cherished instead ordinary day transforming extraordinary occasions experienced filling hearts bellies alike…
And there you have it—the beginnings of crafting your very own Chicken Avocado Melt Sandwich masterpiece awaits completion shortly thereafter…
Step 5: The Art of Assembling Your Masterpiece
Now that we have our beautifully cooked chicken resting and ready to be transformed into something magical, it’s time to assemble our Chicken Avocado Melt Sandwich. This step is where the magic truly begins, so let’s take a moment to savor it! First, grab those slices of bread that you’ve lovingly prepared with a thin layer of mayonnaise and Dijon mustard. The spread serves not just as a flavor enhancer but also creates a barrier that prevents the bread from getting soggy once we load it up with all those delightful ingredients. You’ll want to make sure every slice has an even coating; this small detail is absolutely paramount for achieving that perfect crunch when grilled.
Now, lay two slices of bread on your work surface, mayo side up. It’s time to layer in the star players! Start by placing the sliced chicken on each piece of bread, making sure to cover as much surface area as possible—there’s nothing worse than a bite missing the good stuff! Follow this with the creamy avocado slices; their buttery texture is going to complement the chicken beautifully. And then comes the cheese—oh, glorious cheese! Whether you choose Swiss for its nutty complexity, cheddar for its sharpness, or provolone for its mildness, don’t skimp here; four generous slices will melt into an ooey-gooey dream that brings everything together. Once you’ve layered these key components, sprinkle thin slices of red onion and juicy tomato on top for that refreshing crunch and tangy lift. Trust me on this; these toppings elevate your sandwich into a symphony of flavors you won’t forget.
Step 6: Grilling – The Sizzle That Creates Magic
Now comes my favorite part: grilling! This step is where we bring everything together in a golden embrace of heat and flavor. Heat your skillet or grill pan over medium heat; patience here is key because too high a temperature can scorch the bread before the cheese gets a chance to melt. Once hot, add just a touch of butter or olive oil—this creates that gorgeous golden crust while infusing your sandwich with rich flavor. The sound of sizzling as you place your sandwiches in the pan is music to my ears—it’s like an invitation to indulge!
Carefully lower your assembled sandwiches into the skillet, ensuring they sit flat against the surface without any overcrowding (if they don’t fit nicely in one go, just grill them in batches). Now here’s where you need to exercise some restraint—don’t rush this step! Allow them to cook undisturbed for about 3-4 minutes until you see that beautiful golden-brown color forming on the underside. You’ll know it’s time to flip when you can easily lift a corner without tearing apart all your hard work. Gently press down with a spatula after flipping; this helps meld those flavors and ensures even melting of that luscious cheese.
Step 7: The Perfect Flip – A Moment of Anticipation
Flipping your sandwiches might seem straightforward, but this moment deserves its own spotlight! Once you’ve allowed one side to become perfectly golden brown and aromatic (you should be able to smell that delightful combination wafting through your kitchen), carefully slide your spatula under one half and flip it over. This requires some finesse—too much force could cause all those mouthwatering layers to spill out onto your pan! So take a breath and do it gently yet decisively. What you’re looking for here is not just color but texture—the crispier side will create contrast against the soft fillings inside.
After flipping, give them another 3-4 minutes on this side as well—this allows that gooey cheese time to melt properly while ensuring both sides are equally enticingly crisp. Keep an eye on them during this time; if they seem to be browning too quickly or unevenly, adjust your heat slightly lower—you want perfection without burning! By now, you should be feeling that joyful anticipation building because soon enough you’ll be savoring every spectacular bite.
Step 8: Resting – The Crucial Cooling Phase
Once your sandwiches are grilled to perfection and oozing with melty goodness, resist the urge to dive right in! I know it’s hard; trust me, I’ve been there countless times myself! But letting them rest for just about 1-2 minutes before slicing is non-negotiable—it allows everything inside to settle down a bit. Think about it: if you slice right away, all those delectable juices and melted cheese will spill out everywhere like an enthusiastic waterfall instead of staying nestled within each bite.
During this resting phase, take in the aroma wafting through your kitchen; it’s utterly intoxicating! You’ll notice how each layer starts melding together even more as they cool slightly—a transformative effect that enhances both texture and flavor profiles in ways you wouldn’t expect. And hey—use this time wisely! Grab those plates or garnish with fresh herbs if you’re feeling fancy. Once rested, slice each sandwich in half diagonally (it looks more appealing) and prepare yourself for an experience that’s profoundly satisfying.
Conclusion:
As we wrap up our flavorful journey through crafting the Chicken Avocado Melt Sandwich, I hope you feel as inspired and excited as I do! Each step has been infused with passion—from seasoning those chicken breasts perfectly to layering on creamy avocado and melty cheese—this recipe elevates everyday ingredients into something truly extraordinary. It’s all about creating that symphony of flavors and textures: tender chicken harmonizing beautifully with creamy avocado, complemented by gooey cheese enveloped in crispy bread. Isn’t it amazing how such simple ingredients can come together to create something so profoundly satisfying?
This recipe is an absolute must-try not just because it tantalizes your taste buds but also because it’s incredibly accessible! Whether you’re preparing a comforting lunch on a rainy day or hosting friends for brunch, this Chicken Avocado Melt Sandwich shines bright in any occasion. Picture this: pulling it out from the grill pan, watching as the cheese stretches while taking that first bite—the experience alone makes it worthwhile. It invites smiles and sparks conversations around the table; I can almost hear laughter bubbling up over shared bites!
Pairing suggestions are endless! Imagine savoring one of these sandwiches alongside a refreshing side salad drizzled with lemon vinaigrette; it contrasts beautifully with the richness of the melt. For an afternoon pick-me-up, why not serve it with sweet potato fries? And if you’re after something truly decadent, consider pairing it with roasted garlic mashed potatoes—the creaminess will elevate your meal into pure bliss!
Feeling adventurous? This recipe is wonderfully adaptable! Perhaps swap out avocado for zesty hummus or try adding spicy jalapeños for an extra kick; each variation brings its own unique flair while keeping true to that comforting essence we love so much. So grab your apron and get cooking—I can’t wait for you to try this yourself! Share your experiences with loved ones and let’s connect over our culinary journeys together!
Chicken Avocado Melt Sandwich

Indulge in the delightful flavors of the Chicken Avocado Melt Sandwich, a comforting classic that’s as satisfying to prepare as it is to eat. This sandwich features tender, seasoned chicken breasts paired with creamy avocado and melted cheese, all nestled between crispy slices of your favorite bread. Whether you’re enjoying it for a leisurely brunch or a quick weeknight dinner, this easy-to-make recipe promises layers of flavor that will warm your heart and please your palate. Perfectly grilled to achieve a golden crust, each bite delivers a delicious combination of textures and tastes that make it an instant favorite for any occasion.
- Prep Time: 15 minutes
- Cook Time: 15 minutes
- Total Time: 30 minutes
- Yield: Serves 2 sandwiches 1x
- Category: Main
- Method: Grilling
- Cuisine: American
Ingredients
- 2 boneless skinless chicken breasts
- Salt and pepper to taste
- 1 tablespoon olive oil
- 1 avocado, sliced
- 4 slices of Swiss, cheddar, or provolone cheese
- 4 slices of sourdough or ciabatta bread
- 2 tablespoons mayonnaise
- 1 tablespoon Dijon mustard
- 1 small red onion, thinly sliced
- 1 tomato, sliced
- Butter or olive oil for grilling
Instructions
- Season chicken breasts with salt and pepper. Heat olive oil in a skillet over medium-high heat. Sear the chicken for about 6-7 minutes per side until golden brown; allow to rest before slicing.
- Prepare toppings by slicing avocado, cheese, onion, and tomato.
- Spread mayonnaise and Dijon mustard on bread slices. Layer sliced chicken, avocado, cheese, onion, and tomato.
- Heat skillet over medium heat with butter or olive oil. Grill sandwiches until golden brown and cheese melts (about 3-4 minutes per side).
- Let rest for 1-2 minutes before slicing in half to serve.
Nutrition
- Serving Size: 1 sandwich
- Calories: 590
- Sugar: 3g
- Sodium: 780mg
- Fat: 32g
- Saturated Fat: 10g
- Unsaturated Fat: 20g
- Trans Fat: 0g
- Carbohydrates: 40g
- Fiber: 5g
- Protein: 36g
- Cholesterol: 90mg