Fruity Pebbles Cheesecake Tacos: A Colorful Delight
I first stumbled upon the idea of Fruity Pebbles Cheesecake Tacos during a late-night dessert run with friends. We were at this quirky little spot known for their wild dessert creations, and I couldn’t get over how fun and colorful those tacos looked! The combination of a creamy cheesecake filling nestled in a crunchy taco shell, topped with those nostalgic Fruity Pebbles, was just calling my name. I knew I had to recreate it at home — not only to save a few bucks but also to make it even more delicious than the original!
Let me tell you, perfecting this recipe was no walk in the park. I went through five different attempts, each one more disastrous than the last. The first batch of taco shells turned into sad little puddles, and my initial cheesecake filling? Let’s just say it was more “soup” than “cheesecake.” With each iteration, I aimed to get that ideal balance between crusty yet tender taco shells and a creamy filling that wouldn’t ooze out like a melted ice cream cone. It took a bit longer than I’d like to admit, but hey, practice makes perfect, right?
But oh man, once I finally nailed it, all that trial and error was totally worth it! These Fruity Pebbles Cheesecake Tacos are nothing short of a celebration on your plate — the crunchy shell contrasts beautifully with the velvety cheesecake filling that’s bursting with flavor. Plus, that vibrant pop of fruity goodness from the cereal adds not just texture but also whimsy! I can’t wait for you to try this recipe; trust me, they’re going to be the star of any gathering or midnight snack session!
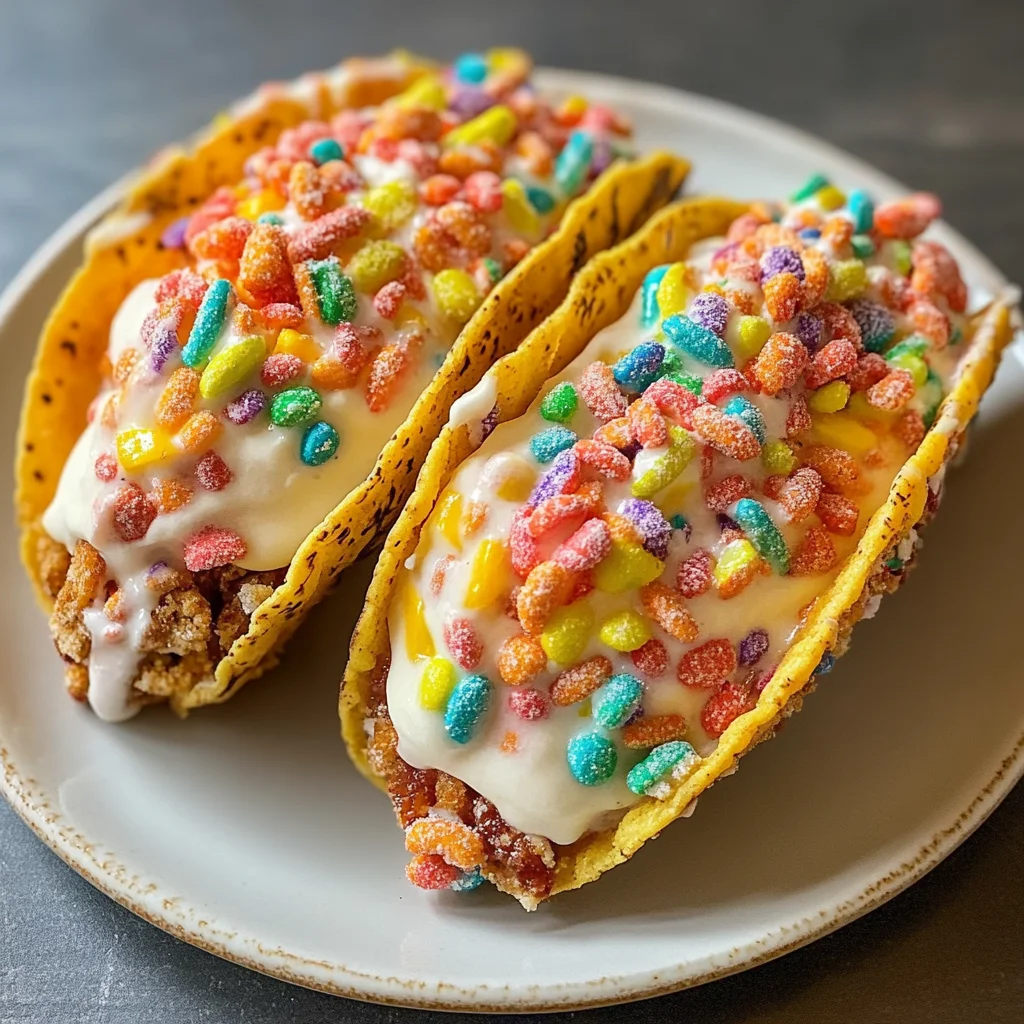
These Fruity Pebbles Cheesecake Tacos are….
…a whimsical dessert that combines rich cheesecake with a playful crunch!
1. They deliver an explosion of flavor with every bite, thanks to the combination of creamy cream cheese and sweet vanilla extract. This delightful mix creates a luscious cheesecake filling that sings with sweetness, perfectly complemented by the fruity notes of the Fruity Pebbles mixed in.
2. Irresistible texture – each taco features a smooth and creamy filling nestled inside a soft yet sturdy shell. The contrast between the velvety cheesecake and the slight crunch from the crushed Fruity Pebbles creates a satisfying mouthfeel that will keep you coming back for more.
3. Elevated technique – the secret to achieving that light and airy cheesecake filling lies in folding whipped cream into the mixture. This method not only enhances the creaminess but also adds an ethereal quality, making these tacos feel indulgently decadent without being overly heavy.
4. Incredible value – making these Fruity Pebbles Cheesecake Tacos at home means you can enjoy a gourmet dessert without breaking the bank. With simple ingredients like cream cheese and sugar, you can whip up a batch that serves multiple people, ensuring everyone can join in on the fun without any guilt!
PS These tacos are perfect for sharing! Each one is just the right size for a sweet treat that won’t leave you feeling too full.
Ingredients for the Fruity Pebbles Cheesecake Tacos
Each ingredient in this dish plays an essential role in flavor and texture. Here’s what you’ll need:
- 8 oz cream cheese (softened): Provides a rich and creamy base for the cheesecake filling.
- 1/2 cup sugar: Sweetens the filling to balance the tanginess of the cream cheese.
- 1 tsp vanilla extract: Infuses a warm, inviting flavor that enhances the overall taste.
- 1 cup whipped cream (for folding in): Adds lightness and a fluffy texture to the cheesecake filling.
- 1/2 cup Fruity Pebbles (for mixing in): Contributes fun flavors and a delightful crunch to the filling.
- 1 cup flour: Forms the structure of the taco shell for holding all the delicious fillings.
- 1/2 tsp salt: Enhances all flavors while balancing sweetness in both the shell and filling.
- 1/4 cup butter (melted): Adds richness and helps create a tender texture in the taco shells.
- 1/4 cup water (as needed): Adjusts the dough consistency for perfect taco shells.
- 1/2 cup Fruity Pebbles (for coating): Coats the taco shells with colorful crunch for added excitement.
- 1/4 cup Fruity Pebbles (for garnish): Provides a vibrant finishing touch and extra crunch on top.
- 1/4 cup chocolate sauce (optional): Offers an indulgent drizzle that complements the sweetness of the cheesecake.
- 1/4 cup whipped cream (for serving): Serves as a light topping, making each bite feel extra special.
You Must Bake the Taco Shells. No Shortcuts!
I know, I know—baking the taco shells adds a bit of time and effort to your day. Believe me, I tried to find a shortcut! I thought maybe I could just fry them or use store-bought shells, but trust me, it’s just not the same. After some serious testing (and a few culinary disasters), I realized that baking is essential for achieving that perfect crispy texture.
When you bake the taco shells, you’re allowing the flour to properly set and develop structure. Think of it like making pizza dough: if you skip the oven, you’ll end up with something mushy and sad instead of a delightful crunchy vessel for your cheesecake filling. The heat transforms your dough into golden perfection that holds its shape while cradling that luscious cheesecake inside.
What does baking the taco shells do?
- Texture — Baking gives the shells a crispy exterior that contrasts beautifully with the creamy filling.
- Structure — Properly baked shells maintain their shape, preventing any sogginess from the filling.
- Flavour — The baking process enhances the nutty flavor of the flour, adding complexity to every bite.
- Colour — A golden-brown hue indicates perfectly baked taco shells, adding visual appeal to your dessert.
- Shelf Life — Baked shells remain crisp longer than unbaked or fried options, making leftovers more enjoyable.
Different baking times
- 5 minutes (okay) — The shells are soft and barely formed; they will collapse under pressure when filled.
- 10 minutes (good) — The taco shells are golden and crispy on the outside but may still be slightly soft inside.
- ⭐️ 12 minutes ⭐️ — Ideal! You get perfectly baked taco shells that are both crispy and sturdy.
- 15 minutes (too far) — While they may look beautiful at this point, they risk becoming overly dry and hard.
If you’re tempted to skip or rush the baking step, let me warn you: under-baked taco shells will lead to disappointment. They’ll crumble under the weight of that dreamy cheesecake filling—and nobody wants a dessert disaster!
How to make Fruity Pebbles Cheesecake Tacos

Are you ready to see how straightforward it is to make the Fruity Pebbles Cheesecake Tacos of your dreams??
1. PREPARE TACO SHELLS
Let’s get those taco shells ready for some delicious cheesecake action!
1. Preheat – Preheat the oven to 350°F (175°C). This temperature is perfect for getting that golden-brown color on your taco shells.
2. Combine – In a mixing bowl, combine 1 cup of flour and 1/2 tsp of salt. Mixing these dry ingredients first ensures an even distribution of flavor.
3. Mix – Add 1/4 cup of melted butter and mix until crumbly. This step is crucial because the butter adds richness; gradually add enough water (about 1/4 cup) until a dough forms that holds together without being sticky.
4. Roll & Cut – Roll out the dough on a floured surface and cut it into circles. Place these circles in taco shell molds and bake for about 10 minutes, or until they are golden brown. Keep an eye on them as they bake; you want them just right!
HANDY TIPS
- If you don’t have taco shell molds, you can shape the dough around the handle of a wooden spoon while baking!
- Want a crunchier shell? Bake them for an additional minute or two, but monitor closely to avoid burning.
2. MAKE CHEESECAKE FILLING
Now onto the creamy, dreamy cheesecake filling that’s going to steal the show!
5. Beat – In a mixing bowl, beat together 8 oz of softened cream cheese, 1/2 cup of sugar, and 1 tsp of vanilla extract until smooth and fluffy. This step will create a luscious base for your filling—make sure there are no lumps!
6. Fold – Gently fold in 1 cup of whipped cream and 1/2 cup of Fruity Pebbles until well combined. The whipped cream lightens up the mixture while the Fruity Pebbles add that fun crunch we all love!
HANDY TIPS
- For best results, ensure your cream cheese is fully softened; cold cream cheese can lead to lumps.
- Feel free to add more Fruity Pebbles if you’re feeling adventurous—who doesn’t love extra crunch?
3. ASSEMBLE TACOS
It’s time to bring everything together into one delightful package!
7. Fill – Once the taco shells have cooled completely, fill each shell with the cheesecake mixture using a piping bag or spoon for neatness.
8. Top – Finish off by topping each filled taco with additional Fruity Pebbles, drizzling with chocolate sauce if desired, and adding a dollop of whipped cream for that extra touch!
HANDY TIPS
- If you want to prepare these ahead of time, assemble them without toppings and add those just before serving for maximum freshness!
- Try swapping out chocolate sauce for caramel sauce—yum!
Now you’ve created these stunning and whimsical Fruity Pebbles Cheesecake Tacos! With their combination of crunchy shells and creamy filling, they’re sure to be a hit at any gathering. Make these once, and I wager they will invade your dreams every night too! – Nagi x
FAQ – Fruity Pebbles Cheesecake Tacos
🧊 How long will these cheesecake tacos keep?
These Fruity Pebbles Cheesecake Tacos are best enjoyed fresh, but you can store them in the refrigerator for up to 3 days. However, I have found that their quality diminishes over time:
- Day 1: 100% delicious
- Day 2: 90% as good (the taco shells may start to get a bit soft)
- Day 3: 75% as good (the filling stays tasty, but the texture suffers)
To maintain their crispness, consider storing the taco shells and cheesecake filling separately and assemble just before serving!
❄️ Can I freeze these cheesecake tacos?
Yes, you can freeze the taco shells and cheesecake filling separately! For best results:
- Taco Shells: Place them in an airtight container or ziplock bag. They should keep well for about 2 months.
- Cheesecake Filling: Store it in a separate airtight container. It can also last up to 2 months.
When you’re ready to enjoy them, thaw both components in the refrigerator overnight. Just remember to re-crisp the taco shells briefly in the oven at 350°F (175°C) for about 5 minutes!
🌾 Can these be made gluten free?
Absolutely! To make gluten-free Fruity Pebbles Cheesecake Tacos, simply substitute the all-purpose flour with a gluten-free flour blend. I recommend using one that has xanthan gum included; this helps mimic the elasticity of regular flour. The rest of the recipe remains unchanged, so you can still enjoy that creamy cheesecake goodness wrapped in a fun taco shell!
🍬 Can I reduce the sugar or substitute with sweeteners?
No, I really wouldn’t recommend reducing the sugar in this recipe. The sugar is essential for achieving that perfect balance of sweetness and creaminess in the cheesecake filling. I tried using less sugar and even experimented with stevia and erythritol, but each time it affected not just the flavor but also the texture—leading to a filling that was too dense or lacking in creaminess. If you’re seeking lower-sugar options, consider using flavored yogurt instead for some sweetness.
🤔 Why do I need to preheat my oven before baking taco shells?
Preheating your oven is crucial because it ensures that your taco shells cook evenly and achieve that lovely golden color. If you skip this step, they may not rise properly and could end up being chewy rather than crispy—definitely not what we’re going for here! Trust me; I’ve made this mistake more times than I care to admit! 😉
🍓 Can I customize or add different toppings?
Of course! This recipe is super versatile when it comes to toppings. While I love using extra Fruity Pebbles for crunch, you can also try:
- Fresh fruits like strawberries or blueberries
- A drizzle of caramel sauce instead of chocolate
- Crushed nuts for added texture
Feel free to get creative! Just remember that what you add should complement the sweet, creamy cheesecake filling without overpowering it.
🥄 How did you come up with this recipe idea?
I tested these tacos multiple times because I wanted to create something fun yet deliciously indulgent—and let me tell you, there were some epic failures along the way! 😅 After many iterations (about ten), balancing flavors and textures became key. The combination of crispy taco shells filled with creamy cheesecake and topped with colorful Fruity Pebbles is truly a party on a plate!
Troubleshooting
I will continue to add more to this Troubleshooting section as I start seeing questions coming through from people who have made the recipe.
Troubleshooting tips
“My taco shells are uneven and not the right shape! 😭”
- This can happen if your dough wasn’t rolled out evenly. Make sure to roll it out to about 1/8 inch thick for uniform thickness, or they may bake unevenly.
- If you didn’t use taco shell molds or shaped them properly before baking, they could spread and lose their intended form. Ensure you press the dough into the molds firmly!
I bet they were still YUM though!
“My cheesecake filling is too runny! 😱”
- If your cream cheese wasn’t softened enough before mixing, it might not combine well with the sugar, leading to a watery filling. Always let your cream cheese sit at room temperature for about 30 minutes before using it.
- Over-folding the whipped cream into the mixture can also cause the filling to become too loose. Gently fold until just combined for a thicker consistency.
I bet they were still YUM though!
“My taco shells turned out too hard! 🔥”
- This usually means that your dough was overbaked. Keep an eye on them in the oven; you want them golden brown but not dark. Baking them for too long can lead to a crunchy texture instead of a soft shell.
- If you used too much flour while rolling out, that could also lead to a tougher texture. Make sure to measure accurately!
I bet they were still YUM though!
“The color of my cheesecake filling is too pale! 😕”
- If you didn’t use enough Fruity Pebbles in your filling, it could lack that vibrant color. Aim for at least 1/2 cup mixed in for that fun pop!
- Mixing at low speed can sometimes keep air from incorporating into the batter, which helps with color intensity as well. Make sure you’re beating thoroughly but gently!
I bet they were still YUM though!
Fruity Pebbles Cheesecake Tacos
Ingredients
Method
- Preheat the oven to 350°F (175°C).
- In a mixing bowl, combine flour and salt.
- Add melted butter and mix until crumbly. Gradually add water until a dough forms.
- Roll out the dough and cut into circles. Place in taco shell molds and bake for 10 minutes until golden.
- In a mixing bowl, beat softened cream cheese, sugar, and vanilla extract until smooth.
- Fold in whipped cream and Fruity Pebbles until well combined.
- Once taco shells are cooled, fill each shell with the cheesecake mixture.
- Top with additional Fruity Pebbles, chocolate sauce, and whipped cream as desired.