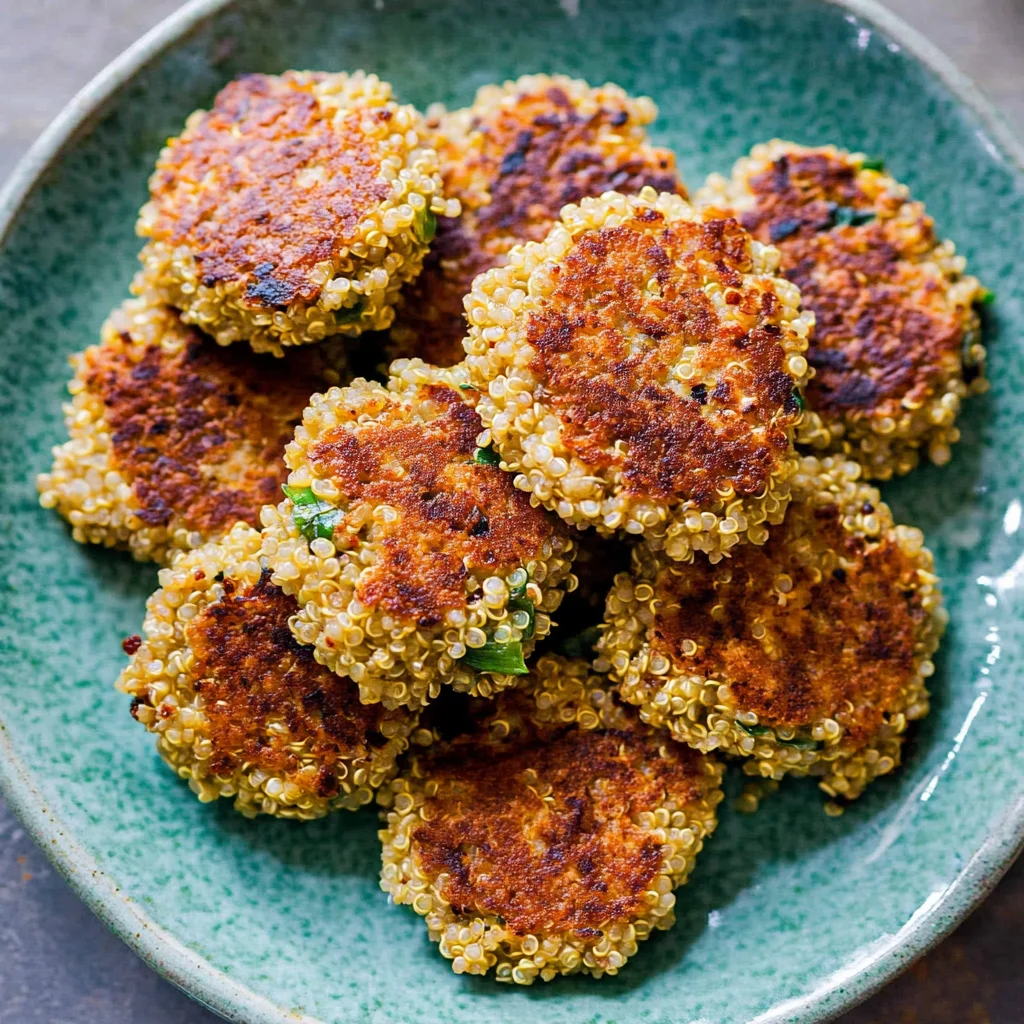
Quinoa Patties: Crispy and Flavorful Homemade Delight
I first fell in love with quinoa patties during a lunch outing at a cozy little café that boasted a menu full of wholesome delights. The moment I took my first bite, I was hooked—the crispy exterior giving way to a tender, flavorful center was pure magic. But as much as I adored those little nuggets of joy, the price tag for a simple meal started to add up. So, I decided to take on the challenge of recreating them at home, not only to save some cash but also to make them exactly how I wanted—extra crispy on the outside and bursting with flavor inside!
Let me tell you, perfecting my quinoa patties wasn’t a walk in the park. I think I went through about six iterations before I finally nailed the recipe! It was a mix of too dry, too mushy, and let’s not even talk about the time they completely fell apart in the pan (cue my dramatic sigh). Each failed attempt taught me something new—I was striving for that ideal balance of texture and flavor while ensuring they held together beautifully. You wouldn’t believe how many times I had to remind myself that it was all part of the process!
But oh boy, was it worth every bit of frustration! The final result? Delicious and nutritious quinoa patties that are not just perfect as a snack but also shine as a main dish. They’re packed with flavor, have that delightful crunch on the outside, and stay wonderfully moist inside—seriously addictive! If you’re looking for something that’s easy to whip up and sure to impress, trust me, you need to give these quinoa patties a try. You won’t regret it!
These Quinoa Patties are….
…simply the best way to enjoy a healthy snack that doesn’t compromise on taste!
1. They deliver a savory depth of flavor thanks to the perfect balance of spices like garlic powder and cumin. These ingredients not only enhance the natural nuttiness of the quinoa but also create a mouthwatering aroma that fills your kitchen, making every bite an experience worth savoring.
2. Expect a crispy exterior with a tender center that makes for an irresistible eating experience. The secret lies in allowing the quinoa to cook properly, which gives it a firm yet fluffy texture that holds up beautifully during frying, ensuring each patty has that delightful crunch.
3. The technique of squeezing excess moisture from the grated zucchini is crucial for achieving the ideal consistency in these patties. By doing this, you prevent them from becoming soggy, allowing the quinoa and other ingredients to shine through while maintaining their shape during cooking.
4. Affordable and accessible, these Quinoa Patties offer fantastic value compared to store-bought options. With simple ingredients like quinoa, eggs, and veggies, they provide a nutritious meal or snack without breaking the bank, making it easy to whip up a batch whenever cravings hit.
PS These Quinoa Patties yield about 12 patties, perfect for meal prepping or sharing with friends!
Ingredients You’ll Need
Each ingredient in this dish plays an essential role in flavor and texture. Here’s what you’ll need:
1 cup quinoa (rinsed and drained): Serves as the hearty base packed with protein and nutty flavor.
2 cups water (for cooking quinoa): Essential for hydrating the quinoa to achieve the perfect fluffy texture.
1/2 teaspoon salt: Enhances all the flavors, bringing balance to the dish.
1 cup carrot (grated): Adds natural sweetness and a lovely crunch to the patties.
1 cup zucchini (grated and excess moisture squeezed out): Contributes moisture and a subtle flavor while keeping the patties light.
1/2 cup green onion (chopped): Provides a fresh, mild onion taste that brightens the overall flavor profile.
2 large eggs: Acts as a binding agent, helping to hold the patties together while adding richness.
1/2 cup bread crumbs (or gluten-free alternative): Gives structure and helps achieve a crispy exterior when cooked.
1/4 cup parmesan cheese (grated): Introduces a savory depth with its umami flavor that complements the other ingredients.
1 teaspoon garlic powder: Infuses a warm, aromatic essence that enhances the overall taste.
1 teaspoon cumin: Adds an earthy warmth, giving the patties a delightful hint of spice.
1/2 teaspoon black pepper (freshly ground): Offers a subtle kick, elevating the flavors without overpowering them.
- 2 tablespoons olive oil (for frying): Ensures a golden-brown crust while adding healthy fats for richness.
You must let the quinoa sit after cooking. No shortcuts!
I wish I could say that skipping this step wouldn’t matter, but trust me, I’ve tried cutting corners and it just doesn’t work. I found myself with mushy patties instead of the delightful texture we want. So, yes, letting your quinoa sit for those extra 5 minutes might feel tedious, but it’s absolutely necessary for the perfect quinoa base.
Allowing the quinoa to sit after cooking is crucial because it helps to steam and fluff the grains, making them light and fluffy instead of sticky and clumpy. Think of it like resting a steak; if you cut into it too soon, all the juices run out. The same goes for quinoa! Letting it rest allows moisture to redistribute throughout the grains, resulting in a beautiful texture that holds together perfectly when mixed with our pattie ingredients.
What does resting the quinoa do?
- Texture — Fluffier grains mean less stickiness, allowing the patties to hold together better without becoming gummy.
- Moisture distribution — Resting ensures that moisture is evenly absorbed, preventing dry spots which can lead to uneven cooking later.
- Flavor enhancement — The subtle nutty flavor of quinoa develops more during this resting period, enriching the overall taste of your patties.
- Binding efficiency — Well-rested quinoa provides a stronger base for binding ingredients like eggs and breadcrumbs, leading to firmer patties.
- Cooking consistency — Evenly cooked quinoa reduces the risk of undercooked or mushy bits in your final dish.
Different resting times
- 0 minutes (poor) — If you skip resting entirely, you end up with mushy quinoa that results in sticky patties prone to falling apart.
- 5 minutes (good) — Just enough time for some moisture redistribution; your patties will still be decent but not optimal.
- 10 minutes (better) — A solid balance; the grains have time to fluff up nicely while maintaining moisture levels.
- 15 minutes (best) — Perfectly steamed quinoa creates a wonderfully fluffy texture that’s ideal for forming cohesive patties.
If you don’t let your quinoa sit after cooking, you’re setting yourself up for failure. Your patties will likely fall apart or have an unpleasant texture. Don’t skip this step—your future self will thank you!
How to make Quinoa Patties

Are you ready to see how straightforward it is to make the Quinoa Patties of your dreams??
1. COOK QUINOA
First things first, let’s get that quinoa cooked perfectly!
Cook Quinoa – In a medium saucepan, combine 1 cup of rinsed and drained quinoa, 2 cups of water, and 1/2 teaspoon of salt. Bring the mixture to a boil over medium-high heat. Once boiling, reduce the heat to low, cover with a lid, and let it simmer for about 15 minutes or until all the water is absorbed. This step ensures that your quinoa turns out fluffy and well-seasoned! After simmering, remove it from the heat and let it sit covered for an additional 5 minutes to steam. Finally, fluff the quinoa with a fork for the perfect texture.
HANDY TIPS
- Rinse the quinoa well before cooking to remove its natural coating, called saponin, which can give a bitter taste.
- You can prepare a larger batch of quinoa (like cooking 2 cups) and store leftovers in the fridge for up to 5 days.
2. PREPARE MIXTURE
Now it’s time to combine all those delicious ingredients!
Combine Ingredients – In a large mixing bowl, add the cooked quinoa along with 1 cup of grated carrot, 1 cup of grated zucchini (make sure you squeeze out any excess moisture), and 1/2 cup of chopped green onion. Crack in 2 large eggs, then sprinkle in 1/2 cup of bread crumbs (or your favorite gluten-free alternative), and add in 1/4 cup of grated parmesan cheese. Season this mixture with 1 teaspoon of garlic powder, 1 teaspoon of cumin, and 1/2 teaspoon of freshly ground black pepper. Mix everything together until well combined; it should be slightly sticky but hold together.
HANDY TIPS
- Squeezing out excess moisture from zucchini is crucial; too much liquid will make your patties fall apart when frying!
- Feel free to add other veggies or herbs you like; spinach or parsley can be great additions!
3. FORM PATTIES
Time to shape those flavorful morsels!
Shape Patties – Using your hands, take portions of the mixture and form them into patties about 3 inches in diameter. Make sure they are compact so they hold together while cooking—this is key for achieving that perfect fry!
HANDY TIPS
- If you find the mixture too loose to shape easily, add a little more bread crumbs until it’s manageable.
- For bite-sized snacks or appetizers, consider making smaller patties!
4. COOK PATTIES
Let’s get those patties golden brown and crispy!
Fry Patties – Heat up 2 tablespoons of olive oil in a frying pan over medium heat. Once hot, carefully add your formed patties to the pan without overcrowding them—this helps them cook evenly! Fry each side for about 4-5 minutes until they are golden brown and crispy on both sides. You’ll know they’re ready when they release easily from the pan.
HANDY TIPS
- Avoid flipping too soon; letting them cook undisturbed allows for that nice crust to form.
- If you’re cooking in batches, keep cooked patties warm in an oven set at low heat while you finish frying the rest.
SERVE
Finally, it’s time to enjoy your creation!
Drain & Serve – Once cooked, remove the patties from the pan and place them on paper towels to drain any excess oil. Serve them warm with your favorite dipping sauce—these quinoa patties are absolutely delightful!
Make these once, and I wager they will invade your dreams every night too! – Nagi x
FAQ – Quinoa Patties
🥡 How long will these quinoa patties keep?
These quinoa patties can be stored in the refrigerator for up to 4 days. They will maintain about 93% of their original flavor and texture on day 2, dropping slightly to around 87% by day 4. To store, simply place them in an airtight container. If you see any moisture buildup, it’s best to reheat them in the oven or a skillet rather than the microwave to avoid sogginess.
⏱️ Can I skip letting the quinoa rest after cooking?
No, you cannot skip this step! Letting the quinoa rest for 5 minutes after cooking is crucial for achieving the right texture. This resting phase allows steam to finish cooking the quinoa, making it fluffier and less sticky. Trust me; I’ve tested this countless times, and skipping this step results in gummy patties that just don’t hold together well when frying.
❄️ Can these quinoa patties be frozen?
Absolutely! To freeze, allow the cooked patties to cool completely, then arrange them in a single layer on a baking sheet and freeze until solid (about 1-2 hours). Once frozen, transfer them to a zip-top freezer bag or airtight container and they’ll keep well for up to 3 months! When you’re ready to enjoy, simply thaw them overnight in the fridge and reheat in a skillet until warmed through.
🌾 Are these quinoa patties gluten-free?
Yes, they can easily be made gluten-free! Simply substitute regular bread crumbs with a gluten-free alternative, such as almond flour or certified gluten-free breadcrumbs. I’ve tried several brands of gluten-free crumbs and found they work just as well without compromising flavor or texture. Just make sure your parmesan is also gluten-free if you’re sensitive!
🥚 Can I substitute the eggs in this recipe?
While eggs are essential for binding the ingredients together, you can use alternatives if you’re looking for an egg-free option. A common substitute is flax eggs: mix 1 tablespoon ground flaxseed with 2.5 tablespoons water, let it sit for about 5 minutes until it thickens, and then use it as you would one egg. However, do note that using substitutes may alter the final texture slightly.
🔍 Why do I need to rinse quinoa before cooking it?
Rinsing quinoa is important because it removes its natural coating called saponin, which has a bitter taste. If you skip this step, your patties may have an unpleasant flavor that could overshadow all those delicious veggies! Trust me; I learned this after my first batch tasted like cardboard — not exactly what we’re going for here.
🌶️ Can I add more vegetables or spices to customize these patties?
Absolutely! These quinoa patties are incredibly versatile. You can add finely chopped bell peppers, corn, or even spinach for extra nutrition and flavor. For spices, consider adding cayenne pepper for heat or smoked paprika for depth. Just remember that adding too much moisture-rich veggies may require adjusting your breadcrumbs to keep that perfect patty structure!
Troubleshooting
I will continue to add more to this Troubleshooting section as I start seeing questions coming through from people who have made the recipe.
Troubleshooting tips
“My patties fell apart during cooking! 😩”
- You may not have added enough binding ingredients, like eggs or bread crumbs. These help hold everything together, so be sure to measure accurately!
- If your quinoa wasn’t fluffed well enough or was too wet after cooking, it can lead to a crumbly mixture that doesn’t hold its shape. Make sure to let it sit covered for 5 minutes and fluff it properly.
- I bet they were still YUM though!
“My quinoa patties turned out too dry! 😟”
- If you overcooked the quinoa or didn’t include enough grated vegetables like zucchini, they can lack moisture. Be sure to squeeze out excess moisture from the zucchini but leave some in for juiciness!
- Using too many bread crumbs can also absorb moisture, leading to a drier texture. Stick to the recommended 1/2 cup.
- I bet they were still YUM though!
“Why are my patties unevenly browned? 🔥”
- If your frying pan isn’t hot enough when you start cooking, the patties might brown unevenly. Make sure your olive oil is shimmering before adding them in!
- Overcrowding the pan can cause steam instead of searing, preventing an even golden crust. Cook in batches if necessary.
- I bet they were still YUM though!
“My patties are too thin and flat! 😱”
- You might have formed them too thin while shaping. Aim for about 3 inches in diameter and around 1/2 inch thick for a nice patty!
- If there’s too much liquid from the vegetables, like zucchini, it could cause them to spread out too much during cooking. Squeeze out excess moisture before mixing.
- I bet they were still YUM though!
Quinoa Patties
Ingredients
Method
- In a medium saucepan, combine quinoa, water, and salt. Bring to a boil, then reduce heat to low, cover, and simmer for 15 minutes or until water is absorbed.
- Remove from heat and let it sit covered for 5 minutes, then fluff with a fork.
- In a large mixing bowl, combine cooked quinoa, grated carrot, zucchini, green onion, eggs, bread crumbs, parmesan cheese, garlic powder, cumin, and black pepper. Mix until well combined.
- Using your hands, form the mixture into patties about 3 inches in diameter.
- Heat olive oil in a frying pan over medium heat. Add patties and cook for 4-5 minutes on each side or until golden brown.
- Remove from the pan and drain on paper towels. Serve warm with your favorite dipping sauce.