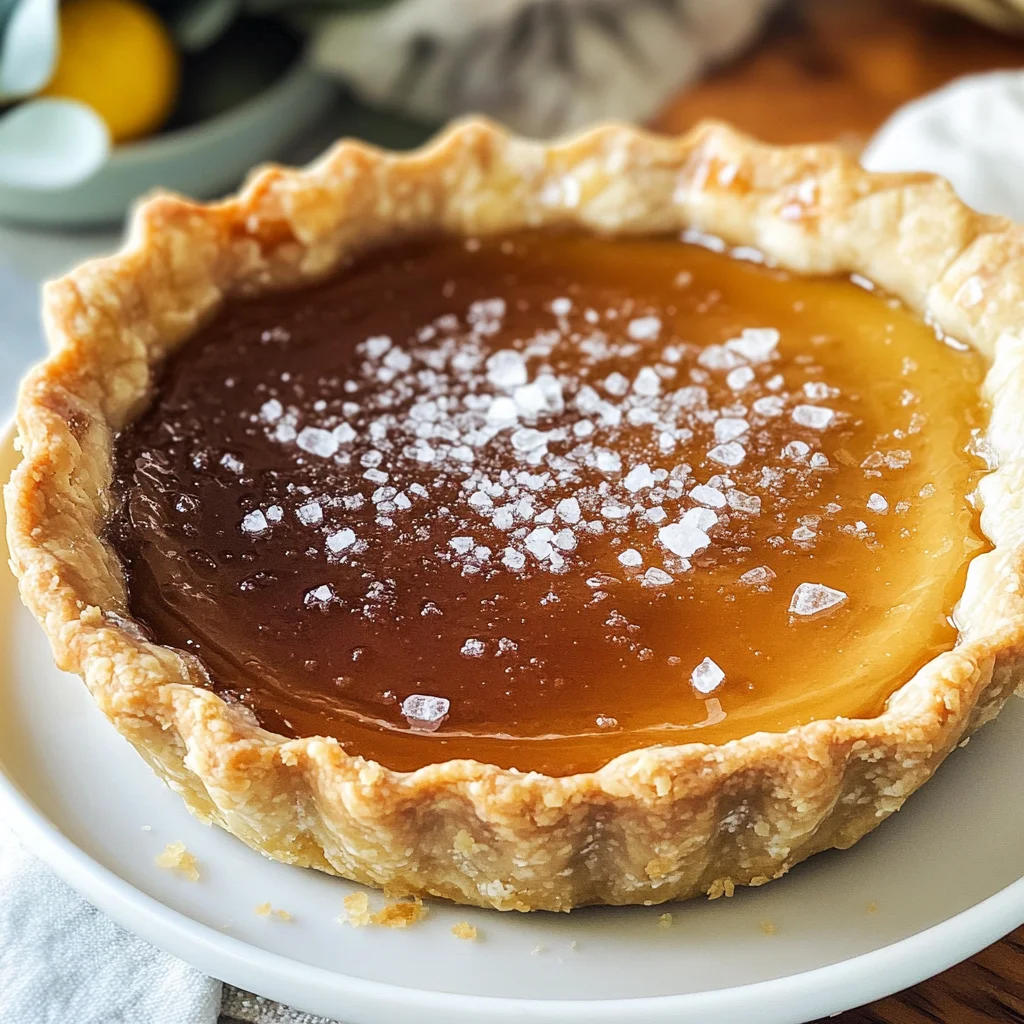
Salted Honey Pie: A Perfect Blend of Sweet and Salty
There’s a certain magic that happens in the kitchen when you create something that feels like home, isn’t there? Cooking is not just about combining ingredients; it’s about crafting an experience that warms the heart and nourishes the soul. As I think about the Salted Honey Pie, I can’t help but smile. This pie is a true celebration of contrasts—sweet and salty, rich and creamy—all wrapped up in a buttery crust that whispers comfort with every bite. The custard filling, with its luscious texture and caramelized notes, beckons you to take another slice, while the flaky sea salt sprinkled on top dances playfully with the sweetness of honey. It’s more than just dessert; it’s a moment of joy shared with loved ones, a sweet memory waiting to be made.
What makes this Salted Honey Pie so special goes beyond its incredible flavor profile—it’s a bridge between tradition and innovation. Imagine biting into a slice where each forkful blends flavors so beautifully that it creates an utterly intoxicating experience. Honey brings warmth and depth, while the hint of sea salt elevates the sweetness to new heights. It’s as if every ingredient has come together for this purpose—to create something profoundly satisfying that leaves everyone at the table in awe. Whether you’re celebrating a holiday or simply enjoying a quiet evening at home, this pie is perfect for any occasion. So gather your loved ones, and let’s embark on this delicious journey together!
Ingredients:
As we dive into our culinary adventure, let’s first gather our ingredients for this delectable Salted Honey Pie: A Perfect Blend of Sweet and Salty. Each component plays an essential role in creating that harmonious blend of flavors and textures we’re after.
- Pie crust (refrigerated or homemade). The foundation of our pie deserves special attention! A good pie crust provides not only structure but also contributes to the overall flavor profile. If you choose to make your own, remember that chilling it before baking is crucial; it helps prevent shrinkage and ensures flakiness by keeping the butter cold until it hits the oven’s heat. If you opt for store-bought, select one that is labeled all-butter for superior taste over those made with vegetable oils.
- 4 large egg yolks, lightly beaten. Egg yolks are the magic behind our creamy custard filling. They add richness and depth while helping to thicken the mixture as it cooks through their emulsifying properties. When whisking them lightly before adding them to your mixture, you’re ensuring even distribution throughout the custard, which will yield that luxuriously smooth texture we desire.
- 2 1/2 cups (600 ml) heavy whipping cream. This is where things get undeniably indulgent! Heavy whipping cream is essential for creating a luscious custard base; its high-fat content gives us that velvety mouthfeel we crave in desserts. When selecting your cream, go for fresh—this will make all the difference in flavor—and make sure it’s labeled heavy or heavy whipping to achieve optimal results.
- 2/3 cup (150 g) packed light brown sugar. Brown sugar lends not only sweetness but also a delightful hint of caramel flavor due to its molasses content. This depth enriches our custard layer beautifully! When measuring out your brown sugar, pack it firmly into your measuring cup; this ensures you’re using just the right amount for balanced sweetness without overwhelming other flavors.
- 1/3 cup (45 g) cornstarch, sifted. Cornstarch acts as our thickening agent here—it’s instrumental in achieving that silky custard texture we’re aiming for! Remember to sift it before use; this prevents clumps from forming during cooking and guarantees a smooth finish in your pie filling.
- 1/2 tsp salt. Salt may seem simple, but it plays an indispensable role in enhancing all the flavors within our pie! It balances sweetness and elevates each ingredient’s natural flavors without making the dessert taste salty—trust me on this one!
- 1/2 cup (120 ml) honey. Ahh, honey—the star player! Not only does it offer natural sweetness, but it also infuses our custard with complex notes of floral richness reminiscent of warm summer days; it’s simply divine! When choosing honey, consider going local if possible as it often carries unique flavors from nearby blossoms—a true treat!
- 2 tsp vanilla extract. Vanilla adds warmth and depth that’s absolutely paramount in desserts like this one! Opt for pure vanilla extract rather than imitation for maximum flavor impact—your taste buds will thank you!
- Flaky sea salt, for sprinkling. This finishing touch transforms our pie from delicious to extraordinary! Flaky sea salt adds an enticing crunch and amplifies all those sweet notes we’ve built up through our ingredients while providing pleasing textural contrast.
With these wonderful components gathered together, we’re ready to embark on creating something truly memorable!
Equipment You’ll Need:
Before we dive headfirst into crafting our Salted Honey Pie: A Perfect Blend of Sweet and Salty, let’s take a moment to ensure we have all the right tools at hand. Having quality equipment not only streamlines your baking process but enhances your overall experience—as any seasoned baker will tell you!
- Mixing bowls – A set of mixing bowls is essential for holding your ingredients during preparation stages. Opt for glass or stainless steel; they provide excellent durability and are easy to clean afterward.
- Whisk – A sturdy whisk helps incorporate air into mixtures like our egg yolks and cream base while ensuring everything comes together smoothly without lumps!
- Saucepan – A medium-sized saucepan will be key while heating your cream mixture over medium heat; choose one with a heavy bottom to prevent scorching as it heats.
- Measuring cups & spoons – Precision matters when baking; having reliable measuring tools ensures you get those ratios just right!
- Rubber spatula – An invaluable tool for scraping down sides of bowls or folding delicate mixtures together with ease—definitely don’t skip out on this one!
- Pie pan (deep dish 8-inch or 9-inch) – Your choice here will shape how deep those luscious layers will be! Either option works beautifully; just ensure it’s oven-safe.
With all these essentials lined up neatly on your countertop alongside your ingredients, we’re ready to embark on making our Salted Honey Pie: A Perfect Blend of Sweet and Salty!
Step 1: Preparing Your Perfect Pie Crust
To start off on this delightful journey toward crafting the perfect Salted Honey Pie: A Perfect Blend of Sweet and Salty, let’s kick things off by preparing our pie crust. You can either use refrigerated dough or create one from scratch—both options yield fantastic results! If you’re making homemade dough, now is when you’ll want to combine flour with chilled butter until crumbly before gradually adding cold water until cohesive—this process fosters flakiness by keeping everything cool throughout mixing! After forming it into a disc shape, wrap tightly in plastic wrap and refrigerate for at least 30 minutes prior to rolling out; chilling prevents shrinkage during baking.
Once chilled properly—or if utilizing store-bought crust—place it gently into either an 8-inch deep dish pan or standard 9-inch pan without stretching it too much (we want those lovely edges!). Make sure there are no air pockets trapped between crust and pan surface as these can lead unpleasant surprises later on when baking! Now place your prepared crust back into refrigeration while we prepare that dreamy custard filling—we’ll need it nice and cold so it bakes evenly when combined later!
Step 2: Crafting Your Creamy Custard Filling
Next up is where things really start getting exciting—the heart of our pie lies within this luscious custard filling! In a medium saucepan over medium heat combine heavy whipping cream along with packed brown sugar followed by sifted cornstarch plus salt—this combination creates an intoxicating aroma right from the start as those sugars melt down slowly releasing their caramelly goodness! Keep stirring gently as you bring everything close towards boiling point—you’ll notice subtle thickening occurring thanks largely due cornstarch working its magic here too!
As soon as bubbles start developing around edges—which indicates reaching near boiling point—keep stirring constantly until fully combined without lumps lingering around anywhere inside mixture itself; trust me when I say consistency matters greatly here since no one wants curdled bits ruining such exquisite dessert experience later on down line—it would be devastating wouldn’t it? Once achieved desired thickness resembling pancake batter consistency remove from heat immediately—we’re almost there my friend!
Step 3: Tempering Those Egg Yolks
Now comes an important step known as tempering—the secret technique needed when integrating egg yolks safely into hot mixtures without scrambling them prematurely (oh no!). Begin by ladling about half a cup worth from hot cream mixture directly into previously beaten egg yolks while whisking vigorously—you want those eggs warmed gently rather than shocked by sudden temperature change! Gradually add remaining warm liquid back into saucepan again whisking continuously until everything melds together smoothly—it’ll look beautiful trust me!
This crucial moment ensures silky smoothness throughout final product once baked—you definitely don’t want bits of cooked eggs floating around ruining texture later on so take care here please my friend; patience pays off big time during baking world especially when aiming perfection like today’s endeavor at hand!
Step 4: Merging Flavors Together
After successfully incorporating yolks back into creamy base mixture give everything another solid stir before adding honey followed closely behind by aromatic vanilla extract—these two stars elevate flavor profile tenfold resulting pure bliss upon tasting later down line after patiently waiting through cooling process ahead too… As honey melts seamlessly throughout warm custard mix stir gently making sure nothing sticks around bottom & sides leaving behind clumps anywhere whatsoever…
The sweet symphony created herein promises delightfully rich indulgence paired alongside touch flaky sea salt sprinkled across top once cooled down completely afterward serving time arrives shortly thereafter… And believe me friends—I promise each bite shall leave lasting impression upon taste buds who dare venture forth trying slice goodness crafted lovingly by hands within kitchen today…
Stay tuned because next I’ll guide you step-by-step towards completing masterpiece creation nestled inside golden brown shell awaiting glory shining bright under warm glow kitchen lights…
Step 5: Pouring in the Magic
Now comes the moment where all your hard work pays off—the pouring of that luxurious custard into the waiting pie crust! Once you’ve meticulously tempered your egg yolks and mixed them into the luscious cream mixture, it’s time to pour this silky concoction into your chilled pie crust. I always find it mesmerizing to watch as the custard cascades into the crust, its pale golden hue promising a depth of flavor that’s just waiting to unfold. Make sure that your custard is slightly warm but not hot; this temperature ensures that it will flow smoothly without disturbing the crust too much. As you pour, take care to spread the mixture evenly across the surface. The key here is to avoid any air pockets—trust me on this! If air bubbles are trapped within, they can disrupt the perfect texture you’ve worked so hard to achieve and leave you with an uneven filling once baked. So take a moment to gently tap the pie pan on your counter after pouring; it helps settle everything in nicely.
Step 6: Baking: The Transformation Begins
With your pie assembled, it’s time to send it into a preheated oven at 375°F (190°C) for about 40-45 minutes. This step is truly where the magic happens! As the pie bakes, you’ll witness a remarkable transformation—the filling begins to bubble and rise while developing that beautiful golden top that signals deliciousness is on its way. You’ll notice that familiar sweet aroma wafting through your kitchen, thanks to the caramelization of both honey and brown sugar—it’s utterly intoxicating! Keep an eye on it as it bakes; while some jiggle in the center is perfectly normal when you pull it out, you’re looking for a firm outer edge and a slightly jiggly center. This slight wobble is important because it indicates that the custard will continue setting as it cools down—overbaking can be detrimental, making your custard grainy instead of smooth and silky. So, set a timer and resist the urge to peek too often; every time you open that oven door, you let precious heat escape!
Step 7: Cooling Down: Patience is Key
Once you’ve pulled your beautiful Salted Honey Pie from the oven, allow it to cool at room temperature for about an hour. This cooling stage isn’t just about letting it drop in temperature; it’s crucial for allowing those flavors to meld together beautifully while also giving time for the custard to firm up properly. As it cools on your counter, you’ll see how it transforms from just-baked warmth into something decadently inviting—this is when patience truly pays off! After letting it sit out, transfer your pie to the refrigerator for at least two hours—ideally longer if you can manage! Chilling allows the custard to set completely, ensuring every slice holds its shape when served. I promise you; skipping this step or rushing through could lead to more of a runny situation than you’d want on your plate. Trust me when I say that waiting will reward you with a slice that’s as stunning as it is delicious!
Step 8: The Finishing Touch: Salty Sweet Perfection
Now we arrive at one of my favorite moments—the finishing touch before serving up slices of joy! Just before you’re ready to present this masterpiece at your table, sprinkle a generous amount of flaky sea salt over the top of your chilled pie. This step might seem simple, but believe me when I say it’s absolutely paramount! The flaky sea salt enhances not just the sweetness from the honey but also adds an unexpected twist that makes each bite truly extraordinary. It creates this delightful contrast—a satisfying crunch paired with velvety smoothness—making every mouthful sing with flavor! Opt for larger crystals if possible; they give those bursts of saltiness without overwhelming your palate. A pinch here and there elevates this dessert from deliciously good to unforgettable—it transforms ordinary into sublime!
Final Presentation: Serving Your Salted Honey Pie
With everything in place—from its perfectly baked crust holding creamy custard nestled beneath that sprinkle of flaky sea salt—it’s finally time to serve up slices of happiness! Slice into portions of 8-10 pieces depending on how indulgent you’re feeling (and trust me, no one would blame you for going back for seconds!). Each slice should reveal that flawless interplay between crust and filling—golden edges alongside creamy goodness beckoning everyone around your table. Presenting this Salted Honey Pie not only showcases your baking prowess but also invites everyone to indulge in flavors they’ll cherish long after dessert has ended.
I cannot express enough how special this pie feels during gatherings or quiet nights at home—you’ll find yourself wanting to share this recipe with friends and family alike because it’s simply too good not to pass along! Whether enjoyed solo with a cup of tea or shared among loved ones over joyous conversation, each slice brings a taste of warmth and love straight from my kitchen to yours. Enjoy every moment spent savoring this extraordinary creation because life is far too short not to delight in sweet—and salty—indulgences like these!
Storage and Enjoyment Tips for Your Salted Honey Pie: A Perfect Blend of Sweet and Salty
Now that you’ve created this divine Salted Honey Pie, it’s time to revel in the joy of enjoying it! There’s something truly delightful about cutting into a beautifully chilled pie, revealing that luscious custard filling glistening under the gentle sprinkle of flaky sea salt. But what happens if you have leftovers? Fear not! This pie not only tastes exquisite fresh out of the oven but also holds up wonderfully in your refrigerator, ready to delight your taste buds again.
Storing Leftover Salted Honey Pie: A Perfect Blend of Sweet and Salty
To preserve the integrity of your Salted Honey Pie, it’s best to store any leftovers in an airtight container. This ensures that the custard stays creamy and doesn’t absorb any unwanted odors from your fridge. I recommend placing a piece of parchment paper between the pie and the lid to keep that delicate crust from getting soggy. If stored correctly, your pie will be at its best for about 3-4 days in the refrigerator. Trust me on this—while it’s absolutely delicious straight out of the oven, it transforms into a wonderfully smooth treat after sitting for a day or two. The flavors meld together beautifully, creating a harmonious balance of sweet honey and salty goodness with each bite. If you’re looking to enjoy it again, simply slice off a piece and savor it chilled; no reheating necessary!
Freezing Your Salted Honey Pie for Later
If you find yourself with extra pie—or if you’re just planning ahead—freezing is a fantastic option! To do this properly, wrap individual slices in plastic wrap or foil before placing them in an airtight container. This way, you can grab just what you need without defrosting the entire pie! When stored correctly, your pie can be frozen for up to 2 months. The convenience factor here is unbeatable; imagine having this stunning dessert ready to go for an unexpected gathering or just a cozy night in. When you’re ready to indulge again, simply thaw it overnight in the fridge, sprinkle on some fresh flaky sea salt right before serving, and you’ll have yourself a heavenly treat once more!
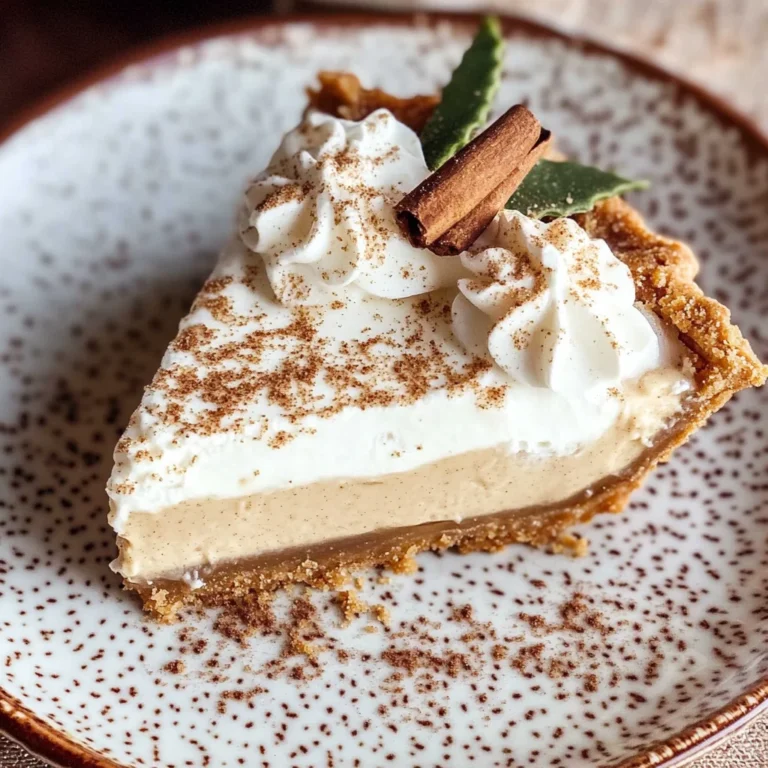
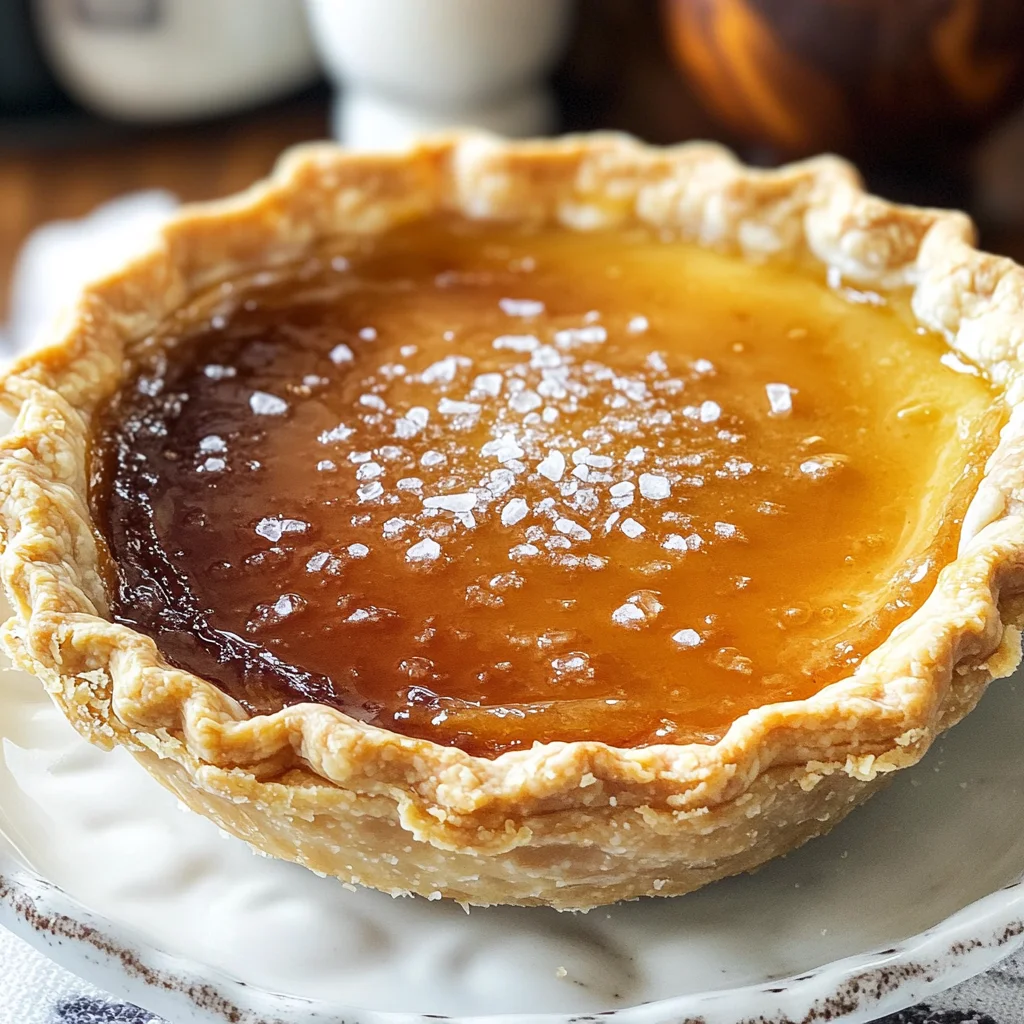
Salted Honey Pie: A Perfect Blend of Sweet and Salty

Discover the delightful experience of making Salted Honey Pie: A Perfect Blend of Sweet and Salty. This indulgent dessert combines a creamy honey custard filling with a buttery crust, topped with a sprinkle of flaky sea salt that enhances the natural sweetness. Each slice of this pie is a celebration of flavors and textures, perfect for gatherings or cozy evenings at home. The contrasts between rich and light create a memorable taste sensation that will leave your loved ones craving more. Easy to prepare and utterly irresistible, this pie is bound to become your new favorite dessert!
- Prep Time: 30 minutes
- Cook Time: 45 minutes
- Total Time: 1 hour 15 minutes
- Yield: Serves approximately 8 slices 1x
- Category: Dessert
- Method: Baking
- Cuisine: American
Ingredients
- Pie crust (refrigerated or homemade)
- 4 large egg yolks
- 2 ½ cups heavy whipping cream
- ⅔ cup packed light brown sugar
- ⅓ cup cornstarch
- ½ tsp salt
- ½ cup honey
- 2 tsp vanilla extract
- Flaky sea salt (for sprinkling)
Instructions
- Prepare the pie crust according to your choice (store-bought or homemade) and chill in the refrigerator.
- In a saucepan over medium heat, combine heavy whipping cream, brown sugar, cornstarch, and salt; stir until thickened.
- Temper the egg yolks by gradually whisking in some hot cream mixture, then return it all to the saucepan.
- Stir in honey and vanilla extract until blended smoothly.
- Pour the custard into the chilled pie crust and bake at 375°F (190°C) for 40-45 minutes until set around the edges.
- Allow cooling at room temperature for one hour, then refrigerate for at least two hours before serving.
- Sprinkle flaky sea salt on top just before slicing.
Nutrition
- Serving Size: 1 serving
- Calories: 400
- Sugar: 28g
- Sodium: 150mg
- Fat: 30g
- Saturated Fat: 17g
- Unsaturated Fat: 10g
- Trans Fat: 0g
- Carbohydrates: 32g
- Fiber: 0g
- Protein: 4g
- Cholesterol: 150mg