Scottish Morning Rolls
There’s something truly magical about the aroma of freshly baked bread that fills a home, wrapping around you like a warm embrace on a chilly morning. As the sun begins to rise, casting its golden glow through the kitchen window, I find myself lost in the simple joy of making Scottish Morning Rolls. This recipe is not just about mixing flour and water; it’s a heartfelt journey into tradition, where each roll becomes a little piece of history that brings warmth and comfort to the breakfast table. The process of transforming humble ingredients into fluffy, golden rolls is an experience that transcends generations, connecting us to our roots while creating new memories with loved ones. These rolls are not just food; they are an invitation to gather around the table, share stories, and savor each bite as if it were an extraordinary moment.
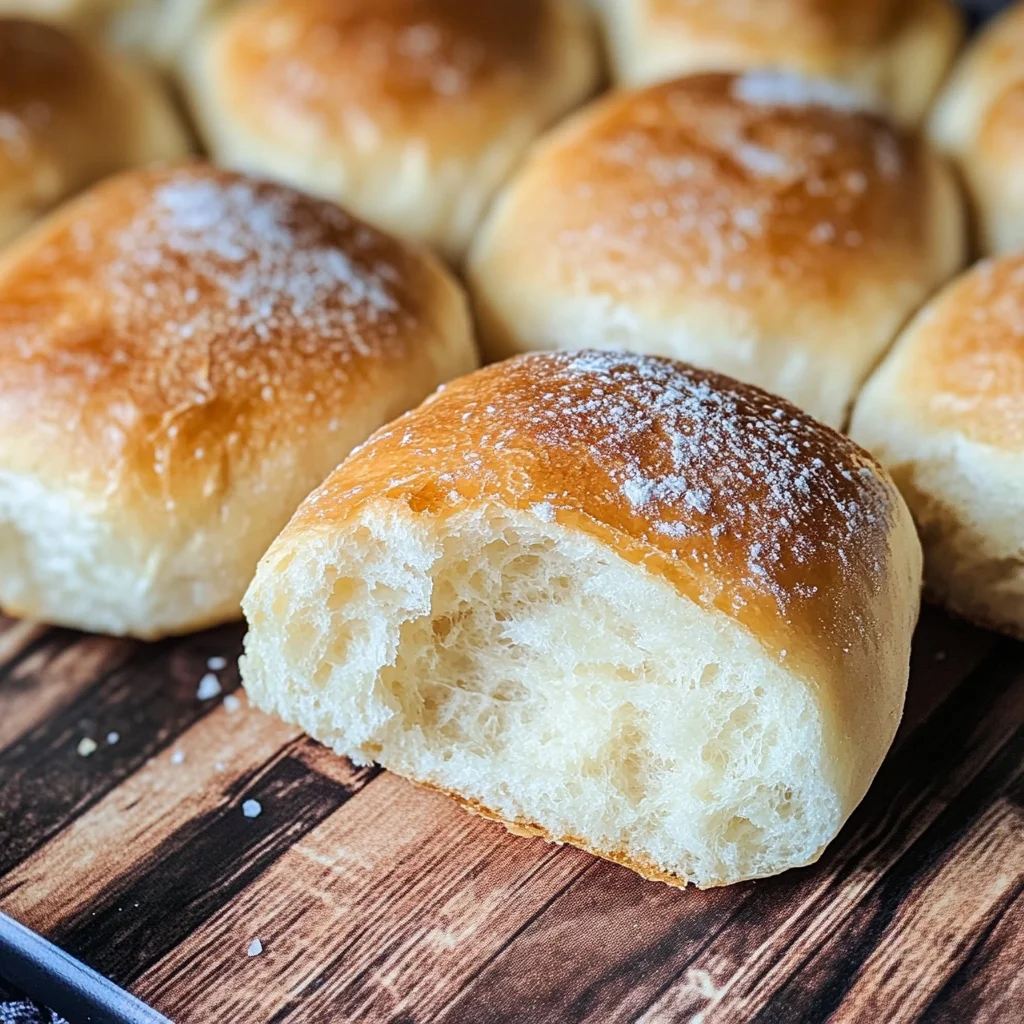
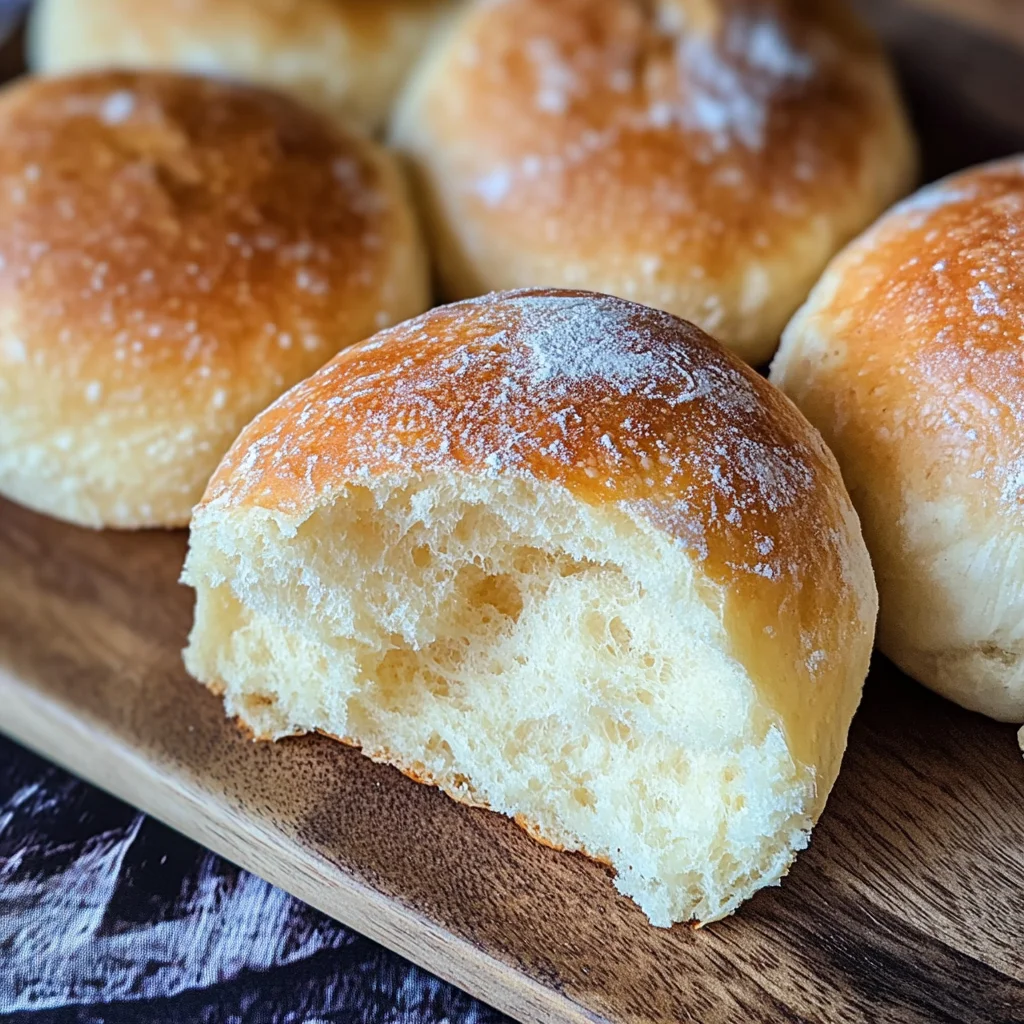
Imagine breaking open a warm roll with your hands, steam escaping like whispered secrets, revealing its tender interior. The crust is beautifully golden, crisp yet yielding to your gentle touch. As you slather on a pat of creamy butter or perhaps a dollop of homemade jam, you can almost taste the love and care that went into their creation. Scottish Morning Rolls pair perfectly with fried eggs or sausage for breakfast or can be enjoyed simply on their own – they’re versatile little delights! Every bite is deeply satisfying and reminiscent of cozy mornings spent with family, sharing laughter over plates piled high with good food. I promise you; once you try making these rolls at home, you’ll never look at breakfast the same way again.
Scottish Morning Rolls: A Taste of Tradition
Let’s dive into this delightful recipe together! Scottish Morning Rolls are incredibly simple to make and require only a handful of ingredients that come together harmoniously to create something truly special. Whether you’re looking to impress guests at brunch or just want to treat yourself on a lazy Sunday morning, these rolls will be your go-to recipe for years to come.
Ingredients:
As we embark on this culinary journey together, let’s take a moment to appreciate each ingredient that plays a vital role in crafting these delectable rolls. Each component has its unique character and contributes richly to the final product.
- 450 grams (4 cups) unbleached all-purpose flour (plus extra for dusting): This flour is essential for giving our rolls structure while maintaining their lightness and fluffiness. Unbleached flour is preferred here because it has been allowed to age naturally without chemicals that might interfere with gluten development. When shopping for flour, look for brands that specify “unbleached” on the packaging; this ensures you’re getting quality ingredients that will yield the best results in your baking endeavors.
- 10 grams (1 3/4 teaspoons) salt: Salt does more than just season our rolls; it’s crucial for enhancing flavor and strengthening gluten structure during kneading. It balances the sweetness from other ingredients and helps control yeast fermentation. Always opt for fine sea salt as it dissolves easily into dough without leaving gritty textures behind.
- 20 grams (3/4 ounce) fresh yeast (or 1 tablespoon active dried yeast): Yeast is our magic ingredient! It’s responsible for leavening our dough, creating those delightful air pockets that make our rolls light and fluffy. Fresh yeast can give you an incredibly rich flavor profile; however, if using active dried yeast—which is more commonly available—make sure to activate it properly in lukewarm milk before adding it to your dough mixture. This step allows it to bloom and ensures your rolls rise beautifully!
- 150 milliliters (2/3 cup) lukewarm milk (105-115˚F / 40-46˚C), plus extra for brushing: Milk adds moisture and richness that enhances both flavor and texture in these morning rolls—it’s like liquid gold for our dough! Make sure it’s lukewarm when added; too hot will kill our precious yeast while too cold will hinder its activation altogether. The extra milk brush before baking gives them a lovely sheen.
- 150 milliliters (2/3 cup) lukewarm water (105-115˚F / 40-46˚C): Water helps balance out the hydration in our dough along with milk. Just like with milk, ensure it’s at the right temperature so our yeast can perform its magic effectively! The combination of both liquids creates an ideal environment for developing gluten—non-negotiable for achieving those soft texture we crave in our rolls.
Equipment You’ll Need:
Having the right tools makes all the difference in creating perfect Scottish Morning Rolls! While these aren’t traditional ingredients, they are essential partners in bringing your culinary vision to life.
- Mixing bowl: A sturdy mixing bowl is key here—it should be large enough to comfortably contain all your ingredients as well as provide space for kneading later on. Glass or stainless steel works wonderfully since they don’t react with any ingredients.
- Measuring cups and spoons: Precision matters when baking! Accurate measurements ensure consistent results every time you make these delightful rolls. Invest in good-quality measuring cups—preferably dry measuring cups for flour and liquid measuring cups with clear markings.
- Baking sheets: You’ll need two baking sheets lined with parchment paper or lightly greased to prevent sticking while ensuring even baking across all rolls. If you have silicone baking mats handy, they work great too!
- Plastic wrap: This will help cover your dough as it rises without sticking—a vital step since we don’t want any drafts affecting our precious yeast activity during fermentation.
Now that we have everything set up perfectly let’s dig into preparing those magical Scottish Morning Rolls!
Step 1: Activate Your Yeast
If you’re using active dry yeast—I love this option because it gives wonderful flavor—you’ll begin by sprinkling it over lukewarm milk in a small bowl. Give it a gentle stir and let it sit undisturbed until frothy; this should take about 5–10 minutes. Trust me on this step—it’s crucial! Watching those little bubbles form reassures us that our yeast is alive and kicking! If you’re using fresh yeast instead, crumble it directly into the warm milk until dissolved before moving onto the next step.
Step 2: Mix Your Dough
In a large mixing bowl, combine unbleached all-purpose flour with salt—this combination creates a strong foundation for our rolls while infusing them with delicious flavor right from the start! Make a well in the center of your flour mixture and add in the activated yeast-milk mixture along with lukewarm water. Using your hands or a wooden spoon, gently mix everything together until it forms a cohesive dough—don’t rush this part! You want every bit of flour incorporated without any dry patches remaining.
Step 3: Knead Until Smooth
Once everything starts coming together beautifully, turn your dough out onto a lightly floured surface—this step lets us get hands-on! Knead the dough until smooth and elastic; this usually takes about 8–10 minutes of good old-fashioned elbow grease! You’ll know you’re done when the surface feels soft yet slightly tacky—a sign that gluten has developed sufficiently to trap air bubbles during rising later on!
Step 4: Let It Rise
After kneading comes one of my favorite parts—the resting phase! Place your smooth ball of dough into an oiled bowl—this prevents sticking—and cover tightly with lightly oiled plastic wrap so no drafts disrupt its cozy environment while rising at room temperature until doubled in size; typically around an hour depending on warmth levels within your kitchen space—it’s always fascinating how such transformations happen!
And there we have it—the first four steps leading us closer to those heavenly Scottish Morning Rolls we’ve been dreaming about! I can hardly wait for you to experience them yourself; stay tuned as we continue crafting these delights together!
Step 5: Shaping Your Rolls into Perfection
Now that your dough has had its time to rise and double in size, we’re entering one of my favorite phases—shaping the rolls! This step is not just about forming dough into shapes; it’s about bringing our Scottish Morning Rolls one step closer to that utterly intoxicating moment when you take your first bite. Begin by gently punching down the dough on a lightly floured surface. This isn’t just for show; it’s a crucial part of the process known as “degassing.” By pressing out the air bubbles, you allow the yeast to redistribute throughout, ensuring an even texture and a beautiful rise during baking. You want the dough to feel soft and pliable at this stage—if it’s sticky, don’t hesitate to dust a little more flour on your hands or the surface.
Once you’ve successfully flattened the dough, divide it into 10 equal pieces. I find that using a bench scraper makes this task much easier and cleaner. Shape each piece into either a neat circle or an oval measuring approximately 4×3 inches (10×7.5 centimeters). The key here is to keep them uniform in size so they bake evenly. When you shape them, be gentle yet firm; you want the rolls to hold their shape without being overly compressed. As you transfer them to your prepared baking sheets, remember to leave ample space between each roll—this gives them room to expand as they rise again. Cover these beauties with lightly oiled plastic wrap, allowing them to rest for another 30 minutes. This second rise is absolutely paramount; it ensures that our rolls will be light and fluffy instead of dense and heavy.
Step 6: The Gentle Press & Prepping for Baking
As you approach the end of the final rise, preheat your oven to 400˚F (200˚C/Gas 6). That’s right! We want our oven hot and ready because nothing beats that aromatic embrace of freshly baked bread wafting through your home. While waiting for your oven to heat up, let’s talk about an important technique: the gentle press! After those lovely rolls have puffed up beautifully during their second resting phase, take three of your middle fingers and gently press down in the center of each roll. This might seem trivial, but trust me—it plays a vital role in creating that signature Scottish Morning Roll texture. By pressing down lightly, you’re creating a small dimple that allows for even baking while giving each roll a unique character.
Next comes what I like to call the finishing touch—brushing each roll with lukewarm milk before baking and sprinkling them with flour. The milk acts as a glaze, helping achieve that golden-brown crust we all crave while adding a touch of richness in flavor. Don’t skimp here; this step brings everything together visually and contributes significantly to taste! Watch how beautifully they transform from simple dough balls into something that looks like it belongs on the cover of a bakery magazine! Once you’ve completed this step with all ten rolls, place them carefully in your preheated oven.
Step 7: Baking Your Rolls – A Symphony of Scents
Now comes perhaps the most exciting part—the baking! As these Scottish Morning Rolls make their way into your preheated oven, get ready for an experience that will awaken every sense in your body. The aroma that fills your kitchen is unlike anything else; it’s warm, comforting, and utterly inviting—a true symphony of scents enveloping you like a cozy blanket on a chilly morning. Bake these rolls for about 15-20 minutes until they turn gloriously golden brown; they should look like little clouds of sunshine emerging from your oven.
To ensure they’re perfectly done, keep an eye on visual cues: they should be puffed up beautifully with a golden crust on top; when tapped gently on the bottom, they should sound hollow—a clear sign that they’ve baked through wonderfully! If you find yourself unsure at any point during baking, don’t hesitate to pull one out early for a quick peek—it’s one of those moments where curiosity truly pays off! Remember: ovens can vary widely in temperature consistency; if yours tends toward hotter or cooler settings than average, adjust accordingly but aim for that perfect golden hue.
Step 8: Cooling & Enjoying – The Best Part!
Once your Scottish Morning Rolls are out of the oven and cooling slightly on a wire rack (if you can resist!), it’s time for some well-deserved indulgence! Allow them to cool just enough so you won’t burn yourself—trust me when I say patience will be rewarded tenfold here because biting into one too soon may result in molten bliss spilling everywhere! When they’re ready for devouring—you’ll know because they’ll still feel warm but not too hot—slice one open and slather with butter or perhaps some jam or honey if you’re feeling adventurous.
Serving these rolls fresh from the oven is non-negotiable; there’s something profoundly satisfying about enjoying homemade bread that’s still warm from its transformative journey through heat. Each bite reveals layers of tender crumb surrounded by a crusty exterior that practically begs for attention! Whether paired with fried eggs or simply enjoyed solo with a cup of tea or coffee, these rolls promise comfort and joy—all wrapped up in their delightful simplicity.
Conclusion:
As we wrap up our delightful journey of crafting these Scottish Morning Rolls together, I hope the excitement has been contagious! From the moment you mixed those simple yet magical ingredients through kneading the dough into submission, you’ve embarked on a culinary adventure filled with love and warmth. What makes this recipe so extraordinary is not just its simplicity but the way it brings people together around the table—each bite offers a comforting blend of texture and flavor that elevates breakfast beyond the ordinary.
You really must try making these rolls; they are perfect not only for breakfast but also for brunches, picnics, or even alongside hearty soups! The joy of pulling these beauties from the oven—golden brown with that irresistible crackle on top—is unmatched. Just imagine breaking one open while steam rises gently off the soft interior, ready to be slathered with butter or your favorite spread. It’s an experience that beckons everyone to gather around and share stories over warm bread—a true celebration of life!
Picture this: savoring one of these rolls with a dollop of homemade jam or perhaps pairing it with creamy scrambled eggs for an utterly divine breakfast feast. For an afternoon pick-me-up, serve it alongside a cup of tea—the contrast between warm bread and soothing tea is simply sublime. If you’re feeling adventurous, why not stuff one with some herbed cream cheese or layer it up with seasonal vegetables? The versatility is endless!
Feeling creative? This recipe is wonderfully adaptable! You could fold in some cheese before baking for an extra layer of flavor or sprinkle herbs into the dough itself for an aromatic twist. Perhaps try adding seeds on top before baking for added crunch—a sprinkle of sesame or poppy seeds would take things up another notch! I encourage you to experiment and make this recipe truly yours. Share your creations with friends and family; there’s nothing more fulfilling than connecting over food made from love. So roll up those sleeves and dive into this delicious adventure—you won’t regret it!
Scottish Morning Rolls
Scottish Morning Rolls are a delightful addition to any breakfast table, blending tradition with comfort. These fluffy rolls, with their golden crust and tender center, are perfect for sharing with loved ones or enjoying solo with your favorite spread. The aroma of freshly baked bread wafting through your kitchen is a heartwarming experience that invites you to slow down and savor each bite. Easy to make and versatile enough for various meals, from brunch gatherings to cozy dinners, these rolls embody the essence of home-cooked goodness. Discover the joy of baking these Scottish Morning Rolls today and elevate your breakfast game!
- Prep Time: 30 minutes
- Cook Time: 20 minutes
- Total Time: 50 minutes
- Yield: Makes approximately 10 rolls 1x
- Category: Breakfast
- Method: Baking
- Cuisine: Scottish
Ingredients
- 450 grams (4 cups) unbleached all-purpose flour
- 10 grams (1 3/4 teaspoons) fine sea salt
- 20 grams (3/4 ounce) fresh yeast or 1 tablespoon active dried yeast
- 150 milliliters (2/3 cup) lukewarm milk
- 150 milliliters (2/3 cup) lukewarm water
Instructions
- Activate the yeast by sprinkling it over lukewarm milk in a small bowl. Stir gently and let sit until frothy (5–10 minutes).
- In a large mixing bowl, combine flour and salt. Make a well in the center and add the activated yeast-milk mixture along with lukewarm water.
- Mix until a dough forms, then knead on a floured surface for 8–10 minutes until smooth and elastic.
- Place the dough in an oiled bowl, cover with plastic wrap, and let rise at room temperature until doubled in size (about 1 hour).
- Punch down the dough, divide into 10 equal pieces, shape into rolls, and place them on lined baking sheets.
- Cover and let rise again for 30 minutes while preheating the oven to 400°F (200°C).
- Press gently in the center of each roll, brush with lukewarm milk, sprinkle lightly with flour, then bake for 15–20 minutes until golden brown.
Nutrition
- Serving Size: 1 roll (60g)
- Calories: 158
- Sugar: 0g
- Sodium: 206mg
- Fat: 2g
- Saturated Fat: 1g
- Unsaturated Fat: 1g
- Trans Fat: 0g
- Carbohydrates: 29g
- Fiber: 1g
- Protein: 5g
- Cholesterol: 3mg