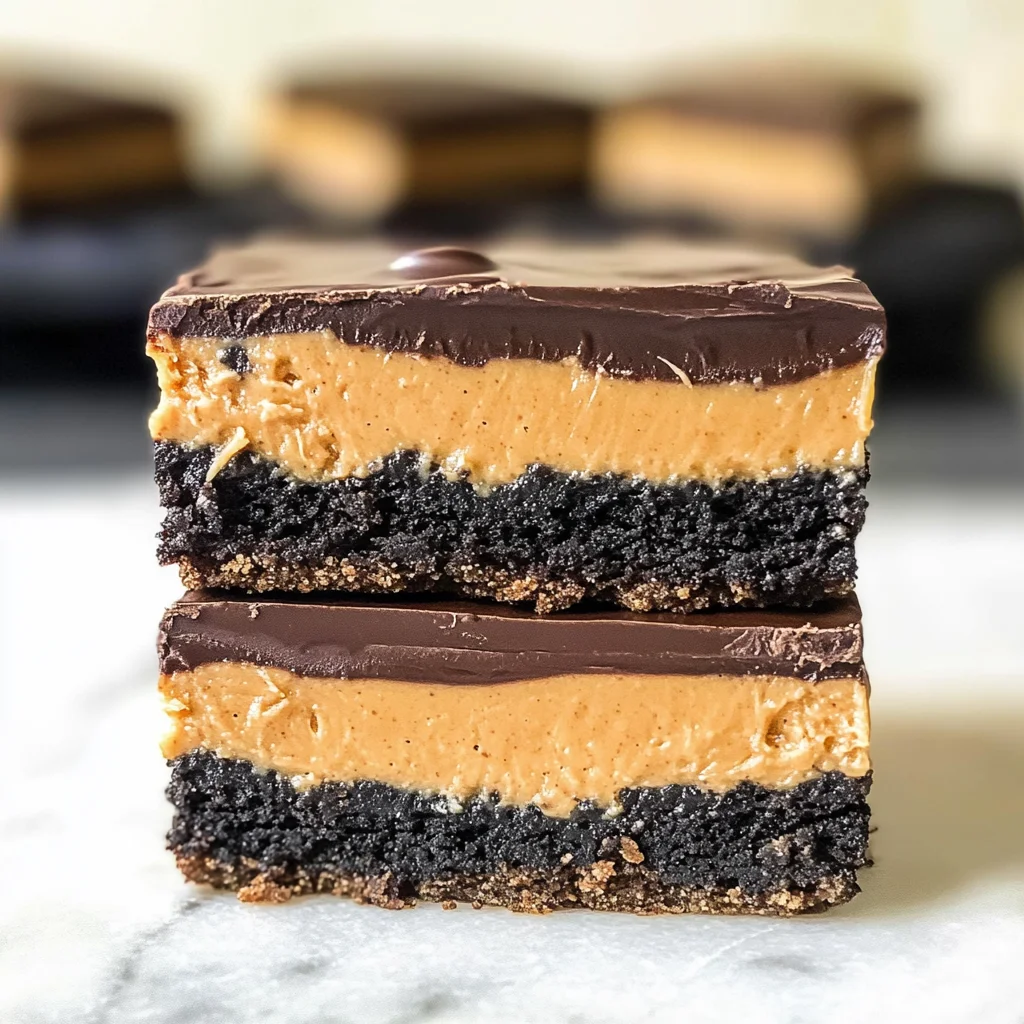
Peanut Butter Oreo Bars
There’s something truly magical about the act of creating a dessert that brings joy not only to ourselves but also to the people we love. Imagine the delightful moment when you slice into a rich, velvety bar, revealing layers of creamy peanut butter, crunchy Oreo crust, and glossy chocolate topping. The first bite is an explosion of flavors—a harmonious blend of sweet and salty that dances on your palate. These Peanut Butter Oreo Bars are not just a dessert; they are an experience, a heartfelt offering from my kitchen to yours, capturing the essence of comfort and indulgence in every square. I promise you, once you make these bars, they will become a cherished recipe in your collection, perfect for sharing during gatherings or savoring quietly after a long day.
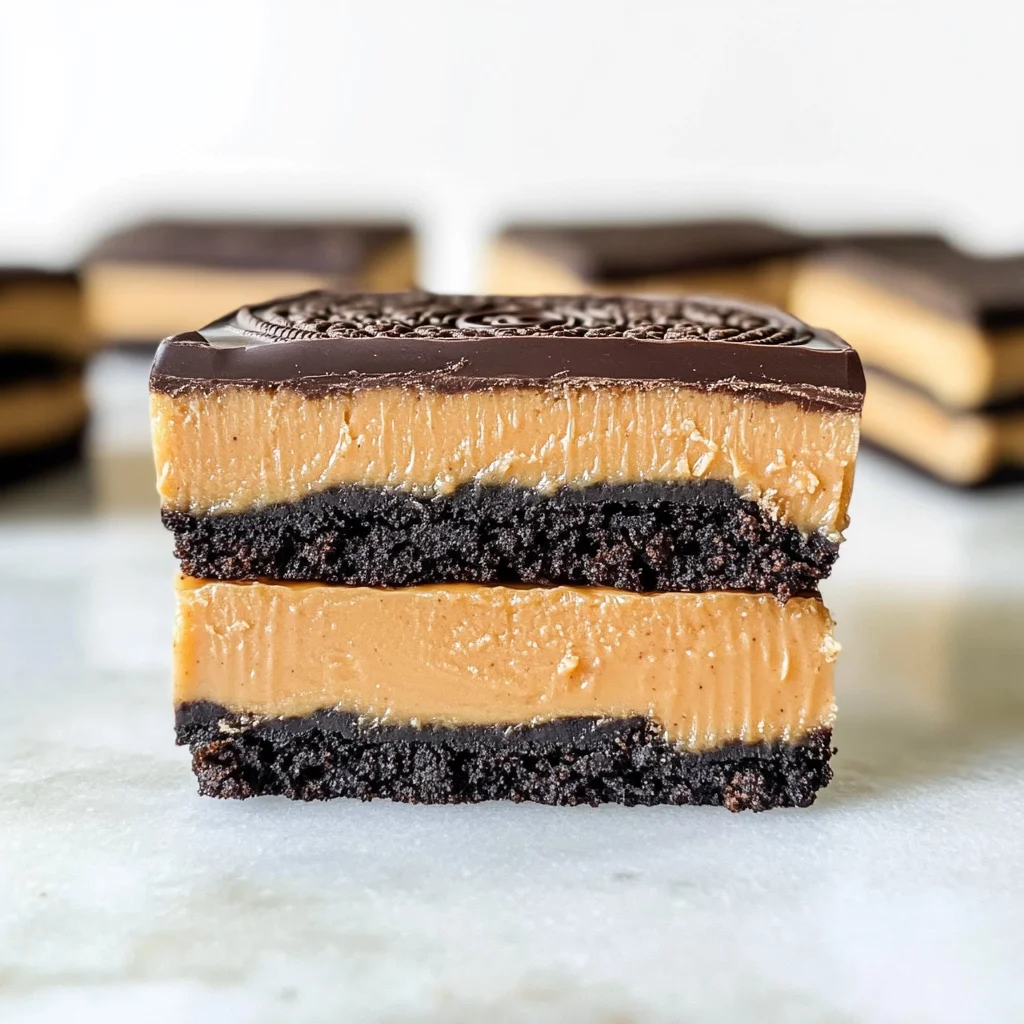
What makes these bars so irresistible? It’s the simplicity and decadence rolled into one no-bake treat. Each layer plays a vital role: the Oreo crust brings a crumbly crunch that perfectly complements the creamy peanut butter filling, while the rich chocolate glaze offers a luscious finish that ties everything together. This recipe embodies the beauty of balance—sweetness from the powdered sugar and chocolate meets the savory depth of peanut butter, creating a symphony of flavors that is utterly intoxicating. You’ll find that these bars are not just for special occasions; they can brighten any day, turning an ordinary moment into something extraordinary.
Peanut Butter Oreo Bars: A Decadent No-Bake Delight
Let’s dive right into one of my favorite recipes—Peanut Butter Oreo Bars! This no-bake wonder is perfect for those of us who crave something sweet but don’t want to spend hours slaving away in the kitchen. Trust me on this one; it’s as simple as it is satisfying! You’ll find yourself reaching for seconds (and possibly thirds) because each bite is like a hug from your favorite childhood memory. So grab your apron, and let’s embark on this delicious journey together!
Ingredients:
As we prepare to create these heavenly Peanut Butter Oreo Bars together, let’s take a moment to appreciate each ingredient we’ll be using. Each component has its own story to tell and contributes uniquely to this delightful treat.
- 15 Oreo cookies (not double stuffed). These iconic cookies form the foundation of our dessert with their unique flavor and texture. Crushed into fine crumbs, they create a buttery base that holds everything together beautifully. Be sure to choose regular Oreos for this recipe; their crispness provides just the right amount of crunch without overwhelming the other flavors. If you’re feeling adventurous, feel free to mix things up by using gluten-free Oreos or even another brand if you prefer!
- 3 tablespoons unsalted butter (42 grams) (melted). This melted butter is essential for binding our cookie crumbs into a cohesive crust. It adds richness while ensuring that your bars don’t crumble apart when you cut them. Always opt for unsalted butter here; it gives you control over the saltiness in your final product—too much salt can mask the sweetness we want in our bars.
- 1/4 cup unsalted butter (56 grams) (softened). Softened butter is key for achieving that creamy texture in our peanut butter filling. When it’s at room temperature, it blends seamlessly with other ingredients without leaving lumps. This step enhances mouthfeel and ensures every bite feels luxurious on your tongue!
- 3 tablespoons brown sugar (light or dark). Brown sugar adds depth with its molasses notes, balancing out the sweetness while also adding moisture to our filling. Whether you choose light or dark brown sugar will depend on how rich you want your flavors—the darker sugar packs more punch!
- 1/4 teaspoon salt (omit if using salted butter). Salt is often underrated in sweet recipes but think of it as an enhancer—it brings out all those lovely flavors! If you are using salted butter in your mixture already, feel free to skip this addition; otherwise, it will help elevate every element in your Peanut Butter Oreo Bars.
- 1 cup smooth peanut butter. Ahh…the star of our show! Smooth peanut butter lends creaminess and robust flavor without being overly gritty or overwhelming. Choose high-quality peanut butter made from just peanuts and maybe some salt—this purity shines through in our bars! If you’re nut-free or looking for alternatives due to allergies, sunflower seed butter works wonderfully too.
- 1 2/3 cups powdered sugar (183 grams) (sifted). Powdered sugar not only sweetens but also helps achieve that indulgent creaminess we all adore in desserts like these bars. Sifting before measuring ensures there are no lumps—trust me; this step makes all the difference in achieving that silky texture.
- 6 ounces semi-sweet chocolate (170 grams) (or your favorite variety). Chocolate is where we get our luxurious finishing touch! Semi-sweet chocolate strikes an excellent balance between richness and sweetness but feel free to use milk chocolate if that’s more your style—or even bittersweet for a deeper flavor profile.
- 2 teaspoons shortening (or 1/2 teaspoon vegetable oil). Shortening helps our chocolate melt smoothly without seizing up when tempered with heat. It creates that glossy finish on top of our bars that’s oh-so-inviting! If you don’t have shortening on hand, vegetable oil can also do the trick; just remember it may alter the texture slightly.
Equipment You’ll Need:
Before we get started on making these delightful bars, let’s ensure we have all our tools ready because having the right equipment makes everything smoother—and trust me, nothing feels better than being organized when you’re creating something delicious!
- 8×8 inch (20×20 cm) pan – A square baking dish is essential for shaping our bars perfectly. Lining it with parchment paper or aluminum foil helps with easy removal later on; you’ll thank yourself when it’s time to cut those beautiful squares!
- Mixing bowls – Having multiple mixing bowls allows you to keep things organized while combining different components without any mess or confusion—a must-have in any kitchen!
- Measuring cups and spoons – Precision matters when baking! Using proper measuring tools ensures consistency across batches—no one wants unevenly sweetened fills now, do they?
- Rubber spatula – This handy tool will help you scrape down sides efficiently while mixing ingredients together smoothly so nothing goes wasted—always strive for perfection!
Now that we’re prepped with both ingredients and tools at hand let’s roll up our sleeves and start preparing those delectable Peanut Butter Oreo Bars!
Preparing the Peanut Butter Oreo Bars
Step 1: Preparing Your Pan
First things first—you’ll want to grab that 8×8 inch pan we talked about earlier and line it with parchment paper or aluminum foil before starting anything else! This step might seem trivial but believe me—it’s absolutely paramount for ensuring easy removal later on without leaving behind bits stuck at bottom corners where nobody wants them stuck forevermore! Just leave enough overhang around edges so pulling out whole block becomes effortless once set.
Step 2: Creating Your Cookie Crust
Now comes one of my favorite parts: making that scrumptious cookie crust! In a large mixing bowl—or if you’re feeling fancy already prepared bowl set aside—take those 15 crushed Oreo cookies along with 3 tablespoons melted unsalted butter and combine until thoroughly blended together into sandy texture resembling wet sand found at beach shores during summer vacations…you know what I mean? At this point when pressing mixture firmly against bottom lined pan surface using spatula’s back should form even layer across entire base yielding crunchy goodness which serves purpose holding everything else together throughout process ahead!
Step 3: Making The Creamy Filling
Time to bring some magic into play as we whip up this luscious peanut buttery filling! In another mixing bowl add softened unsalted butter alongside smooth peanut butter then sprinkle brown sugar atop followed by sifted powdered sugar too—you can imagine how indulgent it’ll taste already can’t you? Using electric mixer fitted with paddles beat mixture until fluffy creamy consistency achieved resembling clouds floating above serene landscapes—oh my goodness just thinking about it makes heart sing! Make sure scrape down sides regularly ensuring even blending occurs throughout entire batch—it’s crucial not letting any stubborn lumps hide out unnoticed ruining future bites filled blissful delightfulness later on down line…
Step 4: Combining Everything Together
Once everything’s come together harmoniously within creamy filling bowl now gently spread half portion evenly atop chilled cookie crust formed earlier—just take care smoothing surface outwards gradually towards edges so each slice enjoys equal share delectable flavors ahead awaiting discovery upon biting through layers blissfully melting away moments shared among friends family gathered around table celebrating life itself…how wonderful does THAT sound? Once settled place back inside refrigerator allowing chill time approximately thirty minutes helping firm up textures lending necessary structure needed cutting straight squares afterward when ready serve guests eager awaiting taste test adventure awaits everyone involved next journey ahead into creamy world filled yummy delights!
Stay tuned as we continue crafting these unforgettable Peanut Butter Oreo Bars through following steps yet ahead where imagination runs wild creativity flourishes brings smiles laughter joy everlasting memories made shared amongst loved ones gathered near bringing warmth hearts every single time appreciated moments cherished forever more…
Step 5: Creating the Irresistible Oreo Crust
Now that we’ve lined our pan, it’s time to create that delectable Oreo crust that will serve as the perfect foundation for our Peanut Butter Oreo Bars. Grab those 15 Oreo cookies and place them in a food processor. If you don’t have one, no worries! You can put them in a zip-top bag and crush them with a rolling pin or even your hands—just make sure they’re finely ground. This step is crucial because the finer the crumbs, the better they’ll hold together when mixed with melted butter. We’re aiming for a texture similar to damp sand, which will compact beautifully when pressed into the bottom of our pan.
Once your cookies are crushed, transfer them into a mixing bowl and pour in the 3 tablespoons of melted unsalted butter. Use a spatula or your hands to mix until every crumb is coated in that luscious liquid gold. This buttery goodness not only binds the crust but also adds richness that complements the peanut butter filling we’re about to create. Don’t rush this step; take your time to ensure everything is well combined. When you press this mixture into the bottom of your prepared pan, aim for an even layer—this will provide a wonderful crunch and flavor in every bite. Use the back of a measuring cup or your fingers to pack it down firmly, and make sure it reaches all corners of the pan. You want it to be solid enough so that it doesn’t crumble apart when you cut into it later on.
Step 6: Crafting the Creamy Peanut Butter Filling
Ah, now comes one of my favorite parts—the creamy peanut butter filling! In a large mixing bowl, combine 1/4 cup of softened unsalted butter, 1 cup of smooth peanut butter, and 3 tablespoons of brown sugar. Using a hand mixer or stand mixer, beat these ingredients together until they’re smooth and creamy—around 2-3 minutes should do the trick. The reason we use softened butter here is twofold: it blends seamlessly with the peanut butter and sugar, creating an incredibly velvety texture that melts in your mouth. Plus, brown sugar brings that hint of caramel flavor which beautifully enhances the nutty notes of our filling.
Next, it’s time to add in our sifted powdered sugar! Gradually mix this into your peanut butter blend until fully incorporated; this will help prevent clumps from forming and ensure an ultra-smooth filling. As you mix, be sure to scrape down the sides of your bowl occasionally—this is where some deliciousness might cling if we’re not careful! Once everything is combined and transformed into a thick yet spreadable consistency, you’ll likely be tempted to taste it (and trust me—you should!). This filling should feel like a dream between your fingers; rich and satisfying without being overly sweet. Spread this delightful mixture evenly over our prepared Oreo crust with a spatula or spoon—it’s okay if it doesn’t look perfect; remember that rustic charm adds character!
Step 7: Melting Chocolate for That Perfect Topping
Now comes what I like to call “the crowning glory” of our Peanut Butter Oreo Bars—the chocolate topping! For this step, you’ll need 6 ounces of semi-sweet chocolate (or any variety you adore). Break it into small pieces and place them in a heatproof bowl along with 2 teaspoons of shortening or half a teaspoon of vegetable oil. The addition of shortening is absolutely paramount here as it helps achieve that glossy finish we all love while making it easier to cut through later on—a truly transformative touch!
To melt this heavenly concoction without burning it (because we certainly don’t want bitter chocolate ruining our bars), set up a double boiler method by placing this bowl over gently simmering water on the stove—just make sure that no water touches your chocolate directly! Stir continuously as it melts until silky smooth; this usually takes about 4-5 minutes at most. Here’s where patience pays off; if you rush this melting process using high heat directly in the microwave or stove, you risk seizing your chocolate—a sad fate for such sweetness! Once melted and glossy, pour this divine chocolate over your peanut butter layer and spread evenly with a spatula—let each dollop cascade over those edges for an extra touch of indulgence!
Step 8: The Essential Chilling Time
This next step is one where I urge you not to skip out on patience—the chilling phase! After you’ve poured that luscious chocolate topping over everything, it’s time for our Peanut Butter Oreo Bars to chill out in the refrigerator for at least an hour—yes, I know waiting can be tough when you’re excited about dessert! But trust me on this: allowing these bars to set properly gives all those glorious layers time to meld together beautifully while firming up enough so they hold their shape when sliced.
As they chill out calmly in their cool haven, something magical happens—the flavors deepen and develop into an utterly intoxicating ensemble that dances across your palate when you finally take that first bite. Aim for at least an hour for optimal results; however longer can sometimes yield even better results—up to two hours if you’re feeling particularly patient! During this time, resist the temptation to sneak glances too often; let them settle undisturbed so they can become everything you’ve envisioned!
Conclusion:
What a delightful journey it has been crafting these Peanut Butter Oreo Bars together! From the moment we mixed that buttery Oreo crust to layering on the creamy peanut butter filling topped with smooth chocolate, each step has been filled with anticipation and joy. These bars are more than just dessert; they embody a beautiful symphony of flavors and textures that dance on your palate with every bite. The contrast between the crunchy crust and velvety filling is what elevates this treat beyond mere indulgence—it’s an experience that warms the heart.
This recipe is truly a must-try—not only for its taste but also for the sheer joy it brings during preparation. Imagine gathering friends or family around as you whip up this simple yet stunning dessert; it’s accessible enough for anyone to try yet impressive enough to wow your loved ones at gatherings, parties, or cozy nights in. Picture pulling these irresistible bars from the fridge and slicing into them—the smell of peanut butter wafting through your kitchen will make everyone’s mouth water!
For serving suggestions, think about pairing one of these divine bars with a tall glass of cold almond milk or perhaps a cup of rich coffee—each sip complements the sweet creaminess of the bars beautifully. If you’re thinking about enhancing your experience further, imagine savoring one while lounging on your porch during sunset or bringing them along as a special treat on your next picnic adventure. They truly elevate any occasion!
Feeling adventurous? This recipe lends itself wonderfully to variations! Perhaps swap out semi-sweet chocolate for dark chocolate if you prefer something richer; or why not incorporate crushed nuts into the peanut butter layer for an added crunch? Feeling inspired? You can even drizzle some melted white chocolate over top for a striking contrast against the dark chocolate—each tweak brings new life into these bars while maintaining their original charm. So go ahead—get creative! I invite you to make this recipe your own, share your unique twists with friends and family, and connect over this delightful creation that has brought us all together here today.
Peanut Butter Oreo Bars
Indulge in the delightful experience of creating Peanut Butter Oreo Bars, a no-bake dessert that perfectly balances creamy peanut butter, crunchy Oreo crust, and a luscious chocolate topping. This easy-to-make treat is perfect for sharing with friends and family or enjoying as a sweet escape after a long day. Each bite offers an explosion of flavors, combining the richness of peanut butter with the sweetness of powdered sugar and the crunch of Oreos. With minimal effort and maximum satisfaction, these bars will quickly become a cherished recipe in your collection. Get ready to dive into this culinary adventure that promises to sweeten any occasion!
- Prep Time: 20 minutes
- Cook Time: None
- Total Time: 0 hours
- Yield: Serves approximately 16 squares 1x
- Category: Dessert
- Method: No-Bake
- Cuisine: American
Ingredients
- 15 Oreo cookies (crushed)
- 3 tablespoons unsalted butter (melted)
- 1/4 cup unsalted butter (softened)
- 3 tablespoons brown sugar
- 1 cup smooth peanut butter
- 1 2/3 cups powdered sugar (sifted)
- 6 ounces semi-sweet chocolate
- 2 teaspoons shortening
Instructions
- Prepare an 8×8 inch pan by lining it with parchment paper.
- In a bowl, combine crushed Oreos and melted butter until mixed well; press into the bottom of the prepared pan to form a crust.
- In another bowl, beat softened butter, peanut butter, brown sugar, and sifted powdered sugar until creamy.
- Spread half the peanut butter mixture over the crust evenly.
- Melt chocolate with shortening in a double boiler until smooth; pour over the peanut butter layer and spread evenly.
- Chill in the refrigerator for at least one hour before slicing into squares.
Nutrition
- Serving Size: 1 square (approx. 45g)
- Calories: 230
- Sugar: 18g
- Sodium: 95mg
- Fat: 12g
- Saturated Fat: 4g
- Unsaturated Fat: 7g
- Trans Fat: 0g
- Carbohydrates: 29g
- Fiber: 1g
- Protein: 4g
- Cholesterol: 10mg