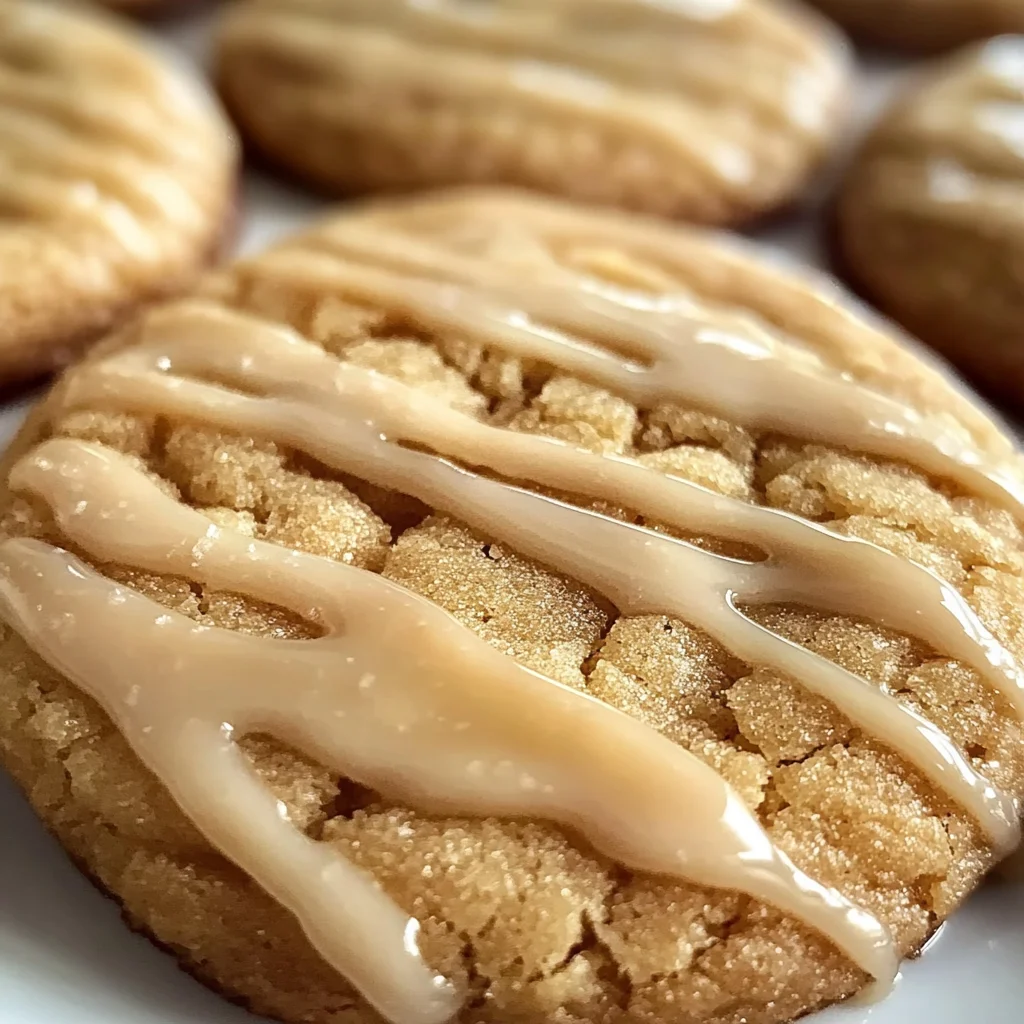
Maple Brown Sugar Cookies
There’s something magical about baking, isn’t there? It’s not just the act of combining ingredients; it’s an experience that transcends the kitchen, enveloping our homes with warmth and nostalgia. When I think of cozy afternoons spent in my grandmother’s kitchen, the scent of freshly baked cookies wafting through the air, it brings a smile to my face and a deep sense of comfort. These Maple Brown Sugar Cookies are more than just a delightful dessert; they’re a sweet embrace, a reminder of cherished moments, and a bridge that connects tradition with the rich flavors of today. With their soft, chewy texture and the intoxicating aroma of maple and cinnamon, these cookies invite you to slow down and savor life’s little pleasures.
As we embark on this culinary journey together, I promise you that baking these cookies will not only fill your home with an irresistible fragrance but will also create memories worth savoring. Imagine biting into one of these cookies—their golden edges crisp yet yielding to a tender center that melts in your mouth, all while being kissed by the gentle sweetness of pure maple syrup. They are perfect for those crisp autumn days or any time you find yourself craving something comforting and delicious. Whether you’re sharing them with loved ones or indulging in a quiet moment for yourself, trust me when I say they are truly extraordinary.
Maple Brown Sugar Cookies: A Sweet Taste of Fall
Welcome to the world of Maple Brown Sugar Cookies! This recipe is one I hold dear to my heart, and I can’t wait to share it with you. The combination of rich brown sugar and pure maple syrup creates a flavor profile that is simply heavenly. Add in a hint of cinnamon for warmth, and finish them off with a silky maple glaze—it’s like wrapping yourself in your favorite sweater on a chilly day! Get ready to bring some coziness into your kitchen.
Ingredients:
Before we dive into baking bliss, let’s gather our ingredients. Each component plays its own essential role in creating these delightful cookies.
- 1 cup (2 sticks or 226g) unsalted butter, softened. This is absolutely paramount for achieving that light and fluffy texture we’re after in our Maple Brown Sugar Cookies. Softened butter allows for proper creaming with the sugars, which incorporates air into the mixture. If your butter is too cold, it won’t cream effectively; if it’s melted, your cookies will spread too much during baking. Look for high-quality butter—European-style butter has higher fat content which can elevate the richness and flavor of your cookies.
- 1 cup brown sugar, packed. Using brown sugar adds depth to our cookies with its caramel-like flavor thanks to the molasses it contains. This sugar not only sweetens but also contributes moisture to our dough, ensuring that our cookies remain soft and chewy even after they cool down. Be sure to pack it tightly into your measuring cup so that you get all that glorious sweetness!
- 1/4 cup pure maple syrup. Ahh, liquid gold! Pure maple syrup is what gives our cookies their signature flavor profile—sweet but complex. It adds both moisture and richness while infusing them with that unmistakable maple essence that’s so comforting during fall. Make sure you choose genuine pure maple syrup over imitation syrup for the best results; it makes all the difference!
- 1 large egg. Eggs serve as binding agents in baking—they help hold everything together while providing moisture as well. In this recipe, one large egg gives structure without overwhelming our delicate cookie texture.
- 1 teaspoon vanilla extract. This ingredient is often overlooked but trust me when I say it’s non-negotiable! Vanilla enhances all other flavors present in our cookie batter—it rounds out the sweetness beautifully and adds depth.
- 2 1/2 cups all-purpose flour. Flour provides structure and stability to our cookies while also absorbing moisture from other ingredients like butter and syrup. Measuring accurately is crucial here; too much flour can lead to dry cookies while too little can make them overly soft.
- 1 teaspoon baking soda. As our leavening agent, baking soda helps our cookies rise slightly during baking while contributing to their chewy texture by promoting spread as they bake.
- 1/2 teaspoon salt. A pinch of salt helps balance out the sweetness—after all, we want every bite to sing harmoniously! It enhances flavors overall without making your cookies taste salty.
- 1/2 teaspoon ground cinnamon. Cinnamon brings warmth and coziness into our Maple Brown Sugar Cookies—a sprinkle transports you straight into an autumn wonderland! It pairs beautifully with maple syrup and brown sugar.
- 1 cup powdered sugar (for glazing). This fine sugar dissolves easily into liquids making it perfect for creating glazes or frostings without any graininess remaining.
- 2 tablespoons pure maple syrup (for glazing). Just like before, this will add sweetness along with that rich maple flavor as we glaze our cooled cookies.
- 1-2 tablespoons milk (for consistency). Milk adjusts glaze thickness—use just enough to get a smooth pourable consistency without making it too runny or thick.
- Optional: A sprinkle of cinnamon for garnish adds not just visual appeal but hints at what lies within those delectable bites!
Equipment You’ll Need:
Now that we have gathered all our ingredients let’s talk about some essential tools that’ll help us create these scrumptious treats! Having the right equipment makes the cooking experience smoother and more enjoyable—not only do they assist us along the way but they also ensure consistent results!
- Electric mixer (handheld or stand) – This gadget is crucial for creaming butter and sugar together effectively! The mixer incorporates air into your batter seamlessly—an important step if you want light-textured cookies rather than dense bricks!
- Mixing bowls (various sizes) – You’ll need both large bowls for mixing wet ingredients as well as smaller bowls for dry ingredients like flour and spices before combining everything together later on.
- Cookie scoop or tablespoon – Perfectly portioned cookie dough balls ensure uniformity in size which leads to even baking throughout each batch! Nobody wants lopsided cookies now do we?
- Parchment paper or silicone baking mats – These prevent sticking during baking while also ensuring easy cleanup afterward—a true baker’s best friend!
- Wire rack – Cooling racks allow air circulation around baked goods so they cool evenly without becoming soggy on one side—a small yet critical detail!
Now we’re finally ready to dive into making these Maple Brown Sugar Cookies! Let’s roll up those sleeves…
Step 1: Preheat Your Oven
First things first: preheat your oven to 350°F (175°C). Preheating might seem like an afterthought but trust me when I say it’s absolutely crucial! By warming up your oven beforehand ensures that once those delightful cookie balls hit their surface inside they begin cooking immediately at optimal temperature resulting in perfectly baked goodies every time! While waiting for your oven’s temperature gauge indicator light (or beep) goes off—take this moment wisely by preparing two baking sheets lined either with parchment paper or silicone mats which facilitate easy removal later on down this delicious path.
Step 2: Creaming Time!
In a large mixing bowl fitted with either paddle attachments from an electric mixer—let’s start creaming together softened unsalted butter along with packed brown sugar until we achieve a light fluffy texture within approximately two-three minutes time frame hereabouts being mindful not rushing this step as proper creaming creates pockets where air gets trapped leading eventually towards beautiful elevation during bake time thus giving shape lift needed throughout process ahead! Once nicely blended add liquid gold aka pure maple syrup alongside egg followed by vanilla extract mixing once again briefly until everything appears smooth combined thoroughly—you’ll know it’s ready when no lumps remain visible against those inviting creamy swirls!
Step 3: Whisk Away Dry Ingredients
In another bowl combine all-purpose flour along with baking soda salt ground cinnamon whisking gently until evenly distributed throughout each element present within mix—that aroma alone should evoke memories reminiscent autumn scents wafting through kitchens everywhere! Gradually introduce this dry mixture little by little whilst lowering mixer speed so avoid overmixing; doing so ensures tender soft cookie textures instead tough outcomes or crumbly disasters instead—this part requires patience folks don’t rush through because skipping would lead disastrous consequences ruining efforts put forth thus far!
Step 4: Shape Those Cookie Dough Balls
Using either cookie scoop or tablespoon measure out approximately 1½ inch diameter sized balls placing onto prepared sheets spaced around two inches apart leaving enough room between each dollop allowing space necessary spreading occurs naturally whilst heating within hot atmosphere inside ovens later on down line here ahead—we want beautiful round shapes forming rather than puddles merging together resembling single giant cookie monstrosities instead right? Gently flatten each ball using palm hand creating flat surface underneath encouraging even cooking throughout entirety batch ensuring delightful bites await everyone lucky enough partake joyfully soon thereafter…
I hope you’re feeling excited because we’re just getting started on these amazing Maple Brown Sugar Cookies! Stay tuned as we continue building towards those final steps including glazing perfection next time around…
Step 5: Bake to Perfection
Now that your cookie dough is ready and shaped into delightful little balls, it’s time to bake them to golden perfection. Preheat your oven to 350°F (175°C) if you haven’t already, allowing it to reach a steady temperature. This is crucial because an accurately heated oven ensures that your cookies will rise beautifully and develop a lovely texture. Place your baking sheets in the center of the oven, giving those little dough balls room to spread out as they bake—this is where the magic happens!
Bake your cookies for 8-10 minutes, but don’t just set a timer and walk away. Keep a close eye on them during those last few minutes. You want the edges to turn a light golden brown while the centers remain slightly soft; they’ll continue to cook as they cool on the baking sheet. Overbaking is something we definitely want to avoid here! Trust me on this: pulling them out just when the edges start to brown will yield cookies that are soft and chewy rather than dry or hard—nobody wants that! Once they’re ready, let them cool on the baking sheets for a few minutes before moving them to a wire rack. This step allows them to firm up just enough so they don’t crumble when you transfer them.
Step 6: Crafting Your Maple Glaze
While those heavenly cookies are cooling, let’s turn our attention to the star of this recipe—the maple glaze! In a small bowl, combine 1 cup of powdered sugar with 2 tablespoons of pure maple syrup. Now, here’s where we add some milk; start with 1 tablespoon and mix it in well until you achieve a smooth, pourable consistency. You might need another tablespoon depending on how thick or thin you like your glaze—this part is really about personal preference!
Why do we glaze our cookies? The glaze not only adds an extra layer of sweetness but also brings out that delightful maple flavor even more. It’s like wrapping your cookies in a cozy blanket of flavor! As you’re whisking, I encourage you to think about how you’d like it—thicker for a more decadent finish or thinner for a delicate drizzle. Once it’s all mixed together and has that perfect pourable quality, set it aside for just a moment while we get back to those cooling cookies.
Step 7: Drizzle with Love
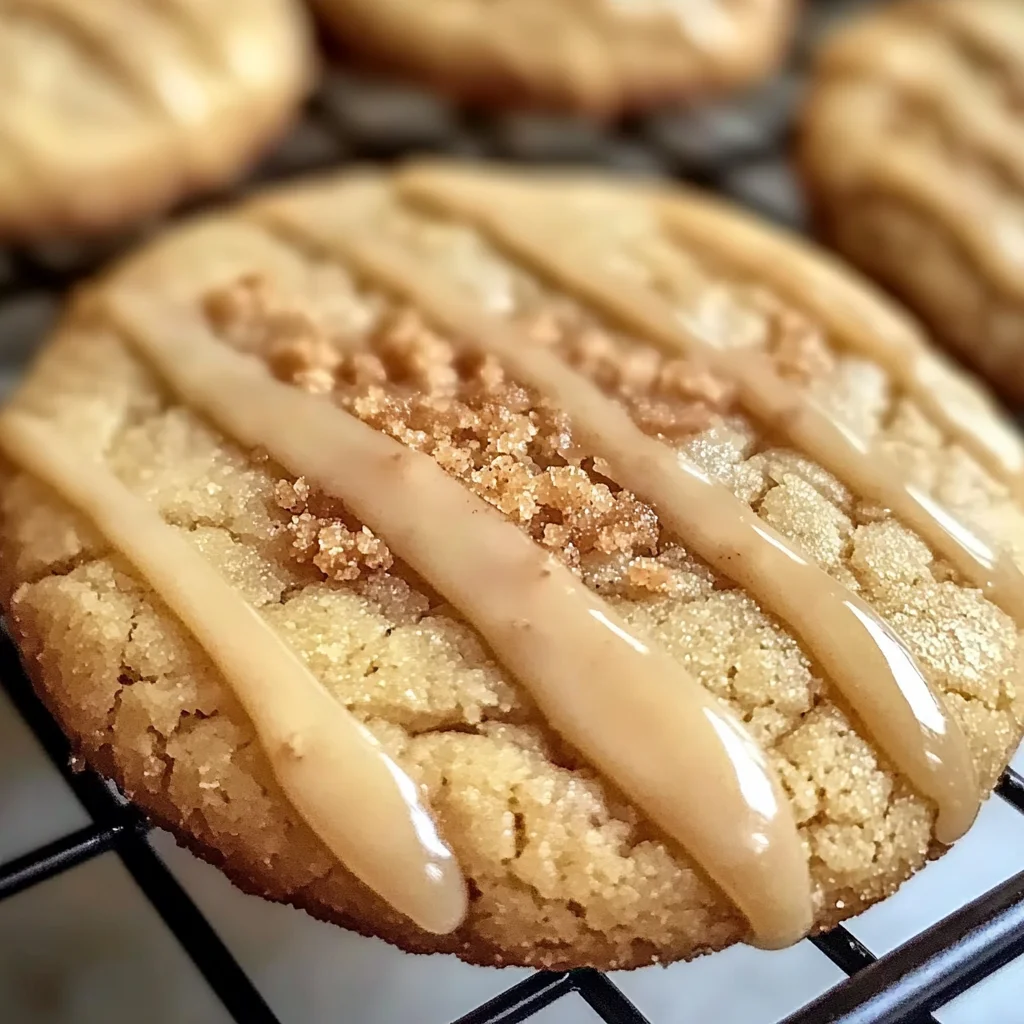
Now comes one of my favorite parts: drizzling that gorgeous maple glaze over your cookies! Once they’ve cooled down (and trust me, there’s nothing more disappointing than melting glaze on warm cookies), take each cookie and place it on a wire rack over parchment paper or a plate to catch any drips—you’ll thank yourself later for this little trick! Using a spoon or a piping bag if you’re feeling fancy, drizzle the glaze generously over each cookie, letting it cascade down the sides like liquid gold.
The beauty of this step lies in its simplicity; nothing compares to the moment when that creamy glaze meets warm cookie goodness. Feel free to get creative with your drizzling technique—zigzag patterns or gentle spirals can make each cookie look like it came straight from a bakery case! And if you’re feeling extra festive, sprinkle just a hint of cinnamon over the glazed cookies while the icing is still tacky; this creates an aromatic finish that’s utterly intoxicating!
Step 8: Allowing Time for Magic
After you’ve beautifully glazed all your cookies, it’s essential to allow them some time for the glaze to set properly. This usually takes about 10-15 minutes at room temperature, but I promise you—it’s worth every second. During this time, the glaze will firm up slightly without losing its silky sheen, making each bite an experience filled with texture and flavor contrasts.
You might be tempted to dive right into these beauties right away—after all, who can resist? But trust me on this one; patience pays off as it allows those flavors time to meld together beautifully. Plus, waiting gives you ample opportunity to brew yourself a comforting cup of coffee or tea—perfectly pairing with these delectable treats! Imagine yourself cozied up with one of these maple brown sugar cookies alongside your warm drink—it’s pure bliss!
Conclusion:
As we wrap up our journey through this delightful recipe for Maple Brown Sugar Cookies, I hope my enthusiasm has inspired you to don your apron and get baking! This recipe is more than just a collection of ingredients; it’s an invitation to create something truly extraordinary in your kitchen. The combination of rich brown sugar paired with pure maple syrup and a whisper of cinnamon creates a symphony of flavors that dances on your palate. Each bite is soft and chewy, enveloped in the warmth of nostalgia—perfectly suited for cozy evenings or sharing with loved ones during festive gatherings.
Why should these cookies be on your must-try list? Well, beyond their irresistible taste lies the joy of making them—a process that fills your home with comforting aromas while inviting everyone around to share in the excitement. From family gatherings to quiet afternoons spent with friends over coffee, these cookies shine bright on any occasion. Picture this: pulling a tray from the oven just as golden edges begin to form, allowing everyone around you to experience that moment of sheer happiness as they take their first bite—it’s truly magical!
When it comes time to enjoy these delectable treats, consider pairing them with your favorite cup of coffee or tea; imagine savoring one alongside a rich espresso or perhaps even indulging in hot cocoa on chilly days—it’s like wrapping yourself in a warm blanket! For an afternoon pick-me-up or an evening treat while unwinding after the day’s hustle, these cookies deliver comfort without question. And if you’re feeling adventurous—try sandwiching two cookies together with your favorite dairy-free spread or whipped coconut cream; now that’s what I call decadence!
Feeling inspired? There are countless variations waiting for you to explore! How about adding chopped nuts for crunch or swapping cinnamon for nutmeg for an exciting twist? You could even fold in some dairy-free chocolate chips if you’re looking for an extra layer of indulgence. This recipe is wonderfully adaptable—each small change can create something new and exciting while retaining its core charm. So go ahead—bake these Maple Brown Sugar Cookies, share your creations, and let’s connect over our shared love of baking magic!
Maple Brown Sugar Cookies
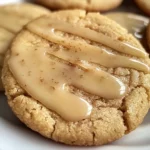
Indulge in the warmth of fall with our delightful Maple Brown Sugar Cookies! These soft and chewy treats combine the rich flavors of brown sugar and pure maple syrup, perfectly enhanced by a hint of cinnamon. Ideal for cozy gatherings or quiet afternoons, these cookies evoke nostalgic memories while filling your home with their irresistible aroma. With a silky maple glaze drizzled on top, they are not only a visual treat but also a comforting bite that brings joy to any occasion. Whether shared with loved ones or savored alone, these cookies promise a sweet escape into comfort and tradition.
- Prep Time: 15 minutes
- Cook Time: 10 minutes
- Total Time: 25 minutes
- Yield: Approximately 24 cookies 1x
- Category: Dessert
- Method: Baking
- Cuisine: American
Ingredients
- 1 cup unsalted butter, softened
- 1 cup packed brown sugar
- 1/4 cup pure maple syrup
- 1 large egg
- 1 teaspoon vanilla extract
- 2 1/2 cups all-purpose flour
- 1 teaspoon baking soda
- 1/2 teaspoon salt
- 1/2 teaspoon ground cinnamon
- 1 cup powdered sugar (for glazing)
- 2 tablespoons pure maple syrup (for glazing)
- 1–2 tablespoons milk (for consistency)
Instructions
- Preheat oven to 350°F (175°C). Line baking sheets with parchment paper.
- In a mixing bowl, cream together softened butter and brown sugar until light and fluffy. Mix in maple syrup, egg, and vanilla until smooth.
- In another bowl, whisk together flour, baking soda, salt, and cinnamon. Gradually add dry ingredients to the wet mixture until just combined.
- Scoop dough into balls and place them on the prepared baking sheets about two inches apart. Flatten slightly.
- Bake for 8-10 minutes until edges are golden but centers remain soft. Cool on the baking sheets for a few minutes before transferring to wire racks.
- For the glaze, mix powdered sugar, maple syrup, and milk until smooth; drizzle over cooled cookies.
Nutrition
- Serving Size: 1 cookie (30g)
- Calories: 150
- Sugar: 10g
- Sodium: 85mg
- Fat: 7g
- Saturated Fat: 4g
- Unsaturated Fat: 3g
- Trans Fat: 0g
- Carbohydrates: 21g
- Fiber: <1g
- Protein: <1g
- Cholesterol: 15mg