Vanilla Sugar Cookies
There’s something truly magical about baking, isn’t there? The way the aroma of warm cookies fills your home, wrapping you in a cozy embrace that feels like a hug from a dear friend. Today, I’m beyond excited to share with you my cherished recipe for Vanilla Sugar Cookies. These cookies are more than just a sweet treat; they are a celebration of life’s simple pleasures, each bite delivering a symphony of flavors that dance on your palate. With their pillowy softness and delightful chewiness, these cookies are bursting with the essence of fresh vanilla—an ingredient that transforms ordinary moments into extraordinary memories. I promise you, once you take that first bite, you’ll feel an overwhelming wave of warmth and nostalgia wash over you, reminding you of family gatherings and joyful celebrations.
Baking these Vanilla Sugar Cookies is not just about following a recipe; it’s about creating an experience filled with love and laughter. This recipe has been passed down through the years, evolving with every generation while retaining its core charm. It’s perfect for any occasion: birthdays, holidays, or even just a quiet afternoon at home when you need a little pick-me-up. The beauty of these cookies lies not only in their taste but also in their versatility. You can enjoy them as they are or adorn them with sprinkles for festive occasions. So let’s gather our ingredients and embark on this delicious journey together!
Vanilla Sugar Cookies: A Sweet Escape into Comfort
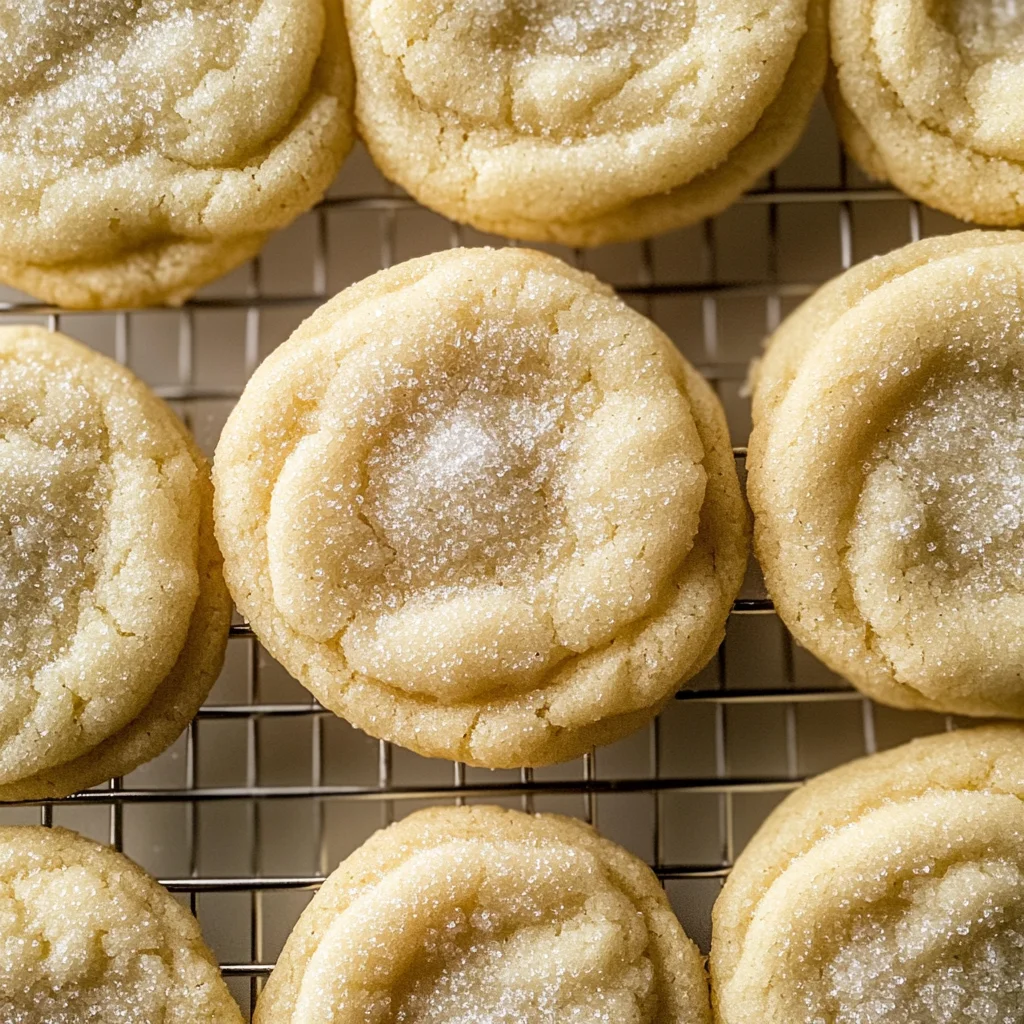
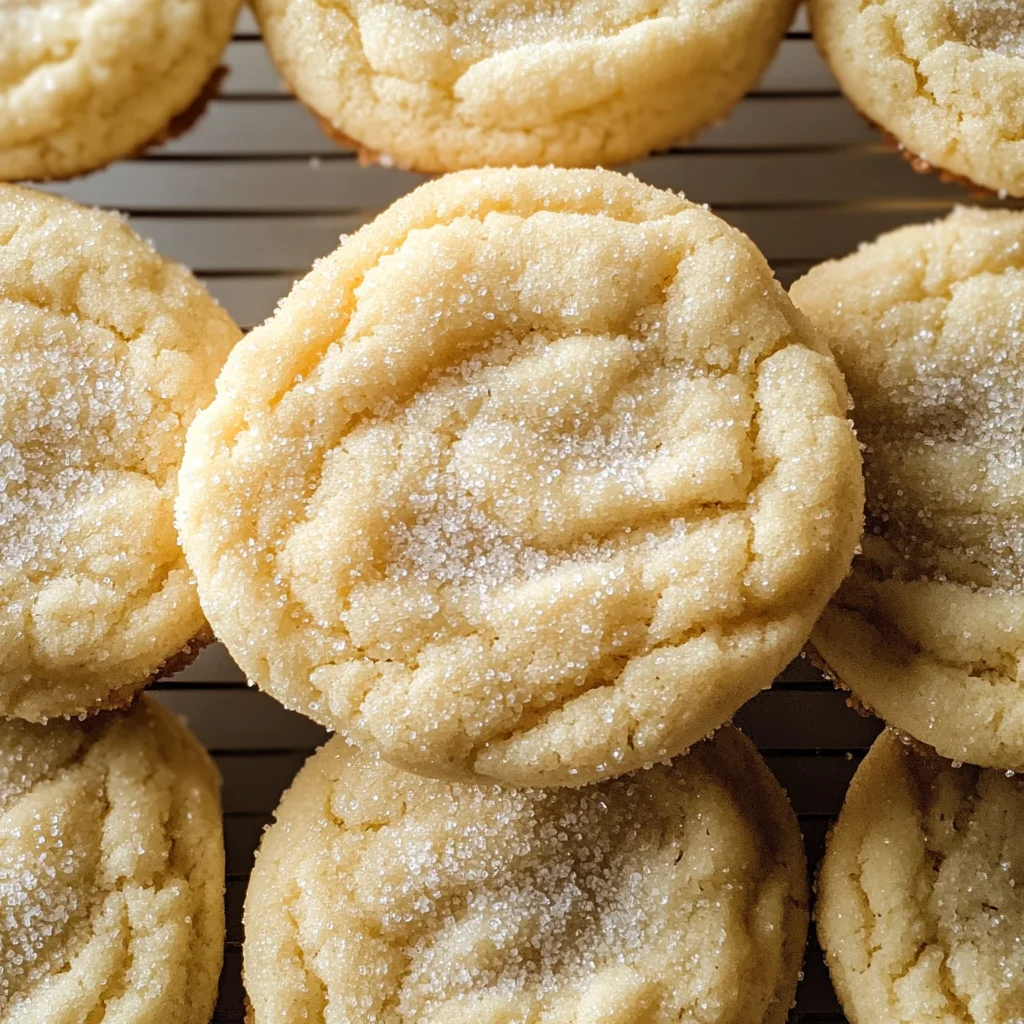
These Vanilla Sugar Cookies are everything your heart desires—soft, chewy, and infused with the purest vanilla flavor imaginable. Each one is delicately rolled in sugar before baking, creating a beautiful dusting that adds both sweetness and texture. As we delve into this baking adventure together, remember that every step is an opportunity to connect with the ingredients and let your creativity shine.
Ingredients:
As we prepare to create these delightful cookies, let’s take a moment to appreciate each ingredient that contributes to their magic. Each component plays a pivotal role in building flavor and texture.
- 2 cups (240g) all-purpose flour. Flour is the backbone of cookie-making; it provides structure and stability to our dough. When selecting flour, look for high-quality all-purpose flour that has enough protein content to give your cookies the perfect balance between chewy and tender. If you want to experiment further, consider using cake flour for an ultra-soft texture or whole wheat flour for a nuttier flavor profile.
- ¾ teaspoon baking powder. This leavening agent is essential for giving our cookies that lovely rise as they bake. Baking powder works by releasing carbon dioxide gas when it reacts with moisture and heat, which helps the cookies puff up slightly while maintaining their soft center. Always check your baking powder’s expiration date to ensure it’s still active; old baking powder can lead to dense cookies.
- ½ teaspoon baking soda. Another leavening agent! Baking soda acts as a base that neutralizes acidity in recipes while helping our cookies spread beautifully in the oven. It creates tenderness by breaking down proteins in flour, making sure our sugar cookies remain soft and delightful instead of hard as rocks! Just like with baking powder, make sure it’s fresh for optimal results.
- ½ teaspoon salt. Though it may seem small in quantity compared to other ingredients, salt is absolutely paramount—it enhances the flavors of all other components in our cookie dough! Salt brings out the sweetness of sugar while balancing flavors overall. I prefer using fine sea salt because it dissolves easily into the batter without leaving granules behind.
- ½ cup (113g) unsalted butter, softened to room temperature. Butter is where the magic begins! It not only provides richness but also contributes to the tender texture we crave in sugar cookies. Make sure your butter is perfectly softened—it should yield slightly when pressed but not be melted—that’s crucial! High-fat European-style butter will elevate your cookies even more with its creamy taste.
- 1 cup (120g) powdered sugar. This fine sugar dissolves quickly into the dough and gives our cookies their signature sweetness along with that delightful melt-in-your-mouth quality! When selecting powdered sugar, look for brands without added cornstarch if possible; pure powdered sugar results in smoother dough without any gritty texture.
- 1 large egg, preferably at room temperature. Eggs act as binders while adding moisture to our cookie dough; they also provide richness which enhances flavor considerably! Using eggs at room temperature ensures better emulsification when mixing them into butter—this means smoother batter without lumps!
- ¼ cup (56mL) vegetable oil. While butter provides flavor and richness, vegetable oil adds moisture without affecting texture negatively since its liquid form keeps things soft inside once baked! Plus, using oil helps cut back on saturated fat compared to using more butter; I often choose canola or sunflower oil for their neutral taste.
- 1 Tablespoon (21g) Rodelle vanilla paste. Ahh…vanilla—the star ingredient! Pure vanilla paste delivers intense flavor concentration thanks to those tiny specks of real vanilla bean throughout each cookie making every bite extraordinary! If you can’t find vanilla paste locally or prefer alternatives for accessibility reasons—vanilla extract works just fine too but won’t provide those charming flecks.
- ½ cup (100g) granulated sugar for rolling before baking! This final touch creates an irresistible sugary crust outside while keeping our interiors soft—a contrast that makes each bite so satisfying! Use ultra-fine granulated sugar if available as it coats well without clumping together during preparation!
Equipment You’ll Need:
Now that we have gathered all our ingredients together like old friends reuniting after years apart let’s talk about some essential tools that’ll help us achieve cookie perfection! Trust me when I say having these items on hand makes everything run smoothly—and who doesn’t love less stress in the kitchen?
- Mixing bowls – A set of various sizes will be invaluable here; sturdy glass or stainless steel bowls work wonders since they resist staining while allowing visibility during mixing processes! Having multiple sizes helps manage different stages without needing extra cleanup work later on!
- Handheld mixer or stand mixer – While hand mixing is always an option (and can be quite therapeutic), using an electric mixer speeds up creaming butter/sugar dramatically which translates into light fluffy doughs quicker than muscle alone ever could achieve!
- Cookie scoop – Using this handy tool ensures uniformity across all cookie shapes/sizes resulting in even baking times so nothing gets left behind burnt around edges while others remain raw inside—trust me this detail can save many heartaches post-baking!
- Baking sheets lined with parchment paper or silicone mats – These prevent sticking during cooking plus keep clean-up minimal afterwards too—who wants stubborn bits clinging onto trays anyway? Liners also promote better heat distribution leading towards evenly baked goodies every single time!
Preparing the Vanilla Sugar Cookies
Step 1: Preheat Your Oven
First things first—let’s get that oven preheated to 350ºF (177ºC). Preheating ensures it’s hot enough when those luscious balls of dough hit its warm embrace so they start rising immediately rather than languishing around waiting too long which might result in flat-dough disasters instead of gloriously rounded bites full joy awaiting us later on! While you’re at it line up those large sheets with parchment paper or silicone mats—this simple act saves lots hassle during cleanup while ensuring perfect non-stick performance throughout bakes ahead!
Step 2: Whisk Together Dry Ingredients
In medium bowl whisk together flour along with baking powder/baking soda/salt until combined thoroughly—this important step ensures nothing clumps up later down line during mix process itself by distributing leaveners evenly throughout mixture beforehand so they activate uniformly once introduced into wet elements next round—we’re aiming no lumps here folks! Set this aside briefly while we tackle creamy goodness coming soon…
Step 3: Cream Butter & Powdered Sugar
Grab either handheld mixer fitted attachment/stand mixer bowl now ready for action—we’ll be creaming softened butter along powdered sugar until light/fluffy consistency forms within around 2-3 minutes max duration wise depending power level equipment yields so keep eye on textures adjusting speed accordingly if needed till desired state achieved here—as soon buttery clouds appear floating above surface we’re golden folks ready add next components coming next round shortly thereafter!
Step 4: Incorporate Egg & Oils
Once fluffy concoction established stop mixer briefly add room-temp egg alongside measured vegetable oils plus vanilla paste then remix again medium level speed whipping everything together until fully combined; don’t rush this step since integrating wet elements properly maximizes flavors blending while maintaining smoothness desired throughout entire batch later down line—you want harmonious unity amongst flavors occurring within each ball created post-baking time frame spent here will pay dividends trust me!
If you’d like me to continue detailing additional steps or any modifications needed please let me know—happy baking friends!!
Step 5: Incorporating the Dry Ingredients – A Dance of Flavors
Now, let’s seamlessly meld our dry ingredients with the wet mixture. Lowering your mixer speed to a gentle low is crucial here; we want to be careful not to overwork the dough, which can lead to tougher cookies. Gradually add the flour mixture in two additions, allowing the first batch to incorporate mostly before introducing the second. This method ensures that everything comes together beautifully without forming gluten too aggressively, which can transform our tender cookies into something quite different. You’re looking for a dough that is soft but not overly sticky—think of it as a comforting cloud ready to be shaped into sweet delights. Once you’ve reached this stage, you should be able to scoop out the dough with ease—trust me, the texture is a key player in achieving those pillowy soft cookies we all crave.
As you mix, take a moment to inhale deeply; you should start to catch that intoxicating aroma of vanilla wafting through your kitchen, mingling with hints of buttery goodness. This isn’t just baking; it’s an experience! If for some reason your dough feels too sticky after all has been combined, don’t panic! A sprinkle more of flour will help achieve that perfect consistency. Just remember: patience truly pays off in baking, so resist the urge to rush this step.
Step 6: Shaping Your Cookies – The Sweet Art of Rolling
Now comes the fun part—shaping those delightful cookie balls! In a small bowl, pour out your granulated sugar; this is where our cookies will get their sweet coating that adds both texture and flavor. Using a cookie scoop (I adore my #50 for standard-sized treats), begin dropping rounded balls of dough into the bowl of sugar. As you gently roll each ball in the sugar, envision how this simple gesture transforms them from mere dough into something magical. The sugar not only creates a delightful crunch on the outside but also contributes a touch of sparkle that makes them utterly irresistible.
It’s important to ensure each ball is thoroughly coated; think of it as giving your cookies a lovely little sugar jacket! Once rolled and ready, place them evenly spaced on your prepared baking sheet—aim for about eight per sheet. This spacing allows for ample room for spreading while they bake without crowding each other. Remember: cookies need their personal space just like us!
Step 7: Baking Your Cookies – The Heartwarming Transformation
Preheat your oven to 350ºF (177ºC) if you haven’t already done so—this step is absolutely paramount! The right temperature is essential for achieving that perfect golden edge while keeping the center delightfully chewy and soft. Once your oven has reached its desired heat, slide in your baking sheets and set your timer for 8-9 minutes. As they bake, keep an eye on them but try not to open that oven door too often—the heat escaping can affect their rise and texture.
You’ll know they are ready when you see that the edges have set just slightly; they may still look soft in the middle—that’s exactly what we want! Cookies continue to cook even after being pulled from the oven due to residual heat; this process is called carryover cooking. So resist any temptation to bake them until completely firm—it’s vital to remove them at just the right moment for that melt-in-your-mouth effect we cherish so much.
Step 8: Cooling Down – The Waiting Game
Once you’ve baked those beautiful rounds of joy, allow them to cool on the baking sheet for about 2-3 minutes before transferring them onto a wire rack. This step might feel torturous because who doesn’t want to dive straight into warm cookies? But trust me here—cooling them slightly on the sheet helps maintain their shape and texture while preventing breakage during transfer. Use a spatula gently beneath each cookie; they will be delicate yet sturdy enough if treated with care.
Allow them to cool completely on the wire rack—a crucial phase where flavors deepen and settle beautifully into one another. They will develop that signature chewiness we all adore as they cool down fully. If you’re anything like me and find it hard waiting, consider this time an opportunity for self-control practice—or perhaps an excuse for enjoying one or two warm from the oven!
Conclusion:
As we wrap up this delicious journey through making Vanilla Sugar Cookies, I can’t help but feel excited about how these simple ingredients can create such extraordinary delights! The blend of rich vanilla flavor with that soft yet chewy texture truly elevates these cookies beyond ordinary desserts. There’s something profoundly satisfying about biting into one and being enveloped by its warm sweetness while feeling that familiar nostalgic tug at your heartstrings—a memory of home baking perhaps? This recipe is special because it captures those fleeting moments of joy shared over warm cookies with loved ones.
You absolutely must try these Vanilla Sugar Cookies not just for their enchanting taste but also for the sheer joy of making them! Baking is inherently therapeutic; it wraps you in warmth and creativity while filling your kitchen with an utterly intoxicating aroma that fills every corner of your home. Imagine pulling these golden-brown treasures from the oven—the edges slightly crisp yet yielding under gentle pressure while soft clouds of dough promise blissful bites ahead. Whether it’s a cozy afternoon at home or celebrating special moments with friends and family, these cookies shine brightly on any occasion.
For serving suggestions, imagine savoring one with a steaming cup of chamomile tea or perhaps alongside a refreshing glass of milk—each sip complementing the cookie’s sweet warmth perfectly. For an afternoon pick-me-up after school or work, pair them with your favorite coffee; there’s nothing quite like dipping one into that rich brew! And if you’re feeling fancy, consider indulging in an ice cream sandwich by squeezing a scoop between two warm cookies—now that’s what I call decadent bliss!
Feeling adventurous? This recipe is wonderfully adaptable! You could fold in chocolate chips or toasted nuts for added crunch; swap out some flour for cocoa powder to create chocolate-infused delights; or even sprinkle in some citrus zest for an exciting twist on flavor profiles! Each variation brings its charm to this base recipe while allowing you to explore your culinary creativity further. So go ahead—bake batch after batch, share photos of your creations, and let me know how it went! I can’t wait to hear all about your delightful experiences with these Vanilla Sugar Cookies!
Vanilla Sugar Cookies
Indulge in the warmth and nostalgia of homemade Vanilla Sugar Cookies, where each bite is a delightful dance of chewy texture and rich vanilla flavor. These cookies are perfect for any occasion—whether you’re celebrating a birthday, enjoying a cozy afternoon at home, or simply treating yourself to something sweet. The simplicity of this recipe makes it accessible for bakers of all skill levels, inviting creativity with options for customization like adding chocolate chips or citrus zest. With their pillowy softness and light sugary coating, these cookies promise to wrap you in comfort and joy. Gather your ingredients and let’s create some magic together!
- Prep Time: 15 minutes
- Cook Time: 9 minutes
- Total Time: 24 minutes
- Yield: Approximately 24 cookies 1x
- Category: Dessert
- Method: Baking
- Cuisine: American
Ingredients
- 2 cups all-purpose flour
- ¾ teaspoon baking powder
- ½ teaspoon baking soda
- ½ teaspoon salt
- ½ cup unsalted butter, softened
- 1 cup powdered sugar
- 1 large egg
- ¼ cup vegetable oil
- 1 tablespoon vanilla paste
- ½ cup granulated sugar (for rolling)
Instructions
- Preheat your oven to 350ºF (177ºC) and line baking sheets with parchment paper.
- In a medium bowl, whisk together flour, baking powder, baking soda, and salt; set aside.
- In a mixing bowl, cream softened butter and powdered sugar until light and fluffy (about 2-3 minutes).
- Add the egg, vegetable oil, and vanilla paste; mix until well combined.
- Gradually incorporate the dry mixture into the wet mixture at low speed until a soft dough forms.
- Using a cookie scoop, roll dough into balls and coat each ball in granulated sugar before placing them on the prepared baking sheets.
- Bake for 8-9 minutes until edges are set but centers are soft. Allow to cool slightly on the baking sheet before transferring to a wire rack.
Nutrition
- Serving Size: 1 serving
- Calories: 130
- Sugar: 10g
- Sodium: 60mg
- Fat: 6g
- Saturated Fat: 3g
- Unsaturated Fat: 2g
- Trans Fat: 0g
- Carbohydrates: 18g
- Fiber: <1g
- Protein: 1g
- Cholesterol: 15mg