Best Dutch Apple Pie Recipe
There’s something truly magical about a homemade Dutch Apple Pie that transcends mere dessert; it’s a heartfelt embrace of nostalgia and warmth, a delicious testament to time-honored traditions. When I think of this pie, I can almost hear the laughter of friends gathered around a table, the tantalizing aroma of cinnamon and baked apples wafting through the air, wrapping everyone in cozy comfort. The Best Dutch Apple Pie Recipe is not just about blending ingredients; it’s about crafting an experience that invites everyone to pause, savor, and celebrate life’s little moments. With its perfectly flaky crust, tart Granny Smith and sweet Pink Lady apples, and that irresistible crumb topping that begs for a scoop of vanilla ice cream on the side, every slice is nothing short of an emotional journey.
This pie holds a special place in my heart because it embodies the essence of home. Each time I bake it, I’m reminded of my grandmother’s kitchen, where she would share stories as she rolled out dough and sliced apples with love and care. There’s a profound satisfaction in creating something so delightful from scratch – one that fills your home with joy and your heart with memories. Trust me when I say this recipe is not just about satisfying hunger; it’s about forging connections, igniting conversations, and making new memories with those you cherish. So grab your apron, and let’s get started on creating something extraordinary together — after all, what could be better than sharing the Best Dutch Apple Pie Recipe?
Best Dutch Apple Pie Recipe: A Slice of Warm Memories
Let’s embark on this delightful culinary journey together! Making this pie isn’t just about following steps; it’s an adventure filled with fragrant spices, buttery crusts, and tender apples that will awaken your senses. You’ll find that each ingredient plays a vital role in crafting a pie that will become a cherished favorite in your home.
Ingredients:
To start off on the right foot, let’s gather our ingredients. Each one has its own purpose in creating the symphony of flavors that makes up this Best Dutch Apple Pie Recipe.
- 1 ¼ cups all-purpose flour. This is the backbone of your crust — it provides structure while remaining tender enough to melt in your mouth. When selecting flour, look for high-quality brands that are finely milled for the best results. Remember, measuring accurately is crucial here; too much flour can lead to a dry crust while too little can make it tough.
- ½ teaspoon salt. Salt is often overlooked but it’s absolutely paramount in baking! It enhances the natural flavors of the other ingredients and balances sweetness beautifully. A pinch of salt can elevate your pie from ordinary to extraordinary.
- ½ cup butter frozen. Using frozen butter is key for achieving that coveted flaky texture in your crust. As it melts during baking, it creates steam pockets that puff up the dough into delicate layers. Be sure to shred or dice it into small pieces and toss them gently with flour to prevent clumping.
- 4-5 tablespoons chilled water. This helps bring our dough together without making it too sticky or warm from handling. Cold water keeps our butter solid until baking begins – trust me when I say this makes all the difference!
- ½ teaspoon cider vinegar. Adding vinegar may seem odd at first but it serves two purposes: it helps tenderize the crust while also contributing subtle flavor notes that complement our apple filling beautifully.
- 7 tablespoons butter melted. This liquid gold not only adds richness but also helps create our crumb topping later on! Using melted butter here ensures we have an evenly mixed topping full of flavor.
- ⅔ cup brown sugar. The deep molasses flavor found in brown sugar brings warmth and complexity to both our filling and crumb topping. It caramelizes wonderfully during baking, adding an enticing sweetness that’s impossible to resist.
- ½ teaspoon cinnamon. Ahh… cinnamon! This spice is synonymous with comfort food for many people; its warm aroma instantly transports you back to cozy kitchens filled with love and laughter. It pairs perfectly with apples by enhancing their natural sweetness while adding depth to every bite.
- ⅛ teaspoon nutmeg. Just a pinch goes a long way! Nutmeg adds warmth and earthiness to complement cinnamon – together they create an intoxicating aroma as they bake.
- 1 cup flour (for crumb topping). Just like before, flour binds everything together in our crumbly mixture but be cautious not to overmix as you want those lovely clumps for texture!
- ½ cup butter (for crumb topping). Again we’re using melted butter which will coat our flour ensuring we get those delectable crumbs — think crunchy yet buttery goodness on top!
- ¼ cup water (for crumb topping). This little bit of moisture helps bind our crumb topping without making it soggy; balance is key!
- 3 tablespoons flour (for sauce). A small amount here thickens our sauce as we pour it over our apples—this step ensures every slice holds its shape beautifully when served!
- ¼ cup granulated sugar—this white sugar contrasts beautifully with brown sugar’s depth; it’s essential for balancing out acidity from the apples.
- ¼ cup brown sugar (again)—yes! More brown sugar adds extra richness to both filling & topping!
- 1 ½ teaspoons cinnamon (for filling)—double down on flavors here – more cinnamon means more warm & cozy vibes throughout every layer!
- 2 ½ lbs Granny Smith and Pink Lady apples cored (peeled), cut into ¼ inch slices (or Honeycrisp). Apples are undoubtedly the stars here! Granny Smith apples bring tartness while Pink Ladies provide sweetness; together they create layers of flavor you’ll adore! Don’t skimp on quality – fresh apples make all the difference in ensuring each bite bursts with juicy goodness.
Now that we’ve gathered everything we need let’s move on!

Equipment You’ll Need:
As much as ingredients are essential players in this game of pie-making magic, having the right equipment makes everything smoother and more enjoyable — think of them as trusty allies ready to help you create culinary wonders!
- Mixing bowl – A large mixing bowl allows ample space for combining ingredients without spills or messes — plus it’s great for kneading dough too if needed! Investing in sturdy bowls can save time during cleanup later.
- Rolling pin – This tool is your best friend when rolling out dough! A good rolling pin should feel comfortable in hand — consider one with handles if you prefer extra control over pressure applied while rolling.
- Pie plate – Opt for glass or ceramic plates; they conduct heat evenly ensuring perfect browning throughout baking while providing beautiful presentation once served!
- Sharp knife & cutting board – Essential tools for prepping those juicy apple slices! A sharp knife makes clean cuts avoiding bruising fruit which leads us straight toward mushy filling — nobody wants that!
- Aluminum foil – A simple yet indispensable item used here as protection against over-browning edges during baking — trust me on this step!
- Baking sheet – Place your pie atop one before sliding into oven; catching any drips guarantees easy cleanup post-baking without messy spills inside oven itself.
With these trusted tools at hand let’s dive into preparing our scrumptious Best Dutch Apple Pie Recipe!
Step 1: Crafting Your Perfect Crust
Whisk together the flour and salt in a large bowl until well combined—this simple act blends flavors seamlessly before any other ingredients enter play! Now comes one of my favorite parts: shredding frozen butter directly into your flour mixture using either box grater or food processor attachment made specifically for shredding tasks—it feels like magic seeing those tiny bits dance amongst dry ingredients! As you stir gently enough just until coated so they don’t clump together — remember we’re aiming for flaky layers later—not chunky bits floating around aimlessly! Once done add chilled water mixed with vinegar gradually one tablespoon at time using fork until dough starts pulling together—don’t rush this step as overworking could yield tough results instead tender delights await us ahead! Finally gather everything into disk shape wrap tightly plastic wrap then chill at least two hours or overnight which allows gluten relax leading smooth rolling process next day!
Step 2: Rolling Out Love
After patiently waiting through chilling process preheat oven 375 degrees Fahrenheit—trust me this step sets stage perfectly golden baked beauty awaits us soon enough! Dust surface generously with flour then take chilled pastry disk roll out gently into twelve-inch circle avoiding excess pressure which could cause cracking edges instead keep rotating dough lifting occasionally allowing gravity do some work beneath creating even thickness throughout entire round shape formed—now carefully fold crust onto rolling pin transferring effortlessly onto prepared pie plate tuck gently inside allowing slight overhang along edge trimming down excess afterward followed by tucking under edge fluting design however pleases you most visually pleasingly styled outcome always makes heart sing louder upon serving later!
Step 3: Blind Baking Perfection
Once satisfied with crust appearance prepare foil shield by gently pressing aluminum foil against top edges preventing browning far too quickly while allowing even bake across bottom surface instead—we’ll fill center area using pie weights next securing everything down firmly preventing bubbling action occurring underneath during initial bake phase lasting fifteen minutes before removing weights plus foil uncovering beautiful sight laid bare prior pricking fork holes multiple times across bottom layer surface ensuring proper airflow begins circulating within oven space leading thorough cooking throughout entire formation ahead keeping sogginess away entirely—as colors shift slightly becoming lightly golden then set aside cooling briefly whilst we venture forth towards heavenly fillings awaiting assembly preparation shortly hereafter…
Step 4: Creating Our Flavorful Filling
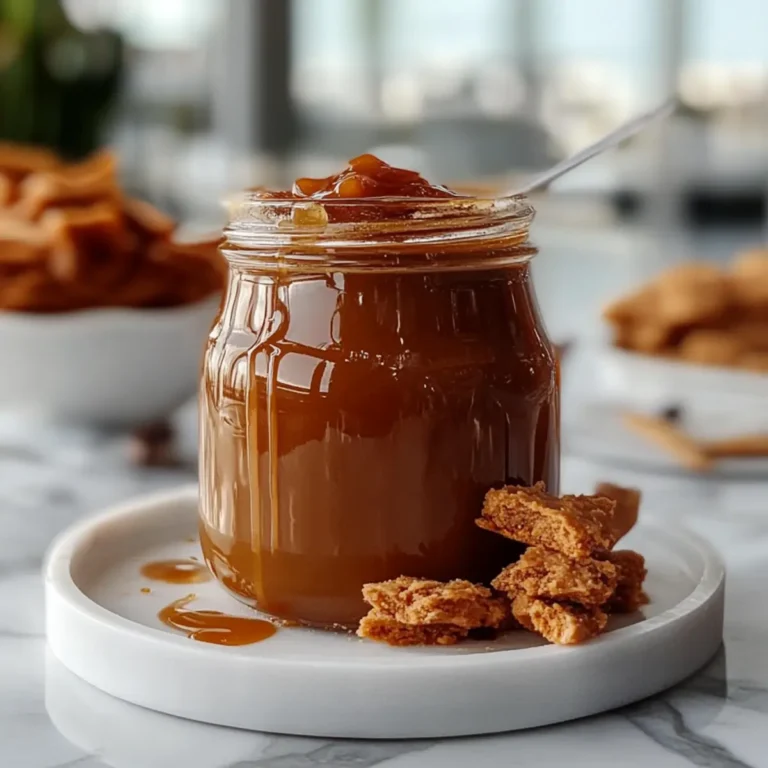
In small bowl whisk together melted butter brown sugar cinnamon nutmeg forming luscious gooey mixture inviting delightfulness pouring excitement through senses leaving taste buds tingling already just imagining luscious scents wafting tantalizingly through air as aromas escape mingling harmoniously creating urgency surrounding kitchen atmosphere elevating moods altogether next step involves combining small saucepan where additional butter water both sugars along flours meet magic again stirring frequently bringing mixture boil keeping watch closely preventing scorching action occurring so simmer three minutes transforming simple elements climaxing rich syrupy consistency we’re after finally pouring decadent goodness atop freshly sliced apple beauties lovingly tossed around coating each piece evenly distributing luscious flavors enhancing overall profile—we’re nearly there my dear friend…
I can’t wait to share more steps leading us closer towards completing this delightful masterpiece—the best part lies ahead as we assemble all components coming together harmoniously wrapping up glorious creation soon enough beckoning eager taste testers ready indulge deeply within layers rich expression love shared amongst friends family alike alike…
Step 5: The Heart of Flavor – Coating the Apples
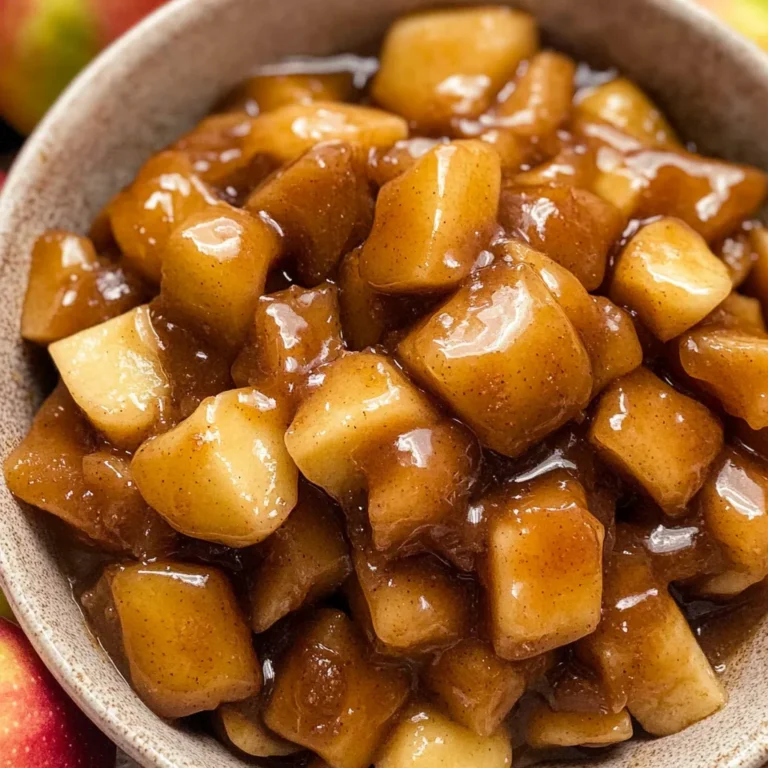
Now, let’s dive into one of the most crucial steps of our Best Dutch Apple Pie Recipe—coating those beautiful apple slices. In a small saucepan, we’re going to combine ½ cup of butter, ¼ cup of water, 3 tablespoons of flour, ¼ cup of granulated sugar, ¼ cup of brown sugar, and 1½ teaspoons of cinnamon. This mixture is not just a glaze; it’s a luscious sauce that will envelop your apples in warmth and sweetness. As you heat this over medium-low heat, stir it frequently until it comes to a gentle boil. This process is vital because it allows the sugars to dissolve completely and the flour to thicken the sauce slightly, creating that dreamy coating that will cling perfectly to each apple slice.
Once your mixture reaches a simmer—this should take about three minutes—you’ll notice it transform into something absolutely intoxicating. The aroma wafting through your kitchen will be nothing short of heavenly! This step is essential because it prevents your pie from becoming too watery during baking, ensuring that every bite is filled with concentrated flavor rather than sogginess. After simmering for those three minutes, turn off the heat and pour this glossy goodness over your sliced apples. Gently toss them to ensure each piece is fully coated; this is where the magic begins! You want every apple slice to be kissed by that delightful sauce so they can caramelize beautifully in the oven.
Step 6: Layering Like a Pro
With your apples coated in that glorious mixture, it’s time to assemble your pie—a step that brings everything together in what feels like a beautiful embrace. Start by spooning those saucy apple slices into your pre-baked pie crust. Lay the apples flat as you go; think of this as creating a work of art! You want to arrange them in layers rather than just dumping them all in at once. This method not only looks appealing but also ensures even cooking throughout the pie. As you layer, don’t be afraid to gently press down on the apples with a spatula; this helps compact the filling and gives you more room for all those delicious slices.
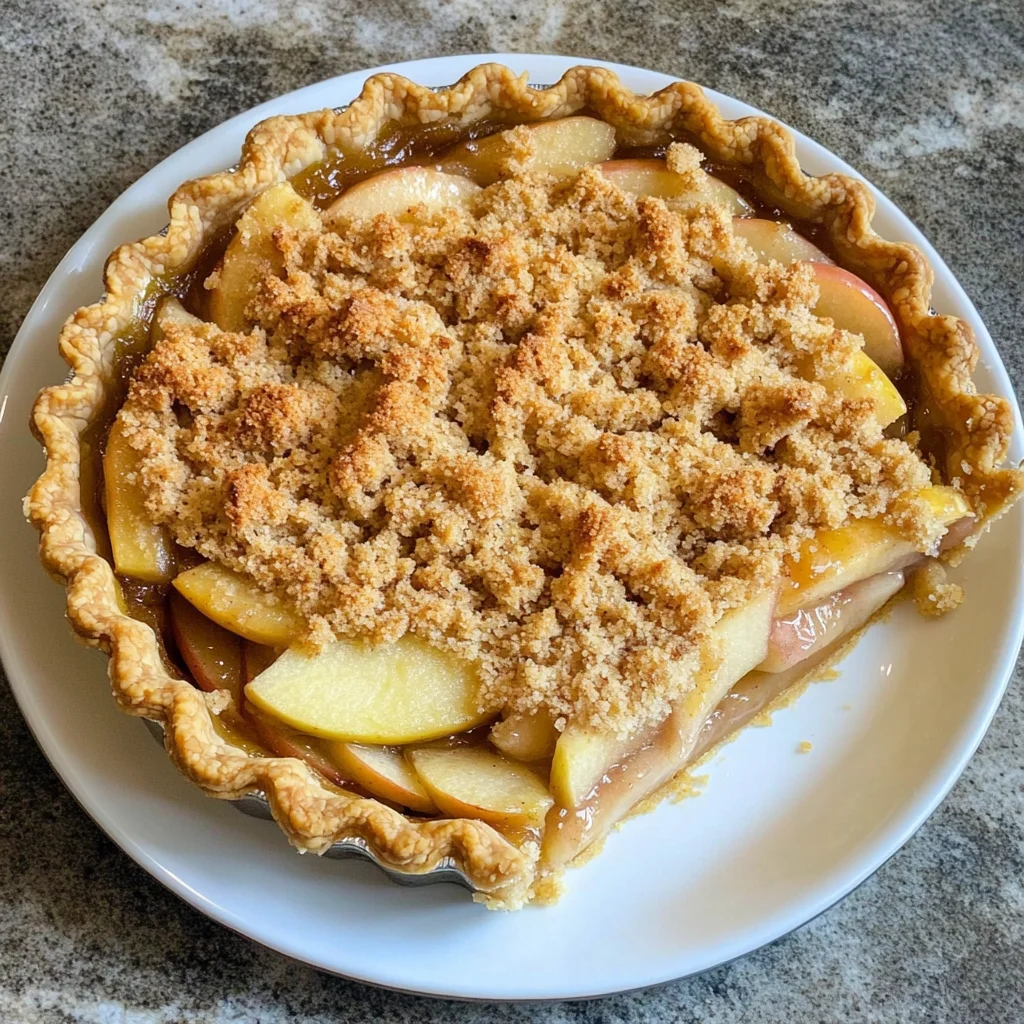
Watch closely as you pile on those apple slices; they should fit snugly without overflowing. If some apples peak over the top, that’s okay—it adds character! Once you’ve arranged your apples evenly, it’s time for the crumb topping—our showstopper! Take that chilled crumb topping from earlier and break it apart with a fork or your fingers until it resembles coarse crumbs (which should be easy after chilling). Spoon this delightful mixture evenly over the apples like a cozy blanket; trust me when I say that this crumb topping will provide an utterly satisfying crunch against the tender apples beneath it.
Step 7: Baking Your Masterpiece
Now comes one of my favorite parts—the baking! Preheat your oven to 375°F (190°C) if you haven’t done so already. Carefully place your assembled pie on a baking sheet; this simple act is absolutely paramount because it catches any drips that may occur during baking—no one wants a messy oven! Bake uncovered for about 50-55 minutes or until you see the crumb topping turn a lovely golden brown and feel compelled to dive right into it (trust me on this!).
As your pie bakes, keep an eye on its transformation—the aroma filling your home will be nothing short of enchanting! You might hear some bubbling as the juices from the apples start to escape; that’s normal and expected—it’s an indication that everything is coming together beautifully. If at any point during baking you notice that the crumb topping browns too quickly before the apples are tenderized underneath (which can happen depending on oven variances), simply cover it loosely with aluminum foil for the remainder of baking. This way, you’ll protect that gorgeous crust while ensuring everything cooks evenly.
Step 8: The Waiting Game – Cooling Your Pie
Once those precious minutes have passed and your kitchen smells divine, it’s time to pull out your masterpiece! But hold on—resist the urge to slice into it immediately! Allowing your Best Dutch Apple Pie to cool for several hours on a rack is an essential step that many people overlook. I know waiting feels torturous when you’re so close to enjoying such deliciousness, but trust me: patience is key here!
Cooling gives time for both flavors and textures to meld together harmoniously; think of how wonderful it would be if all those aromatic spices had time to fully embrace each apple slice? Additionally, allowing it to rest helps stabilize those warm juices so they don’t ooze out uncontrollably when sliced—which would lead us back into sogginess territory we desperately want to avoid! Ideally, aim for at least two hours before slicing into this beauty. During this time, gather family or friends around and share stories or more tempting aromas wafting through your space—your pie will be ready when everyone’s anticipation has reached its peak!
Next Major Phase – Slicing & Serving Your Best Dutch Apple Pie
It’s finally time for what we’ve all been waiting for—the moment we get to indulge in our labor of love! As you prepare yourself for serving up slices of pure comfort food bliss, consider pairing each piece with fresh whipped cream or vanilla ice cream (the non-dairy variety if preferred) for an extra touch of decadence. The creamy texture against warm apple filling creates an exquisite contrast—an experience akin to falling in love all over again!
As you slice through that flaky crust revealing tender apples nestled lovingly under their crunchy blanket, remember: every step you’ve taken has led you here—to enjoy something profoundly satisfying and truly extraordinary. Each bite tells a story not only about flavor but also about love and care put into making something special from scratch—a testament to why home-cooked meals are irreplaceable treasures. So go ahead… serve up generous slices and watch as smiles spread across faces—that’s what cooking is all about!
Storage and Enjoyment Tips for Your Best Dutch Apple Pie Recipe
Oh, the moment has arrived! Your kitchen is filled with that heavenly aroma of baked apples and warm spices, and your heart is just bursting with excitement as you gaze upon your beautifully crafted Dutch Apple Pie. But what comes next? You might wonder how to preserve this masterpiece or even how to savor it over the next few days. Well, my friends, I’m here to guide you through the delightful journey of storing that precious pie so you can enjoy it long after it’s baked!
Storing Leftover Best Dutch Apple Pie Recipe
To keep your leftover Best Dutch Apple Pie in pristine condition, I recommend placing it in an airtight container or wrapping it tightly in plastic wrap. This helps seal in that incredible flavor while preventing any unwanted moisture from sneaking in. If stored properly at room temperature, your pie will stay fresh for about 2–3 days. But trust me on this—if you want to maintain that just-baked experience a bit longer, pop it into the refrigerator where it can last up to a week. Now here’s a little pro tip: place a slice of bread in the container with your pie! This simple trick absorbs excess moisture and keeps your crust delightfully flaky. When you finally slice into that chilled pie, you’ll find that those sweet apples have melded beautifully with the spices, offering an even more profound depth of flavor than when it was first baked. When you’re ready to indulge again, gently reheat individual slices in the oven at 350°F for about 10 minutes or until warmed through—this will revive all those glorious aromas and textures!
Freezing Components for Later
Now let’s talk about freezing! If you’ve found yourself with some extra pie or if you want to prepare ahead of time (and who wouldn’t?), the good news is that this recipe freezes beautifully! To freeze your pie, allow it to cool completely before wrapping it tightly in plastic wrap and then aluminum foil—this double layer ensures no air gets in and ruins your delicious creation. You can store it in the freezer for up to three months without compromising its divine flavors. When you’re ready for a slice of heaven, simply preheat your oven to 375°F and bake directly from frozen for about an hour or until heated through and golden on top. The convenience factor here is absolutely paramount; imagine pulling out a perfectly baked pie on a chilly evening, letting its warmth envelop you like a cozy blanket while the sweet aroma fills your home once more—it’s pure bliss!
CATEGORY_NAME
Best Dutch Apple Pie
Experience the heartwarming delight of baking with our Best Dutch Apple Pie Recipe. This classic dessert features a perfectly flaky crust enveloping a luscious filling of tart Granny Smith and sweet Pink Lady apples, all generously coated in a spiced buttery sauce. Topped with a crumbly, golden-brown topping that adds the perfect crunch, this pie is more than just dessert; it’s an invitation to create cherished memories with family and friends.
- Prep Time: 30 minutes
- Cook Time: 55 minutes
- Total Time: 1 hour 25 minutes
- Yield: Serves approximately 8 slices 1x
- Category: Dessert
- Method: Baking
- Cuisine: American
Ingredients
- 1 ¼ cups all-purpose flour
- ½ teaspoon salt
- ½ cup frozen butter (shredded)
- 4–5 tablespoons chilled water
- ½ teaspoon cider vinegar
- 7 tablespoons melted butter
- ⅔ cup brown sugar
- ½ teaspoon cinnamon
- ⅛ teaspoon nutmeg
- 1 cup flour (for crumb topping)
- ½ cup melted butter (for crumb topping)
- ¼ cup water (for crumb topping)
- 3 tablespoons flour (for sauce)
- ¼ cup granulated sugar
- 2 ½ lbs apples (Granny Smith and Pink Lady)
Instructions
- Preheat the oven to 375°F (190°C).
- In a large bowl, whisk together flour and salt. Shred frozen butter into the mixture and mix gently until coated.
- Gradually add chilled water mixed with cider vinegar until dough pulls together. Shape into a disk, wrap in plastic, and chill for at least two hours.
- Roll out the dough on a floured surface to fit your pie plate. Blind bake for 15 minutes using foil and weights.
- In a saucepan, combine melted butter, brown sugar, cinnamon, nutmeg, flour, and water to make the filling sauce; bring to a boil.
- Toss sliced apples in the sauce until well-coated.
- Arrange coated apples in the pre-baked crust and top with crumb mixture made from flour and melted butter.
- Bake for about 50–55 minutes until golden brown.
Nutrition
- Serving Size: 1 slice (95g)
- Calories: 292
- Sugar: 25g
- Sodium: 162mg
- Fat: 14g
- Saturated Fat: 8g
- Unsaturated Fat: 5g
- Trans Fat: 0g
- Carbohydrates: 39g
- Fiber: 3g
- Protein: 2g
- Cholesterol: 29mg