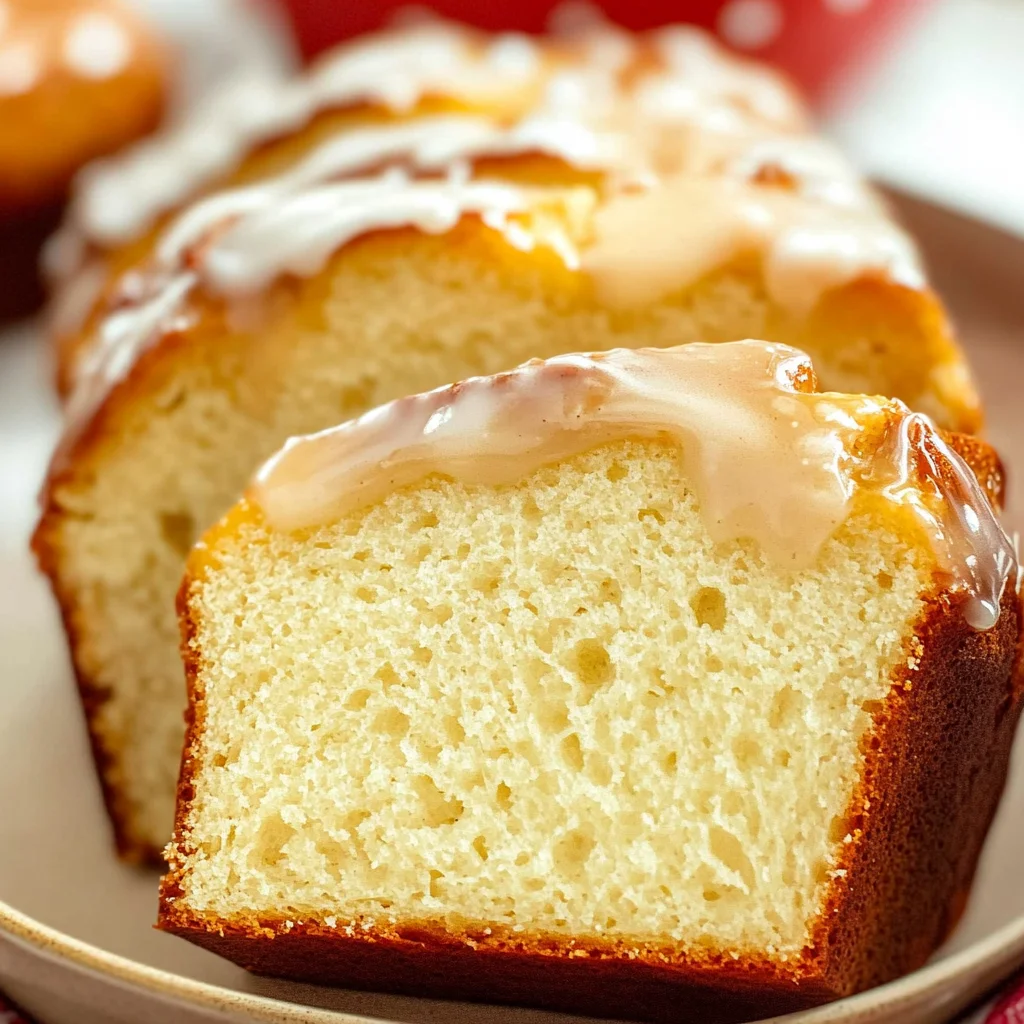
Eggnog Bread
There’s something undeniably magical about the holiday season that invites us to gather around, share stories, and indulge in delicious treats that warm our hearts and homes. One such delightful creation is Eggnog Bread, a recipe that infuses the rich, creamy flavors of traditional eggnog into a soft, fluffy loaf that’s perfect for cozy gatherings or as a sweet surprise for loved ones. Imagine slicing into this tender bread, its golden crust giving way to a soft interior where hints of nutmeg and vanilla dance on your palate. The sweet eggnog glaze drizzled over the top adds a finishing touch that’s simply irresistible. This isn’t just about baking; it’s about creating memories and sharing joy with those you hold dear.
As I pour my heart into this recipe, I can’t help but think of the countless holiday gatherings where this Eggnog Bread has made an appearance—each slice sparking laughter, nostalgia, and warmth. It has become a staple in my home, a testament to how simple ingredients can transform into something profoundly satisfying. This bread isn’t merely food; it’s a bridge connecting tradition with innovation, reminding us to savor each moment spent together. So grab your apron, and let’s embark on this culinary adventure together!
Eggnog Bread: A Fluffy Slice of Holiday Joy
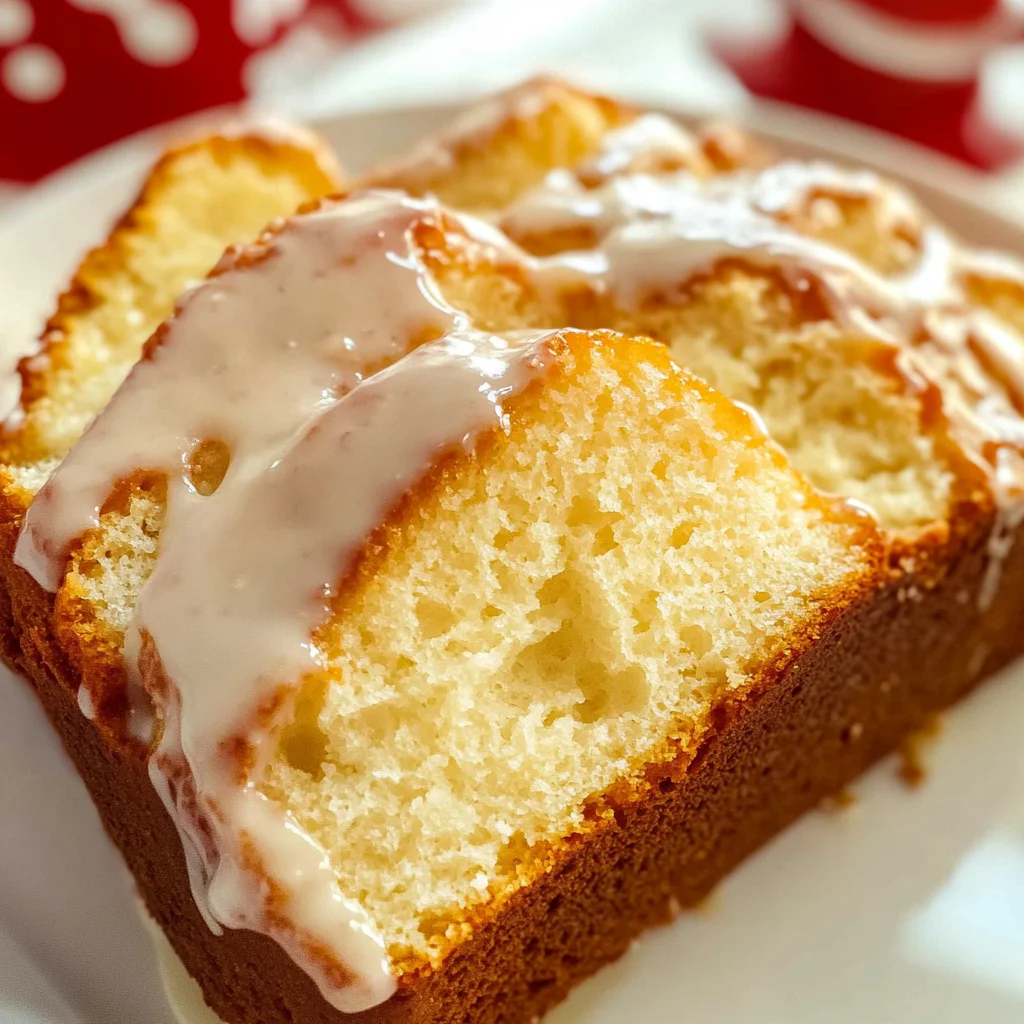
Welcome to the world of Eggnog Bread! This delightful treat is not only fluffy and flavorful but also draped in a sweet eggnog glaze that makes each bite feel like a warm hug. Whether you’re serving it at brunch or enjoying it as an afternoon pick-me-up with your favorite cup of tea or coffee, this loaf is bound to impress everyone who tastes it.
Ingredients:
Before we dive into the kitchen to create this delightful Eggnog Bread, let’s take a moment to appreciate the ingredients that will come together in harmony. Each component plays an essential role in building flavor and texture that will leave you craving more.
- 2 1/4 cups all-purpose flour. This is the foundation of our bread, providing structure and stability while allowing for that beautiful rise we all love. When choosing flour, look for high-quality all-purpose varieties that contain enough protein for good gluten development but aren’t too heavy—this allows our loaf to remain fluffy rather than dense.
- 2 teaspoons baking powder. This magical leavening agent ensures our bread rises beautifully in the oven. The reaction occurs when baking powder meets moisture and heat—creating little bubbles of carbon dioxide that lift our dough as it bakes. It’s vital not to skip or substitute this ingredient; otherwise, you may end up with a sad, flat loaf!
- 1/4 teaspoon salt. Though it might seem small, salt enhances flavor remarkably! It balances sweetness and brings out the natural flavors of other ingredients while also playing a key role in gluten formation—ensuring our bread has just the right texture.
- 1 1/4 cups sugar. This sweetness is what transforms our simple dough into something truly decadent! Sugar not only flavors but also helps retain moisture within the bread once baked—keeping each slice tender over time. Opt for granulated sugar here; it’s what gives us that lovely golden crust we crave.
- 1 3/4 cups eggnog. The star of our show! Rich and creamy eggnog infuses every bite with its indulgent flavor profile—a perfect marriage of spices like nutmeg and cinnamon combined with creamy goodness. If you’re feeling adventurous or want to control sweetness levels further, homemade eggnog can be used instead!
- 2 eggs, beaten. Eggs are crucial for binding our loaf together while also offering moisture and richness which elevate the overall texture of the bread. They contribute protein as well—helping create structure when baked.
- 1/2 cup butter, melted. Butter adds richness and an incredible depth of flavor while also contributing to that coveted moist crumb we desire in bread recipes like this one. Make sure it’s melted before adding; this prevents clumping with dry ingredients!
- 1/4 teaspoon nutmeg. A pinch of nutmeg adds warmth and aromatic spice—instantly transporting us into holiday bliss! Freshly grated nutmeg is always preferred if available since it offers a more vibrant flavor compared to pre-ground options.
- 1 teaspoon vanilla extract (alcohol-free) & 1 teaspoon vanilla extract. Vanilla enhances all those lovely flavors while adding its own fragrant notes—a harmonious blend that’s absolutely non-negotiable in any sweet baked goods recipe! Be sure to use pure extracts for maximum impact on taste.
- 1 package (3.4 oz) instant French vanilla or vanilla pudding mix. This ingredient may seem unusual but trust me—it acts as an emulsifier while adding creaminess to our batter! Pudding mix also helps maintain moisture within the finished product—yielding an incredibly tender crumb.
- 1 cup powdered sugar & enough eggnog to make a glaze: We’ll whisk these together later for drizzling over our cooled bread—a sweet finish adding both flavor dimension and visual appeal!
Equipment You’ll Need:
Having the right tools makes all the difference when crafting your Eggnog Bread experience! With these trusty companions by your side, you’ll find every step smoother so you can focus on creating something wonderful.
- Loaf pan (9×5 inches): This is where your magic happens! A quality non-stick loaf pan ensures easy release after baking without damaging your masterpiece’s shape—a crucial factor when serving guests or family members at gatherings.
- Mixing bowls: You’ll need both large mixing bowls—for combining wet ingredients—and medium-sized bowls—for sifting dry components together effortlessly without making too much mess!
- Whisk: A sturdy whisk will help you blend eggs with sugar smoothly while incorporating air into batters effectively—this aeration is key for light textures in baked goods like our Eggnog Bread!
- Rubber spatula: Perfect for scraping down sides of bowls ensuring nothing gets left behind! Plus it’ll help combine mixtures gently without overworking dough which could lead tough results if rushed through.
- Sifter: While optional depending on your flour quality preference—it does help remove lumps from dry ingredients promoting uniformity throughout plus added lightness thanks fluffiness achieved via additional aeration from sifting!
Now that we’ve gathered everything we need let’s prepare ourselves mentally (and physically!) before diving headfirst into baking some delicious Eggnog Bread!
Preparing the Eggnog Bread
Step 1: Setting Up Your Baking Station
First things first — preheat your oven to 350°F (175°C), letting it warm up while you prepare everything else because consistency is key when baking! Grab your trusty loaf pan; spray it generously with baking spray ensuring even coverage so none of that glorious bread sticks upon removal later on—a step worth taking seriously! Trust me—you don’t want any heartbreak after putting all this effort in only to lose part of your beautiful creation due sticking issues.
Step 2: Mixing Dry Ingredients
In a large mixing bowl sift together 2 1/4 cups all-purpose flour along with 2 teaspoons baking powder, 1/4 teaspoon salt, and 1/4 teaspoon nutmeg until evenly blended—this process helps incorporate air which promotes better rising during baking time leading towards fluffy results we’re aiming for! Don’t rush through this step; proper mixing ensures uniform distribution throughout batter avoiding unexpected lumps later down road when combined with wet elements leading uneven textures across slices served up later on!
Step 3: Combining Wet Ingredients
In another bowl, beat together two eggs until frothy then add in 1 ¼ cups sugar alongside melted butter followed by pouring in rich eggnog liquid gold along with both alcohol-free vanilla extracts stirring gently until fully incorporated—it should have smooth consistency resembling creamy pancake batter at this point! The interplay between these components contributes significantly toward adding moisture richness enhancing overall flavor profile making each bite utterly intoxicating!
Step 4: Bringing It All Together
Now comes one of my favorite parts—we’re going to fold those beautiful dry ingredients from earlier directly into those luscious wet elements we’ve crafted so carefully using rubber spatula technique known as “folding.” Start by adding half dry mixture gradually blending until just combined then repeat process ensuring not overmix otherwise resulting tougher loaves instead desired tenderness achieved through gentle folding motions preserving air pockets formed earlier during whisking stages keeping everything light airy ending up perfect slices awaiting drizzled glaze topping soon thereafter!
Trust me on this step—you don’t want dense bread instead aim towards achieving delicately textured final product bursting flavors leaving everyone asking seconds while they devour every last morsel presented before them at table gatherings filled laughter joy shared amongst friends family alike…
Stay tuned as we continue unfolding how best bake let cool beautifully prepare glaze drizzle finishing touches enhancing deliciousness awaiting eager taste buds ready dive straight into satisfaction heaven awaits next stage completion shortly ahead…
Eggnog Bread: A Holiday Classic Worth Savoring
Step 5: Integrating the Magic
Now that you’ve combined your wet ingredients into a harmonious blend, it’s time to introduce the flour mixture—this is where the magic truly begins! With your mixing bowl filled with the eggnog, sugar, butter, and eggs, gently fold in the sifted flour mixture. I cannot stress enough how important this step is; we’re not just dumping ingredients together; we’re coaxing them into a fluffy batter that will rise beautifully in the oven. Use a spatula or a wooden spoon for this task, and mix just until you see no dry flour. Overmixing can develop gluten too much, leading to a denser loaf than we desire. We want our Eggnog Bread to be light and airy, reminiscent of a cozy winter evening spent by the fireplace, so be gentle.
As you blend everything together, take a moment to appreciate the aroma wafting through your kitchen. The nutmeg will start to make its presence known—a fragrant hint of holiday cheer that makes your heart skip a beat. This is also when you should start visualizing your finished product; imagine slicing into that golden loaf, warm steam escaping and filling your home with comfort. You’ll know it’s ready when everything is just combined and clinging together perfectly—no stubborn flour pockets lurking around!
Step 6: The Pudding Power-Up
Next comes the real secret weapon in this recipe: instant French vanilla or vanilla pudding mix. This ingredient might seem unconventional at first glance, but trust me—it’s absolutely paramount for achieving that tender crumb we crave in our Eggnog Bread. Once you’ve blended in the flour mixture thoroughly, sprinkle in that pudding powder like fairy dust! Fold it into your batter carefully, ensuring every bit is incorporated without overworking it.
Why is this step crucial? The pudding mix adds moisture and richness while enhancing flavor with its creamy texture. It creates an incredibly soft bread that practically melts in your mouth. As you stir it in, notice how the batter thickens slightly—this is good! It means you’re on track towards something truly extraordinary. Take care to keep an eye on it as you mix; you want a smooth consistency without lumps from the pudding mix.
Step 7: Pouring Your Heart Into It
With your batter now rich and inviting, it’s time to transfer this delightful concoction into your prepared loaf pan—this is where all your hard work will come together beautifully! Gently pour the batter into the greased loaf pan, taking care to scrape down the sides of the bowl with a spatula to ensure no delicious morsel is left behind. You should feel an exhilarating sense of anticipation as you look at what will soon become a centerpiece at any holiday gathering.
Make sure to spread it evenly across the pan; this ensures an even bake which contributes to that perfect golden crust we’re after. As you place it in the oven (which should be preheated to 350°F), pause for a moment and take in that feeling of accomplishment—you’ve done something wonderful today! Bake it for about 55 to 60 minutes; however, every oven behaves differently. I recommend checking around the 50-minute mark by inserting a toothpick into the center of the loaf; if it comes out clean or with just a few moist crumbs clinging to it, then it’s ready!
Step 8: Cooling Down & Glazing Up
Once your Eggnog Bread has baked to perfection—a lovely golden brown crust gracing its surface—it’s crucial not to rush this next step: cooling! Allow it to sit in its pan for about ten minutes before attempting to remove it. This resting period allows steam to escape and ensures that your bread doesn’t collapse under pressure when flipped out onto a wire rack. Trust me on this; patience here pays off in spades!
After about ten minutes have passed, gently run a knife along the edges of the pan before flipping it upside down onto your cooling rack—a simple yet vital technique that ensures no precious part of your creation clings stubbornly to its confines. Let it cool completely before you drizzle on that luscious glaze—this is non-negotiable because if you glaze too early while it’s still warm, you’ll end up with a puddle of glaze rather than beautifully drizzled adornment!
Now comes one of my favorite parts: preparing that sweet eggnog glaze! In a small bowl, whisk together powdered sugar with enough eggnog until you achieve a luscious consistency that’s neither too thick nor too runny—think of liquid gold cascading over your bread like winter sunshine after a snowfall! This glaze not only adds sweetness but also enhances that delightful eggnog flavor we adore during these chilly months.
Final Touches: Elevating Your Eggnog Bread Experience
Step 9: The Grand Drizzle
Your Eggnog Bread has cooled and now awaits its crowning glory—the glaze! With great enthusiasm (and perhaps some anticipation), transfer your glaze into either a squeeze bottle or simply use a spoon for drizzling. Begin from one side of the loaf and allow that silky glaze to cascade gently over each slice like delicate snowflakes descending from above during wintertime.
As you watch this transformation happen right before your eyes, I promise you will feel immense joy at how such simple ingredients can yield something profoundly satisfying and absolutely beautiful! Don’t hold back; let yourself be generous with the glaze because each bite deserves that sweet finish—the kind that warms not just your belly but also your heart as memories are made around shared meals.
Once glazed, let it set for just about fifteen minutes before slicing into this masterpiece—it will give those flavors time to meld seamlessly. And there you have it—a beautiful loaf of Eggnog Bread that’s ready for sharing (or hoarding all for yourself!). It’s perfect alongside morning coffee or served as dessert after dinner with family gathered near. I can assure you; this recipe will become one you’ll look forward to making year after year!
So gather everyone around when it’s time for tasting because sharing food is one way we express love—and trust me when I say they’ll never forget this delectable treat!
Storage and Enjoyment Tips for Your Eggnog Bread
Now that your kitchen is filled with the intoxicating aroma of freshly baked Eggnog Bread, it’s time to relish in the simple pleasure that comes from enjoying this delightful treat. Whether you’re preparing for a cozy winter gathering or simply indulging yourself, knowing how to preserve this fluffy masterpiece ensures you can savor every last crumb. As you prepare to dig in, let me share some tips on how to store and enjoy your Eggnog Bread so it stays as delicious as the moment it came out of the oven.
Storing Leftover Eggnog Bread
When it comes to preserving your Eggnog Bread, choosing the right container is non-negotiable. Opt for an airtight container or a resealable plastic bag—this keeps the bread moist while protecting it from any unwanted odors in your fridge. If stored properly, your Eggnog Bread will remain fresh for about 4-5 days at room temperature. However, if you want to maintain its fluffy texture longer, consider refrigerating it where it can last up to a week. A little pro tip: if you slice the bread before storing, place a piece of wax paper between each slice to ensure they don’t stick together. Trust me on this; it makes serving so much easier! After storage, the flavors meld beautifully, creating an even more profound taste experience that feels like a warm hug in every bite. When you’re ready to indulge again, simply pop a slice in the microwave for about 10-15 seconds and watch as it transforms into a warm delight that will make your senses sing!
Freezing Eggnog Bread for Later
If you’re thinking ahead (and you definitely should be), freezing your Eggnog Bread is an excellent option that allows you to have a festive treat on hand whenever the craving strikes. To freeze properly, wrap the loaf tightly in plastic wrap and then in aluminum foil or place it directly into a freezer-safe bag—this double-layering ensures protection against freezer burn and retains moisture. It can stay happily frozen for up to three months without losing its exquisite flavor or texture. When you’re ready to enjoy some frozen goodness, just take out what you need and let it thaw overnight in the refrigerator or set it out at room temperature for a couple of hours. This convenience factor is what makes having homemade treats so special; there’s nothing quite like pulling out a slice of homemade bread from the freezer on a chilly day and watching as your loved ones’ faces light up with joy!
Eggnog Bread
Indulge in the festive spirit with our delightful Eggnog Bread, a fluffy loaf infused with the rich flavors of creamy eggnog, nutmeg, and vanilla. Perfectly suited for holiday gatherings, this sweet treat is topped with a luscious eggnog glaze that adds an irresistible finish. Imagine the warmth of home as you slice into this golden masterpiece, each bite evoking cherished memories of joy and togetherness. Whether served at brunch or enjoyed as a comforting afternoon snack, this Eggnog Bread is sure to become a beloved staple in your holiday repertoire.
- Prep Time: 15 minutes
- Cook Time: 60 minutes
- Total Time: 1 hour 15 minutes
- Yield: Approximately 12 servings 1x
- Category: Dessert
- Method: Baking
- Cuisine: American
Ingredients
- 2 1/4 cups all-purpose flour
- 2 teaspoons baking powder
- 1/4 teaspoon salt
- 1 1/4 cups sugar
- 1 3/4 cups eggnog
- 2 eggs, beaten
- 1/2 cup butter, melted
- 1/4 teaspoon nutmeg
- 1 teaspoon vanilla extract (alcohol-free)
- 1 package (3.4 oz) instant French vanilla pudding mix
- Powdered sugar for glazing
Instructions
- Preheat oven to 350°F (175°C) and grease a 9×5 inch loaf pan.
- In a large bowl, sift together flour, baking powder, salt, and nutmeg.
- In another bowl, whisk eggs until frothy; add sugar, melted butter, eggnog, and vanilla extract. Mix until smooth.
- Gently fold the dry ingredients into the wet mixture until just combined.
- Stir in the instant pudding mix until fully incorporated.
- Pour the batter into the prepared loaf pan and smooth the top.
- Bake for 55–60 minutes or until a toothpick inserted in the center comes out clean.
- Allow to cool for about 10 minutes before removing from the pan.
- For the glaze, whisk together powdered sugar and enough eggnog to achieve desired consistency; drizzle over cooled bread.
Nutrition
- Serving Size: 1 slice (75g)
- Calories: 210
- Sugar: 18g
- Sodium: 180mg
- Fat: 8g
- Saturated Fat: 5g
- Unsaturated Fat: 3g
- Trans Fat: 0g
- Carbohydrates: 31g
- Fiber: <1g
- Protein: 3g
- Cholesterol: 40mg