Easy Refrigerator Pickled Vegetables Recipe – Quick & Tangy!
There’s something profoundly satisfying about the process of pickling vegetables, a culinary dance that transforms fresh produce into vibrant, tangy bites that elevate any meal. Whether you’re enjoying a picnic, adding zest to your salads, or simply snacking from the jar, these Easy Refrigerator Pickled Vegetables are not just a recipe; they’re an experience. The crunch of the vegetables paired with a symphony of flavors from the brine is utterly intoxicating and will undoubtedly become a staple in your kitchen. I promise you; once you taste these bright, colorful pickles, you’ll find every excuse to whip up another batch!
The magic of this Easy Refrigerator Pickled Vegetables Recipe – Quick & Tangy! lies in its simplicity and the freshness of its ingredients. You don’t need to be a seasoned chef or have any special equipment; all you need is a little time and enthusiasm. It’s a delightful way to preserve the bounty of your garden or your local farmer’s market while embracing the art of making something truly extraordinary. And let me tell you, there’s nothing like opening your fridge to find jars filled with beautifully colored veggies waiting for you—each one promising a burst of flavor that dances across your palate.
Easy Refrigerator Pickled Vegetables Recipe – Quick & Tangy!: A Colorful Crunch Awaits
Are you ready to embark on this culinary adventure? Making refrigerator pickles is as much about the process as it is about the finished product. You’ll find joy in selecting your favorite vegetables and crafting them into a vibrant medley that can transform any dish. Let’s dive into this easy recipe that promises to bring sunshine and crunch to your table!
Ingredients:
To begin our journey into homemade pickling, let’s gather our ingredients. Each component plays a pivotal role in creating that perfect balance of tanginess and crunch.
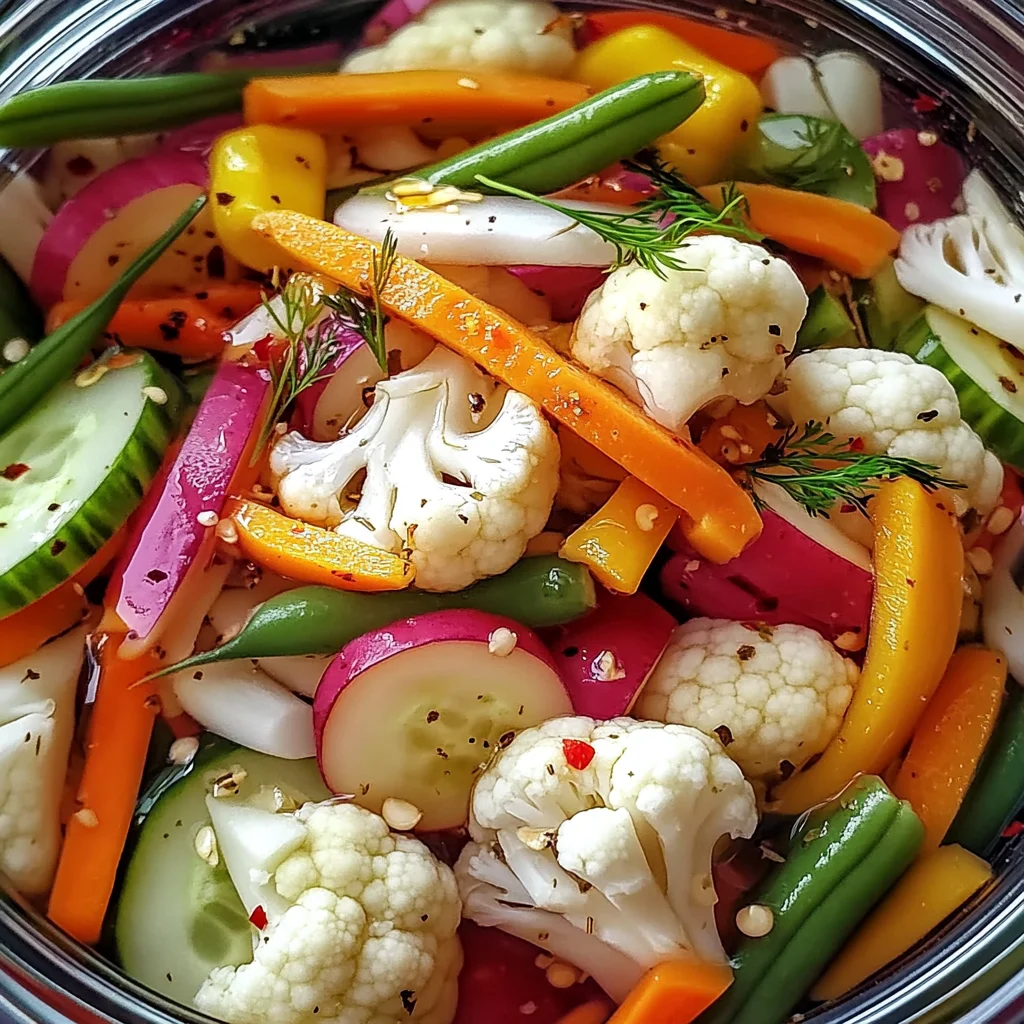
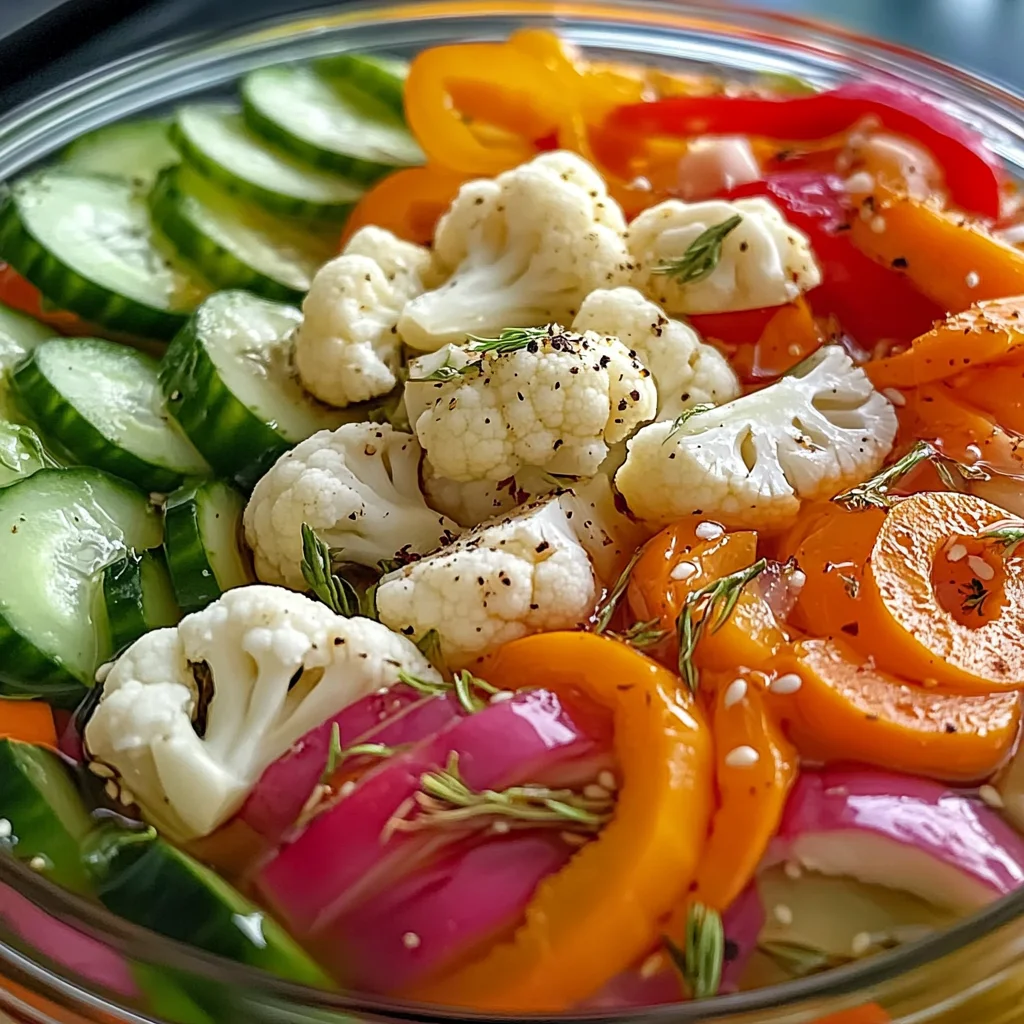
- 2 cups cauliflower florets. Cauliflower brings not only its lovely white color but also an amazing texture that holds up beautifully during pickling. When you bite into these florets after they’ve soaked in the brine, you’ll experience an explosion of flavor and crunch that’s just delightful! Look for firm heads with tightly-packed florets when selecting your cauliflower; they should feel heavy for their size without any browning.
- 1 cup sliced carrots. Carrots add sweetness and vibrant color to our mix. Their natural sugars caramelize slightly during the pickling process, creating a beautiful contrast with the tangy brine. Choose fresh carrots that are crisp and firm—these will give you the best crunch! If you’re feeling adventurous, consider using colorful heirloom varieties for those stunning shades of purple or yellow.
- 1 cup sliced cucumbers. Cucumbers are perhaps the quintessential pickle vegetable! They absorb flavors wonderfully while maintaining their refreshing crispness. For optimal results, select firm cucumbers with minimal seeds; Persian cucumbers work wonderfully here if available! You’ll want to slice them evenly so they pickle uniformly—trust me, it makes all the difference.
- 1 red bell pepper, sliced into strips. The sweetness of red bell peppers adds depth and color to our pickle jars. Plus, their juicy flesh provides a different texture compared to some of our crunchier veggies. When selecting bell peppers, look for ones that are shiny and feel heavy—they should have no blemishes or soft spots.
- 1 cup green beans, trimmed. Green beans offer a delightful snap and vibrant green hue to our jarred creations. They are great at soaking up the brine while remaining crunchy—just how we like them! Opt for slender beans as they tend to be crisper; avoid any that are limp or overly wrinkled.
- 3 cloves garlic, minced. Garlic brings warmth and aroma that’s simply irresistible! It infuses every bite with its distinct flavor profile that pairs beautifully with all our veggies. Fresh garlic is key here; choose bulbs that are tightly packed with no signs of sprouting for maximum impact.
- 2 cups white vinegar. This liquid gold acts as both a preservative and flavor enhancer in our recipe! White vinegar has a sharpness that penetrates through each vegetable while balancing out their natural sweetness—a crucial element for achieving those perfectly tangy notes we crave in pickles.
- 2 cups water. Water helps dilute our vinegar solution while keeping everything balanced without overwhelming acidity on our delicate vegetables.
- 2 tablespoons salt. Salt is non-negotiable in this recipe; it draws out moisture from the vegetables while enhancing their natural flavors during pickling—it also helps create that satisfying crunch!
- 1 tablespoon sugar. Just a touch of sugar balances out the acidity from the vinegar perfectly—think of it as a gentle hug for your taste buds!
- 2 teaspoons mustard seeds. These tiny seeds add an unexpected burst of flavor and texture to each bite—when you crunch down on them, they release an earthy warmth that’s utterly enchanting.
- 1 teaspoon black peppercorns. Whole peppercorns introduce subtle spice without overpowering other ingredients; they’re essential for adding complexity to our pickles.
- 1/2 teaspoon red pepper flakes (optional). If you’re seeking an extra kick in your refrigerator pickles, toss in some red pepper flakes! This optional ingredient can elevate your dish depending on how much heat you desire—so feel free to adjust according to your taste!
Equipment You’ll Need:
Having the right tools makes all the difference when preparing this vibrant dish! While these aren’t technically ingredients, these essential partners will help ensure everything runs smoothly as we craft our delicious refrigerator pickles together.
- Large bowl – This will be where all your vegetables come together before being transformed by brine! A large bowl allows space for mixing without spilling over which can make cleanup more tedious than it needs to be!
- Saucepan – A medium-sized saucepan will be perfect for boiling together your vinegar solution; it’s crucial for dissolving salt and sugar efficiently while integrating all those lovely spices into one harmonious liquid.
- Measuring cups & spoons – These trusty tools are vital for ensuring accuracy in both volume measurements (like vinegar) and weight measurements (like sugar). Trust me—the right balance can make or break your final product!
- Jars with tight-fitting lids – Glass jars work best here since they’re non-reactive and won’t absorb flavors from previous uses—the key is finding ones that seal tightly so no air gets in after refrigerating which could spoil all this hard work!
Now that we’ve gathered everything we need let’s get started on preparing these Easy Refrigerator Pickled Vegetables Recipe – Quick & Tangy! Together we’ll create something truly magical!
Step 1: Gather Your Veggies
Begin by preparing all those beautiful vegetables you’ve selected—this step sets the stage for success! Wash them thoroughly under cold running water until they’re clean from dirt or grit before slicing them into uniform pieces: think about how they’ll fit together aesthetically once they’re packed away in jars later on—that visual appeal really matters when presenting food!
Once everything looks neat and tidy chop up those cauliflower florets into bite-sized pieces along with slicing carrots thinly before dicing cucumbers lengthwise into quarters followed by neatly arranged strips from red bell peppers—and don’t forget trimming off both ends off each green bean ensuring nothing goes unused here!
Step 2: Prepare Your Brine
Next up is crafting that tantalizing brine which will envelop our veggies like liquid sunshine filled with zingy goodness! In your saucepan pour in two cups each of white vinegar followed by water then sprinkle salt along with sugar before tossing mustard seeds alongside black peppercorns as well as optional red pepper flakes if desired—this combo brings forth layers upon layers of flavor elevating those crunchy bites ahead!
Bring everything over medium heat allowing it all simmer gently until it comes bubbling just shy of boiling point—you’ll notice delightful fragrances wafting through kitchen air showcasing what’s yet-to-be transformed within jars soon enough because trust me—the scent alone will have everyone curious about what’s cooking!
Step 3: Pour Over Veggies
Once dissolved completely take care now pouring hot liquid over prepared veggies filling jars generously but ensuring they remain fully submerged beneath surface level—this step allows each piece time marinating fully absorbing every ounce from zesty concoction created moments before hand so don’t rush either allow some patience here savoring anticipation building knowing incredible flavors await shortly thereafter too!
Step 4: Cool & Refrigerate
After pouring brine leave jars at room temperature cooling down naturally before sealing tightly ensuring nothing escapes inside during refrigeration process ahead—this waiting period might feel endless but trust me it’s absolutely paramount allowing those veggie flavors meld harmoniously creating unforgettable symphony once finally chilled overnight yielding extraordinary results once tasted next day when hunger strikes again just thinking back towards how perfect everything turned out initially too!
These steps lay down solid groundwork leading straight towards fridge-worthy delights awaiting us soon enough… Keep going my friend—we’re almost there together crafting something remarkable destined becoming household favorite guaranteed delighting everyone who dares indulge eagerly awaiting first bites ahead towards spectacular moments shared alongside friends family alike enjoying what we’ve created wholeheartedly indeed!
Step 5: Pouring the Liquid Gold Over Your Vegetables
Now comes one of my favorite parts of this Easy Refrigerator Pickled Vegetables Recipe – Quick & Tangy! Once your vibrant array of vegetables is beautifully combined in that large bowl, it’s time to introduce them to the sizzling hot brine we’ve prepared. Carefully take your saucepan filled with the fragrant vinegar mixture and pour it over the veggies, ensuring every piece is generously coated and submerged. This step is crucial because the heat from the liquid will not only infuse each vegetable with that delicious tangy flavor but also helps soften them just enough to enhance their crunch without losing that delightful snap you crave.
As you pour, watch how the steam wafts up; it’s like a warm hug for your veggies! The vinegar blend, which is a harmonious marriage of acidity from white vinegar and a hint of sweetness from sugar, will work its magic as it cools. Trust me on this: allowing your pickles to rest in this briny bath is non-negotiable! It’s during this moment that the flavors mingle and deepen, transforming these ordinary vegetables into something truly extraordinary. Don’t rush through this; let all those flavors embrace each other for maximum impact.
Step 6: Cooling Down – The Waiting Game Begins
Once you’ve poured that aromatic hot brine over your colorful medley of vegetables, it’s time to let everything cool down to room temperature before sealing up those jars. I know, waiting can be tough when you’re excited about what’s coming next, but patience here is key! Allowing the mixture to cool ensures that when you transfer it into jars, you won’t accidentally create a mess or risk cracking those lovely glass containers with sudden temperature changes.
This cooling phase typically takes around 30 minutes to an hour depending on your kitchen’s ambient temperature. You’ll know it’s ready when the steam has settled and you can comfortably touch the sides of your mixing bowl without feeling any heat. I promise you; this small moment makes a world of difference in preserving both flavor and texture. So while you wait, why not give yourself a pat on the back for creating something so vibrant?
Step 7: Jarring Up Your Flavorful Creation
Now that your brine has cooled beautifully, it’s time to transfer everything into jars! This is where those glass containers become essential players in our fridge pickling adventure. Using clean jars is paramount—make sure they’re free from any residue or lingering odors because we want our pickles to shine in all their glory! Carefully ladle or spoon your cooled vegetable mixture into each jar, filling them generously but leaving about half an inch at the top—this little space allows for any expansion as they chill.
As you pack those jars tightly with veggies (but don’t squish them!), ensure each piece gets a good dose of brine. You’ll want to make sure the vegetables are fully submerged in that tangy elixir because exposure to air can lead to spoilage—definitely not what we want here! If necessary, gently push down on any stubborn pieces that might be floating above the surface; they deserve their share of flavor too! Once you’ve filled up your jars, secure their lids tightly to lock in all those vibrant flavors.
Step 8: The Transformative Chill – Letting Flavors Marry
And now, my friends, we enter one of the most magical phases of this Easy Refrigerator Pickled Vegetables Recipe – Quick & Tangy —the chilling process! This stage might seem simple but trust me when I say it’s absolutely paramount for developing that exquisite flavor profile we’re after. Place your jars in the refrigerator and allow them to sit for at least 24 hours before diving into this zesty creation. Why 24 hours? Well, during this time, each vegetable will soak up all that delicious briny goodness while also softening slightly without losing its beloved crunch.
As those hours tick by, imagine how every bite will soon burst with layers upon layers of flavor—the sharpness from the vinegar balancing perfectly against the subtle sweetness and spices introduced earlier. Patience pays off here; I promise these pickles will taste even better after they’ve had time to mingle and develop their character. If you can manage it (and I know it’s hard), try waiting even longer; some folks swear by letting them sit for up to a week for an even more profound depth of flavor!
Conclusion:
As we wrap up our journey through this Easy Refrigerator Pickled Vegetables Recipe – Quick & Tangy!, I can’t help but feel giddy about sharing this gem with you. There’s something profoundly satisfying about creating these crunchy bites at home; each step reveals layers of flavor that come together in harmony. The bright acidity paired with hints of sweetness creates an unforgettable experience that dances on your palate—this is what makes your kitchen feel magical! The textures are equally captivating: crisp cucumbers mingling with tender carrots and cauliflower create a delightful contrast that keeps every bite interesting.
I wholeheartedly believe this recipe is a must-try for everyone—not just because it tastes incredible but because making it is pure joy! It’s so accessible; anyone can dive in and whip up this quick and easy recipe without any fuss. Picture yourself pulling a jar from the fridge during lunch with friends, sharing bites filled with laughter and stories as everyone savors those vibrant flavors together. These pickles shine during summer barbecues too—imagine how refreshing they would be alongside grilled veggies or in sandwiches at a picnic!
As far as serving suggestions go, let your imagination run wild! Imagine savoring one with your favorite artisan cheese on crusty bread for an afternoon pick-me-up or adding slices into tacos for an utterly intoxicating crunch that complements savory fillings beautifully. For breakfast lovers, consider tossing some into scrambled eggs alongside sautéed greens—they add a delightful zing that will transform your mornings! If you’re feeling adventurous, try pairing them with fish dishes; their acidity cuts through richness perfectly.
This recipe is wonderfully adaptable too! Feeling adventurous? You can easily switch up the vegetables based on what’s fresh or in season—zucchini would work beautifully here too! Or perhaps add some sliced radishes for extra bite or even sprinkle in fresh herbs like dill or cilantro right before sealing those jars—you’ll create unique flavor profiles that reflect your culinary creativity! So go ahead, give this recipe a whirl, share your experiences with loved ones, and let’s connect over our shared passion for delicious homemade food!
Easy Refrigerator Pickled Vegetables Recipe – Quick & Tangy
Embark on a culinary adventure with this Easy Refrigerator Pickled Vegetables Recipe – Quick & Tangy! Transform fresh, crisp vegetables into vibrant, tangy bites that will elevate any meal. Perfect for snacking, enhancing salads, or serving at gatherings, these pickles burst with flavor and are incredibly easy to make at home. With a simple brine of vinegar, garlic, and spices, you can preserve the crunchiness of your favorite garden veggies. In just 24 hours, you’ll be ready to enjoy your colorful creations—each bite promising a delightful explosion of taste. Say goodbye to store-bought pickles and hello to this homemade delight that’s bound to become a staple in your kitchen!
- Prep Time: 20 minutes
- Cook Time: 10 minutes
- Total Time: 30 minutes
- Yield: Approximately 4 servings 1x
- Category: Snack
- Method: Refrigerating
- Cuisine: American
Ingredients
- 2 cups cauliflower florets
- 1 cup sliced carrots
- 1 cup sliced cucumbers
- 1 red bell pepper, sliced into strips
- 1 cup green beans, trimmed
- 3 cloves garlic, minced
- 2 cups white vinegar
- 2 cups water
- 2 tablespoons salt
- 1 tablespoon sugar
- 2 teaspoons mustard seeds
- 1 teaspoon black peppercorns
- 1/2 teaspoon red pepper flakes (optional)
Instructions
- Prepare vegetables by washing and slicing them into uniform pieces.
- In a saucepan, combine vinegar, water, salt, sugar, mustard seeds, and black peppercorns; bring to a simmer until dissolved.
- Pour the hot brine over the prepared vegetables in a large bowl.
- Allow the mixture to cool to room temperature before transferring it into clean glass jars.
- Seal jars tightly and refrigerate for at least 24 hours before enjoying.
Nutrition
- Serving Size: 1/2 cup (120g)
- Calories: 30
- Sugar: 3g
- Sodium: 350mg
- Fat: 0g
- Saturated Fat: 0g
- Unsaturated Fat: 0g
- Trans Fat: 0g
- Carbohydrates: 7g
- Fiber: 2g
- Protein: 1g
- Cholesterol: 0mg