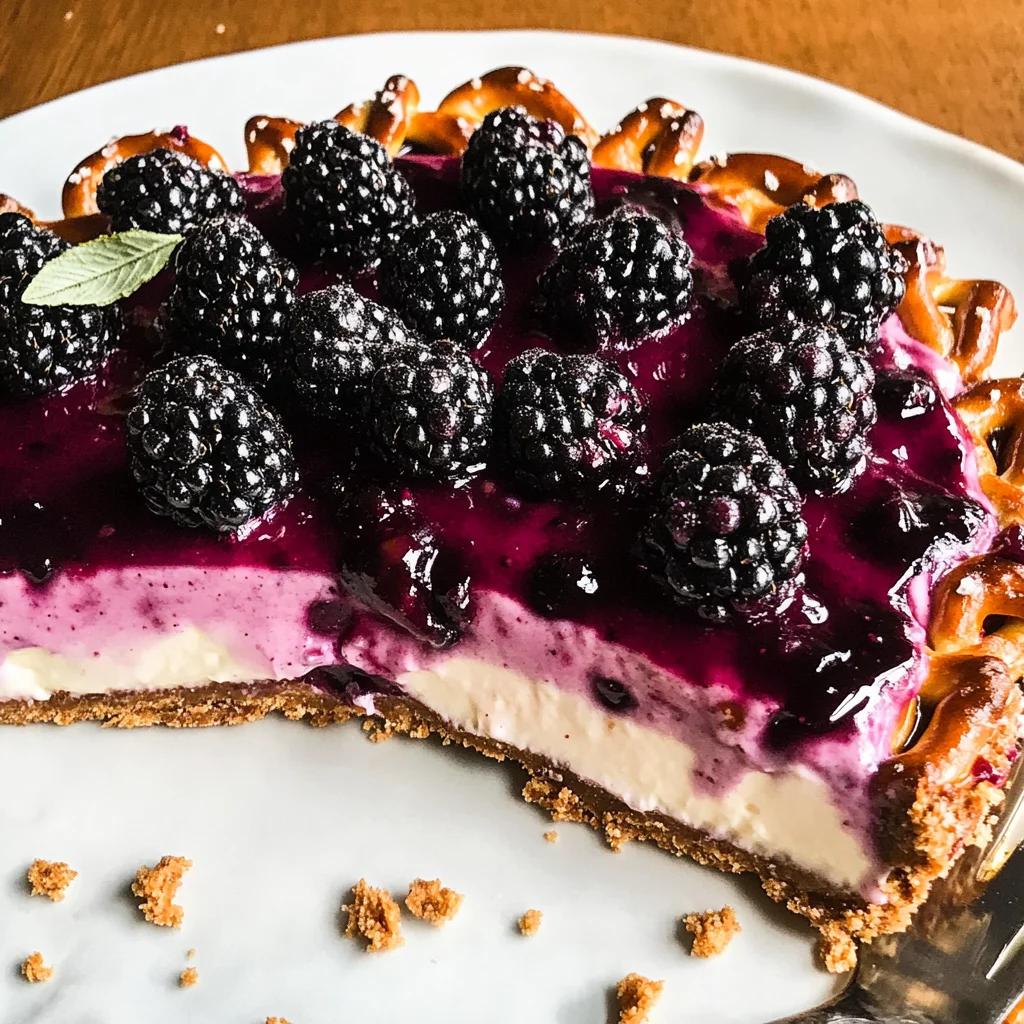
Blackberry Pretzel Dessert
There’s something magical about the way certain desserts can evoke memories and feelings of comfort. This Blackberry Pretzel Dessert is one of those enchanting creations that bridges the gap between sweet and salty, tradition and modernity. When I take a bite of this delightful dish, I’m immediately transported to summer picnics where laughter mingles with the sweet scent of ripe blackberries. The contrast of the crunchy pretzel crust with the creamy filling and the luscious blackberry topping creates a symphony of flavors that dances on your palate. Each layer tells a story, not just of ingredients but of shared moments over dessert, where families gather and friends bond over sweetness. Trust me when I say, this recipe isn’t just food; it’s an experience waiting to unfold in your kitchen.
As you embark on creating this delightful blackberry pretzel dessert, you’ll appreciate how each component brings its uniqueness to the table. The salty crunch of pretzels pairs unexpectedly well with the tartness of fresh blackberries, creating a flavor profile that is both familiar and exciting. This dessert has a way of making any occasion feel special—whether it’s a summer barbecue, a birthday celebration, or simply a cozy evening at home. It’s hard not to fall in love with its vibrant colors and textures! Let’s dive into this captivating recipe together; I promise you won’t be disappointed!
Blackberry Pretzel Dessert: A Sweet Symphony of Flavor
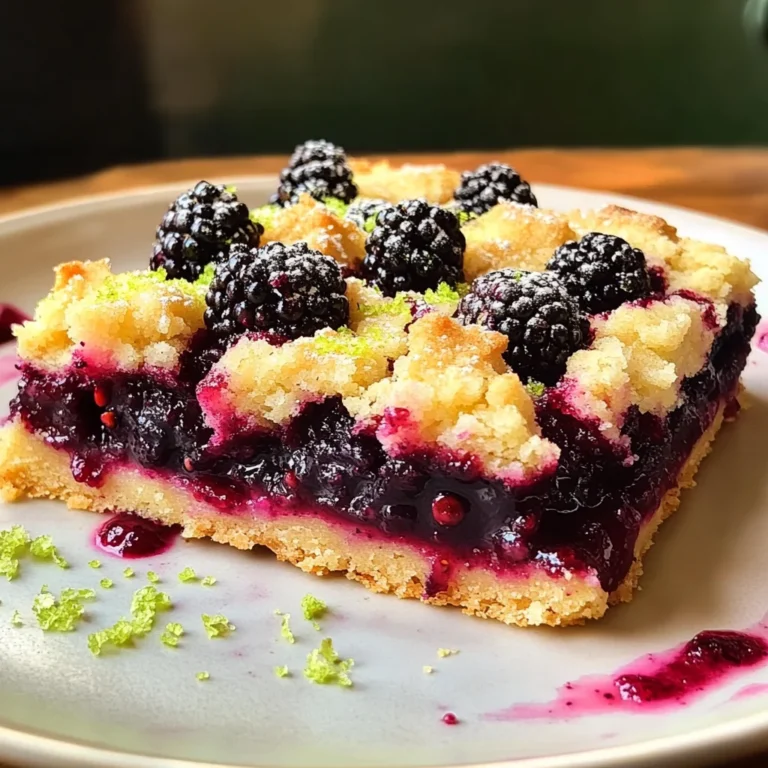
This charming dessert combines a crunchy pretzel crust with a creamy filling and a fresh blackberry topping that will make your heart sing. Perfect for gatherings or just as a special treat for yourself, this dessert is sure to win over everyone who tries it.
Ingredients:
Before we dive into the creation process, let’s gather our ingredients and prepare for an adventure in flavor! Each ingredient plays a pivotal role in crafting this deliciousness, so let’s explore what makes them essential.
- 2 ½ cups coarsely crushed pretzels. The star of our crust! These little morsels provide that delightful salty crunch that sets up the perfect contrast to the sweetness of our cream cheese layer and blackberry topping. When choosing your pretzels, opt for traditional varieties without added flavors; their simplicity will shine through in this dish. The coarseness is also important—too fine, and you might lose that satisfying texture we adore.
- ⅔ cup brown sugar. This adds depth and warmth to our crust while enhancing its sweetness without overpowering it. Brown sugar contains molasses, which not only contributes moisture but also creates that lovely caramelized flavor when baked. Don’t worry if you run out—light brown sugar works just as well in this recipe!
- 2 tablespoons all-purpose flour. This is our binding agent; it helps hold everything together while baking. The flour ensures our pretzel crust doesn’t crumble apart when sliced into squares later on. Make sure to measure accurately; too much can lead to an overly dense crust.
- 2 teaspoons vanilla extract. Ahh, vanilla—the essence of warmth and nostalgia! This liquid gold elevates every layer with its sweet aroma and subtle complexity. Always choose pure vanilla extract over imitation for an honest flavor boost; trust me—your taste buds will thank you!
- ¾ cup butter (melted). Butter adds richness to our crust while helping achieve that golden-brown color we all crave. Ensure your butter is melted but not bubbling hot when combined with other ingredients; too much heat can affect how well they blend together.
- 3 cups fresh blackberries. These beauties are not just pretty—they’re bursting with juicy tartness! When selecting blackberries, look for ones that are plump and shiny without any signs of mushiness or mold; freshness is key here! Their natural sweetness will shine through once cooked down into a sauce.
- ¼ cup granulated sugar. This sweetener balances out the tartness from our blackberries beautifully! It helps create that luscious syrupy topping on our dessert as we cook down those berries into something utterly intoxicating.
- 1 tablespoon lemon juice. A splash of acidity enhances brightness in flavors—think of it as nature’s magic touch! It will elevate our blackberry topping by accentuating their natural sweetness while also preventing browning during cooking.
- 1 tablespoon cornstarch. A wonderful thickening agent! This is crucial for giving our berry mixture body without altering its flavor profile too much; it will help achieve that perfect consistency for draping over our whipped cream layer.
- 8 ounces cream cheese (room temperature). Cream cheese adds creaminess and tang to our filling—it’s utterly heavenly when blended until smooth! Make sure it’s at room temperature so it incorporates seamlessly with other ingredients; cold cream cheese can lead to lumps that are difficult to rectify later on.
- 8 ounces extra creamy cool whip. This heavenly concoction brings lightness and fluffiness to our filling! If you’re looking for alternatives, consider using homemade whipped cream as long as it’s stabilized properly since we need it to hold up against the other layers.
- 1 cup powdered sugar. This fine sugar dissolves easily into our cream cheese filling without leaving any graininess behind—a must-have for achieving that silky-smooth texture we’re after!
Equipment You’ll Need:
Having the right tools makes all the difference in creating your masterpiece! While they may not be ingredients themselves, these kitchen companions are essential partners in bringing your blackberry pretzel dessert dreams to life.
- 9×13 baking dish: A classic size for many desserts, ensuring even cooking throughout while providing ample space for layers without overcrowding or spilling over during baking.
- Mixing bowls: You’ll need various sizes here—one large bowl for combining ingredients like cream cheese and another smaller one for mixing up your dry components such as crushed pretzels or sugars before they come together harmoniously!
- Electric mixer or whisk: For those moments when arm strength alone won’t cut it! An electric mixer saves time and effort when creaming butter or whipping cool whip but don’t hesitate to use good old-fashioned elbow grease if needed!
- Rubber spatula: Ideal for scraping down sides during mixing sessions—ensuring no ingredient left behind means maximum flavor potential achieved!
Preparing the Blackberry Pretzel Dessert
Step 1: Preheat & Prepare
First things first—preheat your oven to 375°F (190°C). This step is crucial because starting with a hot oven ensures even cooking throughout all layers once they hit those cozy heat waves inside! While that’s warming up, grab your trusty 9×13 baking dish and lightly spray it with non-stick cooking spray or brush it with butter; this prevents sticking later on as we slice through this beauty after baking!
Step 2: Create Your Pretzel Crust
In your largest mixing bowl, combine those coarsely crushed pretzels along with brown sugar and flour until evenly mixed. Pour in melted butter next—it should still be warm but not scalding hot—then stir gently until every crumb feels coated yet remains distinctively crunchy! Think about how delightful it’ll feel biting into each piece later—the contrast between textures is part of what makes this dessert so extraordinary! Once combined thoroughly (it should resemble wet sand), pour this mixture directly into your prepared baking dish before pressing firmly down using either clean hands or flat-bottomed measuring cup (this helps compact everything nicely). Bake in preheated oven for about 10 minutes until golden brown—this short bake time gives us just enough crunch while preventing overly dry results!
Step 3: Whip Up That Creamy Filling
While your crust cools slightly after coming out from its hot bath in the oven (don’t rush—let it rest!), move onto creating that dreamy cream cheese filling next! In another mixing bowl (or use same one after rinsing), beat room-temperature cream cheese until soft fluffy clouds form before gradually adding powdered sugar followed by vanilla extract; continue beating until fully incorporated without lumps remaining—that silky smooth texture really matters here because who wants grainy filling? Trust me on this—you’ll want every bite melt-in-your-mouth good! Gently fold in extra creamy cool whip using rubber spatula just enough so no streaks remain—we want lightness incorporated evenly throughout every scoop!
Step 4: Prepare That Berry Topping
Now comes my favorite part—the glorious blackberry topping! In saucepan over medium heat combine fresh blackberries alongside granulated sugar lemon juice cornstarch whisked together beforehand until everything gently bubbles away happily under watchful eye stirring occasionally—but don’t fret if some berries pop open releasing juices—that’s all part of their charm plus they’ll thicken up nicely once cooled off later on once removed from heat source so keep an eye out making sure nothing burns along edges maintaining gentle simmer instead until thickened approx 5 minutes max then set aside let cool completely before layering atop other components already assembled earlier earlier—you want each bite bursting full flavor alongside creamy goodness below!
I can assure you—the combination of these layers truly transforms ordinary dessert nights into extraordinary experiences worth savoring again again time after time…
Step 5: Crafting the Perfect Pretzel Crust
Now that your oven is preheating, let’s dive into creating that crunchy pretzel crust that will serve as the backbone of your blackberry pretzel dessert. In a large mixing bowl, combine the coarsely crushed pretzels with brown sugar and flour—this is where the magic begins! The brown sugar adds a caramel-like sweetness that balances beautifully with the saltiness of the pretzels, while the flour helps bind everything together. Pour in the melted butter, which acts like liquid gold in this recipe; it will not only help create a cohesive crust but also lend richness and flavor. Stir this mixture until it’s evenly coated—the texture should resemble wet sand, ready to be pressed into your baking dish.
Once combined, pour this lovely mixture into your prepared 9×13 baking dish. Using your fingers or a flat-bottomed measuring cup, press it down firmly and evenly across the bottom of the dish; don’t rush this step! A well-packed crust will hold together beautifully once baked, giving you those satisfying crunches with every bite of dessert. Bake this for about 10 minutes until it turns a light golden brown. This initial baking is crucial because it solidifies the crust and enhances its flavor through caramelization—a process where natural sugars break down and develop deeper flavors. Keep an eye on it; you want a warm golden hue without any dark spots signaling burnt edges!
Step 6: Preparing the Creamy Filling
While your pretzel crust cools slightly, let’s move on to crafting that utterly intoxicating cream cheese filling that will elevate this dessert to extraordinary levels. Begin by taking your room-temperature cream cheese and placing it in a mixing bowl—this is so important because soft cream cheese blends seamlessly without lumps. Add in the powdered sugar and vanilla extract; I promise you, this simple combination creates a sweet symphony of flavors that will be the heart of your dessert. Using an electric mixer on medium speed, beat these ingredients until they’re smooth and creamy—about two minutes should do it. This step not only combines flavors but also introduces air into the mixture, making it light and fluffy.
Once you have achieved that velvety consistency, gently fold in the extra creamy cool whip with a spatula. This technique—folding—is essential to maintain the airy texture we’ve created, ensuring our filling remains light rather than dense. Trust me on this: if you overmix at this stage, you’ll lose all that delightful fluffiness! When you see no streaks of cream cheese or cool whip remaining and everything looks harmoniously blended, you know you’re ready to spread this luscious filling over your cooled pretzel crust like a silky blanket.
Step 7: Making That Heavenly Blackberry Topping
Now comes one of my favorite parts: preparing our homemade blackberry topping! Start by rinsing those fresh blackberries gently under cold water—their vibrant color and juicy flesh are what make this dessert truly special. In a medium saucepan over medium heat, combine your berries with granulated sugar, lemon juice, and cornstarch. The sugar will draw out their natural juices while balancing their tartness; meanwhile, lemon juice brightens all those flavors up! Cornstarch acts as a thickening agent here—it’s non-negotiable if we want our topping to be perfectly syrupy without being runny.
Stir this mixture continuously as it heats up; soon enough, you’ll notice the blackberries beginning to pop and break down under gentle pressure from your spoon—what an absolutely beautiful sight! The transformation from whole berries to bubbling sauce is nothing short of magic; allow it to bubble away for about 5-7 minutes until thickened slightly—you’re looking for a glossy finish that’ll coat the back of a spoon nicely. Don’t walk away during this phase! You want to ensure no berries burn at the bottom or stick to the sides of your pot. Once it reaches that perfect consistency, remove it from heat and let it cool down slightly before layering atop our cream cheese filling.
Step 8: Assembling Your Blackberry Pretzel Dessert
It’s finally time for assembly—this part always feels so rewarding! Carefully pour that luscious blackberry topping over your dreamy cream cheese layer; as you do so, watch how those vibrant berries cascade down like jewels adorning a crown—the sight alone is enough to make anyone swoon! Using an offset spatula or simply the back of a spoon, spread them out gently so every inch is covered in berry goodness. This step is crucial because each slice deserves equal parts of sweet creaminess mingling with those tart blackberries—they balance each other out beautifully!
Once topped evenly, cover your dish with plastic wrap (make sure it’s not touching the surface!) or foil; we don’t want any condensation ruining our gorgeous layers. Now comes one of my most vital tips: chill this masterpiece for at least four hours in the refrigerator—yes, patience is key here! Chilling allows all these incredible flavors to meld together while setting up beautifully so that when you cut into it later, every layer holds its own yet still plays in harmony with each bite! Just imagine slicing through those layers after waiting patiently—it’s worth every second!
Final Touches: Presenting Your Blackberry Pretzel Dessert
Step 9: Slicing and Serving Your Masterpiece
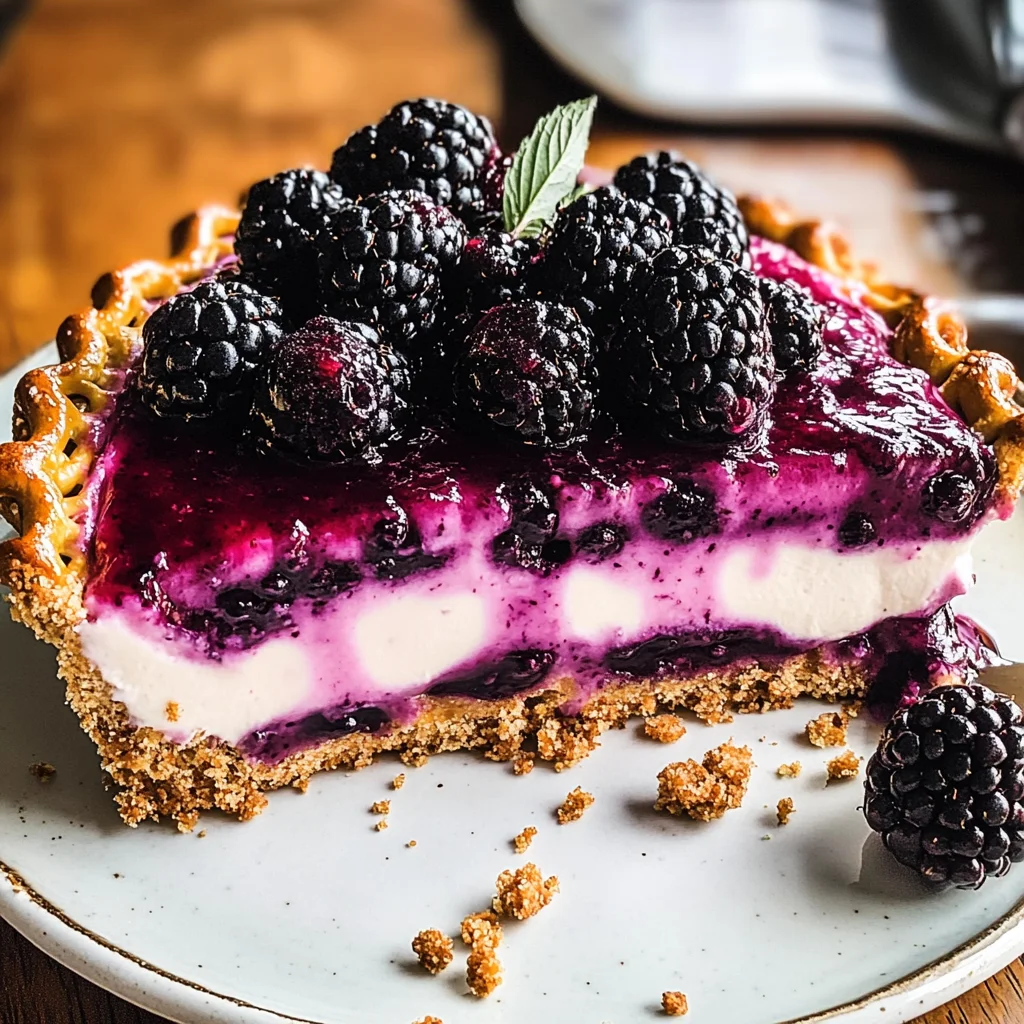
After what may feel like an eternity (but trust me—it’s going to be worth it!), take out your chilled blackberry pretzel dessert from the fridge and unveil what can only be described as pure happiness on a plate! Use a sharp knife dipped in warm water for ease when cutting clean slices—this little trick keeps everything neat and tidy instead of turning into a messy situation (we want Instagram-worthy slices!). Each piece should reveal distinct layers—the salty crunch from the pretzel bottom contrasting against that creamy filling topped off with rich blackberry sauce bursting with freshness.
As you serve up these delightful squares onto plates (or straight onto forks!), consider garnishing them with fresh mint leaves or additional blackberries for added flair—it makes such an impression for gatherings or family dinners alike! I promise you, everyone who takes even just one bite will be captivated by this perfect blend of flavors—from salty to sweet—and they’ll keep coming back for seconds (or thirds!). So gather around friends and family—enjoy every moment spent sharing stories alongside this delicious treat because nothing says love quite like homemade desserts made from scratch!
Remember—a good dessert isn’t just about taste; it’s about creating memories too! Enjoy making this blackberry pretzel dessert as much as I do—you’re going to absolutely love how wonderful each bite tastes!
Storage and Enjoyment Tips for Your Blackberry Pretzel Dessert
Now that you’ve crafted this stunning masterpiece, it’s time to talk about how to preserve that deliciousness! Whether you’re savoring each layer of the blackberry pretzel dessert right away or planning to enjoy it over the next few days, I’ve got all the tips you need to keep it fresh and delightful. Trust me on this; once you taste that sweet, creamy filling paired with the salty crunch of the pretzel crust, you’ll want to ensure every last bite is as exquisite as the first.
Storing Leftover Blackberry Pretzel Dessert
To store your leftover blackberry pretzel dessert, I recommend placing it in an airtight container to maintain its wonderful texture and flavor. If you don’t have one on hand, covering it tightly with plastic wrap will do just fine—though I must say, a proper container is always preferable! You can keep it in the refrigerator for up to five days without losing any of its charm. Now, here’s a little pro tip: if you want to keep your crust crispy, consider placing a slice of bread in the container with your dessert. This trick helps absorb excess moisture without compromising that delightful crunch we all love! After a day or two in the fridge, some might wonder if it loses its zing—but let me assure you, it merely transforms into a chilled delight that brings out those berry flavors even more vibrantly. When you’re ready to serve leftovers, simply cut yourself a generous slice and allow it to sit at room temperature for about 15 minutes; this will help restore some of that glorious creaminess.
Freezing Blackberry Pretzel Dessert for Later
If you’re looking to store your blackberry pretzel dessert for an extended period, freezing is a fantastic option! Just be sure to slice it into individual pieces before wrapping each one tightly in plastic wrap and then slipping them into a freezer-safe bag or container—this way, they won’t stick together and will be easy to grab whenever your cravings strike! The beauty of freezing is that your dessert can last up to three months in the freezer while still retaining its delectable taste and texture. When you’re ready to indulge again, simply take out a slice and let it thaw in the refrigerator overnight. This method not only saves time but also gives you that lovely balance of flavors when served cold. Isn’t it wonderful knowing that such an extraordinary treat can be just a moment away? It’s like keeping a little piece of joy tucked away for those days when you need a sweet pick-me-up!
Blackberry Pretzel Dessert
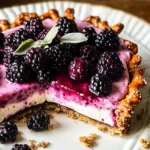
Blackberry Pretzel Dessert is a delightful blend of crunchy, salty pretzel crust, creamy filling, and luscious blackberry topping that will transport you to summers filled with joy and laughter. This enchanting dessert is perfect for gatherings or a cozy night in, making it an ideal treat for any occasion. The unique contrast of flavors creates a symphony on your palate, where the salty pretzels harmonize beautifully with the sweet and tart blackberries. Each bite offers a delightful experience that’s sure to impress family and friends alike.
- Prep Time: 30 minutes
- Cook Time: 10 minutes
- Total Time: 40 minutes
- Yield: Serves approximately 12 slices 1x
- Category: Dessert
- Method: Baking
- Cuisine: American
Ingredients
- 2 ½ cups coarsely crushed pretzels
- ⅔ cup brown sugar
- 2 tablespoons all-purpose flour
- ¾ cup melted butter
- 8 ounces cream cheese (room temperature)
- 8 ounces extra creamy cool whip
- 3 cups fresh blackberries
- ¼ cup granulated sugar
- 1 tablespoon lemon juice
- 1 tablespoon cornstarch
Instructions
- Preheat your oven to 375°F (190°C) and prepare a 9×13 baking dish by lightly greasing it.
- In a large bowl, mix crushed pretzels, brown sugar, and flour. Stir in melted butter until combined. Press this mixture firmly into the bottom of the prepared baking dish.
- Bake for about 10 minutes until golden brown. Allow to cool.
- In another bowl, beat cream cheese until smooth. Gradually add powdered sugar and vanilla extract; then fold in the cool whip until well combined.
- Spread the cream cheese mixture over the cooled pretzel crust.
- For the topping, combine blackberries, granulated sugar, lemon juice, and cornstarch in a saucepan over medium heat. Cook while stirring until thickened (about 5 minutes). Let cool slightly before pouring over cream cheese layer.
- Chill for at least four hours before slicing and serving.
Nutrition
- Serving Size: 1 serving
- Calories: 320
- Sugar: 24g
- Sodium: 310mg
- Fat: 18g
- Saturated Fat: 10g
- Unsaturated Fat: 7g
- Trans Fat: 0g
- Carbohydrates: 35g
- Fiber: 2g
- Protein: 4g
- Cholesterol: 30mg