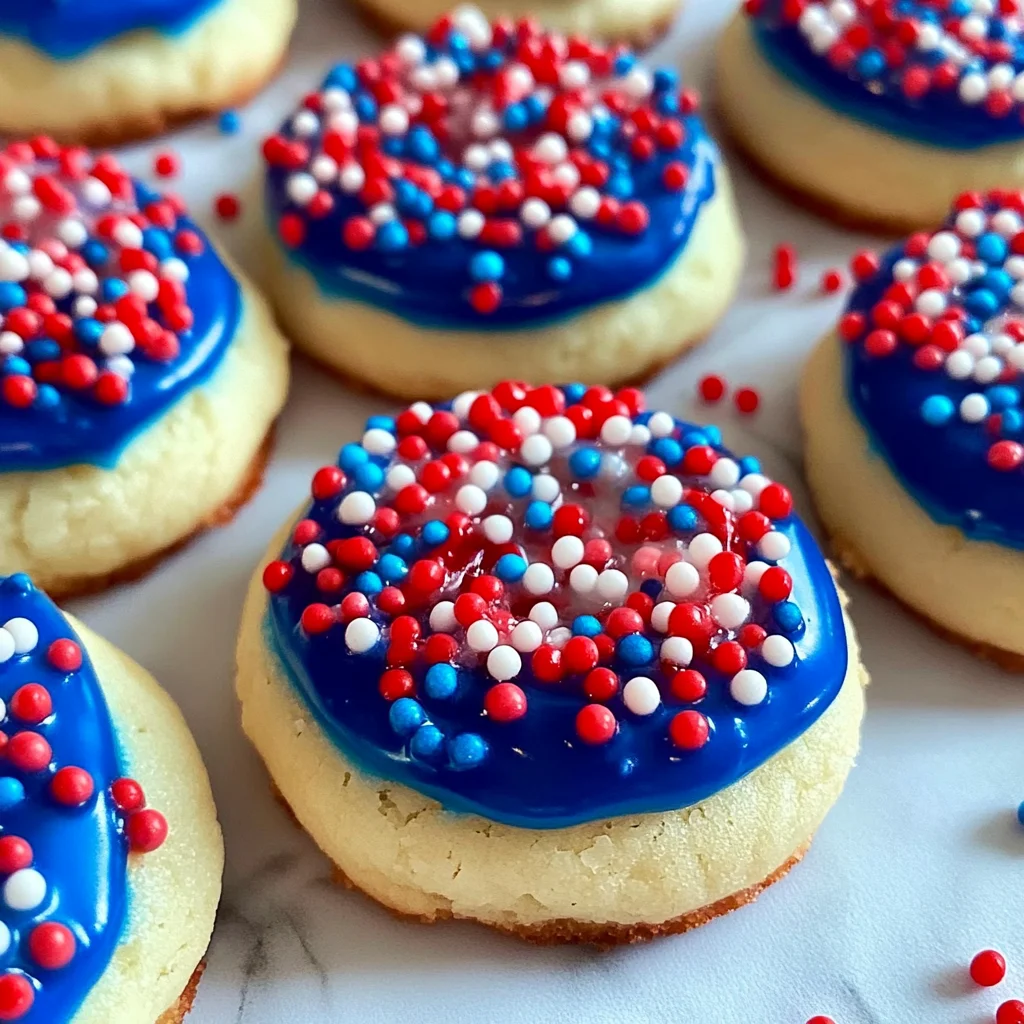
Patriotic Red, White & Blue Thumbprint Cookies
It’s that time of year again when the air is filled with the laughter of friends and family, the scent of barbecues wafts through the neighborhood, and we gather to celebrate our vibrant traditions. For me, nothing captures the spirit of these joyous occasions quite like a batch of Patriotic Red, White & Blue Thumbprint Cookies. These cookies are more than just a sweet treat; they’re an invitation to create lasting memories, a way to express our love for this beautiful country, and a delightful way to showcase the colors that symbolize our unity. Picture this: a buttery cookie with a soft center that melts in your mouth, topped with vibrant red and blue icing and festive sprinkles that catch the light just right. Each bite is a celebration—a symphony of flavors and textures that transports you straight to summer picnics and fireworks lighting up the night sky.
I’ve always been captivated by thumbprint cookies. They have a charm that’s both nostalgic and modern, making them perfect for any gathering—especially on holidays like the Fourth of July when we want everything to be as festive as possible. What truly makes these cookies extraordinary is not just their eye-catching appearance but also the blissful creaminess of their base paired with the sweet pop of color from the icing. Trust me when I say these cookies will become your new go-to for celebrations! They bring people together in such a profound way; every time I make them, I can see faces light up with joy as they anticipate that first bite. Whether you’re hosting a backyard barbecue or simply looking for something fun to bake with your kids, these cookies are sure to be a hit!
Patriotic Red, White & Blue Thumbprint Cookies: A Colorful Celebration in Every Bite
Let’s embark on this delightful culinary adventure together! Making Patriotic Red, White & Blue Thumbprint Cookies is not only simple but also incredibly rewarding. With each step, you’ll see how easy it is to create something special that encapsulates the essence of celebration while filling your kitchen with warmth and happiness.
Ingredients:
As we dive into preparing this recipe, let’s take a moment to appreciate each ingredient that plays its part in bringing these cookies to life. Each one contributes not just flavor but also texture and character—so pay attention because it makes all the difference!
- ½ cup (1 stick or 113g) unsalted butter, softened. This ingredient is crucial for achieving that rich, tender texture in your thumbprint cookies. When you use softened butter at room temperature, it allows for better incorporation into your sugar during the creaming process. This is what gives us those lovely air pockets that result in light and fluffy cookies rather than dense ones. Always opt for high-quality butter because it can elevate your baked goods significantly; European-style butter has a higher fat content which means richer flavor—just divine!
- ¼ cup granulated sugar. This isn’t just about sweetness; granulated sugar plays an essential role in creating structure within your cookies. It helps with browning due to caramelization during baking while also contributing to that satisfying crispness around the edges. When measuring sugar, make sure it’s leveled off properly so you don’t end up altering the balance of flavors.
- 1 egg yolk. The egg yolk adds moisture and richness to our dough while providing emulsification which helps bind everything together beautifully. Why only the yolk? Well, leaving out the whites prevents excess liquid which could lead to spreading—something we definitely want to avoid if we’re aiming for those perfectly shaped thumbprints!
- 1½ teaspoons pure vanilla extract. Ahh… vanilla—the soul of baking! This pure extract adds depth and complexity to our cookie dough that rounds out its flavor profile beautifully. Always choose pure over imitation vanilla extract whenever possible; it makes such a difference! Just trust me on this—you want every bite to be utterly intoxicating.
- 1 cup all-purpose flour. Flour forms the foundation of our cookie dough—it provides structure and stability while ensuring our cookies hold their shape during baking. When measuring flour, spoon it into your measuring cup instead of scooping directly from the bag; this prevents packing which can lead to dry dough.
- ¼ teaspoon salt. Don’t skip this little gem! Salt enhances all flavors immensely—it’s like magic in baking! It balances sweetness while elevating other flavors present in our ingredients so that every bite feels profoundly satisfying.
- 5 ounces red, white, and blue sprinkles. Sprinkles add not only color but also a playful crunch that complements our buttery cookie perfectly! When choosing sprinkles, make sure they are made from natural ingredients—this ensures vibrant colors without artificial aftertaste.
- 2 cups powdered sugar. We’ll need this later for our icing! Powdered sugar is essential for achieving that smooth consistency we’re looking for when decorating our cookies—it dissolves effortlessly into liquids creating luscious icings that coat beautifully without clumping.
- 2 tablespoons milk. Milk serves as a binding agent here—it softens our icing making it easy to spread or pipe onto our cooled cookies once baked! You can substitute it with almond milk if you’re looking for dairy-free options—just keep in mind that different types may alter consistency slightly.
- 1 tablespoon light corn syrup. This ingredient is absolutely crucial if you want shiny icing! Light corn syrup helps prevent crystallization while adding glossiness; trust me—it takes your decorated cookies from good to show-stopping!
- Red gel food coloring & blue gel food coloring. These gels are perfect for achieving those vibrant hues without altering consistency too much compared with liquid dyes—just remember: less is more! A tiny drop goes a long way here!
Equipment You’ll Need:
Having the right tools makes all the difference when it comes to baking—and believe me when I say investing in quality equipment will enhance your experience significantly! Let’s gather our trusty companions before we begin mixing up some cookie magic.
- Mixing bowl (large) – A sturdy mixing bowl is essential for combining ingredients efficiently without any splatter disasters occurring! Look for one that’s large enough so you can comfortably mix without worrying about ingredients escaping during vigorous stirring.
- Electric mixer (hand-held or stand) – While you could mix by hand using a wooden spoon or spatula (and get quite the workout!), an electric mixer will save you time and energy especially when creaming butter with sugar—it’s worth every penny!
- Measuring cups & spoons – Precision matters in baking; having proper measuring cups specifically designed for dry versus liquid measurements ensures accuracy so your ratios remain intact throughout preparation.
- Baking sheet(s) – A quality non-stick baking sheet ensures even heat distribution allowing your cookies to bake uniformly without sticking—a total game changer!
- Parchment paper or silicone baking mats – These aids not only prevent sticking but also promote even browning which contributes greatly towards achieving those perfect cookie results we’re after!
Now we’re all set up with ingredients and equipment ready at hand—it’s time to roll up our sleeves and start crafting these stunning Patriotic Red, White & Blue Thumbprint Cookies!
Step 1: Creaming Butter and Sugar
Begin by placing your softened butter into your mixing bowl along with granulated sugar—this process known as creaming combines both ingredients until they’re light and fluffy which typically takes about 2–3 minutes on medium speed (or longer if done manually). Why do we cream? It incorporates air into our mixture creating tiny bubbles which will expand during baking resulting in those beautiful light textures we adore in cookies! Don’t rush this step; take your time here because it’s absolutely paramount for getting that melt-in-your-mouth quality you crave.
Step 2: Add Egg Yolk and Vanilla
Next up, add in one egg yolk along with 1½ teaspoons of pure vanilla extract—you’ll notice an immediate change in aroma as this rich warmth fills your kitchen! Mix until fully combined then stop briefly scraping down sides if necessary—this ensures no ingredient gets left behind feeling lonely at the bottom of your bowl—every bit counts towards success!
Step 3: Incorporate Dry Ingredients
In another bowl (you don’t need anything fancy), whisk together one cup of all-purpose flour alongside ¼ teaspoon salt until evenly combined before gradually adding it into wet mixture while continuing on low speed until just blended together forming cohesive dough—we want minimal gluten development since too much would yield tough cookies instead of tender ones! If at any point things start looking crumbly don’t panic; simply use clean hands or spatula gently pressing mixture until it comes together nicely while being cautious not overwork dough itself either!
Step 4: Forming Cookie Dough Balls
Now comes my favorite part: shaping those adorable little cookie balls! Using about one tablespoon worth per cookie (a handy ice cream scoop works wonders here) roll between palms gently creating smooth spheres before placing them onto prepared baking sheets spaced apart evenly since they’ll spread slightly during cooking time ahead—you should aim for about two inches apart ideally unless you’re feeling adventurous wanting extra chewy edges then closer clusters could work too!
As we continue through these steps together crafting scrumptious treats filled with joy—I encourage you embrace each moment wholeheartedly because there’s magic waiting inside each batch awaiting discovery through shared experiences around tables filled laughter amongst loved ones enjoying homemade delights made straight from heart & soul…
Stay tuned as we’ll dive deeper into specific decorating techniques next—but first let’s bask in glory watching these beauties rise golden brown as they twirl around oven dancing merrily alongside fragrant notes floating through air inviting smiles everywhere!
Step 5: Creaming the Butter and Sugar to Perfection
Now that we have our delightful ingredients ready, let’s embark on the next step, which is truly where the magic begins. In a mixing bowl, combine the softened butter and granulated sugar. You want that butter to be just soft enough to make this process smooth—think of it as your favorite couch after a long day; it should feel inviting but not overly mushy. Using an electric mixer or a wooden spoon, cream these two together until the mixture transforms into a light, fluffy cloud of sweetness. This step is absolutely paramount because creaming incorporates air into the butter, which will help to create those perfectly tender cookies we all crave.
You’ll know you’re done when it looks pale in color and has doubled in volume—about 2 to 3 minutes with an electric mixer or a bit longer by hand. Trust me on this one: don’t rush this step! If you skip it, your cookies might turn out dense instead of delightfully airy. Once you achieve that fluffy texture, it’s time to add in the egg yolk and vanilla extract. The yolk not only adds richness but also contributes moisture, while the vanilla infuses your cookies with its warm aroma, making every bite utterly intoxicating.
Step 6: Incorporating Dry Ingredients for Structure
Next up is the wonderful world of dry ingredients! In a separate bowl, whisk together the all-purpose flour and salt. Now, here’s where we talk about balance: salt is essential in baking because it enhances sweetness and brings together all those flavors beautifully. Slowly add this flour mixture into your creamed butter and sugar blend. I recommend doing this in increments—about one-third at a time—so that everything combines seamlessly without creating any pesky lumps.
Mix gently until just incorporated; overmixing will develop gluten in the flour, which can lead to tougher cookies—a fate we don’t want for our patriotic treats! You’ll want to stop mixing as soon as you no longer see any streaks of flour; this is key for achieving that melt-in-your-mouth texture we all adore. Once mixed, you’ll have a lovely dough that’s soft yet manageable. Take a moment here to appreciate how effortless it feels under your fingers; it’s like holding potential joy waiting to be baked!
Step 7: Forming Your Cookies with Care
With our dough ready, now comes one of my favorite parts—shaping these little gems into thumbprint cookies! Preheat your oven to 350°F (175°C) and line a baking sheet with parchment paper or a silicone mat; this will ensure they bake evenly while avoiding any sticky situations later on. Using a tablespoon or cookie scoop (which makes life so much easier!), portion out the dough into equal balls—about one inch in diameter works beautifully here.
Once you have those adorable little balls lined up on your baking sheet (leave about two inches between them), it’s time for the thumbprint magic! Gently press your thumb into each ball to create an indentation; don’t worry if they crack slightly—that’s completely normal! Just embrace their imperfections because they’ll be filled with colorful icing soon enough! This step is crucial because those tiny thumbprints are what will hold our patriotic icing later on, providing both visual flair and sweet flavor bursts.
Step 8: Baking Your Perfect Patriotic Red, White & Blue Thumbprint Cookies
Now comes the moment we’ve all been waiting for—the baking! Slide those trays into your preheated oven and set a timer for about 10 minutes. Keep an eye on them starting around minute eight; you’re looking for those edges to become ever-so-slightly golden while the centers remain soft—they’ll continue cooking as they cool on the baking sheet afterward. This delicate balance between time and temperature is key; overbaked cookies can lose that coveted softness we adore!
When they’re done, pull them from the oven and let them rest on the baking sheet for about five minutes before transferring them to wire racks to cool completely. Ahh… just think of how wonderful your kitchen must smell right now—it’s pure bliss! The cooling process allows them to firm up just enough so you can handle them without fear of breaking apart—but don’t wait too long before moving them; otherwise, they might stick stubbornly to your pan!
Final Touches: Decorating Your Patriotic Masterpieces
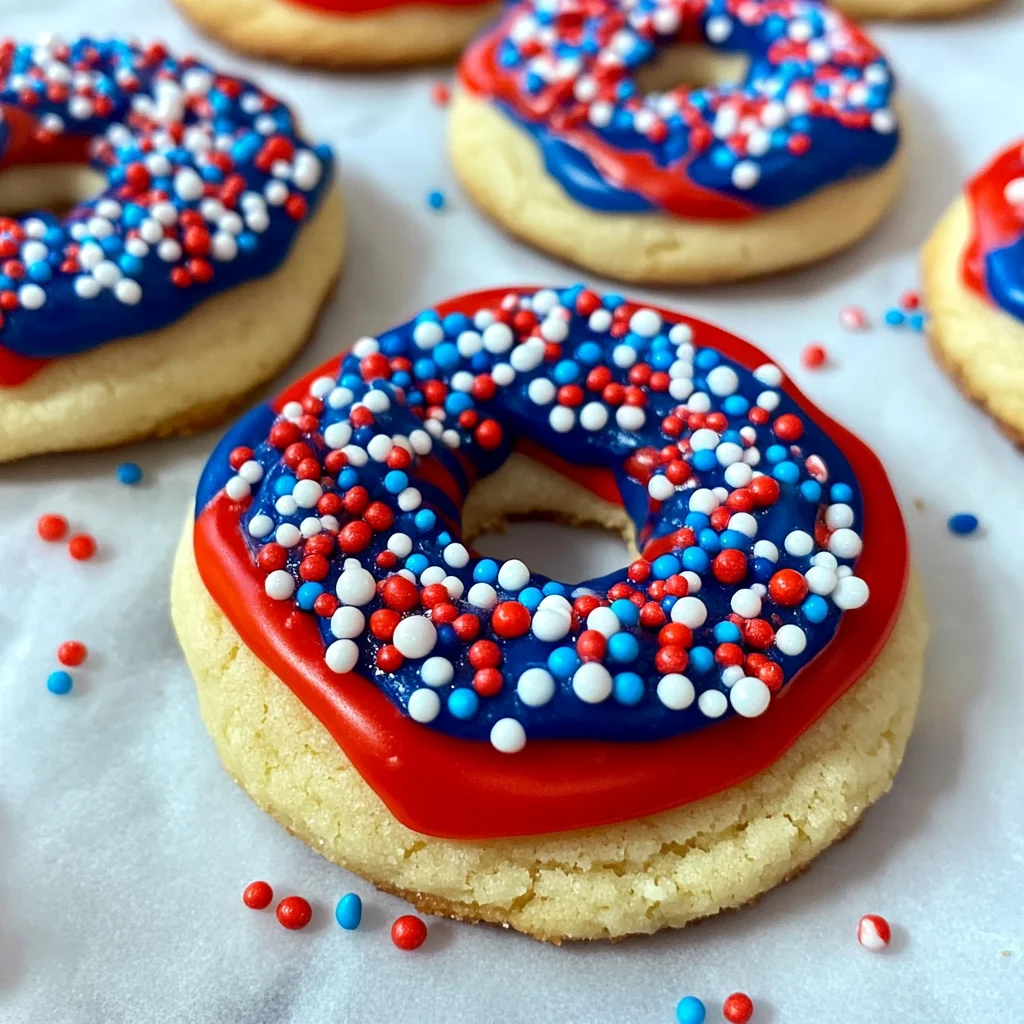
Now that your cookies are cool and ready for their festive transformation, let’s dive into decorating these Patriotic Red, White & Blue Thumbprint Cookies! In a medium bowl, whisk together powdered sugar, milk, light corn syrup, and red or blue gel food coloring until you reach your desired consistency—a beautiful glossy glaze that flows effortlessly but isn’t too runny is what we’re aiming for here.
This part is where creativity blooms! Dip each cooled cookie into your vibrant icing—don’t rush this step either; allow each cookie to soak in those colors like they’re taking a refreshing dip in summer sunshine! Afterward, immediately sprinkle some red, white, and blue sprinkles onto each glazed thumbprint while it’s still wet—you want those sprinkles to adhere perfectly without bouncing off like tiny confetti during a celebration.
It’s such an exhilarating experience watching each cookie transform from simple dough balls into vibrant masterpieces that scream patriotism! As they dry (which won’t take long), take a moment to appreciate what you’ve created—a batch of delicious memories waiting to be shared with friends and family during festivities or quiet moments at home. Trust me when I say that every bite will evoke smiles of joy—these cookies are more than treats; they’re heartfelt tokens of celebration bursting with flavor and love.
So there you have it—the complete guide to crafting these irresistible Patriotic Red, White & Blue Thumbprint Cookies! Whether you’re gearing up for July 4th festivities or simply indulging in some creative baking at home, I hope these cookies bring as much happiness into your kitchen as they have mine over the years. Enjoy every colorful morsel—you’ve earned it!
Storage and Enjoyment Tips for Your Patriotic Red, White & Blue Thumbprint Cookies
Now that you’ve baked these delightful Patriotic Red, White & Blue Thumbprint Cookies, it’s time to revel in the joy of sharing them with friends and family—or perhaps savoring them all to yourself! Just imagine a warm cookie melting in your mouth, bursting with that sweet promise of celebration. But what if you have leftovers? Fear not! Let’s talk about how to preserve these little treasures so they remain as delicious as the moment they came out of the oven.
Storing Leftover Patriotic Red, White & Blue Thumbprint Cookies
To keep your cookies fresh and flavorful, store them in an airtight container at room temperature. This is crucial because exposure to air can dry them out and rob you of that wonderfully buttery texture. I recommend using a container lined with parchment paper for an extra layer of protection—this little trick helps absorb any moisture that could make your cookies soft. If stored properly, these cookies will keep their delightful charm for about 5 days. Trust me when I say they still taste heavenly after a few days—while they may lose a bit of their original crispness, the flavors continue to meld together beautifully. For serving, simply let them come back to room temperature or pop them in the microwave for just a few seconds to bring back that fresh-out-of-the-oven hug of warmth.
Freezing Patriotic Red, White & Blue Thumbprint Cookies for Later
If you’re looking to extend the life of your cookies even further, freezing is an excellent option! To do this properly, place your cooled cookies in a single layer on a baking sheet and freeze them until solid. Once frozen, transfer them into a freezer-safe bag or container—be sure to label it with the date so you know when you made these beauties! They’ll keep well frozen for up to 3 months without losing their delicious flavor. When you’re ready for a treat, simply take out however many you’d like and let them thaw at room temperature or pop them directly into a preheated oven at 350°F (175°C) for about 5-7 minutes. The convenience factor here is truly fantastic—you can have festive cookies on-hand anytime inspiration strikes or when guests drop by unexpectedly!
Patriotic Red, White & Blue Thumbprint Cookies
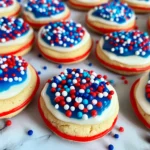
Celebrate summer gatherings with these delightful Patriotic Red, White & Blue Thumbprint Cookies! Perfect for the Fourth of July or any festive occasion, these cookies are a vibrant blend of buttery goodness and sweet icing. Each one features a soft, melt-in-your-mouth center topped with colorful sprinkles that capture the spirit of celebration. Easy to make and fun to decorate, they not only bring joy to your taste buds but also create lasting memories with friends and family. Whether you’re hosting a backyard barbecue or baking with kids, these cookies are sure to be a hit!
- Prep Time: 20 minutes
- Cook Time: 10 minutes
- Total Time: 30 minutes
- Yield: Approximately 24 cookies 1x
- Category: Dessert
- Method: Baking
- Cuisine: American
Ingredients
- ½ cup unsalted butter, softened
- ¼ cup granulated sugar
- 1 egg yolk
- 1½ teaspoons pure vanilla extract
- 1 cup all-purpose flour
- ¼ teaspoon salt
- 5 ounces red, white, and blue sprinkles
- 2 cups powdered sugar
- 2 tablespoons milk (or almond milk)
- 1 tablespoon light corn syrup
- Red gel food coloring
- Blue gel food coloring
Instructions
- Preheat oven to 350°F (175°C). Line baking sheets with parchment paper.
- In a large mixing bowl, cream together softened butter and granulated sugar until light and fluffy (about 2–3 minutes).
- Add egg yolk and vanilla extract; mix until fully combined.
- In a separate bowl, whisk together flour and salt. Gradually add to the wet mixture until just blended.
- Roll dough into balls (about 1 inch in diameter) and place on prepared baking sheets. Press your thumb into each ball to create an indentation.
- Bake for 10 minutes or until edges are lightly golden. Allow cooling on wire racks.
- For the icing, combine powdered sugar, milk, corn syrup, and food coloring in a medium bowl until smooth. Dip cooled cookies into icing and top with sprinkles.
Nutrition
- Serving Size: 1 serving
- Calories: 110
- Sugar: 10g
- Sodium: 40mg
- Fat: 4g
- Saturated Fat: 2g
- Unsaturated Fat: 2g
- Trans Fat: 0g
- Carbohydrates: 17g
- Fiber: 0g
- Protein: 1g
- Cholesterol: 20mg