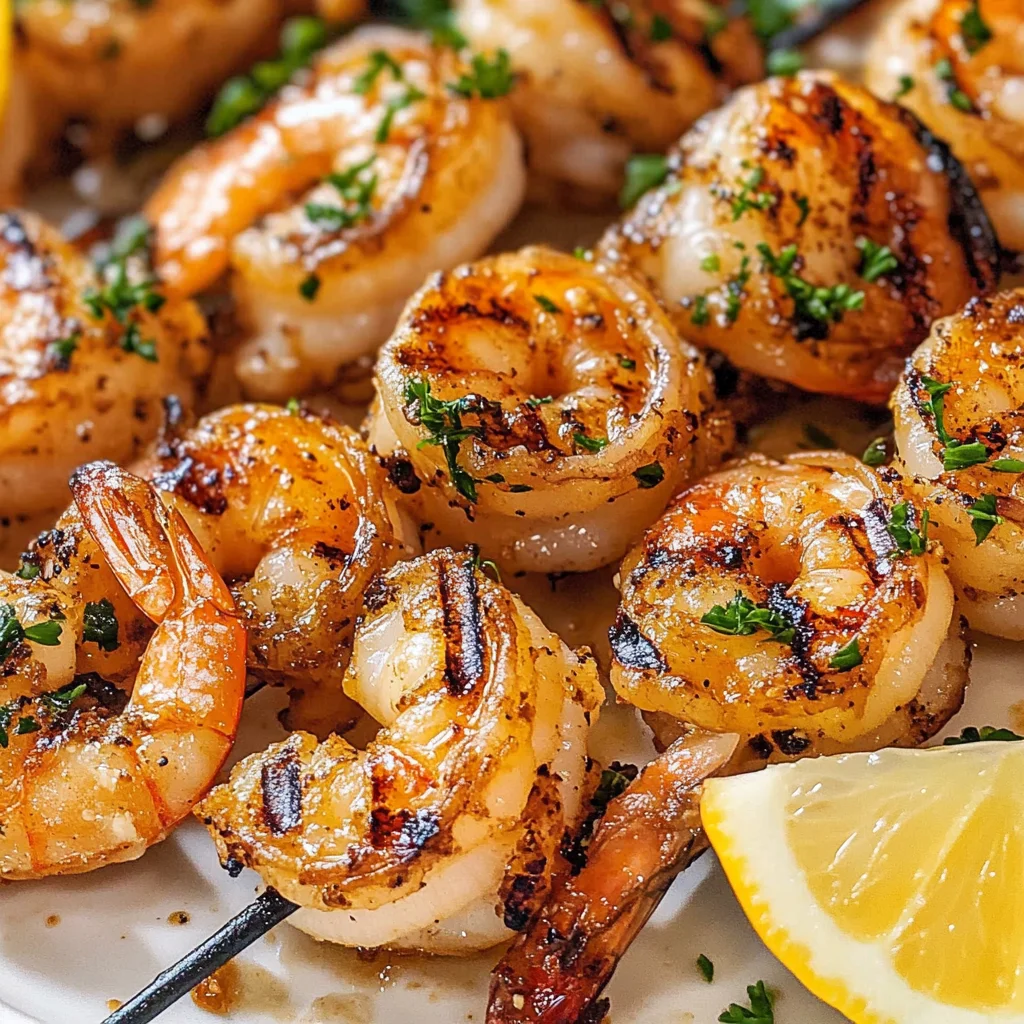
Texas Roadhouse Grilled Shrimp Recipe
There’s something profoundly satisfying about enjoying a meal that feels both indulgent and refreshing. The Texas Roadhouse Grilled Shrimp is one of those dishes that transcends mere food; it’s an experience, a delightful celebration of flavors that dances on the palate. Picture this: succulent shrimp, marinated in a symphony of lemony goodness and fragrant herbs, sizzling away on the grill, their enticing aroma wafting through the air. Each bite reveals a juicy morsel, perfectly charred, with a hint of spice that leaves you craving more. This dish isn’t just about feeding the body; it’s about nourishing the soul, creating memories around the table, and sharing laughter with loved ones as you savor the moment.
I’ve always been captivated by how simple ingredients can come together to create something truly extraordinary. The Texas Roadhouse Grilled Shrimp Recipe is a testament to this idea. It’s perfect for summer barbecues or cozy dinner parties alike—any occasion that calls for something light yet satisfying. As you gather your friends and family around the grill, you’ll find that this recipe not only brings people together but also sparks conversation and joy. I promise you, once you serve these grilled shrimp skewers, they will become a beloved staple in your culinary repertoire.
Texas Roadhouse Grilled Shrimp Recipe: A Summer Sensation
This Texas Roadhouse Grilled Shrimp recipe is not just another dish; it’s an invitation to embrace the vibrant flavors of summer while indulging in easy-to-prepare elegance. With its straightforward steps and minimal prep time, you’ll be amazed at how quickly you can whip up this enchanting dish that will leave your guests raving. Let me share with you all the secrets to making these grilled shrimp shine like stars on your dining table!
Ingredients:
As we embark on this culinary journey together, let’s take a moment to appreciate each ingredient that plays an essential role in bringing this dish to life. Every item adds its unique character and charm.
- 1 1/2 pounds Jumbo shrimp (16/20), peeled and deveined: The star of our show! When selecting shrimp, look for those that are labeled “jumbo” or “extra-large” as these will provide a delightful bite and hold up beautifully on the grill. Freshness is key here—opt for shrimp that have a mild ocean scent and firm texture. Choosing sustainably sourced shrimp not only enhances flavor but also supports responsible fishing practices.
- 1/4 cup olive oil: Often referred to as liquid gold in the culinary world, olive oil serves as both a marinade base and a grilling medium. It adds richness while allowing other flavors to shine through. When selecting olive oil, go for extra virgin; its fruity notes will elevate the entire dish’s taste profile and create that luscious coating around our shrimp.
- 2 tablespoons lemon juice: Freshly squeezed lemon juice is non-negotiable here—it cuts through the richness of the oil and brings brightness to our marinade. The acidity from lemon juice helps tenderize the shrimp while imparting an invigorating zing that’s reminiscent of sunshine on warm summer days.
- 2 tablespoons fresh parsley (chopped): This vibrant herb adds not just beautiful color but also a burst of freshness that complements our grilled shrimp marvelously. Always opt for fresh parsley over dried—it has far more flavor and aromatic qualities than its dried counterpart, making it absolutely paramount for our recipe!
- 3 cloves garlic, minced: Garlic is one of those magical ingredients that transforms any dish into something unforgettable. Its pungent aroma when sautéed mingles wonderfully with our marinade components, imparting warmth and depth to every bite of grilled shrimp.
- 1 teaspoon dried oregano: Oregano harmonizes beautifully with seafood—its slightly bitter notes balance out the richness of olive oil while enhancing overall flavor complexity. Dried oregano is more potent than fresh due to its concentrated oils during drying; thus, even a small amount goes a long way!
- 1/2 teaspoon paprika: Paprika brings not only color but also subtle smokiness to our skewers without overwhelming them—which makes it an ideal addition when grilling! Look for sweet paprika or smoked paprika based on your preference—both will lend distinct character without compromising the shrimp’s natural sweetness.
- 1/2 teaspoon salt: Salt is vital in enhancing all aspects of flavor within our dish—it draws moisture from ingredients while balancing sweetness with savory notes! Remember—you can always add more later but starting off lightly seasoned ensures we maintain control over final taste profiles.
- 1/2 teaspoon black pepper: Freshly cracked black pepper adds warmth and just enough heat to round out flavors seamlessly without taking center stage away from other components in our marinade blend!
- 1/2 teaspoon crushed red pepper (optional): If you’re looking to add an extra kick without overpowering delicate shrimp flavors—this one’s for you! Adjust according to personal preference; I often recommend starting with less before building up as needed during grilling times.
- Lemon wedges for garnish: A simple yet elegant touch—these wedges serve dual purposes! Not only do they brighten up presentation visually but squeezing fresh lemon juice right before serving adds another layer of invigorating flavors right at first bite!
Equipment You’ll Need:
Before we dive into crafting these divine grilled shrimp skewers together let’s talk tools! Having proper equipment makes every step smoother while ensuring delightful results—a must-have partnership when creating magic in your kitchen!
- Grill (charcoal or gas): Your grill acts as both cooking surface and flavor enhancer here! The high heat creates those gorgeous sear marks we all love while simultaneously locking in moisture within each succulent piece of seafood. Whether using charcoal or gas depends on personal preference; just ensure it reaches medium-high heat before starting!
- Skewers (metal or wooden): Skewers are essential for threading those beautiful shrimps which makes flipping during cooking easier too! Wooden skewers should be soaked beforehand—this prevents burning during grilling time—while metal skewers offer durability without needing soaking prior.
- Mixing bowl: A medium-sized mixing bowl allows ample space for combining all marinade ingredients effectively before introducing our marinated proteins into flavorful bliss!
Now we’re set up beautifully—we have all necessary components lined up neatly ready to assemble magic onto plates later! So let’s jump into preparing this delicious Texas Roadhouse Grilled Shrimp Recipe together—where I’ll guide every step along this joyous cooking adventure ahead!
Step 1: Preparing Your Shrimp
The first step might seem simple enough—peeling those jumbo shrimps—but trust me; there’s an art behind it! Start by gently pulling off their shells while leaving tails intact (this adds visual flair when plating). If needed—for instance if they haven’t been deveined already—take time here carefully removing veins along back side too—it makes such difference visually too plus taste-wise once cooked through properly!
Step 2: Creating That Flavorful Marinade
Now onto mixing heaven—the marinade! In your mixing bowl combine olive oil & freshly squeezed lemon juice followed by chopped parsley & minced garlic along with dried oregano & spices mentioned above (salt-pepper-paprika-crushed red). Whisk it together until uniform—a beautiful fragrant elixir forms before your eyes welcoming those shimmery pieces waiting patiently nearby feeling excited about what’s coming next!
Step 3: Marinating Time
Add cleaned shrimps into freshly made mixture tossing gently until well coated then cover tightly letting flavors meld beautifully over at least 15 minutes but preferably closer towards hour mark if possible—it allows deeper penetration throughout giving us fantastic results later during grilling process yielding maximum flavor profiles achieved effortlessly thanks marinating magic working behind scenes here!
Step 4: Prepping Your Grill
While waiting eagerly let’s prepare grill itself ensuring perfect char marks await us upon completion! Preheat grill towards medium-high heat allowing sufficient time for grates reach optimal temp prior adding skewered shrimps shortly after soaking wooden varieties beforehand if utilizing them earlier thus preventing burning issues down line ahead resulting exquisite outcome desired ultimately!!
Now you’re armed with everything needed—from ingredients through tools—to embark upon creating your very own Texas Roadhouse-inspired Grilled Shrimp masterpiece! Trust me; once tried—you’ll find yourself captivated by joy experienced alongside satisfaction derived from sharing such delightful bites shared among dear friends & family alike gathered around enjoying summer evenings outdoors filled laughter companionship shared enhancing bonds tighter than ever before!!
Texas Roadhouse Grilled Shrimp Recipe
This Texas Roadhouse Grilled Shrimp Recipe is like a warm embrace on a summer evening, a dish that brings friends and family together under the open sky. The beauty of this recipe lies not just in its simplicity but also in the profound flavors that come alive with every bite. Trust me on this—once you master these grilled shrimp, you’ll find yourself coming back to this dish time and time again. Now, let’s dive deeper into the remaining steps to create this unforgettable experience!
Step 5: Preheat the Grill to Perfection
Ah, preheating the grill—a step that might seem mundane but is absolutely crucial for achieving that perfect char and smoky flavor we all adore! When you’re ready to start grilling your shrimp, make sure to crank up your grill to medium-high heat. This temperature setting is non-negotiable because you want those lovely grill marks and that delightful caramelization without overcooking the shrimp. I recommend letting your grill preheat for at least 10-15 minutes; during this time, you can enjoy the anticipation of what’s to come! You should aim for a temperature around 400°F (204°C) because this is where magic happens—your shrimp will sizzle beautifully upon contact, sealing in all their moisture and flavor. So don’t rush through this step; it sets the stage for an utterly intoxicating dining experience.
Step 6: Skewering Your Shrimp Like a Pro
Now comes one of my favorite parts—skewering! It’s almost like threading little jewels onto a necklace, and I promise it’ll be worth it when you see them sizzling on the grill. Grab those marinated shrimp from the bowl and begin threading them onto your skewers. Aim for about 4-6 shrimp per skewer; this ensures they cook evenly while maintaining their juiciness. When skewering, try to thread them through both the thickest part of each shrimp and avoid piercing too close to the tail end; this way, they won’t fall apart while grilling. If you’re using wooden skewers (which I absolutely love for adding subtle flavor), remember to soak them in water for at least an hour beforehand to prevent burning. Skewering isn’t just about aesthetics; it also makes flipping them easier on the grill, ensuring even cooking from all sides.
Step 7: The Grilling Technique That Transforms
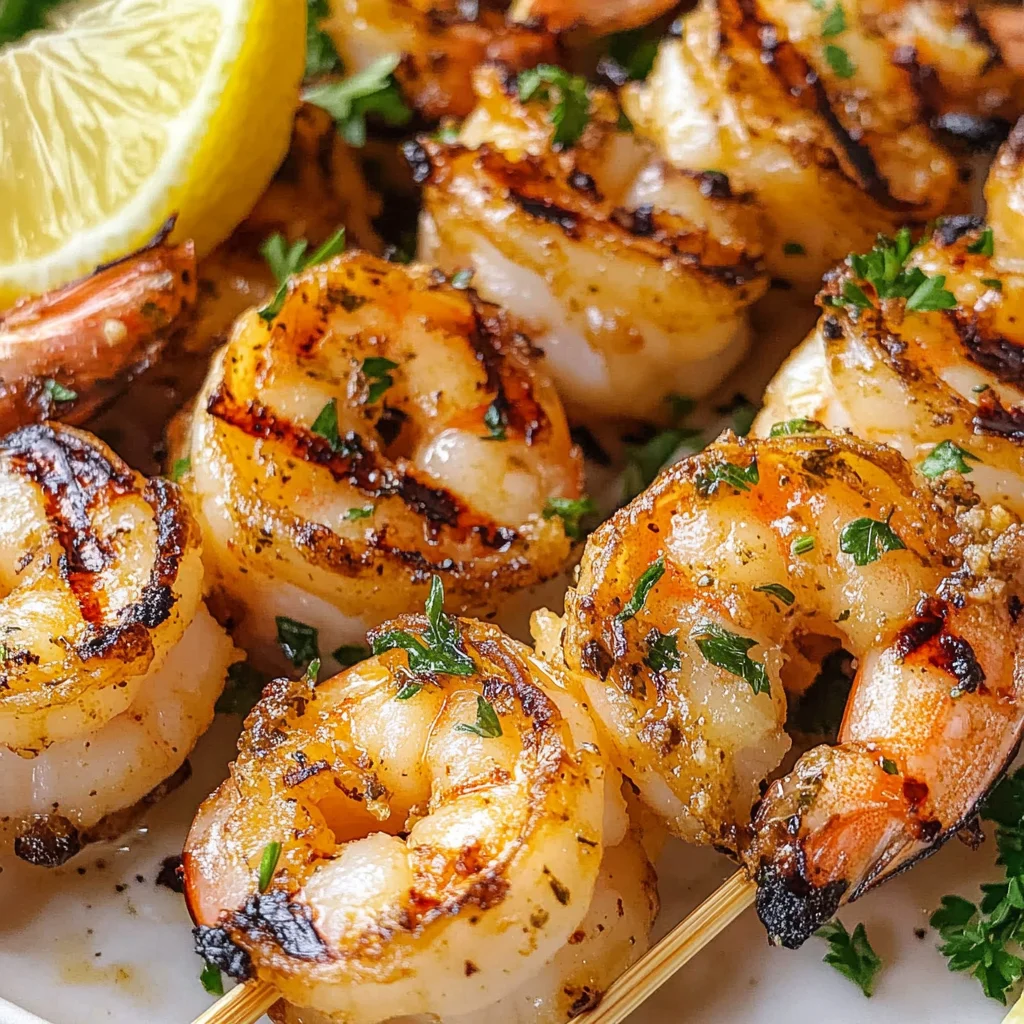
With your skewers ready and your grill preheated, it’s time for the transformative act of grilling! Place those beautiful shrimp skewers directly on the hot grill grates, ensuring they’re evenly spaced out for optimal heat circulation—this is where science meets art. Grill them for about 2-3 minutes on each side; during this time, keep an eye out for visual cues—the shrimp will start turning opaque and develop a lovely pink hue as they cook. This transformation is not only visually stunning but also signifies that they are reaching their perfect doneness. Use tongs to carefully flip each skewer; you want that slight resistance when you press down lightly—not mushy or rubbery! Remember, shrimp cook quickly, so stay attentive—overcooked shrimp can become tough and chewy rather than delightfully tender.
Step 8: Final Garnishing Touches
As soon as your shrimp are perfectly grilled—opaque with enticing char marks—it’s time to take them off the grill and elevate their presentation with some finishing touches! Place them on a serving platter while they’re still warm; there’s something utterly magical about serving food right off the grill. Now grab some fresh parsley that you’ve set aside earlier—it adds both color and freshness—and sprinkle it generously over your grilled masterpiece. And don’t forget those lemon wedges! Squeezing fresh lemon juice over your grilled shrimp just before serving brightens everything up; it’s like a burst of sunshine enhancing all those symphonies of flavors that are already present. The acidity cuts through any richness from the olive oil and balances everything perfectly. Trust me when I say these final touches are essential—they transform ordinary grilled shrimp into something truly extraordinary.
Elevate Your Dining Experience
As you serve up these Texas Roadhouse Grilled Shrimp Skewers at your next gathering or cozy dinner at home, feel free to share stories about how easy yet impressive they are to make! Each bite transports you straight to summer barbecues filled with laughter, sunshine, and good company. Don’t hesitate to pair these succulent morsels with sides like grilled vegetables or a refreshing salad—it’s all about creating an experience that nourishes not just our bellies but our souls too. Enjoy every moment as you savor these delightful flavors—you’ve earned it!
Storage and Enjoyment Tips for Your Texas Roadhouse Grilled Shrimp Recipe
Now that you’ve grilled up a storm with this delightful Texas Roadhouse Grilled Shrimp Recipe, it’s time to savor every juicy bite. But before you dive mouth-first into this exquisite dish, let’s chat about how to store any leftovers (if there are any, and I promise you’ll be tempted to devour them all!). Proper storage means you can relive those vibrant flavors even days later, so let’s ensure your shrimp stays just as succulent and delicious as when it first hit the grill.
Storing Leftover Texas Roadhouse Grilled Shrimp Recipe
When it comes to storing your leftover Texas Roadhouse Grilled Shrimp, I recommend using an airtight container to lock in all that luscious moisture and flavor. Find one that fits snugly without leaving too much air space—this is important because exposure to air can lead to dryness. If you’re tucking away some shrimp, they’ll keep well in the refrigerator for up to 3 days. To maintain their lovely texture, consider adding a slice of bread into the container; it works wonders by absorbing excess moisture, keeping your shrimp from feeling rubbery. When it’s time for a snack or meal, simply reheat them gently in a skillet over low heat or give them a quick zap in the microwave for no more than 30 seconds at a time. Trust me; these little beauties will still sing with flavor!
Freezing Shrimp for Later
If you want to take your Texas Roadhouse Grilled Shrimp experience to the next level of convenience, freezing is an excellent option! Before you freeze them, make sure they are completely cooled down. Then lay them out in a single layer on a baking sheet and pop them into the freezer for about an hour. Once they’re firm, you can transfer them into freezer-safe bags or containers—just squeeze out as much air as possible before sealing tight. These little gems will keep beautifully in the freezer for up to 2 months! Whenever you’re craving that fresh grill taste but don’t have the time to marinate and grill from scratch, just pull out what you need! Thawing is simple; let them sit in the refrigerator overnight or run them under cold water until defrosted. This way, you get that burst of summertime flavor anytime you desire!
Texas Roadhouse Grilled Shrimp
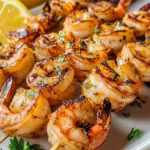
Indulge in the vibrant flavors of summer with this Texas Roadhouse Grilled Shrimp Recipe. Perfectly marinated in a zesty blend of lemon juice, garlic, and fresh herbs, each succulent shrimp skewer offers a delightful burst of flavor that will elevate your outdoor gatherings or cozy dinners.
- Prep Time: 15 minutes
- Cook Time: 10 minutes
- Total Time: 25 minutes
- Yield: Serves 6
- Category: Main
- Method: Grilling
- Cuisine: American
Ingredients
- 1 1/2 pounds jumbo shrimp, peeled and deveined
- 1/4 cup olive oil
- 2 tablespoons lemon juice
- 2 tablespoons fresh parsley, chopped
- 3 cloves garlic, minced
- 1 teaspoon dried oregano
- 1/2 teaspoon paprika
- 1/2 teaspoon salt
- 1/2 teaspoon black pepper
- 1/2 teaspoon crushed red pepper (optional)
- Lemon wedges for garnish
Instructions
- Prepare the shrimp by peeling and deveining if not done already.
- In a mixing bowl, combine olive oil, lemon juice, parsley, garlic, oregano, paprika, salt, and pepper. Whisk until well combined.
- Add shrimp to the marinade and toss gently until coated. Let marinate for at least 15 minutes.
- Preheat the grill to medium-high heat (around 400°F).
- Thread marinated shrimp onto skewers (about 4-6 per skewer).
- Grill skewers for about 2-3 minutes on each side until shrimp are opaque and slightly charred.
- Serve hot with lemon wedges for squeezing over the top.
Nutrition
- Serving Size: 3 skewers (about 170g)
- Calories: 220
- Sugar: 0g
- Sodium: 300mg
- Fat: 10g
- Saturated Fat: 1g
- Unsaturated Fat: 9g
- Trans Fat: 0g
- Carbohydrates: 3g
- Fiber: 0g
- Protein: 25g
- Cholesterol: 150mg