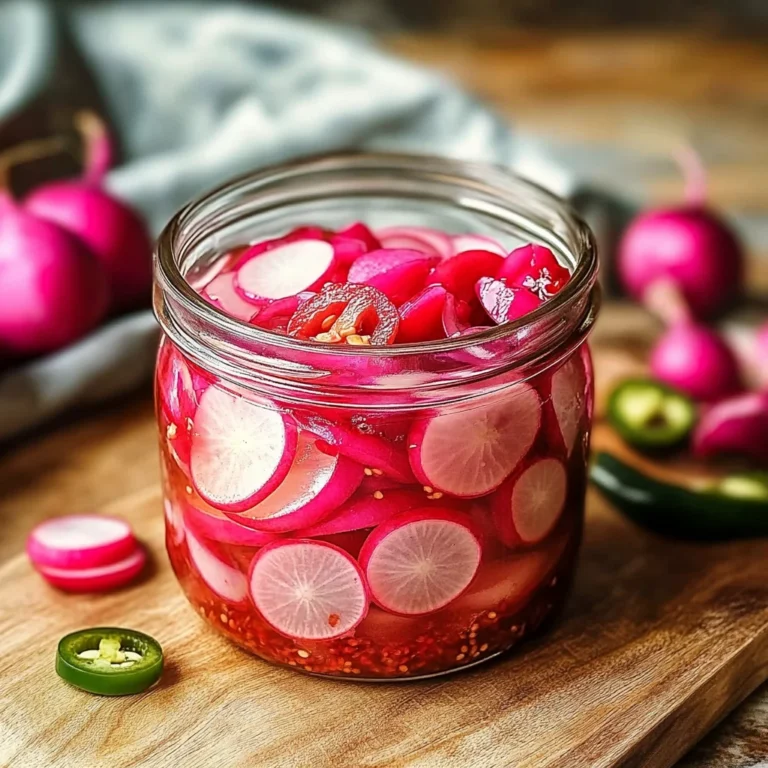
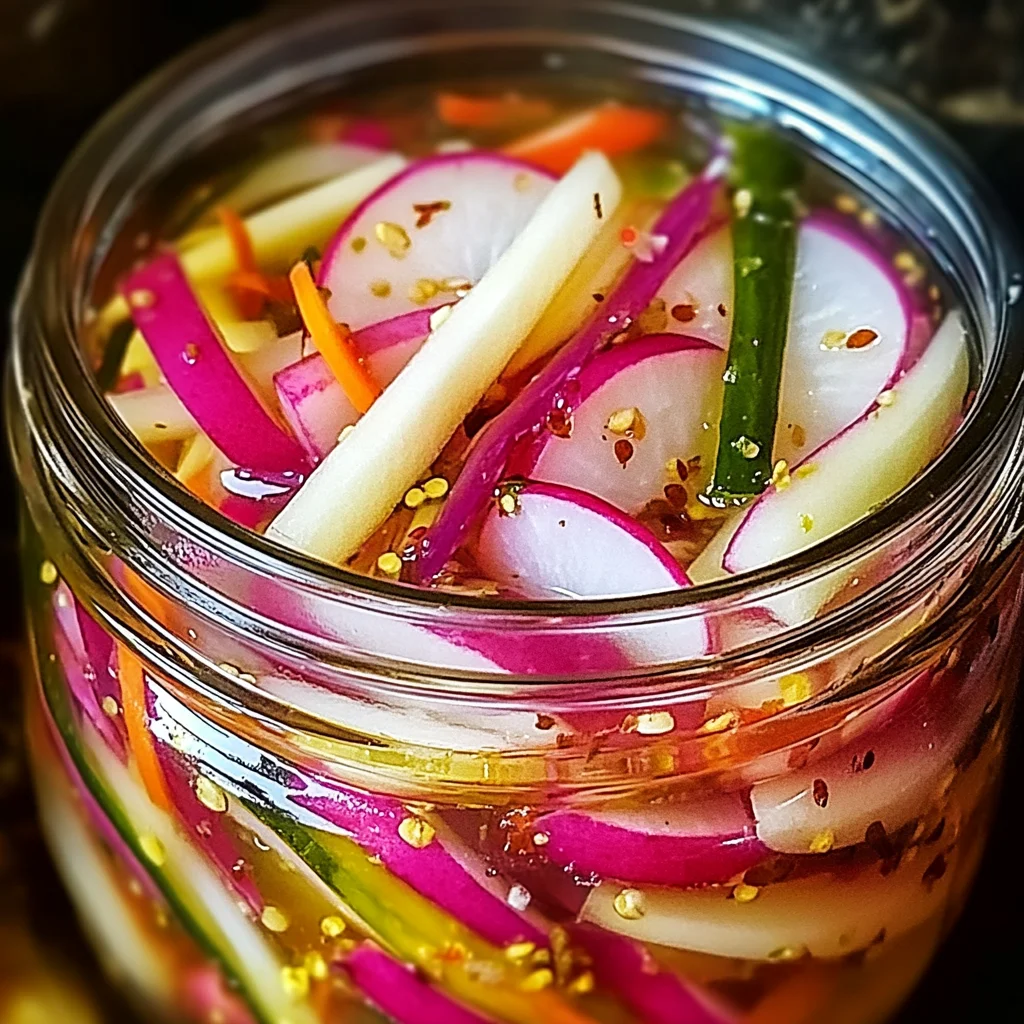
Fridge Pickled Radish & Veggies: Crunchy & Flavorful Delight
I am thrilled to share with you something that has become a delightful staple in my kitchen: Fridge Pickled Radish & Veggies: Crunchy & Flavorful Delight. This recipe is more than a mere method of preservation; it’s a celebration of color, texture, and taste that dances on the palate and brightens any meal. Imagine opening your fridge to jars bursting with vibrant hues, each filled with crisp vegetables marinated in a tangy brine that awakens the senses. The way these pickles can elevate your dishes—from sandwiches to salads—is nothing short of magical. I promise you, once you try this easy recipe, you’ll be hooked!
What makes this recipe truly special is not just its ease or the stunning crunch it provides but the versatility it brings to your dining table. Whether you’re looking for a quick snack, an appetizer for gatherings, or a zesty side dish to complement your mains, these pickled radishes and veggies fit beautifully into any occasion. And let’s not forget the joy of customization—swap out ingredients based on what you have on hand or what flavors excite you at the moment! So grab your cutting board and let’s embark on this flavorful journey together.
Fridge Pickled Radish & Veggies: Crunchy & Flavorful Delight: A Colorful Symphony in a Jar
This delightful recipe invites you into the world of pickling—a simple yet rewarding culinary adventure that transforms ordinary vegetables into extraordinary bites. It’s an invitation to play with flavors and textures while creating something that not only looks stunning but also tastes incredible.
Ingredients:
As we dive into our culinary journey of crafting Fridge Pickled Radish & Veggies: Crunchy & Flavorful Delight, let’s take a moment to appreciate each ingredient that plays a crucial role in this vibrant dish. Each one contributes unique flavors and textures that come together harmoniously in your jars.
- 2 carrots (about 180g) sliced into matchsticks or pre-shredded for convenience. Carrots lend a natural sweetness and satisfyingly crunchy bite to our pickles. When selecting carrots, look for firm ones without cracks or soft spots; they should feel crisp when you snap one in half. Their bright orange hue not only adds visual appeal but also packs them full of vitamins and antioxidants that are beneficial for health. If you’re feeling adventurous, try using rainbow carrots for an even more colorful presentation!
- 1 cucumber (about 200g) Any variety works wonderfully here; I particularly love English cucumbers for their thin skin and minimal seeds, which means less bitterness and more crunch! However, if you’re looking to shake things up a bit, consider substituting zucchini for an unexpected twist that still promises great texture and flavor. When prepping your cucumber, slicing it into thin rounds or spears will help maximize its surface area for better absorption of our flavorful brine.
- 1 bunch radishes (about 250g) These little gems add not only a peppery crunch but also vibrant color to our pickle medley—think of them as nature’s confetti! Choose firm radishes without blemishes for the best results. If radishes aren’t your favorite, feel free to experiment with bell peppers for a sweeter alternative; they’ll bring their own lovely crunch while soaking up all those tangy flavors.
- 1/2 onion (about 75g) This humble vegetable introduces savory depth and complexity to our pickle mix. While yellow onions work beautifully here, don’t hesitate to use green onions or shallots if you’re after something milder yet equally delicious. The sharpness will mellow during pickling, transforming into a sweet undertone that complements the other ingredients beautifully.
- 1 cup vinegar (240ml) Experimenting with different types can lead to wonderful flavor profiles—white vinegar offers clean acidity while apple cider vinegar adds fruity notes; rice vinegar brings a mild sweetness that’s simply divine! Vinegar is crucial because it creates the brine that preserves these veggies while infusing them with flavor over time.
- 1 cup water (240ml) This ingredient helps dilute our vinegar for balanced brine perfection! Too much vinegar can overpower the delicate flavors of our veggies; by adding water, we create an inviting environment where every ingredient shines through harmoniously.
- 2 cloves garlic Fresh garlic introduces an aromatic punch that elevates all other flavors within our jarred treasures. You can always add more if you’re like me—a true garlic lover at heart! Make sure to crush or finely chop it before adding it to release those essential oils that pack so much flavor.
- 1 tablespoon sea salt Salt isn’t just about seasoning; it plays a fundamental role in drawing out moisture from our veggies while enhancing their inherent flavors. Opting for sea salt ensures no additives interfere with our pickling process—trust me on this one!
- 1 teaspoon oregano This herb adds an herbal note that beautifully complements the crispness of our veggies. If oregano isn’t available or isn’t your favorite, feel free to swap it out with fresh dill or basil—the goal here is to create layers of flavor that resonate with your personal taste.
- 1 tablespoon sugar Balancing acidity is absolutely paramount when pickling! Sugar tempers the vinegary tang and gives us that harmonious blend we crave in every bite. For those looking for natural alternatives, honey or agave syrup can work wonders too!
Equipment You’ll Need:
Before we get started on creating our crunchy delights, let’s take stock of the tools we’ll need along this flavorful journey. Having the right equipment not only streamlines the process but makes cooking feel like pure joy—so let’s gather these essential partners in crime!
- Cutting Board A sturdy cutting board gives you ample space to work your magic as you slice up those colorful veggies. It’s important to choose one made from materials like bamboo or plastic since they’re easier on your knife blades compared to glass or stone boards.
- Sharp Knife A good-quality knife allows you precision as you cut through firm vegetables effortlessly—it’s essential for achieving those perfect matchsticks from carrots or thin slices from cucumbers! A dull knife could lead to frustration and uneven pieces; trust me when I say investing in one sharp tool will elevate your entire cooking experience.
- Mixing Bowl This bowl becomes your staging area where all ingredients come together before diving into their jars. Choose one large enough so everything fits comfortably without spilling over—this is where you’ll mix up your brine too!
- Measuring Cups & Spoons Accurate measurements are critical in achieving taste balance—having both dry and liquid measuring cups ensures you’ll nail each ingredient quantity perfectly every time.
- Jars with Lids Glass jars are ideal for pickling as they allow visibility so you can marvel at those colorful layers unfold over time! Ensure lids seal tightly; this keeps air out while preserving freshness inside—mason jars are always a reliable choice here.
Preparing the Fridge Pickled Radish & Veggies: Crunchy & Flavorful Delight
Step 1: Assemble Your Ingredients
Begin by gathering all your beautiful vegetables—there’s something soulful about arranging them on your counter as if preparing a canvas for painting! Take each carrot and slice them into matchsticks if you’re going traditional; however, pre-shredded works just as well if you’re short on time—it’s all about convenience here! Next up is the cucumber—wash it thoroughly under cold water before slicing either into rounds or spears depending on how you want them presented later when serving alongside meals. Lastly, prepare your radishes by trimming off the greens (save them if you’re feeling waste-conscious—they make great additions to salads). Now onto chopping half an onion; remember how important it is not just for flavor but also texture!
Step 2: Create Your Brine
In your mixing bowl, combine one cup each of vinegar and water along with sea salt and sugar—you’ll see those granules dissolve quickly as they mingle together like old friends catching up after years apart! Add minced garlic next; I love crushing mine first; it releases such intoxicating aromas throughout my kitchen while ensuring maximum flavor infusion later during pickling! Stir gently until everything blends seamlessly—we want this brine rich yet balanced because it’ll be wrapping around all those veggie bites shortly!
Step 3: Pack Those Jars
Now comes my favorite part—packing everything neatly into jars! Start by layering some radishes at the bottom since they’ll soak up all that delicious briny goodness first before adding carrots followed by cucumbers then finishing off with onion bits peeking through like little gems waiting patiently until they’re ready! Don’t rush this step because how tightly packed determines how well they’ll pickle—a gentle shake after sealing helps distribute any remaining brine evenly among layers too!
Step 4: Pour Your Brine
Once you’ve packed everything snugly into jars (and maybe taken some photos because seriously—they’re so pretty!), it’s time for pouring that lovely brine over top until everything’s submerged completely beneath its tangy embrace—this is where magic truly happens folks! Seal tightly with lids before giving each jar another gentle shake—it helps disperse any remaining air pockets trapped near those gorgeous veggies we’ve just prepared together—and voilà!
Now we’ll let these beauties chill in the fridge overnight at minimum before tasting but trust me—you’ll want them around longer than necessary once you experience their transformative power firsthand!
Stay tuned as I guide you through more steps towards enjoying these delightful Fridge Pickled Radish & Veggies: Crunchy & Flavorful Delight soon enough!
Step 5: Prepare the Brine – The Heart of Your Pickles
Now that your veggies are prepped, it’s time to create the magical brine that will transform them into the irresistible, Fridge Pickled Radish & Veggies: Crunchy & Flavorful Delight. Begin by pouring 1 cup of vinegar into a medium saucepan—this acidic base is absolutely crucial as it not only preserves the vegetables but also infuses them with a tangy flavor profile that contrasts beautifully with their natural sweetness. Next, add in 1 cup of water; this step is all about balance. The water dilutes the vinegar, ensuring that your pickles aren’t overwhelmingly sour but still possess enough zing to keep your taste buds dancing.
As you turn on the heat, add in your 1 tablespoon of sea salt and 1 tablespoon of sugar. Trust me on this one—these ingredients work together like magic! The salt enhances the natural flavors of the vegetables while acting as a preservative, preventing unwanted bacteria from spoiling your creation. Meanwhile, the sugar counteracts the acidity, creating harmony within each jar. Stir gently as you bring the mixture to a gentle simmer over medium heat; you’ll know it’s ready when you see steam rising and small bubbles forming along the edges. Allow this delightful concoction to simmer for about 3-4 minutes until both the salt and sugar dissolve completely; this process is vital for achieving a well-rounded brine that coats every piece of veggie perfection.
Step 6: Infuse with Aromatics – Unlocking Layers of Flavor
Once your brine has reached its ideal state, it’s time to elevate its flavor profile by introducing aromatic ingredients. Add in those luscious minced garlic cloves—oh, how they’ll perfume your kitchen with an utterly intoxicating aroma! Garlic not only adds depth but also contributes its own health benefits, making each bite not just delicious but also nourishing. If you’re feeling adventurous or want an extra kick, consider adding some crushed red pepper flakes or even a hint of ginger to introduce a unique twist—the possibilities are endless!
Next, sprinkle in your teaspoon of oregano (or any herbs you decide to incorporate), letting them mingle with the hot brine for about another minute; this brief cooking time allows their essential oils to be released fully into the liquid gold you’re creating. As you stir gently, take a moment to absorb the fragrant steam rising from your pot—it’s like a warm hug for your senses! This step may seem simple, but believe me when I say it’s absolutely paramount for achieving that complex flavor profile we all crave in pickled veggies.
Step 7: Pack It All In – Layering for Visual Appeal
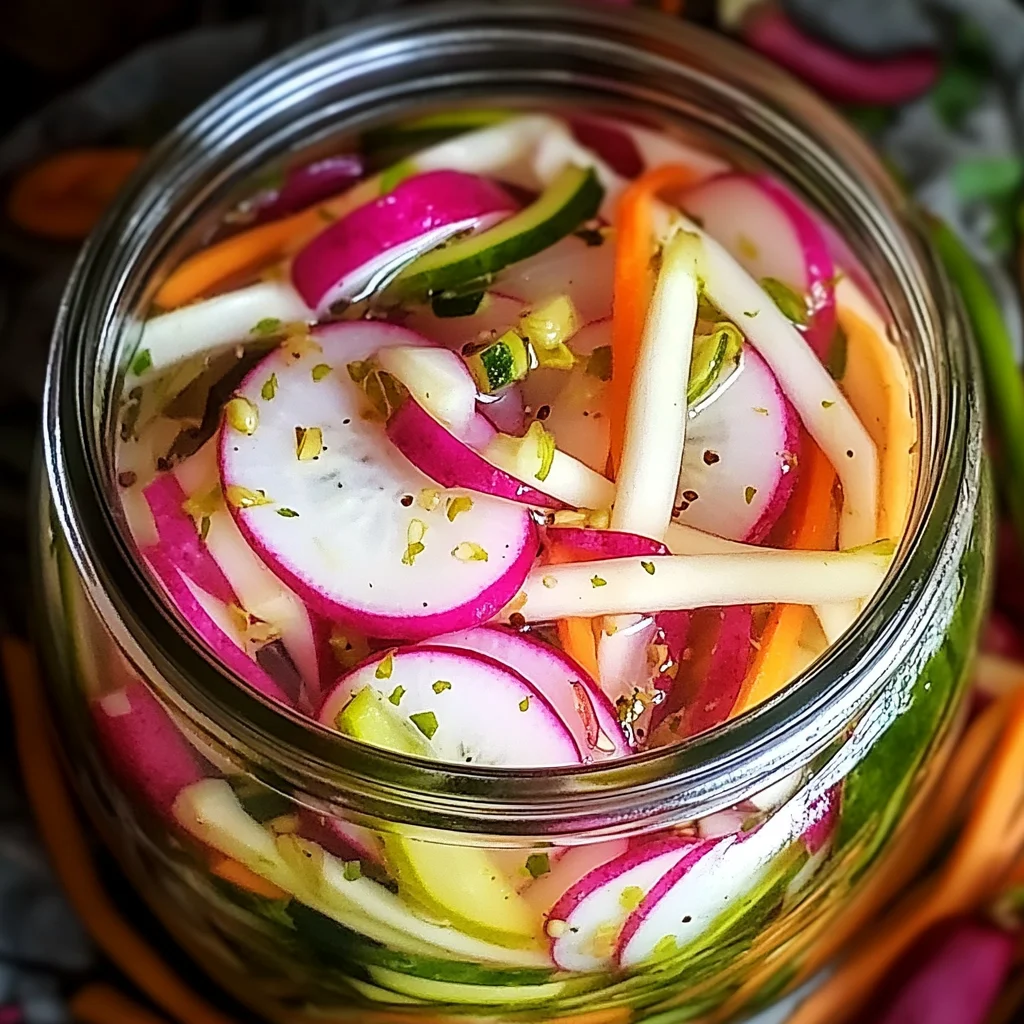
Now comes one of my favorite parts—packing your vibrant vegetables into jars! This is where you can truly express yourself and showcase your artistry in food preparation. Grab clean mason jars (four pint-sized jars work wonderfully) and begin layering in your colorful veggies: start with the radishes, then alternate between carrots, cucumber slices, and onion rings. As you layer them up, think about visual appeal; aim for a beautiful mix of colors so when you pop open these jars later on, they look like little treasures waiting to be discovered!
The goal here is to pack them tightly without squishing them too much; this ensures that every piece gets coated evenly in that lovely brine we’ve prepared. Don’t forget to leave some space at the top—about half an inch or so—this is essential because it allows for expansion as they marinate and soak up all those incredible flavors over time. And let me tell you—the anticipation builds as you watch those layers come together! It’s profoundly satisfying to know what awaits once they’ve had their time in the fridge.
Step 8: Pouring Over Brine – The Final Transformation
With your jars filled and looking stunningly colorful, it’s finally time to pour that warm brine over everything—this step is where all your hard work culminates into something extraordinary! Carefully ladle or pour the hot brine directly into each jar until they’re filled just below that half-inch mark we saved earlier. Feel free to give each jar a gentle tap on the counter after pouring; this helps release any air bubbles trapped among those beautiful veggies which could otherwise cause uneven pickling.
Once you’ve filled all jars with brine, seal them tightly using their lids while they’re still warm—this creates a slight vacuum effect which helps preserve freshness and flavor even more effectively during chilling. Now here comes perhaps one of the most important steps: allow these jars to cool down at room temperature before transferring them into the fridge. This resting period can take around 30 minutes or so but trust me—it’s worth every second because it allows those flavors to meld beautifully before they chill out together.
Conclusion:
As we wrap up this journey through crafting Fridge Pickled Radish & Veggies: Crunchy & Flavorful Delight, I hope you’re feeling as excited as I am! This recipe isn’t just about quick prep; it’s about creating something truly extraordinary that transforms ordinary meals into unforgettable experiences. The combination of crisp radishes, sweet carrots, and zesty cucumbers mingling together creates a symphony of flavors that dance on your palate with every bite. The vibrant colors alone are enough to bring joy to any table!
This recipe is a must-try not only for its delightful taste but also for the sheer joy of making it. It’s so simple yet incredibly rewarding—perfect for casual lunches or fancy dinners alike! Just imagine pulling open your fridge and discovering these colorful jars waiting for you; it’s like having a little party ready to enhance whatever dish you’re preparing. Whether you’re topping off tacos or adding zing to salads, these pickles will shine through every occasion.
When it comes to pairing suggestions, think beyond traditional uses! Imagine savoring one with grilled chicken or fish for an afternoon delight; picture yourself layering them onto sandwiches for an unexpected crunch that elevates each bite—truly divine! And if you’re enjoying a cozy night in with friends? They make an excellent snack alongside crackers and hummus or even served right beside your favorite cheeses.
Feeling adventurous? This recipe is wonderfully adaptable! You could try adding spices like chili flakes for heat or even experimenting with different vinegars—each tweak offers new dimensions of flavor waiting to be explored! And don’t forget about seasonal variations; toss in some fresh herbs or swap out veggies based on what’s available from local markets. I invite you to try this recipe today and share your experience with me; I’d love nothing more than hearing how it turned out in your kitchen!
Fridge Pickled Radish & Veggies: Crunchy & Flavorful Delight

Fridge Pickled Radish & Veggies: Crunchy & Flavorful Delight is your new go-to recipe for brightening up any meal! This easy pickling method transforms fresh vegetables into tangy, crunchy bites that add a burst of flavor to sandwiches, salads, or as a stand-alone snack. With vibrant colors and delightful textures, these quick pickles are perfect for meal prep or last-minute gatherings.
- Prep Time: 15 minutes
- Cook Time: 5 minutes
- Total Time: 20 minutes
- Yield: About 4 servings 1x
- Category: Snack
- Method: Pickling
- Cuisine: American
Ingredients
- 2 carrots (sliced)
- 1 cucumber (sliced)
- 1 bunch radishes (sliced)
- 1/2 onion (sliced)
- 1 cup vinegar
- 1 cup water
- 2 cloves garlic (minced)
- 1 tablespoon sea salt
- 1 teaspoon oregano
- 1 tablespoon sugar
Instructions
- Prepare your vegetables by slicing the carrots, cucumber, radishes, and onion.
- In a saucepan, combine vinegar, water, sea salt, and sugar. Heat until dissolved.
- Add minced garlic and oregano to the brine; let simmer for about 3 minutes.
- Layer the sliced vegetables in clean mason jars tightly but without squishing them.
- Pour the warm brine over the vegetables until fully submerged.
- Seal jars tightly and refrigerate for at least 24 hours before tasting.
Nutrition
- Serving Size: 100g
- Calories: 30
- Sugar: 5g
- Sodium: 420mg
- Fat: 0g
- Saturated Fat: 0g
- Unsaturated Fat: 0g
- Trans Fat: 0g
- Carbohydrates: 7g
- Fiber: 2g
- Protein: 1g
- Cholesterol: 0mg