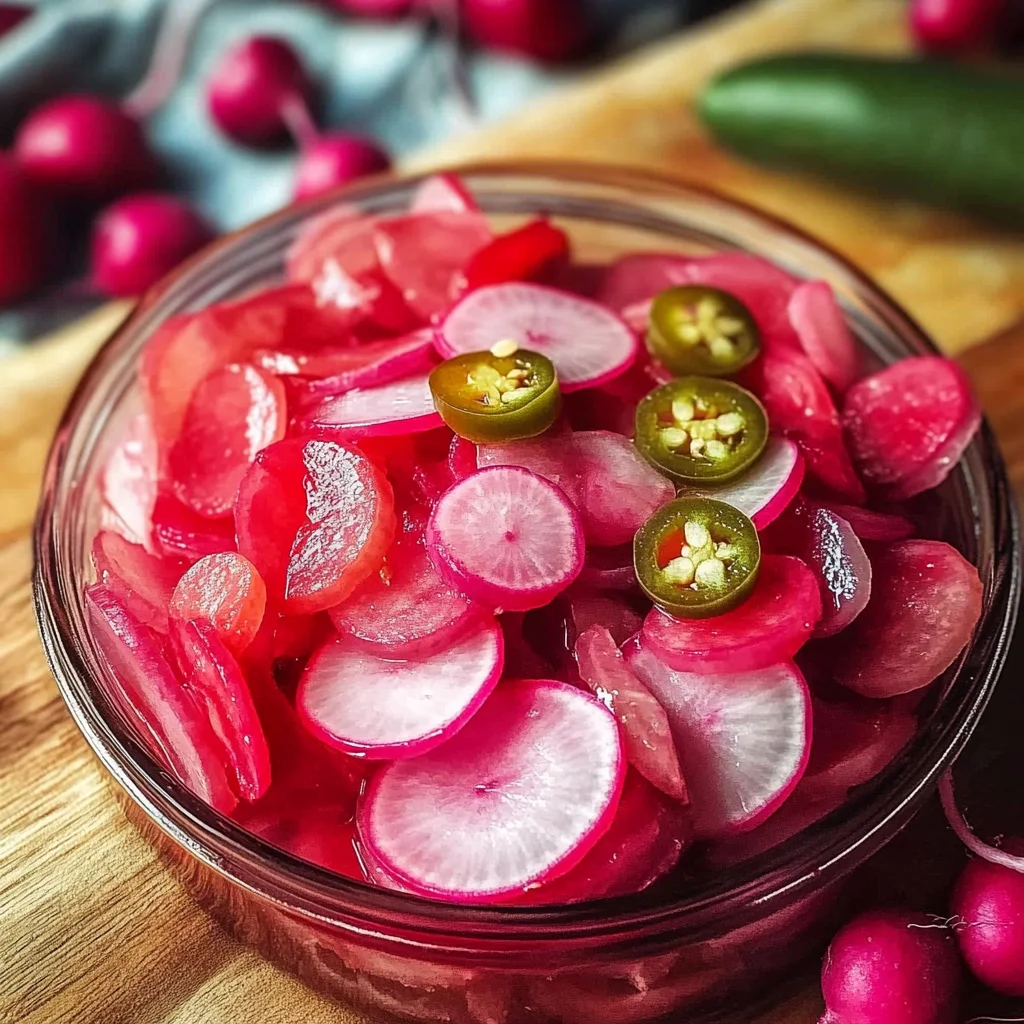
Easy Quick Pickled Radishes
There’s something truly magical about pickling—it’s not just a method of preservation, but a celebration of flavors that dance on your palate! When I first stumbled upon the idea of quick pickled radishes, it felt like discovering a hidden gem in my kitchen. These zesty little beauties transform from humble vegetables into something utterly extraordinary with just a few simple ingredients. As you slice through the crisp radishes and feel the vibrant colors against your fingers, you can almost taste the crunch and tanginess that awaits. This recipe for Easy Quick Pickled Radishes is more than just food; it’s an experience that bridges tradition with innovation, creating a burst of flavor that adds excitement to any meal. I promise you, once you try these radishes, you’ll find yourself wanting to sprinkle them on everything—from salads to sandwiches.
What makes this recipe so special is its simplicity combined with its versatility. Quick pickling is an art form that allows you to capture the essence of seasonal produce and enjoy it long after its peak freshness has passed. The delightful crunch of radishes, paired with the subtle heat from jalapeños and the sweet-tart balance provided by rice apple vinegar, creates a symphony of flavors that enhance any dish you serve them with. Whether you’re hosting a gathering or simply enjoying a quiet dinner at home, these radishes will elevate your culinary creations to new heights. Trust me when I say that they are perfect for brightening up meals or serving as a refreshing side dish!
Easy Quick Pickled Radishes: A Burst of Zesty Flavor
Let’s embark on this culinary journey together! Making Easy Quick Pickled Radishes is not only simple but also incredibly rewarding. You’ll soon marvel at how such basic ingredients can come together to create something so vibrant and delicious. This recipe serves 32 generous portions, making it ideal for sharing with friends or keeping in your fridge as an everyday accompaniment to meals. So grab your cutting board and let’s dive in!
Ingredients:
As we gather our ingredients for these delightful pickled radishes, let me assure you: each one plays a pivotal role in crafting those irresistible flavors we’re after.
- 1/2 jalapeño pepper (thinly sliced): The jalapeño adds just the right amount of heat without overwhelming the other flavors. When selecting your jalapeño, look for one that’s firm and glossy; this indicates freshness. If you’re sensitive to spice, feel free to remove the seeds before slicing—it’ll still provide flavor without too much kick!
- 6 cups radishes (sliced into rounds): These vibrant root vegetables are the stars of our recipe! Their natural crunch provides texture that contrasts beautifully with the tangy brine. When choosing radishes, opt for ones that are firm and unblemished; fresh radishes will have a crisp bite even after pickling. You can experiment with different varieties like purple or black radishes for visual flair!
- 2 cups red onion (thinly sliced): Red onions bring sweetness and color to our pickles while balancing the sharpness of the vinegar. Their stunning hue will make your finished product pop visually! Look for onions that feel heavy for their size; they should have smooth skin without any soft spots.
- 2 1/2 cups rice apple vinegar: This tangy elixir is what turns our vegetables into quick-pickles! Rice apple vinegar offers a gentle acidity with subtle sweetness—perfect for complementing our crunchy veggies. If you can’t find rice apple vinegar, you can substitute it with white wine vinegar or apple cider vinegar; however, be aware these options might alter the flavor profile slightly.
- 2 cups water: Water acts as a diluent in our brining solution, helping balance out the acid from the vinegar while allowing all those fabulous flavors to meld together harmoniously.
- 1/2 cup sugar: Sugar may seem like an unconventional addition but trust me—it’s absolutely paramount! It counteracts the acidity and enhances natural sweetness from the vegetables themselves. You can use granulated sugar here or switch things up with agave nectar or maple syrup if you’re looking for alternatives.
- 2 teaspoons sea salt: Salt is essential not just for flavor—it also aids in drawing out moisture from vegetables during pickling, which enhances their crispness and helps preserve them longer. Opt for high-quality sea salt; it dissolves easily and contributes better flavor than table salt.

Equipment You’ll Need:
Having the right tools at your disposal will make this entire process smoother and more enjoyable! While they’re not technically ingredients, these kitchen essentials are crucial partners in creating our delicious Easy Quick Pickled Radishes.
- Cutting board: A sturdy cutting board is non-negotiable when slicing up all those beautiful veggies! It provides you with a stable surface while protecting your countertops from nicks and scratches.
- Chef’s knife: A sharp chef’s knife ensures clean cuts when slicing both radishes and onions. A dull knife can crush rather than slice through produce—leading to uneven pieces which won’t pickle uniformly.
- Large mixing bowl: This will be your go-to vessel for combining all ingredients before transferring everything into jars later on. A large bowl allows ample space for tossing ingredients together without spilling over!
- Mason jars or airtight containers: These are essential for storing your quick-pickled radishes once they’re ready! Choose glass mason jars if possible—they’re non-reactive and help maintain freshness better than plastic.
Preparing the Easy Quick Pickled Radishes
Step 1: Slice Your Veggies
Begin by preparing your radishes and red onions—this step sets everything in motion! Take your sharp chef’s knife and start slicing those vibrant radishes into rounds about 1/4 inch thick; aim for consistency here as it ensures even pickling throughout each piece. As you cut through those bright pink disks, notice how their crispness gives way beneath your blade—the texture alone is enough to get excited about! Next up, take half of that jalapeño pepper; thinly slice it too (again aiming for uniformity). This process not only sets up beautiful layers within each jar but also guarantees every bite delivers a burst of flavor.
Step 2: Create Your Brine
Now onto one of my favorite parts—the brining solution! In your large mixing bowl, combine the rice apple vinegar with water along with sugar and sea salt before whisking thoroughly until everything dissolves completely—a well-mixed brine ensures every slice will soak up those flavors beautifully over time. As you stir away, take note of how aromatic this mixture becomes; it’s almost intoxicating! This step is crucial because if any granules remain undissolved when poured over veggies later on, they could lead to uneven seasoning throughout your final product.
Step 3: Combine Everything
Once you’ve perfected that brine mixture—let’s toss those sliced veggies right in! Add in both radish rounds along with red onion slices as well as jalapeño pieces into your mixing bowl filled with brine goodness before gently folding everything together using tongs or even clean hands if you’re feeling adventurous (just be careful!). The goal here is ensuring each piece gets coated evenly—trust me on this—it makes all difference when biting into each crunchy morsel later on!
Step 4: Jar Them Up
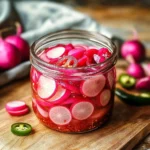
Now comes my favorite part—transferring everything into jars! Grab those mason jars you’ve prepared earlier (if they’ve been previously used make sure they’ve been cleaned thoroughly) before filling them generously—aiming for at least three-quarters full while leaving some space at top so flavors can mingle freely within jar itself once sealed tight later on too! Once filled adequately pour remaining brine over top until submerged completely—this step ensures no veggie goes unseasoned during soaking period ahead which lasts anywhere between four hours minimum overnight maximum depending how strong you’d like initial taste profile be achieved (though honestly waiting overnight yields best results!).
With each layer carefully packed away within these charming little vessels—we’re getting closer towards indulging ourselves soon enough…how exciting is that?!
Stay tuned as we continue exploring more steps together until we’ve crafted our perfect batch of Easy Quick Pickled Radishes ready share joyfully around table (or sneakily snack upon alone!).
Crafting Your Easy Quick Pickled Radishes: A Journey Begins
Step 5: Mix Your Zesty Brine
Now that your vegetables are prepped and awaiting their transformation, it’s time to create the heart of this recipe—the brine. In a large mixing bowl, combine the 2 1/2 cups of rice apple vinegar, 2 cups of water, 1/2 cup of sugar, and 2 teaspoons of sea salt. As you stir the mixture, you’ll notice how the sugar and salt dance together, dissolving into the tangy vinegar like magic. This step is absolutely paramount because it’s the brine that will infuse your radishes with that exquisite zesty flavor we’re aiming for. Remember, the balance between sweet and sour here is what makes these pickles so utterly intoxicating!
As you whisk everything together, take a moment to appreciate the aroma wafting up—it’s sharp yet refreshing, hinting at the delightful crunch that awaits. You want to ensure all the sugar and salt dissolve completely; otherwise, you might end up with some overly salty bites or pockets of sugar lurking in your jar. Trust me on this one; a smooth brine is non-negotiable for achieving that harmonious flavor profile we desire.
Step 6: Layering Flavors
With your brine ready, it’s time to layer those beautifully sliced radishes and onions into a clean glass jar or multiple jars if you prefer. Start by adding a layer of sliced radishes followed by a generous handful of red onion slices, then sprinkle in some of your thinly sliced jalapeño for an extra kick! Repeat this process until all your vegetables are snugly packed into the jar. This layering technique not only looks gorgeous but also ensures that every bite will be bursting with flavor thanks to a well-distributed brine soaking through every piece.
As you do this, take note of how vibrant and colorful your ingredients are—it’s like nature’s confetti! The visual appeal is part of why I love cooking; we eat with our eyes first! After you’ve layered everything beautifully, slowly pour your brine over the top until all the veggies are submerged. If any bits are floating above the liquid line, give them a gentle push down; they need to be fully immersed for proper pickling.
Step 7: Seal and Shake
Now comes one of my favorite parts—sealing the deal! Once you’ve poured in all that luscious brine, it’s time to cap your jar tightly with a lid. This step may seem simple, but it’s crucial for creating an airtight environment where flavors can meld beautifully during the pickling process. After sealing, give your jar a gentle shake; it’s like giving those veggies a little dance party! This helps distribute the brine evenly throughout.
What you’ll notice as you shake is how quickly everything combines—the colors become even more vibrant as they soak up that tangy goodness. Don’t rush through this; allowing those flavors to mingle creates something truly extraordinary. At this point, I encourage you to set aside any impatience—you’ll want these beauties to pickle properly before diving in.
Step 8: Chill Out
Here comes an essential part of our journey—patience! Place your jar(s) in the refrigerator where they should chill out for at least one hour before tasting them. Yes, just one hour can make a world of difference! During this resting period, osmosis takes place; your radishes will begin releasing their moisture while absorbing that zesty brine around them. It’s truly fascinating how science plays such an integral role in cooking!
Why chill? Well, cool temperatures allow flavors to develop more richly without cooking or altering their texture too drastically. You want those radishes to retain their satisfying crunch while allowing them to soak up all those fabulous flavors from the brine—this transformation is absolutely worth waiting for! If you can resist (and I know it’s tough!), letting them sit overnight will yield even better results as they continue to deepen in flavor.
Conclusion:
As we wrap up our journey through this recipe for Easy Quick Pickled Radishes, I can’t help but feel a wave of excitement bubbling within me! It has been such a joy sharing not just the method but my passion for creating something so vibrantly satisfying. This recipe embodies everything I love about cooking: simplicity melded with bold flavors and textures that make every bite an absolute celebration. The combination of crisp radishes with sweet-tart vinegar creates an extraordinary balance that’s not only pleasing to the palate but also adds an element of brightness to any meal.
You absolutely must try making these pickles because they offer both unparalleled taste and delightful versatility! Imagine crafting beautiful summer salads adorned with these crunchy jewels or layering them onto sandwiches that need just a hint of zing—they elevate every dish effortlessly. Plus, there’s something profoundly rewarding about preparing food that bursts with flavor while being so accessible. You can whip these up in just 15 minutes; it’s almost magical how quickly they come together while still delivering such a powerful punch!
For serving suggestions, think beyond traditional pairings; imagine savoring one alongside grilled vegetables on a warm evening or enjoying them as part of a picnic spread nestled among crunchy breads and fresh cheeses. Picture pulling out a jar during taco night—each slice adding that perfect pop of color and texture against savory fillings or draping them atop creamy avocado toast for brunch with friends.
Feeling adventurous? This recipe is wonderfully adaptable! If you’d like to experiment further, consider infusing your brine with garlic or fresh herbs like dill or cilantro—each twist brings new life and character to this tried-and-true favorite! You could even swap out some radishes with cucumbers for a refreshing change—why not make it your own? I wholeheartedly invite you to dive into this culinary adventure, share your experiences with loved ones, and let the joy of cooking unite us all in delicious harmony!
Easy Quick Pickled Radishes
Easy Quick Pickled Radishes are a vibrant and zesty addition to any meal, transforming humble radishes into a crunchy delight that’s bursting with flavor. This simple pickling process captures the essence of fresh produce and allows you to enjoy the tangy taste long after their peak season. With just a few key ingredients, you’ll create a colorful condiment perfect for salads, sandwiches, or as a stand-alone snack. The subtle heat from jalapeños and the sweet-tart balance provided by rice apple vinegar enhance the natural crispness of radishes, making every bite an experience worth savoring. Whether you’re entertaining guests or simply preparing for your week ahead, these pickled radishes are sure to impress!
- Prep Time: 15 minutes
- Cook Time: None
- Total Time: 0 hours
- Yield: Approximately 32 servings 1x
- Category: Salad
- Method: Refrigerating
- Cuisine: American
Ingredients
- 6 cups radishes (sliced into rounds)
- 2 cups red onion (thinly sliced)
- 1/2 jalapeño pepper (thinly sliced)
- 2 1/2 cups rice apple vinegar
- 2 cups water
- 1/2 cup sugar
- 2 teaspoons sea salt
Instructions
- Slice radishes and red onions into thin rounds.
- In a large mixing bowl, whisk together rice apple vinegar, water, sugar, and sea salt until dissolved.
- Add sliced vegetables to the brine mixture and gently toss to coat.
- Transfer the mixture into clean mason jars, ensuring vegetables are submerged in brine.
- Seal jars tightly and refrigerate for at least one hour before enjoying.
Nutrition
- Serving Size: 1/4 cup (60g)
- Calories: 28
- Sugar: 6g
- Sodium: 275mg
- Fat: 0g
- Saturated Fat: 0g
- Unsaturated Fat: 0g
- Trans Fat: 0g
- Carbohydrates: 7g
- Fiber: 1g
- Protein: <1g
- Cholesterol: 0mg