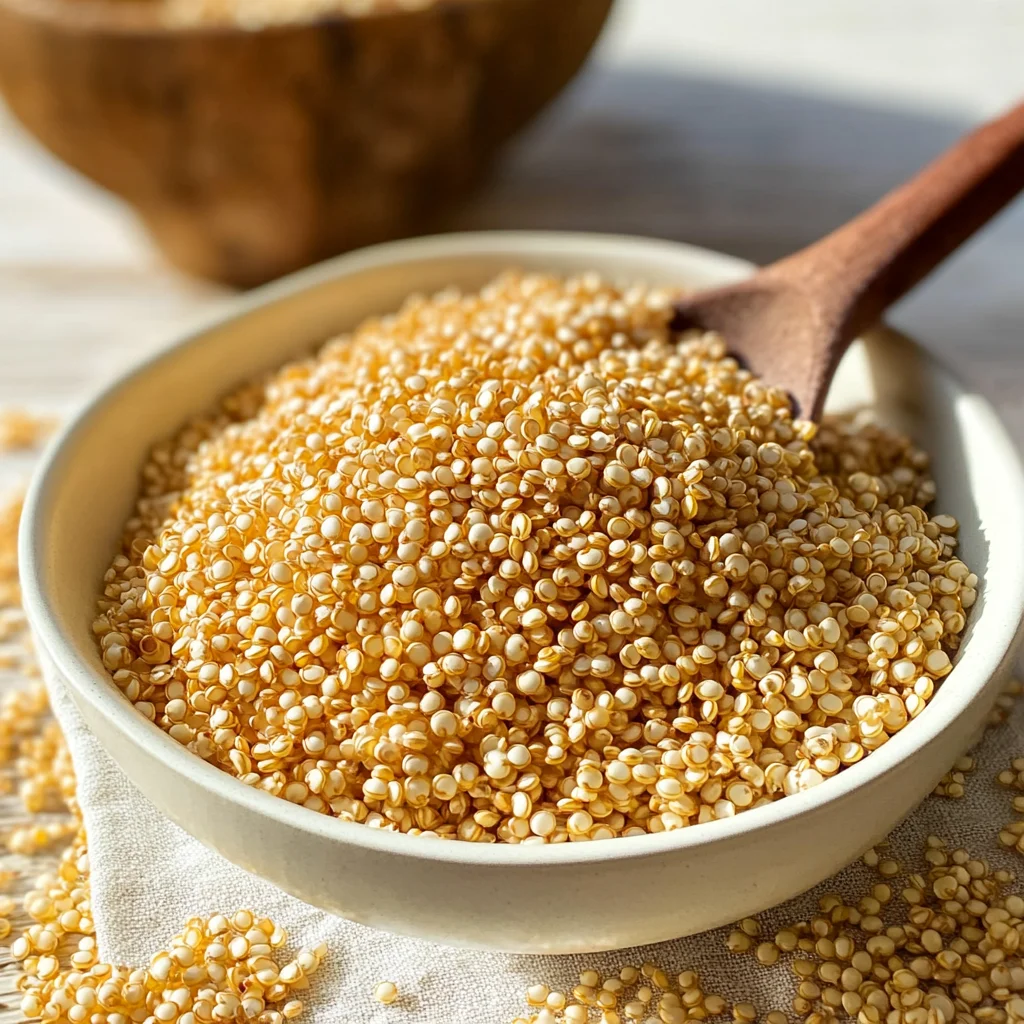
Popped Quinoa
There’s something truly magical about the way food can connect us, isn’t there? It’s not just about nourishing our bodies; it’s about feeding our souls and creating memories that linger long after the last bite. Today, I want to share with you a little gem of a recipe that embodies this spirit: Popped Quinoa. Picture this: tiny grains of quinoa dancing joyfully in a hot skillet, transforming into delightful nuggets that add a nutty crunch to your favorite dishes. This is more than just a recipe; it’s an experience—a bridge between wholesome ingredients and culinary creativity. The first time I made popped quinoa, I was captivated by its transformation. The scent wafting through my kitchen was utterly intoxicating, and I found myself eagerly anticipating how this new texture would elevate everything from my morning yogurt to afternoon salads.
I promise you, once you learn how to make popped quinoa, it will become a staple in your kitchen repertoire. Not only is it incredibly simple—taking mere moments to prepare—but it also invites endless possibilities for experimentation. Whether you’re sprinkling these golden morsels over fresh fruit or mixing them into homemade granola for an extra crunch, the versatility of popped quinoa is truly extraordinary. And let’s not forget about its nutritional benefits! Packed with protein and fiber, this delightful snack is naturally gluten-free and dairy-free, making it a perfect addition for anyone looking to embrace healthier eating habits without compromising on flavor or satisfaction.
Popped Quinoa: A Crunchy Delight Awaits
Let’s dive right into the joy of making popped quinoa together! It’s such a straightforward process that opens up a world of textures and flavors in your cooking. Trust me; when you taste that lovely crunch against creamy yogurt or crisp greens, you’ll understand why I adore this recipe so much. So grab your skillet and let’s get started!
Ingredients:
As we embark on this culinary journey together to create popped quinoa, let’s take a moment to appreciate each ingredient’s role in this transformation.
- ⅓ cup quinoa: This humble grain is the star of our show! Quinoa is often celebrated for its impressive nutritional profile—it’s packed with protein, fiber, and an array of vitamins and minerals. When selecting quinoa, look for whole grains that are free from any discoloration or debris. Rinsing it thoroughly before popping helps remove any bitter saponins from the surface, ensuring that what you’re left with is pure deliciousness. Plus, quinoa’s unique ability to puff up when heated makes it ideal for creating that delightful crunch we’re after in this recipe.
- 1 teaspoon canola oil (optional): While using oil isn’t strictly necessary for popping quinoa, it can help create an even crisper texture while preventing sticking. Canola oil has a neutral flavor that won’t overpower the nutty essence of the quinoa itself. If you’re looking for alternatives due to dietary preferences or availability, avocado oil or grapeseed oil work beautifully as well! Just remember that using oil may slightly change the final taste but will enhance the overall mouthfeel.
Equipment You’ll Need:
Having the right tools at your disposal makes cooking smoother and more enjoyable—almost like having reliable friends by your side in the kitchen! Here are some essentials you’ll need:
- Large stainless steel skillet: A heavy-bottomed skillet is crucial here because it retains heat well and distributes it evenly. Stainless steel also allows for excellent browning without any unwanted reactions—unlike non-stick pans which may not get hot enough for popping effectively.
- Spatula: This trusty tool will help you stir if you’ve opted to use oil in your popping process. It’s perfect for gently moving around those tiny grains without crushing them—after all, we want each piece of quinoa to pop beautifully!
Now that we’ve gathered our ingredients and tools, let’s move on to preparing our delightful popped quinoa!
Step 1: Preheat Your Skillet
The first step in our popping adventure involves heating up your skillet! Set your large stainless steel skillet over medium heat and allow it to warm up thoroughly—the pan needs to be sizzling hot before adding any quinoa. Why is this so important? Well, achieving the right temperature ensures that the quinoa pops quickly rather than just drying out or burning. You should hear a gentle sizzle as you drop in a few grains; if not, give it another minute or two. Patience here pays off—don’t rush this step!
Step 2: Add Optional Oil
If you’ve decided to include canola oil for added crispiness (which I highly recommend), now’s the time to pour in just one teaspoon. Swirl it around in the pan to coat evenly; this helps prevent sticking while allowing those little seeds some room to dance around as they heat up. If you’re going sans oil today (which is perfectly fine too!), simply skip this step and go straight into adding your beloved quinoa!
Step 3: Pour In The Quinoa
With your skillet ready and possibly greased up with oil, it’s time for the magic moment! Pour ⅓ cup of rinsed quinoa into your hot skillet and gently shake it so that it’s spread out into an even layer across the bottom of the pan. It might seem like such a small amount at first glance but trust me; as soon as that heat hits those tiny seeds—they’re going to expand! Keep an eye on them; they should start popping almost immediately.
Step 4: Shake It Up!
This part is where things get really exciting! As soon as you hear those delightful pops (and believe me—you will!), gently shake the pan every few seconds so none of your precious grains burn on one side while others aren’t fully popped yet. If you’ve opted for oil instead of shaking, use your spatula here instead—stirring occasionally ensures all pieces get equal love from that heat source! Continue cooking until they turn golden brown and become fragrant—the aroma filling your kitchen will be nothing short of heavenly.
And there you have it! These initial steps set us up beautifully for creating perfectly popped quinoa that’ll make all your dishes sing with excitement! Let’s continue exploring how we can finish off this splendid process together…
The Art of Popped Quinoa: A Delicious Journey
Every time I make popped quinoa, I can’t help but feel a rush of excitement. It’s one of those culinary magic tricks where simple ingredients transform into something truly extraordinary. This little seed, often overlooked, becomes a crunchy delight that not only adds texture but also a nutty flavor which elevates whatever dish it graces. Imagine sprinkling these golden puffs atop your morning yogurt or incorporating them into a vibrant salad; the possibilities are endless! So, let’s dive deeper into this delightful recipe and explore how to achieve perfect popped quinoa together.
Step 5: The Sizzling Start – Heating the Skillet
Now that you have your quinoa ready, let’s focus on heating that skillet. You’ll want to grab a large stainless steel skillet because it retains heat beautifully, ensuring even cooking. Place it over medium heat and give it a few moments to warm up; this is an essential step—not just a formality! The skillet needs to be sizzling hot before adding the quinoa; otherwise, the seeds will just sit there and sulk instead of popping like they should. If you’re using canola oil, drizzle in about a teaspoon once the pan is hot enough. The oil not only helps prevent sticking but also enhances that lovely crunch we’re after by creating the perfect environment for popping.
As you wait patiently for the skillet to reach that optimal temperature, take a moment to appreciate the intricate little grains of quinoa—tiny powerhouses packed with protein and nutrients! You should hear a gentle sizzle as you add the oil if you’re using it. This sound is music to any cook’s ears; it means you’re on the right track! Trust me on this: if you rush this step and add quinoa too soon, it may clump rather than pop, which would be such a missed opportunity.
Step 6: The Pop-ulation Begins – Adding Quinoa
Once your skillet is sizzling and ready, it’s time to introduce your quinoa to its new home. Carefully pour ⅓ cup of rinsed quinoa into the center of the hot skillet and gently shake the pan so that the seeds spread out in an even layer. This step is crucial because crowding them can lead to uneven cooking—some might get burned while others remain unpopped. By creating an even layer, you ensure that each grain has its moment in the spotlight.
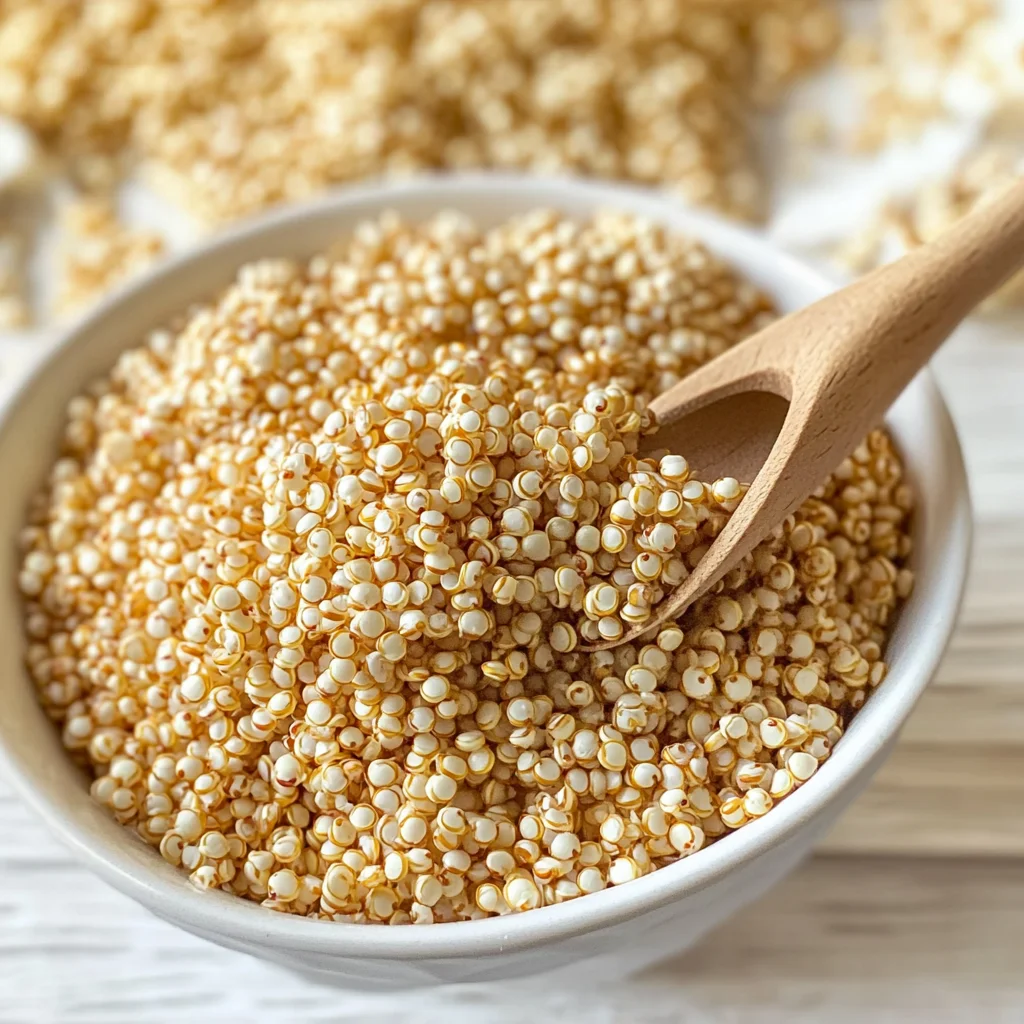
Now comes the fun part: listen closely as you hear those wonderful pops begin almost immediately! It’s like nature’s own popcorn show right in your kitchen! Gently shake or stir every few seconds—this keeps them from burning and allows all sides to get that beautiful golden brown color we desire. If you’ve opted for oil, use your spatula for stirring instead of shaking; it helps keep everything moving smoothly without sticking too much. Keep an eye on them—they’ll go from clear to opaque as they puff up. This transformation is not just visual; it’s also deeply aromatic!
Step 7: Perfecting the Puff – Cooking Time
As you continue shaking or stirring your quinoa, watch closely as they start to turn golden brown and emit an utterly intoxicating aroma that fills your kitchen with warmth and anticipation. This process usually takes about 3-5 minutes, depending on how hot your skillet is—don’t rush this step! Each little seed needs time to transform fully; otherwise, you’ll end up with chewy bits instead of crunchy delights. Remember, patience is key here!
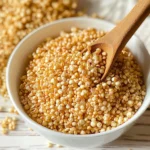
The moment you’re greeted with that enticing nutty scent and see those lovely golden hues breaking through, it’s time to take action! Remove your skillet from heat immediately and transfer your popped quinoa onto a plate or bowl to cool down. Letting them cool on a plate prevents further cooking from residual heat in the pan—this cooling stage is vital for achieving that delightful crunch we all love so much.
Step 8: Cooling Off – The Final Touch
Now comes another important phase: cooling off our freshly popped quinoa. Allowing them to cool for at least 5 minutes may seem trivial, but this step allows them to set their structure properly after popping! As they cool down, they’ll firm up and become irresistibly crisp—a texture contrast that’s simply divine when added to other dishes.
During this cooling period, resist every temptation to nibble too much (though I know it’s hard!). Instead, take this time to envision how you’ll use these beautiful puffs in your meals ahead—whether mixed into salads for added texture or sprinkled over breakfast bowls like shimmering jewels of flavor! The transformation from mere seeds into delightful crunchies is nothing short of magical and deserves a moment of appreciation.
Embrace Your Popped Quinoa Adventure
With our popped quinoa ready and waiting for its debut in various dishes, let me tell you how wonderfully versatile it can be. Whether you’re tossing some into homemade granola for breakfast or sprinkling it over roasted vegetables for dinner—it truly shines everywhere! The nutty flavor combined with its satisfying crunch creates what I like to call food joy. So go ahead—embrace this adventure in popped quinoa-making!
Now that you’ve mastered how to make puffed quinoa, don’t hesitate to experiment with seasoning or mixing it into different recipes as well! Enjoy every crunchy bite knowing you’ve created something nutritious and utterly delicious from scratch. I promise you’ll fall deeper in love with cooking every time you pop those little seeds!
Storage and Enjoyment Tips for Your Popped Quinoa
Now that your popped quinoa is beautifully golden and bursting with flavor, it’s time to dive into the joyful world of enjoying this delightful snack! I can already envision how this nutty crunch will elevate your meals, from sprinkled atop creamy yogurt to adding an irresistible texture to vibrant salads. But what if you find yourself with some leftovers? Don’t worry! I’m here to share how you can preserve that lovely popped quinoa so you can keep enjoying it long after the cooking is done.
Storing Leftover Popped Quinoa
To keep your popped quinoa fresh and delicious, it’s essential to store it properly. Place your cooled popped quinoa in an airtight container—glass jars work wonders for this purpose, as they not only seal in freshness but also let you see that tempting golden goodness inside! Keep this container in a cool, dry place like your pantry or kitchen cupboard, where it will be safe from humidity and light. When stored correctly, your popped quinoa should stay crunchy for about one week. Pro tip: if you want to maintain its delightful crispness even longer, consider adding a small slice of bread into the container; this little trick helps absorb moisture while keeping your quinoa perfectly airy. Trust me, there’s nothing quite like the sound of that satisfying crunch when you finally reach for a handful after a few days! If you ever find yourself unsure about how it tastes after storage, just take a whiff; if that nutty aroma hits you right—the quinoa is good to go! You can enjoy it straight from the container or sprinkle it over your favorite dishes for an added crunch.
Freezing Popped Quinoa for Later
If you’ve made more than you can indulge in within a week (which is a fabulous problem to have!), freezing your popped quinoa is another fantastic option. To do this properly, spread the cooled popped quinoa evenly on a baking sheet lined with parchment paper and place it in the freezer until frozen solid—this prevents clumping and ensures each piece stays separate. Once frozen, transfer the quinoa to a freezer-safe bag or container, squeezing out as much air as possible before sealing it tight. When stored this way, your popped quinoa can last up to three months in the freezer! When you’re ready to use some from frozen, simply pull out what you need and let it sit at room temperature for about 15 minutes; no reheating necessary! This convenience factor means you’ll always have a delightful topping on hand whenever inspiration strikes for salads or snack time. Imagine pulling out a bag of these crispy morsels on a busy weekday—what a treat!
Popped Quinoa
Popped quinoa is a delightful and nutritious snack that adds a unique crunch to your meals. This quick and easy recipe transforms humble quinoa into crispy nuggets, perfect for sprinkling over salads, yogurt, or incorporating into homemade granola. Once you master the art of popping quinoa, you’ll discover endless possibilities to elevate your dishes with its nutty flavor and satisfying texture. Plus, it’s a gluten-free option that’s packed with protein and fiber, making it an excellent addition to any healthy eating plan. Get ready to enjoy the magic of popped quinoa!
- Prep Time: 5 minutes
- Cook Time: 5 minutes
- Total Time: 10 minutes
- Yield: Approximately 2 servings 1x
- Category: Snack
- Method: Cooking
- Cuisine: Global
Ingredients
- ⅓ cup quinoa
- 1 teaspoon canola oil (optional)
Instructions
- Preheat a large stainless steel skillet over medium heat until sizzling.
- If using oil, add 1 teaspoon of canola oil to the skillet and swirl to coat.
- Pour in ⅓ cup of rinsed quinoa, spreading it into an even layer.
- Shake the skillet gently every few seconds as the quinoa begins to pop.
- Continue cooking until the quinoa turns golden brown and fragrant (about 3-5 minutes).
- Remove from heat and transfer popped quinoa to a bowl or plate to cool.
Nutrition
- Serving Size: 1/3 cup (45g)
- Calories: 164
- Sugar: 0g
- Sodium: 0mg
- Fat: 1g
- Saturated Fat: 0g
- Unsaturated Fat: 1g
- Trans Fat: 0g
- Carbohydrates: 30g
- Fiber: 4g
- Protein: 6g
- Cholesterol: 0mg