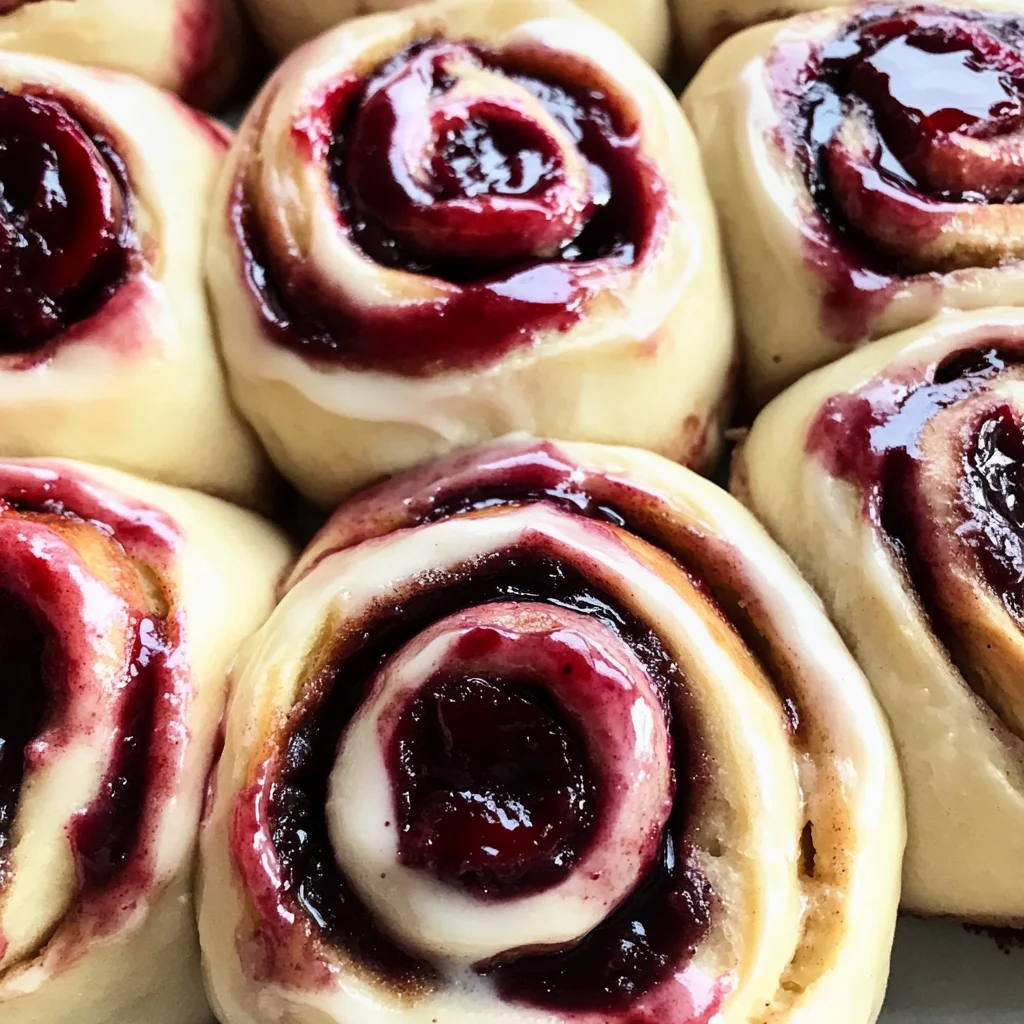
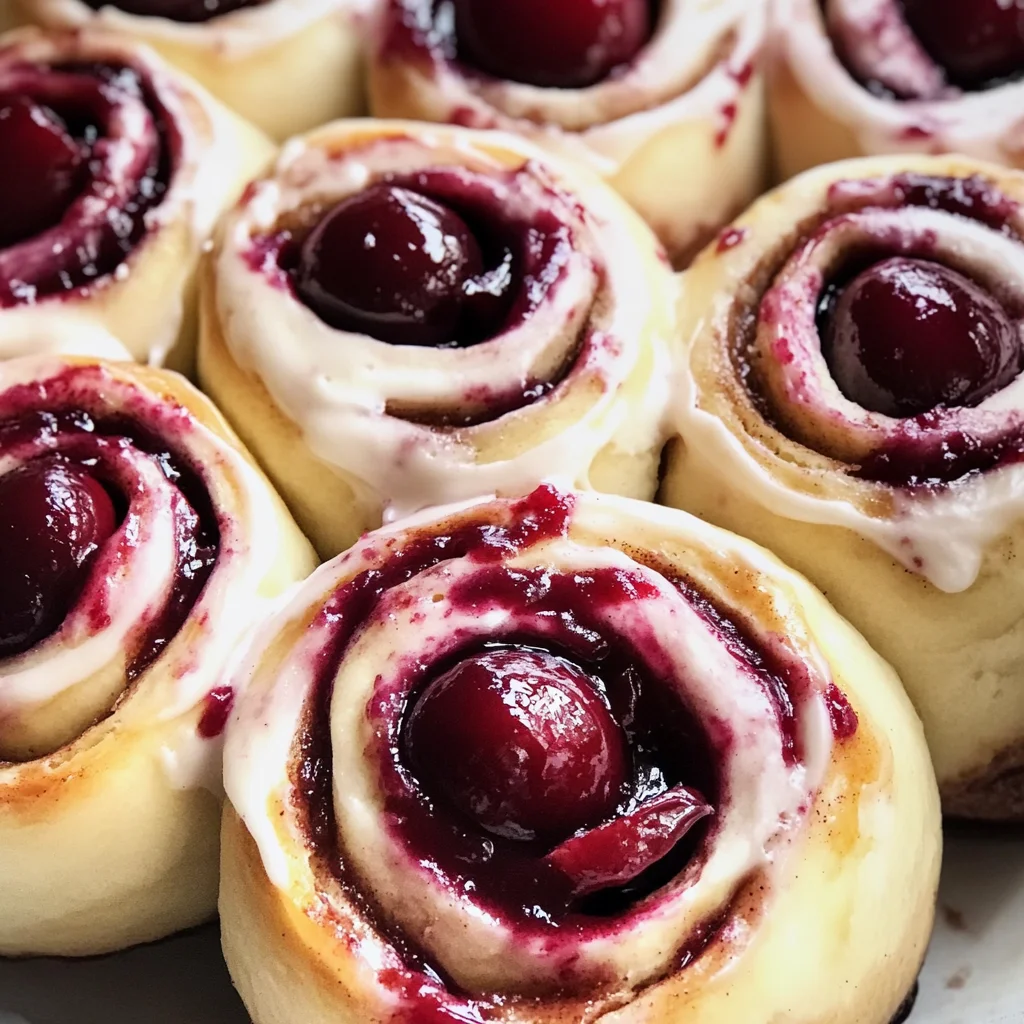
Cherry Cinnamon Rolls with Homemade Filling
There’s something profoundly satisfying about pulling a warm batch of cherry cinnamon rolls from the oven, their delightful aroma wafting through the house like an inviting hug. As the sweet and tart scent of cherries mingles with the warm, buttery fragrance of freshly baked dough, it transports you to those cherished moments spent in the kitchen with loved ones. These Cherry Cinnamon Rolls with Homemade Filling are more than just a recipe; they represent a beautiful fusion of nostalgia and innovation, where the classic goodness of cherry pie meets the fluffy elegance of cinnamon rolls. I promise you, every bite is a symphony of flavors that will make your taste buds dance with joy.
Imagine sinking your teeth into the soft, pillowy dough that envelops a luscious filling bursting with juicy cherries. The combination is utterly intoxicating—a perfect balance between sweet and tart, reminiscent of summer days spent picking ripe cherries under blue skies. And let’s not forget about the creamy frosting that drapes over each roll like liquid gold, adding that final touch of decadence. Whether you’re serving these at brunch, indulging in them for dessert, or simply treating yourself on a cozy Sunday morning, these rolls have a way of turning any ordinary day into an extraordinary occasion.
Cherry Cinnamon Rolls with Homemade Filling: A Sweet Embrace of Flavor
This recipe is close to my heart, representing countless moments spent baking and sharing sweet treats with my friends and family. The beauty lies not only in how delightful they taste but also in the process—each step is an invitation to connect with your ingredients and enjoy every moment in the kitchen. So roll up your sleeves and let’s embark on this delicious journey together!
Ingredients:
As we gather our ingredients for these Cherry Cinnamon Rolls with Homemade Filling, let’s take a moment to appreciate each one for its unique contribution. Baking is truly a magical experience where simple ingredients transform into something spectacular!
- 3 1/2 cups frozen cherries (454g): Frozen cherries are our star ingredient here! They’re picked at peak ripeness and flash-frozen to lock in their natural sweetness and tartness. This makes them perfect for our filling—juicy and vibrant without needing any extra prep work. If you can find fresh cherries when they’re in season, feel free to use those instead! Just make sure they’re pitted and chopped before incorporating them into your filling.
- 1/3 cup granulated sugar (67g): Sugar does more than just sweeten; it plays several vital roles in our dough and filling. In addition to balancing out the tartness of our cherries, it helps activate yeast during fermentation, creating that fluffy texture we desire. When choosing sugar, opt for finely granulated as it dissolves better in batter—this ensures even sweetness throughout.
- 1/4 cup cold water (60g): Cold water might seem trivial but trust me—it’s crucial for thickening our cherry filling! By mixing it with cornstarch before adding it to the cherries, we create a luscious sauce rather than a watery mess. This is an important step because it allows us to achieve that perfect consistency without compromising flavor.
- 2 tablespoons corn starch (20g): Cornstarch acts as a thickening agent here—transforming our cherry mixture from juicy fruit into a cohesive filling that holds its shape within those glorious rolls. It’s essential that we mix this with our cold water beforehand; otherwise, it may clump together when heated!
- 1/4 cup warm water (60g): Warm water is another key player in activating our yeast! Yeast thrives best when it’s cozy—too hot will kill it while too cold won’t wake it up at all. The right temperature encourages our dough to rise beautifully so we can enjoy those light-as-a-cloud rolls.
- 1 teaspoon active dry yeast (6g): Yeast is what gives our dough its lift! When combined with warm water and sugar, it begins feeding on those sugars and producing carbon dioxide gas—creating bubbles that make our dough rise. Always check expiration dates on yeast packets; stale yeast won’t do much good for your baking adventure!
- 3/4 cup whole milk (180g): Whole milk adds richness and moisture to both our dough and frosting. It contributes to an incredibly tender crumb while also helping dissolve sugar more effectively during mixing. For best results, bring your milk to room temperature before using; this will help create an even texture throughout.
- 1/3 cup granulated sugar (67g): Here we have more sugar making its appearance! This time we’re using it to sweeten our dough further—balancing out flavors while also providing additional fuel for yeast activation during rising time.
- 2 large eggs: Eggs serve multiple purposes—they provide structure, moisture, flavor, and richness to our dough which ultimately enhances everything about these rolls! Make sure your eggs are at room temperature so they blend seamlessly into your mixture—this leads to better texture overall!
- 4 1/2 cups bread flour (540g): Bread flour has higher protein content compared to all-purpose flour which creates gluten structure needed for chewy yet tender rolls! While you could substitute all-purpose flour if necessary, achieving that ideal pull-and-chew texture becomes trickier without using bread flour.
- 1/2 teaspoon salt (3g): Salt isn’t just there for flavor; it strengthens gluten strands within our dough while controlling yeast activity—which is pivotal since too much yeast can lead us down the path toward dense rolls instead of light ones!
- 6 tablespoons unsalted butter, room temperature: Butter brings flavor AND tenderness into play! Using unsalted butter allows us better control over saltiness level across recipes as well since different brands vary widely in sodium levels.
- 4 tablespoons unsalted butter (57g), room temperature: This additional portion enriches both frosting later on AND contributes extra creaminess within each bite—think of how heavenly melted butter tastes paired alongside sweet fillings—it elevates every element involved!
- 3 oz cream cheese (85g), room temperature: Cream cheese adds tangy richness which pairs beautifully against sweetness found throughout other components here—all while lending body & smoothness necessary when whipping up lovely frosting later down line!
- 2 cups powdered sugar (260g): Powdered sugar forms the base layer behind creamy frosting we’re after—it dissolves effortlessly resulting in silky-smooth texture desired overall plus provides necessary sweetness required without overpowering other flavors found within recipe itself.
- 2 teaspoons vanilla extract: Vanilla extract introduces aromatic warmth enhancing overall experience tremendously—it’s non-negotiable if seeking depth across flavors harmoniously uniting everything together from start finish!
- 1–3 tablespoons whole milk (20–60g): The amount varies based on desired consistency—using this milk helps soften frosting enough until able achieve spoonable texture easily spreadable atop freshly baked cinnamon rolls ensuring every last bite remains decadent!
Equipment You’ll Need:
Now that we’ve gathered our wonderful ingredients, let’s talk about some essential tools that will make this journey smoother and more enjoyable. Having the right equipment not only enhances your cooking experience but also sets you up for success in achieving those perfect Cherry Cinnamon Rolls with Homemade Filling!
- Mixing bowls – A set of different-sized mixing bowls will be your best friends here! Use them for combining dry ingredients separately from wet ones or simply letting dough rise comfortably without crowding anything else around it. Glass or stainless steel bowls work wonderfully as they don’t interact negatively with acidic elements present within recipes.
- Measuring cups & spoons – Precision matters greatly when baking! Using proper measuring tools means accurate ratios leading us towards successful outcomes—we don’t want flat rolls due missing ingredients after all! Consider investing in nested sets which allow easy storage since space often gets tight within kitchens too!
- Stand mixer or hand mixer – While you can mix by hand if preferred—a stand mixer makes quick work out kneading process required yield lovely airy-textured results efficiently without tiring arms out faster than anticipated either way would go about preparing everything else involved here later on too!
- Rolling pin – A trusty rolling pin helps flatten dough evenly while ensuring uniform thickness throughout which contributes directly towards consistent baking times across entire batch produced overall as well—no one wants unevenly cooked portions now do they?
Step 1: Activating the Yeast
Start by warming 1/4 cup of water until it’s just slightly warmer than lukewarm—not boiling hot but pleasantly cozy to touch—and stir in 1 teaspoon of active dry yeast along with 1 tablespoon from the total amount needed later on during mixing phase too! Allow this mixture rest undisturbed for about five minutes until foamy bubbles form atop surface indicating successful activation occurred; trust me—this step is crucial because activated yeast will ensure lightness throughout entire roll experience later down line…
Step 2: Creating Our Dough
In a large mixing bowl fitted onto stand mixer whisk together remaining dry ingredients including bread flour alongside previously mixed foamy liquid created earlier plus eggs followed by softened butter afterwards as well; slowly add warmed milk gradually incorporating via paddle attachment until smooth elastic ball appears forming itself amidst swirling motions happening inside bowl—that’s right folks—that’s what we’re after here…a beautifully pliable yet firm consistency throughout existing mixture representing all components coming together harmoniously under perfect conditions established thus far…
Step 3: Kneading Time!
Once you’ve achieved adequate elasticity desired remember not rush through kneading process either—it takes good ten minutes minimum working hands firmly pressing down pushing forward creating stretches allowing gluten develop fully leading towards achieving ultimate fluffiness necessary every single bite experienced thereafter…keep eyes peeled noticing changes happening within dough itself becoming smoother shinier over time indicating progress made successfully alongside visual cues shared earlier regarding natural transitions occurring along way…
Step 4: First Rise
After kneading sufficiently place formed ball back inside greased bowl cover tightly utilizing plastic wrap letting sit patiently somewhere warm away drafts ensuring happy resting period lasting around one hour approximately doubling volume seen prior beginning stages originally initiated earlier—during this time magic happens transforming simple ingredients into airy wonders awaiting peeling apart revealing luscious cherry-filled centers waiting patiently beneath layers awaiting discovery upon first glorious bite taken…
Baking Your Perfect Cherry Cinnamon Rolls with Homemade Filling
Ahh… the moment we’ve been waiting for has arrived—the baking phase! Preheat your oven to 375°F (190°C), ensuring it’s nice and hot before sliding those delicious rolls inside; this temperature gives them just enough heat to rise wonderfully while browning beautifully on top.
Step 9: Baking – Transforming Dough into Bliss
Once preheated, bake those gorgeous cherry cinnamon rolls for about 25-30 minutes or until they’re golden brown on top—the aroma wafting through your kitchen will be nothing short of heavenly! Keep an eye out during those final minutes; if they become too dark before cooking through completely—which can happen due to oven variations—simply cover them loosely with aluminum foil.
When done baking, allow them to cool slightly in their pans on wire racks before frosting because trust me: nothing beats warm cinnamon rolls topped with creamy frosting! As they cool down just enough so you won’t burn yourself but are still warm enough to melt that frosting beautifully… Oh my goodness—it’s pure bliss waiting right there!
Finishing Touches: Cream Cheese Frosting Delight
While those rolls cool down slightly (and you’re practically bouncing off walls from anticipation), let’s whip up some divine cream cheese frosting that takes these cherry cinnamon rolls from extraordinary to truly unforgettable! In another mixing bowl combine 3 ounces of softened cream cheese, 4 tablespoons unsalted butter, and 2 teaspoons vanilla extract until light and fluffy—this usually takes around three minutes using an electric mixer at medium speed.
Gradually sift in 2 cups powdered sugar, mixing slowly at first so you don’t create a cloud of sweetness around yourself (though I’m sure you’d love that too). Finally add 1-3 tablespoons whole milk, adjusting based on how thick or spreadable you desire—that silky drizzle over warm cinnamon rolls? Yes please!
Once everything is perfectly blended together into creamy perfection spread generously over each roll while they’re still warm—they’ll absorb some warmth from frosting creating an utterly intoxicating experience as they melt together.
And there you have it—the most heavenly Cherry Cinnamon Rolls with Homemade Filling ready for sharing (or devouring solo)! Serve these delightful creations fresh outta the oven at breakfast brunches or even as dessert—you’ll find yourself delightfully overwhelmed by compliments from friends and family alike.
Storage and Enjoyment Tips for Your Cherry Cinnamon Rolls with Homemade Filling
Oh, my friends, the moment has finally arrived! Your cherry cinnamon rolls are golden brown, fluffy, and begging to be devoured. But before you dive in headfirst, let’s talk about how to preserve these delightful treasures so that every bite remains as heavenly as the first. Storing your cherry cinnamon rolls properly can ensure they stay soft and flavorful for days (if they last that long!).
Storing Leftover Cherry Cinnamon Rolls with Homemade Filling
To keep your cherry cinnamon rolls with homemade filling fresh and delicious, I recommend using an airtight container. This helps maintain their moisture and flavor while keeping them free from any unwanted odors in your fridge. If you’re wondering how long they’ll last, you can expect them to stay delectable for about 3-4 days—though I have a feeling they won’t stick around that long! Now, here’s a pro tip: place a slice of bread in the container with your rolls; this simple trick helps to absorb excess moisture without drying out the rolls themselves. Trust me on this one; it makes all the difference! When you take them out after a day or two, they may lose a bit of their fluffiness but will still offer that utterly intoxicating flavor that makes these rolls so special. For a warm treat any time of day, reheat them in the microwave for about 10-15 seconds or pop them in a toaster oven until warmed through—nothing beats a fresh roll when it’s slightly warm!
Freezing Cherry Cinnamon Rolls with Homemade Filling for Later
Now, if you’re planning ahead or want to indulge later on, freezing these cherry cinnamon rolls is an absolutely brilliant option! To freeze them properly, allow them to cool completely first—this prevents any condensation from making them soggy when stored. Then wrap each roll tightly in plastic wrap or aluminum foil before placing them in a freezer-safe bag or container. They can be kept frozen for up to three months—a fantastic way to have a sweet treat ready at your fingertips whenever the craving strikes! When you’re ready to enjoy them again, simply thaw overnight in the fridge and reheat as mentioned earlier. The convenience factor here is just tremendous; imagine pulling out these beauties on a cozy Sunday morning or for an impromptu gathering with friends and family—it’s like having a secret stash of joy waiting just for you!
Cherry Cinnamon Rolls with Homemade Filling

Indulge in the comforting embrace of homemade Cherry Cinnamon Rolls with Homemade Filling. These delightful rolls combine the sweet-tart flavor of juicy cherries with a soft, fluffy dough, topped with a rich cream cheese frosting that melts in your mouth. Perfect for brunch or a cozy dessert, these rolls are sure to bring warmth and joy to any occasion. With every bite, you’ll experience the nostalgia of cherished family moments and the satisfaction of baking something truly special from scratch. Let’s roll up our sleeves and dive into this delicious adventure!
- Prep Time: 30 minutes
- Cook Time: 30 minutes
- Total Time: 1 hour
- Yield: Approximately 12 servings 1x
- Category: Dessert
- Method: Baking
- Cuisine: American
Ingredients
- 3 1/2 cups frozen cherries
- 1/3 cup granulated sugar (for filling)
- 1/4 cup cold water
- 2 tablespoons cornstarch
- 1/4 cup warm water
- 1 teaspoon active dry yeast
- 3/4 cup whole milk
- 2 large eggs
- 4 1/2 cups bread flour
- 1/2 teaspoon salt
- 6 tablespoons unsalted butter (for dough)
- 4 tablespoons unsalted butter (for frosting)
- 3 oz cream cheese
- 2 cups powdered sugar
Instructions
- Activate yeast by mixing warm water and active dry yeast in a bowl; let it bubble for about five minutes.
- In a separate bowl, whisk together whole milk, sugar, and eggs. Add the activated yeast mixture.
- Gradually mix in bread flour and salt until a shaggy dough forms; let rest for 10 minutes.
- Knead the dough for about 8–10 minutes until smooth and elastic. Let rise in a greased bowl for one hour.
- Meanwhile, prepare the cherry filling by heating frozen cherries and sugar until bubbling. Mix cold water with cornstarch; stir into cherries until thickened.
- Roll out the dough into a rectangle; spread softened butter and cherry filling evenly over it. Roll tightly and slice into pieces.
- Place cut rolls in greased pans, let rise again for another half hour, then bake at 375°F for about 25–30 minutes.
- Allow to cool slightly; top with cream cheese frosting made by blending cream cheese, butter, powdered sugar, and vanilla.
Nutrition
- Serving Size: 1 roll (90g)
- Calories: 320
- Sugar: 18g
- Sodium: 150mg
- Fat: 12g
- Saturated Fat: 7g
- Unsaturated Fat: 4g
- Trans Fat: 0g
- Carbohydrates: 46g
- Fiber: 2g
- Protein: 5g
- Cholesterol: 50mg