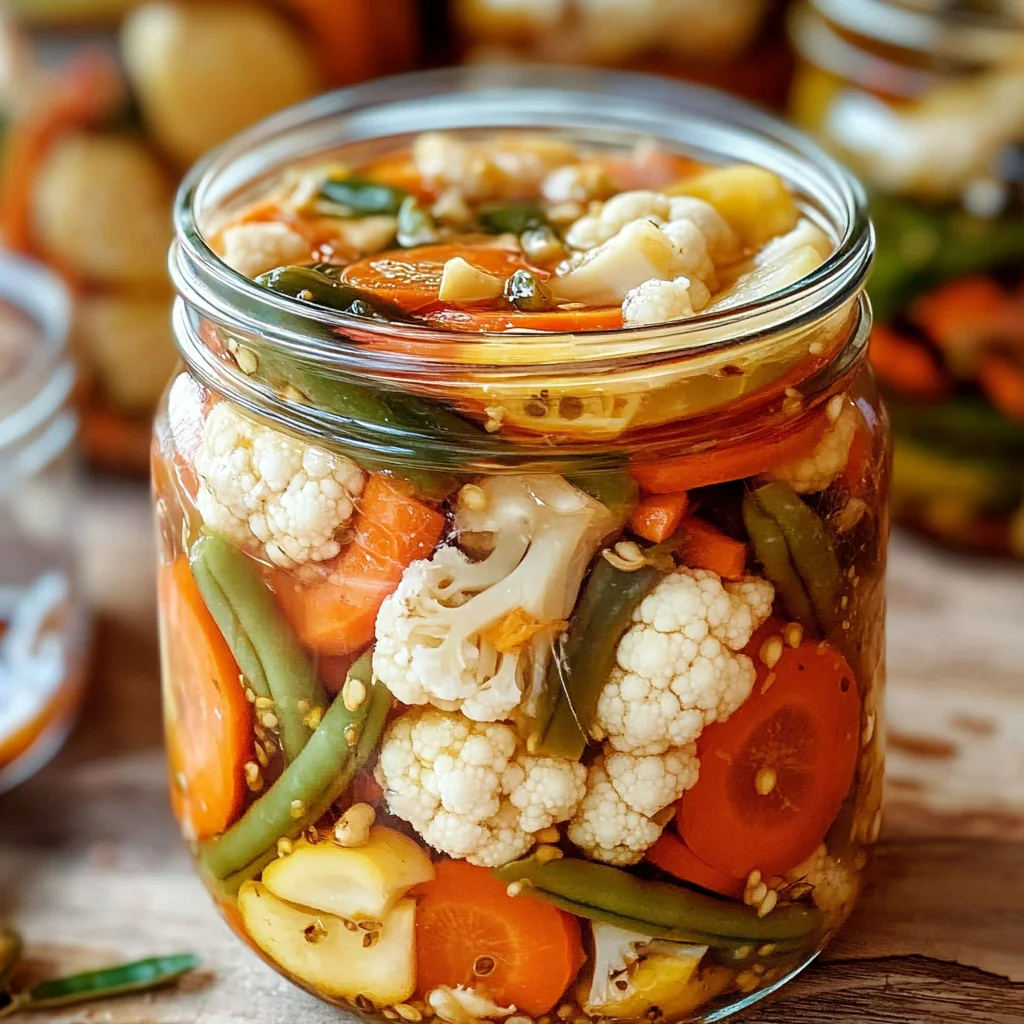
Easy Refrigerator Pickled Vegetables (Crunchy & Tangy!)
There’s something truly magical about the act of pickling vegetables, a process that transforms humble produce into vibrant, crunchy bites of tangy joy. As I stand in my kitchen, surrounded by the colors and scents of fresh veggies, I can’t help but feel a wave of nostalgia wash over me. This isn’t just another recipe; it’s a celebration of flavor and preservation that allows us to savor the essence of summer long after the last tomato has been harvested. With my Easy Refrigerator Pickled Vegetables (Crunchy & Tangy!), you’ll create a jar filled with bright hues and an explosion of taste that dances across your palate with every bite. Imagine the satisfying crunch as you sink your teeth into these colorful morsels, their tanginess a perfect complement to rich dishes or simply enjoyed on their own as a healthy snack.
This recipe is not only quick and easy—taking merely 30 minutes of active work—it represents an age-old tradition that has been passed down through generations. There’s a certain joy in preparing these quick-pickled delights without the complexities of canning; this method brings together freshness and convenience, making it accessible for everyone, even those who may be new to the world of cooking. The thrill comes from watching the vibrant vegetables transform in their brine, soaking up flavors while sitting patiently in your refrigerator. And trust me when I say that while they’re ready to eat after just 24 hours, they become even more extraordinary after a few days as they continue to develop and deepen in flavor. So let’s embark on this culinary journey together!
Easy Refrigerator Pickled Vegetables (Crunchy & Tangy!): A Symphony of Flavor
Get ready to dive into a delightful experience with these Easy Refrigerator Pickled Vegetables (Crunchy & Tangy!). This recipe is not just about putting vegetables in vinegar; it’s about creating a vibrant condiment that can elevate any meal or stand alone as a refreshing snack. Whether you’re preparing for a family gathering, packing lunches for the week, or simply looking for something zesty to brighten your dinner plate, these pickles are here to impress.
Ingredients:
As we begin our adventure into pickling, let’s gather our beautiful ingredients that will come together to create this crunchy delight. Each component plays an integral role, contributing its unique flavor and texture to our final masterpiece.
- 2 cups crisp cauliflower florets. The cauliflower brings an incredible crunch to our pickle mix, offering both texture and versatility. When selecting cauliflower, look for firm heads without browning spots; freshness is key here! Its mild flavor allows it to soak up the brine beautifully while also adding visual appeal to your jar.
- 1 cup sliced carrots (coins). Carrots add not just sweetness but also stunning color contrast against the other veggies. Choose fresh carrots that are firm and vibrant; they should snap when you break them! Slicing them into coins ensures even pickling and makes them perfect for snacking.
- 1 cup sliced cucumbers (about 1/4-inch thick). Cucumbers are essential for providing that refreshing crunch we all love in pickles! Opt for firm varieties like Kirby or Persian cucumbers, which have fewer seeds and thicker skins ideal for pickling. The contrast between their coolness and the tangy brine is utterly intoxicating!
- 1 red bell pepper, sliced. Sweet red bell peppers not only add gorgeous pops of color but also impart a mild sweetness that balances out the acidity of the brine perfectly. When selecting your bell pepper, go for one that’s unblemished with a shiny skin—this indicates freshness!
- 1 cup fresh green beans, trimmed. Green beans bring an exciting snap to your pickles! They’re wonderfully crisp when pickled and provide another layer of texture in each bite. Look for bright green ones with no yellowing or wilting; freshness here translates directly into crunchiness.
- 3 cloves garlic, minced (potent). Garlic adds depth and an irresistible aroma to our brine, infusing every vegetable with its pungent flavor. I always choose fresh garlic cloves over pre-minced varieties because they pack so much more flavor—trust me on this!
- 2 tsp mustard seeds. These tiny seeds release their warm aroma as they soak in the brine, giving our pickles an added layer of complexity that’s simply divine! You can find them at most grocery stores or spice shops—just make sure they’re whole so they’ll hold onto their flavors well.
- 1 tsp whole black peppercorns. Whole black peppercorns contribute a subtle heat without overwhelming our dish; they’re little bursts of flavor waiting to surprise you with every bite! Their earthy notes harmonize beautifully with all the other ingredients.
- 1/2 tsp red pepper flakes (optional). If you enjoy a hint of heat—especially alongside all those sweet veggies—this addition is absolutely paramount! Adjust according to your personal preference; it’s all about finding that balance.
- 2 cups white vinegar (5% acidity). Vinegar acts as our preserving agent here; it’s what gives our veggies that signature tang! Use good-quality white vinegar with at least 5% acidity level—it will ensure safety during storage while delivering robust flavor.
- 2 cups water. Water helps dilute the intensity of the vinegar while balancing flavors throughout the brine; it’s essential for achieving that tender yet crunchy texture we crave in pickles!
- 2 tbsp kosher or pickling salt. Salt is non-negotiable when it comes to pickling—it draws out moisture from vegetables while enhancing their natural flavors! Kosher salt is preferred due to its larger crystals which dissolve easily without leaving behind too much sodium per volume.
- 1 tbsp sugar. A touch of sugar helps soften the tartness from the vinegar while rounding out flavors beautifully—don’t skip this step! It creates that beloved sweet-tangy profile we associate with perfect pickles.
Equipment You’ll Need:
Before we dive headfirst into transforming these lovely ingredients into something extraordinary, let’s talk about some essential tools you’ll need along this culinary journey. Having the right equipment not only makes each step smoother but also enhances your overall experience in creating these delightful Easy Refrigerator Pickled Vegetables (Crunchy & Tangy!).
- Medium saucepan – This sturdy vessel is where we’ll create our aromatic brine! It needs to be deep enough so there’s room for boiling without splattering everywhere—safety first! A heavy-bottomed pan distributes heat evenly and prevents scorching.
- Large heat-proof bowl – Once our brine is bubbling away perfectly, we need somewhere safe to pour it over our vegetables without risk of shattering glass or melting plastic! A glass or ceramic bowl works best here since they can handle hot liquids gracefully.
- Clean glass jars with lids – Proper storage is crucial post-pickling because we want those flavors locked in tight until we’re ready to enjoy them later! Make sure your jars are sterilized beforehand by running them through hot soapy water or placing them in boiling water briefly.
- Ladle – This handy tool will help you transfer hot brine over veggies easily without burning yourself—a must-have partner during this process!
Now that we’ve gathered everything we need let’s dive into preparing these delicious Easy Refrigerator Pickled Vegetables (Crunchy & Tangy!) together!
Step 1: Prep Your Colorful Canvas
First things first: let’s prepare those beautiful vegetables! Begin by washing each piece thoroughly under cool running water—this step ensures any dirt or residues are gone before we start slicing away into uniform pieces that’ll soak up every bit of tangy goodness later on. For instance, slice those carrots into neat coins about ¼ inch thick—the thinner slices allow them better absorption compared to thicker ones which might take longer time-wise during marination but still result in delicious outcomes!
Next comes breaking apart cauliflower florets into bite-sized pieces—you want them small enough so every morsel fits snugly inside each jar—but make sure not too tiny either; aim for roughly one-inch sized florets since they’ll retain crunch post-pickling better than smaller bits would do once submerged completely within liquid gold!
For cucumbers—slice ’em up similarly at ¼ inch thickness too—as stated earlier—they just provide such refreshing bites when served chilled alongside meals or snacked upon solo straight from fridge later on down road…trust me on this one! Finally trim those green beans neatly before adding everything together—remember: uniformity matters immensely here as it means even exposure ensuring consistent results across board once everything has been packed properly into jars afterwards!
Step 2: Create Your Aromatic Brine
Now onto making our luscious brine—a vital component in achieving those unforgettable flavors found within each crunchy bite packed tightly inside jars awaiting discovery later on down line… In your medium saucepan combine white vinegar alongside water first off followed closely by kosher/pickling salt plus sugar—the sugar works wonders helping balance tartness naturally present due acidic nature found within vinegars themselves bringing harmony amongst contrasting elements at play here throughout entire creation process itself too!
Next up? Add minced garlic along mustard seeds plus whole black peppercorns stirring gently until everything dissolves completely—this part’s crucial because if any granules remain undissolved it could lead unwanted gritty textures rather than smooth mouthfeel desired instead once finished product finally arrives awaiting taste test excitement ahead soon thereafter… Now turn heat up medium-high until mixture reaches rolling boil point observed visually: bubbles forming rapidly surface indicating readiness signals letting us know transition phase has commenced nicely towards pouring action soon approaching next stage shortly thereafter…
Step 3: Pour That Liquid Gold Over Veggies
Once boiling properly witnessed earlier now comes time pour aforementioned aromatic brine directly atop prepared veggies waiting patiently nestled comfortably waiting nearby large heat-proof bowl set aside beforehand earlier previously mentioned moments ago… Carefully ladle hot liquid gold across all colorful morsels ensuring everything gets fully submerged beneath surface level completely coated generously throughout each piece—it’s important not leave anything peeking out since exposure air can lead spoilage quicker than expected otherwise potentially ruining efforts put forth thus far leading disappointment rise unexpectedly due lack attention given small details like this matter tremendously overall…
After pouring done let cool at room temperature around hour mark allowing flavors meld together harmonizing beautifully whilst enjoying enticing aromas wafting around kitchen space creating anticipation building excitement knowing something special awaits further ahead shortly thereafter…
Step 4: Pack Those Jars Carefully
Next step involves packing tightly yet delicately ensuring no gaps exist between different types filling jars evenly throughout making sure nothing escapes unnoticed either… Grab clean glass jars already prepped previously mentioned ensuring sterilization achieved earlier before filling begins take care using ladle again transferring freshly prepared veggie mix along hot aromatic brine gently pouring atop until contents reach brim near top edges carefully avoiding spillage wherever possible maintaining cleanliness surrounding area whilst doing so maintaining focus throughout entire process since attention detail matters greatly especially during moments like this where enjoyment stems directly from efforts expended previously put forth already leading towards successful outcome guaranteed ahead post chill period experienced shortly thereafter arriving soon enough…
Seal tightly secured lids locking away precious contents safely preserved yearning future tastings ahead planned accordingly keeping track expiration dates allowing maximum enjoyment occur before potential loss arises inadvertently unexpected circumstances arise catching everyone off guard ultimately ruining celebratory experiences intended share amongst friends family alike coming together enjoying moments created around tables sharing laughter stories alike created memories lasting lifetimes cherished forevermore treasured heavily indeed…
With every step taken thoughtfully considered lovingly crafted outcomes guaranteed bring warmth smiles faces radiating joy pure bliss experienced once finally tasted embraced held dear hearts souls forevermore remembered fondly shared amongst loved ones dear ultimately enriches lives significantly overall heightening appreciation finer aspects life itself transcending simple act cooking becoming profound connection shared between individuals fostering bonds strengthened through culinary creations enjoyed wholeheartedly indulged upon entirely bringing satisfaction beyond measure fulfilling senses nourishing spirits deeply inspiring joyfulness found along way…
And there you have it—a journey through creating Easy Refrigerator Pickled Vegetables (Crunchy & Tangy!) infused lovingly crafted flavors awaiting discovery soon enough… Can’t wait hear feedback thoughts feelings shared upon tasting unique creations made ourselves personally connecting deeper levels artistry displayed artistry exhibited expressing love care put forth each ingredient chosen specifically tailored creating magic unfold oh-so-beautifully together interweaving lives intertwining experiences uplifted hearts soulfully nourished hearts forevermore cherished deeply appreciated always known sought after endlessly inspired endlessly motivated adventure continues onward forth…
Step 5: Jar and Pack Your Vegetables Like a Pro
Now comes the moment where all your hard work shines—jarring those vibrant veggies! You’ll want to grab some clean glass jars, ideally pint-sized or quart-sized, depending on your preference. As you pack the vegetables into these jars, aim for a snug fit without squishing them too much. This is important because the tighter they are packed, the more efficiently they’ll absorb that tangy brine, creating a symphony of flavors that will dance on your palate. Trust me, there’s something profoundly satisfying about seeing those colorful veggies piled up in their jars, just waiting to mingle and transform into something extraordinary.
Once you’ve filled the jars with your beautiful vegetables, it’s time to ladle in that aromatic brine you worked so hard on. Ensure every piece is submerged under the liquid; this is absolutely paramount for achieving that crunchy texture and bold taste. If you notice there isn’t enough liquid to cover everything completely (which can sometimes happen), don’t panic—simply top off your jars with a mixture of half vinegar and half water until everything is submerged. Now seal those jars tightly with lids; this creates an airtight environment that keeps your pickles crisp and flavorful as they chill. Can you feel the excitement? You’re one step closer to enjoying these delightful bites!
Step 6: The Chilling Transformation
Ah, the anticipation! Now it’s time for the chilling process—this is where the magic truly happens. By refrigerating your pickled vegetables for at least 24 hours (though I highly encourage letting them sit for 3–5 days if you can resist), you’re allowing all those lovely flavors to meld together in a way that is utterly intoxicating. Why is this step so crucial? Well, during this time, the vegetables soak up all that tangy goodness from the brine, transforming from ordinary veggies into an extraordinary condiment or side dish bursting with flavor.
As you wait patiently, try not to rush this step—great things take time! The longer you allow them to mingle in the fridge, the more pronounced and complex their flavors will become. If you’re curious about what’s happening inside those jars while they chill, think of it like marinating: the vinegar penetrates deeply into each vegetable piece, while salt draws out excess moisture and helps keep everything crisp. So set aside any temptation to dig in right away; trust me when I say these pickles will be worth every minute of wait!
Step 7: The Taste Test (But Not Too Soon!)
After what feels like an eternity (but is really just a day or two), it’s finally time for that first taste! But before you dive in headfirst with glee, allow me to share a little secret: if possible, let your pickles rest for at least three days before indulging fully. This gives them ample time to develop that rich flavor profile we’re after. When you finally open up one of those jars after chilling, take a moment to appreciate the fragrant aroma wafting up from within—it’s truly captivating! You’ll notice how vibrant each vegetable still looks; that bright color isn’t just for show—it indicates freshness and quality.
When you’re ready to dig in, grab a fork and take a bite of those crunchy green beans or juicy cucumbers dipped in zesty brine. Each mouthful should deliver both crunch and tang—a testament to your patience and effort. If you find yourself craving even more flavor depth after tasting them at day one or two, don’t be disheartened; just remember they get better with time! Each passing day allows flavors to deepen further—a delightful evolution worth waiting for!
Step 8: Enjoying Your Easy Refrigerator Pickled Vegetables (Crunchy & Tangy!)
Now comes perhaps my favorite part—the enjoyment! These Easy Refrigerator Pickled Vegetables are not only delicious but also incredibly versatile. Picture them next to grilled meats as a refreshing side dish or tossed into salads for an instant flavor boost. You could even chop them finely and mix them into creamy dips or spreads—a truly extraordinary way to elevate any gathering with friends or family.
As you savor each crunchy bite bursting with tanginess, take pride in knowing that you’ve created something beautiful from scratch—a recipe passed down through generations but now made uniquely yours. Remember to keep these pickles refrigerated; they’ll stay fresh for about 2–3 weeks—but I promise they won’t last long once everyone gets a taste of how good they are! So go ahead and experiment with different veggies if you’re feeling adventurous; after all, cooking should always be fun and creative!
In conclusion, making Easy Refrigerator Pickled Vegetables (Crunchy & Tangy!) is not just about preserving food; it’s about crafting joy-filled moments around shared meals—one slice of cucumber at a time!
Storage and Enjoyment Tips for Your Easy Refrigerator Pickled Vegetables (Crunchy & Tangy!)
Now that your vibrant, crunchy, and utterly tangy pickled vegetables are ready to be enjoyed, let’s talk about how to store them so they remain fresh and delightful! The beauty of these Easy Refrigerator Pickled Vegetables is their simplicity, yet they pack a punch of flavor that elevates any meal. As they sit in the brine, their flavors will deepen and become even more pronounced, making them an exciting addition to your meals over the next few weeks. But let’s make sure you know exactly how to keep them at their best!
Storing Leftover Easy Refrigerator Pickled Vegetables (Crunchy & Tangy!)
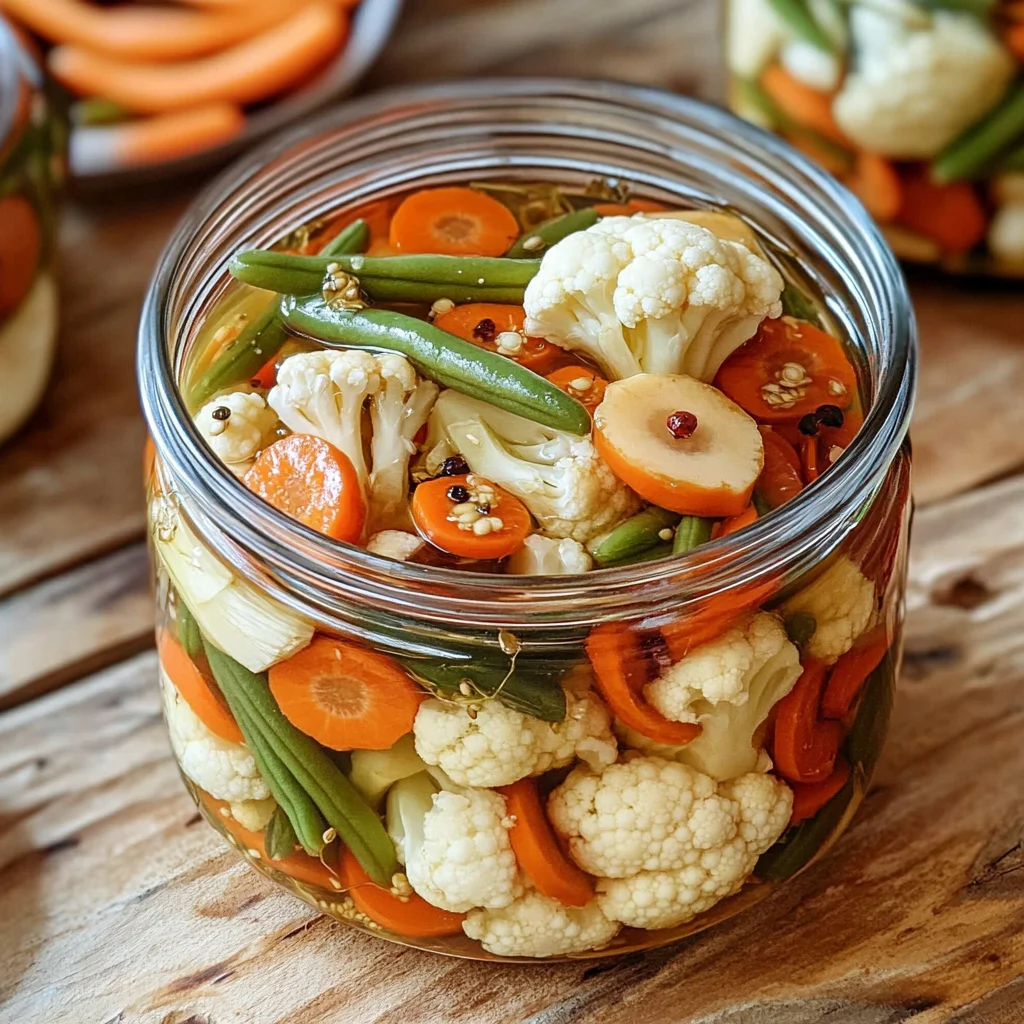
To keep your Easy Refrigerator Pickled Vegetables as fresh as possible, it’s essential to use clean glass jars with tight-fitting lids. I personally love using mason jars because they not only look charming but also seal in all that zesty goodness! Store these beauties in the fridge where they can stay crisp and tangy for up to three weeks. The key to maintaining their crunch is ensuring they are submerged completely in their brine; if you notice any vegetables floating above the liquid, simply top off with a mixture of equal parts vinegar and water. Trust me on this – the brine acts like a protective cloak, preserving that refreshing crunch while enhancing the flavors! After a few days in the fridge, you’ll discover how their profiles meld together beautifully, creating a flavor experience that’s profoundly satisfying. When you’re ready to serve them again, there’s no need for reheating; simply pop open the jar and enjoy them straight from the fridge or toss them into salads or sandwiches for an extra kick!
Freezing Components for Later
If you find yourself with more pickled veggies than you can consume within a few weeks, don’t worry! You can freeze some components for later enjoyment. Just remember that while freezing does affect texture somewhat—these pickles may become softer—it’s still a fantastic option if you’re looking to preserve their vibrant flavors. To freeze your pickled vegetables properly, first drain them from the brine and pack them into airtight freezer bags or containers, removing as much air as possible before sealing. They can be safely frozen for up to three months without losing too much of their zing! When ready to use from frozen, simply thaw them in the refrigerator overnight or give them a quick soak in cold water. Imagine having these bright bursts of flavor at your fingertips whenever a craving strikes—it makes meal prep so much easier and adds incredible depth to dishes like grain bowls or stir-fries!
Easy Refrigerator Pickled Vegetables (Crunchy & Tangy!)

If you’re looking for a vibrant way to elevate your meals, these Easy Refrigerator Pickled Vegetables (Crunchy & Tangy!) are the perfect solution. This quick and simple recipe transforms fresh vegetables into tangy, crunchy delights that can be enjoyed on their own or as a zesty accompaniment to any dish. With just 30 minutes of active preparation time, you’ll be able to savor the essence of summer all year round. Each colorful jar is packed with flavor, making them an excellent addition to salads, sandwiches, or as a healthy snack straight from the fridge. Let your creativity shine by experimenting with different seasonal vegetables and enjoy the delightful crunch in every bite.
- Prep Time: 30 minutes
- Cook Time: 10 minutes
- Total Time: 40 minutes
- Yield: Approximately 10 servings 1x
- Category: Side
- Method: Pickling
- Cuisine: American
Ingredients
- 2 cups crisp cauliflower florets
- 1 cup sliced carrots (coins)
- 1 cup sliced cucumbers (about 1/4-inch thick)
- 1 red bell pepper, sliced
- 1 cup fresh green beans, trimmed
- 3 cloves garlic, minced
- 2 tsp mustard seeds
- 1 tsp whole black peppercorns
- 2 cups white vinegar (5% acidity)
- 2 cups water
- 2 tbsp kosher or pickling salt
- 1 tbsp sugar
Instructions
- Prepare vegetables by washing and cutting them into uniform pieces.
- In a medium saucepan, combine vinegar, water, salt, and sugar; bring to a boil.
- Stir in garlic, mustard seeds, and peppercorns until dissolved.
- Pour the hot brine over the prepared vegetables in a heat-proof bowl.
- Allow to cool at room temperature for about an hour before packing tightly into clean glass jars.
- Seal jars and refrigerate for at least 24 hours before enjoying; flavors improve after a few days.
Nutrition
- Serving Size: 1/4 cup (65g)
- Calories: 24
- Sugar: 3g
- Sodium: 295mg
- Fat: 0g
- Saturated Fat: 0g
- Unsaturated Fat: 0g
- Trans Fat: 0g
- Carbohydrates: 6g
- Fiber: 1g
- Protein: 1g
- Cholesterol: 0mg