Ginger Dressing
There’s something truly enchanting about the symphony of flavors that a well-crafted Ginger Dressing can bring to your table. Imagine drizzling this vibrant, zesty concoction over a crisp salad—a delightful mix of iceberg lettuce and juicy tomatoes—and savoring the way it elevates each bite into a profound culinary experience. This Ginger Dressing isn’t merely a topping; it’s a bridge connecting the comforting nostalgia of your favorite Japanese restaurant with the creativity of your home kitchen. The bright notes of fresh ginger dance playfully alongside the sweetness of agave nectar, while the umami depth from soy sauce and miso adds an irresistible richness. I promise you, once you try making this at home, you’ll find yourself reaching for it time and again, not just for salads but as a marinade for grilled vegetables or even drizzled on rice bowls.
What makes this dressing so special is its ability to transform ordinary ingredients into something extraordinary. A classic recipe in many Asian cuisines, it encapsulates the essence of balance—sweetness melding beautifully with tartness and savoriness. Whether you’re preparing a family dinner or hosting friends for a casual gathering, having this Ginger Dressing on hand will surely impress. It’s perfect for those moments when you want to feel connected to culinary traditions while also allowing your own creativity to shine through. So let’s embark on this flavorful journey together; I can’t wait to share every little secret that will make your Ginger Dressing truly magical!
Ginger Dressing: A Zesty Delight That Transforms Any Salad
Let me introduce you to my beloved Ginger Dressing—a vibrant and refreshing blend that brings life to any meal! With its roots steeped in Japanese cuisine, this dressing is reminiscent of those delightful salads served at your favorite Asian eateries. Each ingredient plays its part in creating an unforgettable experience that delights both the senses and the soul.
Ingredients:
As we dive into creating this delicious dressing, let’s take a moment to appreciate each ingredient that contributes to its unique flavor profile. These components are not just elements; they’re essential players in crafting something truly special.
- 1 cup sweet onion, such as Vidalia, chopped. Sweet onions are the heart of this dressing, providing a gentle sweetness that perfectly balances the tangy notes. Vidalia onions are particularly renowned for their mild flavor and juiciness; they ensure that your dressing isn’t overpowered by sharpness but instead offers a harmonious backdrop for the other flavors. When selecting your onions, look for those with smooth skins and no blemishes—this tells you they’re fresh and ready to shine in your recipe.
- 6 tablespoons grated fresh ginger. Fresh ginger is what elevates this dressing from ordinary to extraordinary! Its peppery warmth adds depth and complexity while also offering numerous health benefits—think anti-inflammatory properties and digestive support! Grating the ginger ensures that its flavor fully integrates into the dressing, yielding an aroma that’s utterly intoxicating. Trust me on this: using fresh ginger over powdered ginger is non-negotiable here; you’ll notice such a difference!
- ¼ cup celery, chopped. Celery may seem like a minor character in this recipe, but it brings a delightful crunch and subtle earthiness that rounds out the other flavors beautifully. When choosing celery, opt for crisp stalks that snap easily when bent—this freshness will translate into your final product!
- ½ cup carrots, chopped. Carrots add both color and natural sweetness to our dressing. Their vibrant orange hue not only brightens up your dish visually but also contributes essential nutrients like beta-carotene. Be sure to chop them finely so they blend seamlessly into the mixture—this way, they’ll incorporate well without overwhelming any single bite.
- 1 teaspoon fresh garlic minced. Garlic introduces an aromatic punch that complements the sweetness of ginger beautifully! It really enhances each component’s flavor while adding another layer of complexity to our dressing. Here’s a little tip: use freshly minced garlic rather than pre-minced varieties for maximum impact—it makes all the difference in taste!
- 2/3 cup rice vinegar. The tangy zest from rice vinegar is absolutely paramount—it cuts through the richness of oil while lifting all those lovely flavors we’ve created together! Its mild acidity pairs perfectly with sweeter ingredients like agave nectar and sweet onion without being overpowering.
- ¼ cup water. Adding water helps adjust consistency and balance out more potent flavors from other ingredients without diluting their essence entirely. It allows us to achieve that ideal pourable texture we crave in our dressings.
- 2 tablespoons ketchup. Yes, ketchup! This unexpected addition gives our dressing an intriguing sweetness along with some acidity—it’s like adding liquid gold! Just be sure to choose an organic or high-quality variety without unnecessary additives for best results.
- 2 ½ tablespoons soy sauce. Soy sauce adds depth with its umami profile—this savory note ties everything together beautifully while enhancing overall flavor complexity! For those avoiding gluten, there are fantastic tamari options available that work equally well.
- ¼ cup agave nectar. Agave nectar provides gentle sweetness without being overly cloying; it balances out sharper tastes perfectly while maintaining harmony within our dressing’s profile.
- 1 ½ tablespoons lemon juice. Fresh lemon juice brings brightness like nothing else! It works in tandem with rice vinegar to create that delightful zing we adore in salad dressings—don’t skip it!
- 1 teaspoon kosher salt & ½ teaspoon white pepper – salt enhances all flavors present here; it’s absolutely crucial! White pepper offers subtle warmth without coloring our beautiful mixture too much—it keeps things elegant!
- 1 tablespoon white miso paste, optional but recommended. While optional, I wholeheartedly recommend adding miso paste if you can find it! It enhances umami depth significantly while lending creaminess—a true game changer in achieving balance!
- 1 cup good quality peanut oil. Peanut oil serves as our base fat here; its neutral flavor allows all other ingredients’ nuances to shine through while providing richness necessary for mouthfeel! Always go for high-quality variants—the difference is palpable.
Equipment You’ll Need:
Before we jump into making our zesty Ginger Dressing, let’s chat about some essential tools you’ll need on hand—having these will make everything smoother and more enjoyable!
- Food Processor – This kitchen hero is vital for achieving that perfect texture where vegetables are finely pureed yet still retain some graininess—not quite smooth but not chunky either! If you don’t have one handy (though I highly encourage getting one), you could use a blender or even finely chop everything by hand though that’ll take longer.
- Measuring Cups & Spoons – Precise measurements ensure consistency every time—you want each batch of your dressing tasting just as good as the last! Invest in sturdy measuring cups and spoons; they’re indispensable tools in any kitchen.
- Sharp Chef’s Knife & Cutting Board – A good knife makes chopping vegetables effortless while ensuring safety during prep time—it’s worth investing in quality here! A spacious cutting board provides ample room for maneuvering around ingredients as you chop away joyfully!
Now that we have everything prepped let’s dive into preparing our deliciously vibrant Ginger Dressing—it’s time to transform these simple ingredients into something magical!
Step 1: Gather Your Vegetables
Begin by placing your chopped sweet onion, grated ginger (don’t forget to peel it first!), celery, carrots, and minced garlic into your trusty food processor. This process is known as puréeing—the goal here is not full-on smoothness but rather achieving fine grains throughout so every bite has texture without large chunks dominating any spoonfuls later on! Pulse until combined yet still grainy—about 10 seconds should do it—but keep an eye on things; no rush here!
Step 2: Combine Liquid Ingredients
Once you’ve reached desired consistency with those veggies (trust me—the aroma at this point is intoxicating!), it’s time to add all our liquid ingredients: rice vinegar, water (to thin if needed), ketchup (for added sweetness), soy sauce (for umami goodness), agave nectar (to balance), lemon juice (adding brightness), salt & white pepper (for seasoning) along with optional miso paste which enhances creaminess wonderfully too if you’re feeling adventurous! Pulse gently several times until just mixed—this isn’t about pureeing again but blending flavors together harmoniously!
Step 3: Emulsify with Peanut Oil
With everything nicely mixed up now comes perhaps my favorite part! While running food processor steadily at low speed (don’t crank up too high!) slowly drizzle in peanut oil until fully incorporated—we’re emulsifying here which means creating stable mixtures where oils disperse evenly throughout liquids resulting ultimately creamy texture desired within dressings like ours today! Expect slight thickening as oil blends—incredible right?
Step 4: Taste & Adjust Seasonings
Now let’s take a moment before concluding—is everything tasting how you’d hoped? This step offers opportunity—it’s all about balancing flavors so don’t hesitate adjusting level salt/acid/sweetness according preferences whether adding pinch more lemon juice or drizzle extra agave nectar—these small tweaks make significant difference ultimately leading towards perfection achieved through personal touch added along journey taken cooking together today!
And there you have it—the ultimate homemade Ginger Dressing ready for drizzling over salads or enhancing dishes beyond imagination! Enjoy every bite knowing artistry involved reflects love shared within kitchen space transformed beautifully through simple yet powerful combination created lovingly by hands eager embrace culinary tradition passed down generations before us…
Transforming Your Ingredients into a Flavorful Symphony
Step 5: Blending the Ingredients into a Harmony of Flavors
Now that you’ve prepped those vibrant vegetables, it’s time to bring everything together in an orchestra of taste. You’ll want to take your food processor—yes, that trusty kitchen companion—and add in the finely chopped sweet onion, grated ginger, celery, carrots, and minced garlic. This is where the magic begins! As you pulse these ingredients together, aim for a consistency that is fine yet grainy; think of it as creating a flavorful base that will infuse your Ginger Dressing with layers of complexity. Trust me on this—this step is absolutely crucial because it allows the flavors to meld beautifully while retaining enough texture to make each bite interesting.
As you blend, keep an eye on the mixture; you don’t want it to turn into a puree. We’re looking for that perfect balance where the essence of each vegetable shines through. If you notice any larger chunks lingering, give it a couple more pulses until everything is well incorporated but still has some grit. This step builds the foundation for your dressing’s flavor profile—each ingredient plays its part in this culinary symphony, contributing sweetness from the onion, earthiness from the ginger, and freshness from the celery and carrots.
Step 6: Adding Liquid Gold
Next up is where we introduce those liquid components that will elevate our dressing to new heights! With your vegetable mixture ready and waiting, it’s time to add in all the vibrant liquids: rice vinegar, water, ketchup, soy sauce, agave nectar (which adds that lovely touch of sweetness), lemon juice, kosher salt, white pepper, and if you’re feeling adventurous—white miso paste. Each ingredient here serves a purpose; for instance, rice vinegar provides acidity which balances out the sweetness of agave nectar and ketchup while adding depth with its tangy profile.
Once you’ve added all those glorious liquids into the food processor with your blended vegetables, pulse just a few times to mix everything together. This isn’t about fully blending; rather it’s about creating harmony—letting those flavors intermingle without losing their individuality. I promise you; this stage sets up a beautiful contrast between sweet and savory notes that will leave your taste buds dancing in delight! After this quick mix, take a moment to taste your mixture; adjusting seasoning at this point can make all the difference!
Step 7: Emulsifying for Creamy Goodness
Now comes one of my favorite parts—the emulsification! With your food processor still whirring away gently—because we want to maintain that delightful texture—it’s time to slowly stream in your good quality peanut oil. This technique is known as emulsifying; by adding oil gradually while mixing at medium speed, you’re creating a stable blend that results in creamy goodness. The oil will bind beautifully with our previous ingredients creating a luscious dressing that’s both rich and satisfying.
The key here is patience; pour in that peanut oil like you’re painting on liquid gold—slowly and steadily! Watch as your mixture transforms before your eyes—it should become thicker yet remain slightly grainy. This is what gives our Ginger Dressing its signature texture and mouthfeel! Don’t rush through this step; allowing time for emulsification enhances not only flavor but also helps create stability in your dressing so it won’t separate when stored later.
Step 8: The Final Touches Before Serving
With your Ginger Dressing now beautifully blended and emulsified into what can only be described as an utterly intoxicating concoction of flavors and textures—it’s time for some final touches! Take a moment to taste again; perhaps adjust with just a pinch more salt or another squeeze of lemon juice if you’re looking for extra brightness. Remember that every great chef has their signature twist on recipes—don’t hesitate to make this dressing truly yours!
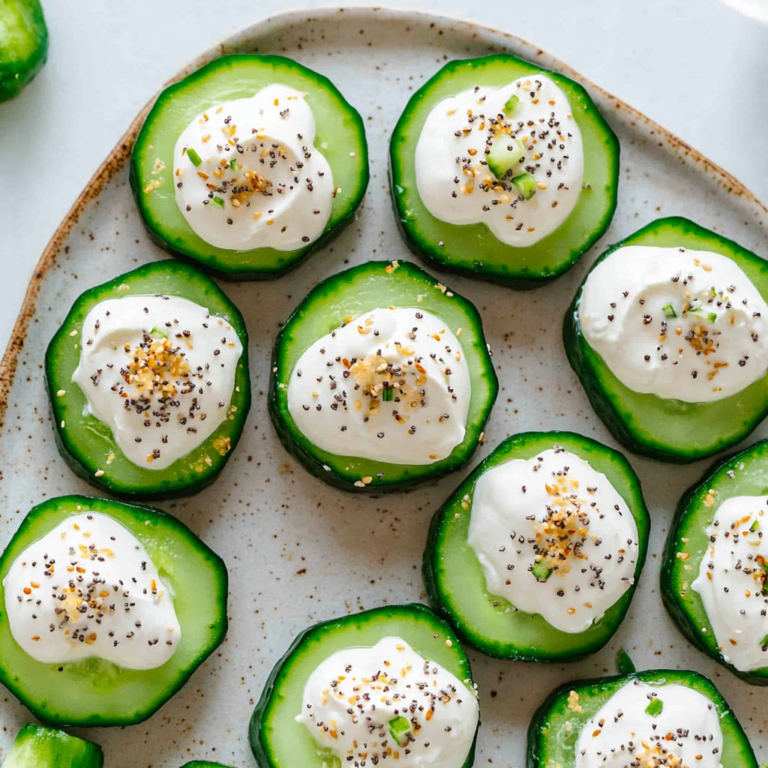
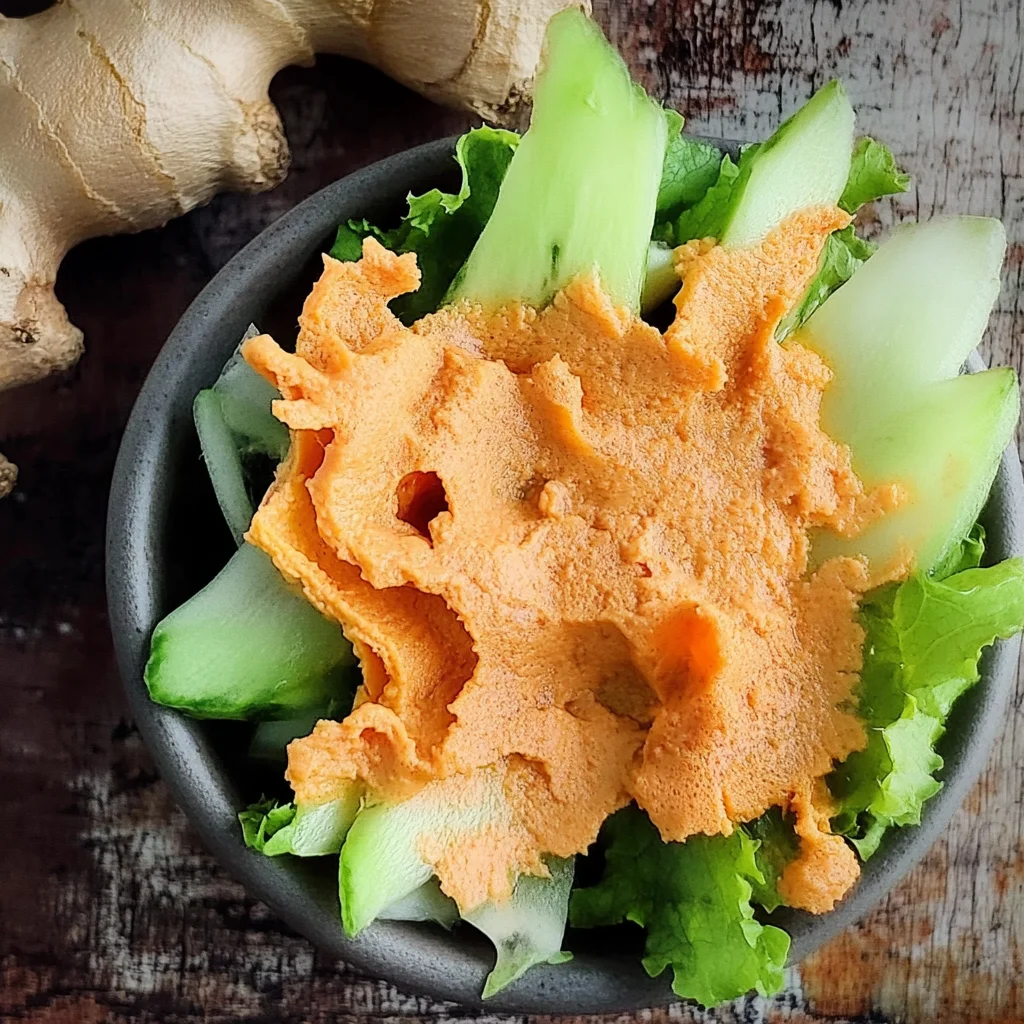
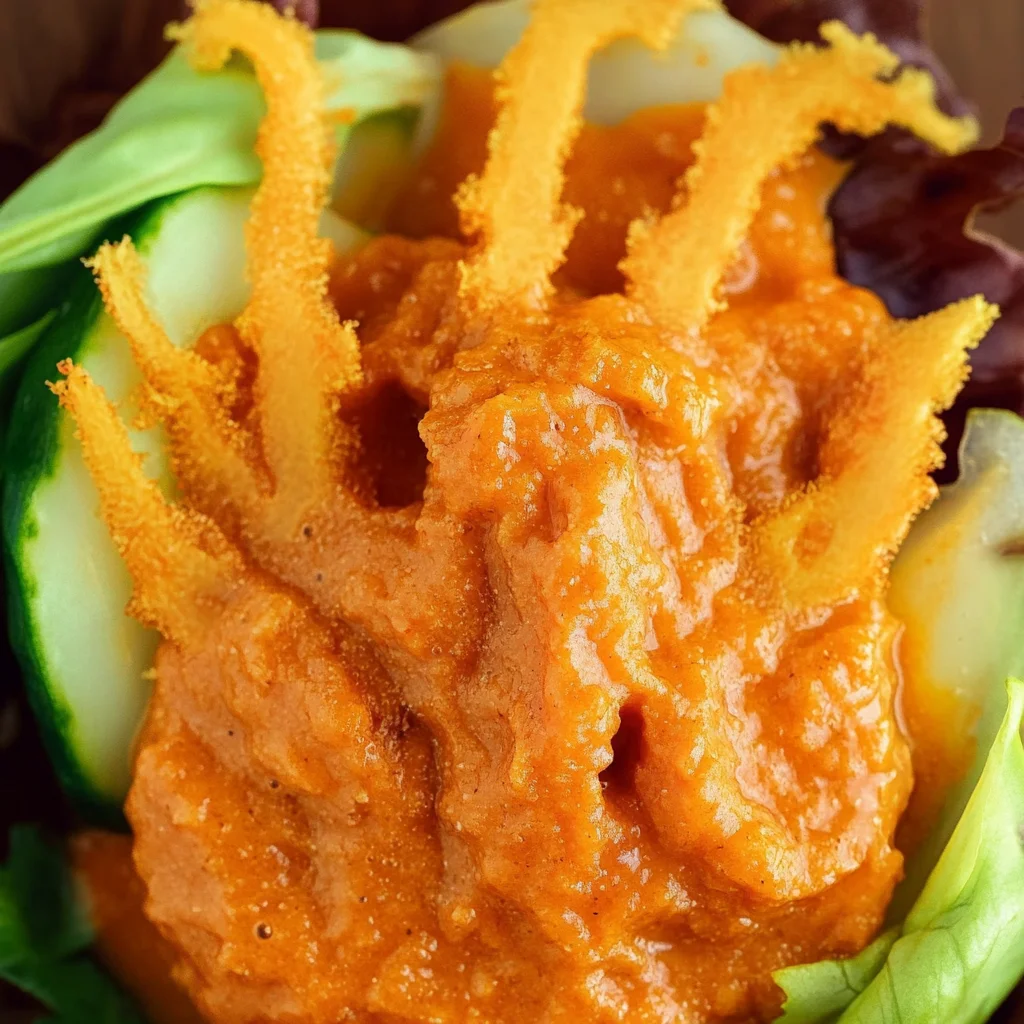
Once satisfied with the flavor profile, transfer your creation into an airtight container or bottle. At this point I have to emphasize something important: chilling your Ginger Dressing is non-negotiable! While you can certainly enjoy it right away over a crisp salad of iceberg lettuce and tomatoes (which pairs perfectly), letting it sit in the fridge for at least an hour—or even overnight—allows those flavors to deepen and mature incredibly. It’s like giving them time to have a little party together before they hit the plate!
So if you can resist the urge (and I know it’s tempting!), let it chill out for at least 30 minutes in the refrigerator before serving. During this magical resting period, you’ll find that all those pungent notes from ginger meld seamlessly with sweet onion and tangy vinegar—creating a dressing that’s not just good but truly extraordinary!
Serve It Up!
At long last—you’re ready to bask in the glory of your culinary creation! When serving up your Ginger Dressing over simple salads or even grilled vegetables or seafood dishes (if that suits your fancy), do remember to give it a gentle shake first before pouring. This ensures every bit of flavor is evenly distributed across whatever dish you’re adorning.
I promise you; every drizzle will be met with delight as friends gather around asking where they can get more of this deliciousness! So there you have it—a beautiful homemade Ginger Dressing reminiscent of those enchanting Japanese restaurants we adore so much—all made from scratch right in your own kitchen! Enjoy every drop knowing you’ve created something truly special while nourishing yourself and sharing joy with those around you!
Storage and Enjoyment Tips for Your Ginger Dressing
Now that you’ve whisked together this delightful Ginger Dressing, I can hardly contain my excitement for you to taste it! The vibrant flavors and fresh ingredients create a dressing that’s not only delicious but also incredibly versatile. Whether you drizzle it over a simple salad or use it to marinate your favorite proteins, this dressing is sure to elevate any dish. And if you find yourself with leftovers (which is rare, trust me!), don’t worry—I’ve got some great tips for storing and preserving its wonderful taste!
Storing Leftover Ginger Dressing
To keep your ginger dressing fresh and flavorful, transfer it into an airtight container—glass jars work beautifully here, as they don’t absorb any odors and allow you to see the gorgeous color of your dressing. Store it in the refrigerator, where it will stay good for up to a week. If you’re like me and love that fresh burst of ginger flavor, here’s a pro tip: place a slice of bread in the container while it’s stored. This little trick helps absorb excess moisture and keeps your dressing from getting watery or losing its zest. After a few days in the fridge, you might notice the flavors maturing beautifully; they become even more pronounced! When you’re ready to enjoy it again, simply give it a gentle shake or stir before serving—there’s no need to reheat as it’ll retain its delightful texture straight from cold.
Freezing Ginger Dressing for Later
If you’re looking to extend the life of your ginger dressing even further, freezing is an excellent option! Pour the dressing into ice cube trays or silicone molds for easy portioning; once frozen solid, transfer those cubes into a resealable bag. In the freezer, your ginger dressing can last up to three months without losing its vibrant flavor profile. When you’re ready to use it, simply pop out a cube or two and let them thaw in the fridge overnight or blend them directly into salads or marinades for an instant flavor boost. This is such a convenient way to ensure you always have this liquid gold on hand whenever inspiration strikes!
Ginger Dressing
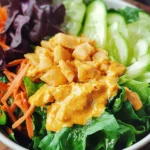
Ginger Dressing is a vibrant and refreshing sauce that brings a burst of flavor to salads, grilled vegetables, and rice bowls. With its roots in Japanese cuisine, this dressing combines the zesty warmth of fresh ginger with the sweetness of agave nectar and the umami richness of soy sauce. Each drizzle transforms ordinary ingredients into an extraordinary culinary experience, making it a must-have in your kitchen. Ideal for enhancing salads or marinating proteins, this Ginger Dressing not only elevates your meals but also invites creativity into your cooking. Enjoy the harmonious blend of flavors that will have everyone reaching for more!
- Prep Time: 15 minutes
- Cook Time: None
- Total Time: 0 hours
- Yield: About 12 servings 1x
- Category: Sauce
- Method: Blending
- Cuisine: Japanese
Ingredients
- 1 cup sweet onion, chopped
- 6 tablespoons fresh ginger, grated
- ¼ cup celery, chopped
- ½ cup carrots, chopped
- 1 teaspoon fresh garlic, minced
- 2/3 cup rice vinegar
- ¼ cup water
- 2 tablespoons ketchup
- 2 ½ tablespoons soy sauce
- ¼ cup agave nectar
- 1 ½ tablespoons lemon juice
- 1 tablespoon white miso paste, optional
- 1 cup peanut oil
Instructions
- In a food processor, combine chopped sweet onion, grated ginger, celery, carrots, and minced garlic. Pulse until finely blended but still grainy.
- Add rice vinegar, water, ketchup, soy sauce, agave nectar, lemon juice, salt, white pepper, and optional miso paste to the processor. Pulse gently to mix.
- While the processor is running at low speed, slowly drizzle in peanut oil until emulsified and creamy.
- Taste and adjust seasoning if necessary.
- Transfer to an airtight container and refrigerate for at least one hour before serving.
Nutrition
- Serving Size: 1 serving
- Calories: 107
- Sugar: 6g
- Sodium: 187mg
- Fat: 10g
- Saturated Fat: 1g
- Unsaturated Fat: 9g
- Trans Fat: 0g
- Carbohydrates: 5g
- Fiber: 0g
- Protein: 1g
- Cholesterol: 0mg