Honey Garlic Shrimp Rice Bowls
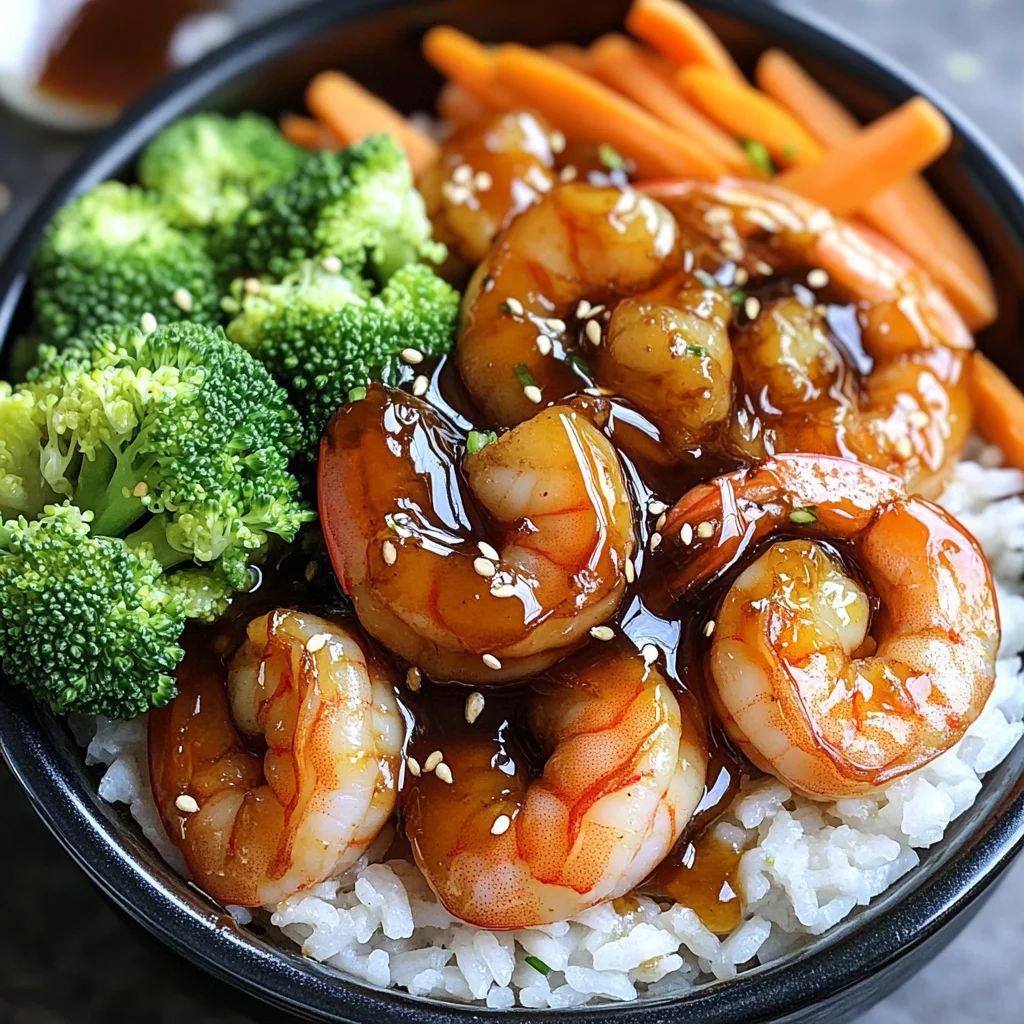
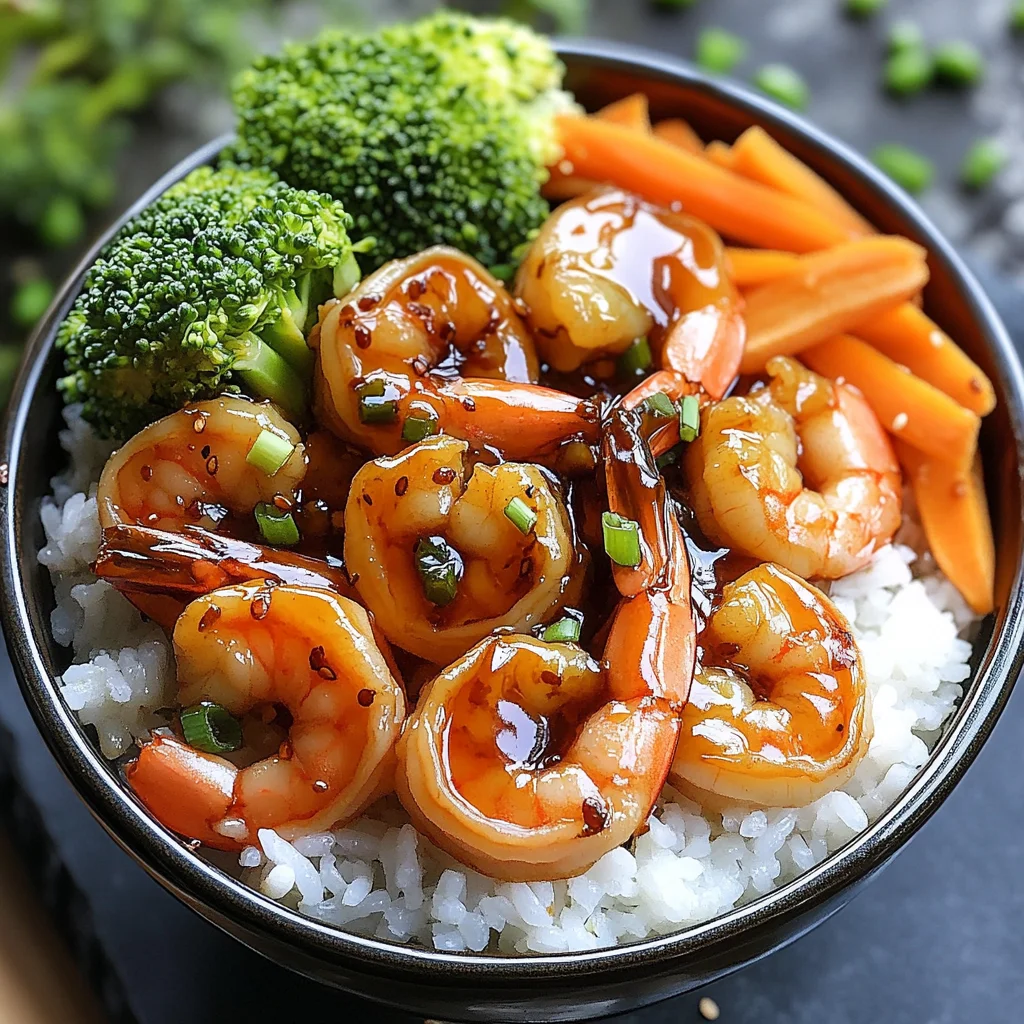
There’s something truly magical about the way food can transport us, isn’t there? It’s not just a matter of taste; it’s a whole experience that unfolds on our plates and in our hearts. When I think of my Honey Garlic Shrimp Rice Bowls, I’m reminded of those evenings spent in cozy kitchens, the air thick with the intoxicating aroma of garlic sizzling in sesame oil, mingling with honey’s sweet embrace. Each bite is a symphony of flavors: the succulent shrimp bathed in a sticky sauce that glistens like liquid gold, vibrant veggies adding crunch and color, all resting on a bed of fluffy rice that soaks up every delicious drop. This dish is more than just food; it’s an invitation to gather around the table, to share stories and laughter, to savor life’s simple pleasures.
As we dive into this recipe together, I want you to feel the warmth and excitement I have for cooking. These Honey Garlic Shrimp Rice Bowls are perfect for those busy weeknights when you crave something quick yet utterly satisfying. Trust me on this – after just 20 minutes in the kitchen (yes, you read that right!), you’ll have a meal that not only delights your taste buds but also nourishes your soul. Imagine serving this bowl of joy to your loved ones, watching their faces light up with every mouthful. It’s moments like these that remind us why we cook: to create memories, to connect with one another, and to celebrate the everyday.
Honey Garlic Shrimp Rice Bowls: A Delightful Weeknight Wonder
Let me take you through this delightful recipe that brings together juicy shrimp and fresh vegetables under a glossy honey garlic sauce. It’s fast, flavorful, and oh-so-satisfying—a true testament to what home cooking should be! Whether it’s for a family dinner or a cozy night in with friends, these bowls are sure to impress.
Ingredients:
As we embark on this culinary journey together, let’s gather our ingredients with love and intention. Each component plays a crucial role in crafting the magic that will unfold in your kitchen.
- 500g shrimp, peeled and deveined. This is where our dish begins—fresh shrimp bring not only texture but also an incredible flavor profile that pairs beautifully with our sauce. Look for shrimp that have a firm texture and a slight sheen; they should smell like the ocean—fresh and clean. If possible, opt for wild-caught shrimp over farmed varieties for better taste and sustainability. And remember, don’t rush the cooking process; perfectly cooked shrimp should be pink and opaque—overcooking them will lead to rubbery bites!
- 2 cups cooked rice. The fluffy rice serves as the perfect canvas for our vibrant flavors. You can use white rice or brown rice depending on your preference; both will soak up the honey garlic sauce beautifully. If you want an extra layer of flavor, consider using jasmine or basmati rice—these fragrant varieties add an aromatic touch that elevates your dish even further! Just be sure it’s cooked before starting your shrimp—nothing beats freshly made rice!
- 1 cup broccoli florets. This green gem adds not only color but also nutrition and crunch to our bowls. Broccoli is rich in vitamins K and C as well as fiber – truly a powerhouse vegetable! When selecting broccoli at the store, look for bright green florets without any yellowing or wilting; freshness is key here! Plus, they pair wonderfully with our sticky sauce as they absorb its flavors while maintaining their crispness.
- 1/2 cup carrots, sliced. Sweet and crunchy carrots offer a delightful contrast to the savory notes of our dish while providing additional nutrients such as beta carotene which converts into vitamin A in your body—a non-negotiable for healthy vision! Slice them thinly so they cook quickly but retain their shape; trust me when I say their vibrant orange hue will brighten up your bowl!
- 2 tbsp honey. Here comes the star of our sauce—the sweet nectar that binds everything together! Honey is nature’s gift—it adds glossiness while balancing out savory flavors magnificently. The quality matters immensely; go for raw or local honey if you can find it—the depth of flavor will astound you! For those with dietary restrictions or preferences leaning toward vegan options, agave syrup works splendidly as an alternative without compromising on sweetness.
- 3 tbsp soy sauce. This umami-packed ingredient enhances every element within our dish—it adds depth while complementing both sweetness from honey and freshness from vegetables brilliantly! If you’re looking for gluten-free options, tamari does an excellent job as well without sacrificing flavor! Don’t skip this step because soy sauce is absolutely paramount—it ties all flavors harmoniously together.
- 3 garlic cloves, minced. Ahh…garlic—the aromatic staple with its unmistakable fragrance that fills your kitchen with warmth! It offers complexity to dishes like ours by adding layers of flavor while contributing health benefits too (hello immune booster!). Always use fresh garlic; powdered versions just won’t give you that punch we want here!
- 1 tbsp sesame oil. A drizzle of this fragrant oil enriches our dish significantly—its nutty aroma provides a distinct character that speaks volumes about Asian cuisine! Use toasted sesame oil if available for an even deeper flavor profile—it’s worth seeking out! Just remember: it’s potent stuff so don’t go overboard—this little addition makes all kinds of difference!
- 1 tsp ginger, grated. Fresh ginger adds brightness along with warmth—a harmonious balance against honey’s sweetness! Grate it finely so it integrates seamlessly throughout our dish without overpowering other flavors—it has such a unique zing that’s simply irresistible!
- 1 tbsp olive oil. A splash of good-quality olive oil helps sautéing vegetables beautifully—it provides moisture while enhancing overall richness too! Feel free to swap out for any high smoke point oils like avocado if preferred—what matters most here is ensuring even cooking without burning!
- Sesame seeds (optional) & Green onions, chopped – These two gorgeous garnishes add finishing touches that’ll elevate presentation dramatically! Toasted sesame seeds provide nutty crunch while green onions impart freshness—they’re not just pretty but contribute essential textural contrasts too!
With all these ingredients gathered lovingly before us, we’re ready to dive into creating something extraordinary together!
Equipment You’ll Need:
Having the right tools at hand makes all the difference when cooking! Think of them as essential partners in your culinary adventure—they’ll help streamline everything so you can focus on bringing joy through your meal.
- Large skillet or frying pan – This will be where all the magic happens! A skillet allows for even heat distribution which ensures perfect cooking across all ingredients without overcrowding them—a must-have for achieving great results!
- Spatula or wooden spoon – Your trusty stirring companion! Opt for silicone spatulas if possible—they’re gentle on cookware surfaces while allowing effortless mixing without scratching anything up!
- Cutting board – A sturdy board provides stability during prep work—it also acts as protection against messy countertops (trust me). Choose one made from non-toxic materials since it’ll see plenty of chopping action!
- Chef’s knife – Having a sharp knife makes slicing through veggies quick work—plus safety is crucial when working in any kitchen setting! Keep yours honed regularly so you’ll glide through prep tasks effortlessly.
Let’s get cooking now—we’re about to transform these beautiful ingredients into something truly special together!
Preparing the Honey Garlic Shrimp Rice Bowls
Step 1: Heat Things Up
Start by placing your large skillet over medium heat and adding both olive oil and sesame oil into it—this combination creates an incredibly flavorful base for sautéing our aromatic elements later on! Allow them enough time (about 30 seconds) until they shimmer gently—that’s when you’ll know they’re ready for action. Once heated sufficiently but not smoking (we don’t want burnt flavors here), toss in minced garlic along with grated ginger into this luscious pool—it’s at this moment when aromas start enveloping your kitchen like warm hugs from loved ones afar.
Step 2: Sauté Until Fragrant
Now comes the fun part: using your spatula or wooden spoon gently stir everything around until fragrant (about 1–2 minutes). You’ll notice how quickly garlic transforms from pungent rawness into something profoundly satisfying—the sweetness paired beautifully alongside ginger creates complex layers within mere moments! Keep an eye here because burned garlic becomes bitter—a quick stir occasionally prevents sadness over ruined aromatics later downline…so take care not rush through this step either—you deserve every second spent enjoying these scents wafting through air!
Step 3: Add Shrimp Perfection
With aromas dancing delightfully around you now it’s time introduce those lovely shrimp into hot pan alongside fragrant mixture already bubbling away excitingly beneath them—you’ll hear sizzles welcoming them immediately upon contact—an encouraging sign indicating transformation has begun! Spread them evenly across bottom surface ensuring none overlap each other too much since overcrowding leads uneven cooking later on (which no one wants). Let these beauties cook undisturbed until they turn pinkish-white along edges (around 2–3 minutes)—flipping halfway ensures even browning occurs naturally without fussing too much about timing here either; trust me when I say watching colors change brings joy unmatched simply by knowing deliciousness awaits ahead soon enough!
Step 4: Create That Luscious Sauce
Once shrimp are cooked perfectly through crisp edges glowing golden brown delightfully signaling readiness let’s pour honey-soy mixture directly atop beautiful seafood transforming entire scene instantly—we want everything coated generously creating glossy glaze enveloping each morsel evenly throughout pan bringing harmony between salty-sweet essence merging flawlessly together before serving next layer goodness next found within vibrant veggies waiting patiently below excitedly anticipating inclusion momentarily soon enough now that everything melds harmoniously together becoming unified masterpiece awaiting final touches soon thereafter finishing touches make world shine brighter than ever experienced before…
Stay tuned as we continue building upon these incredible Honey Garlic Shrimp Rice Bowls—there’s still so much more to do before fully diving into enjoyment ahead filled joyous moments shared around tables near & dear ones alike cherished forevermore time spent embracing life altogether…
Step 5: Sautéing the Aromatics
Now that you have your oils heated and ready, it’s time to awaken those wonderful flavors by sautéing the garlic and ginger. This step is absolutely paramount in building the foundation of your Honey Garlic Shrimp Rice Bowls. The moment you add the minced garlic and grated ginger to your pan, prepare yourself for an intoxicating aroma that will dance around your kitchen like a warm hug. You want to sauté them gently over medium heat for about 1-2 minutes until they become fragrant; this is when their essential oils are released, creating a symphony of flavors that will infuse every bite of shrimp and vegetable.
But be cautious here—watch closely! Garlic can quickly go from perfectly cooked to burnt, which would impart a bitter flavor that we certainly want to avoid. Stirring continuously during this short cooking time ensures even heating and prevents any unfortunate browning. Trust me when I say that this small step will elevate your dish from simply good to utterly extraordinary. It’s all about coaxing out those natural flavors, turning your humble ingredients into something magical.
Step 6: Cooking the Shrimp
Next up, it’s time for the star of our show: the shrimp! Carefully add the peeled and deveined shrimp into your pan, ensuring they lay flat without overcrowding. This is crucial because it allows each shrimp to cook evenly and develop that lovely pink color we all adore. You’ll want to cook them for about 2–3 minutes on each side; look for a beautiful transformation as they morph from a translucent grey to a vibrant coral pink. The visual cue here is key—when they curl into a C-shape and lose their glossy sheen, that’s your signal they’ve reached doneness.
Why do we take such care with timing? Well, overcooked shrimp can become rubbery and tough—a textural nightmare! So keep an eye on them; once you see that lovely pink hue forming, flip them gently with a spatula or tongs. I promise you’ll be rewarded with juicy morsels that are not only delicious but also perfectly tender. It’s during this stage that patience pays off; allowing each side to sear properly creates those delectable caramelized edges that contribute so much depth to our sauce later on.
Step 7: Creating the Sticky Sauce
With our shrimp now perfectly cooked, it’s time to bring everything together with our sticky honey garlic sauce—a truly transformative moment! In a small bowl, whisk together the honey and soy sauce until combined, then pour this liquid gold directly over the shrimp in the pan. As this mixture hits the heat, you’ll witness magic unfold right before your eyes; it begins to bubble and thicken almost instantly, enveloping each shrimp in its sweet embrace. This is where flavor harmony truly comes alive!
You’ll want to let this simmer for about 1-2 minutes while gently tossing everything in the pan so each piece gets coated in that luscious sauce. The combination of honey’s sweetness with the savory depth of soy sauce creates an utterly intoxicating glaze that beautifully balances both taste and texture. Don’t hesitate to scrape along the bottom of the pan either; those little browned bits are flavor-packed treasures just waiting to be incorporated! Remember, this step isn’t just adding flavor—it’s building layers of richness that will make every bite profoundly satisfying.
Step 8: Adding Vibrant Vegetables
The final touch before serving involves adding our fresh vegetables—the broccoli florets and sliced carrots—that not only enhance the dish’s nutritional value but also add crunch and color. Gently fold these veggies into your sizzling honey garlic shrimp mixture for about 3–4 minutes until they’re slightly tender yet still vibrant in color—this is vital! We want them cooked just enough so they absorb some of that glorious sauce while retaining their crispness; think al dente rather than mushy.
As you stir them in, watch as they take on a glossy sheen from the sticky sauce—this visual cue tells you they’re soaking up all those fantastic flavors without losing their bite. It’s important not to rush this step; allowing just enough cooking time ensures we maintain both texture and freshness. If cauliflower or bell peppers are more your style, feel free to sprinkle those in instead; however, remember that different vegetables may require slight adjustments in cooking time due to their varied textures.
Conclusion:
What a journey we’ve taken together crafting these Honey Garlic Shrimp Rice Bowls! From the moment we sautéed aromatic garlic and ginger, infusing our kitchen with those utterly intoxicating scents, to plating up those vibrant bowls filled with juicy shrimp coated in sticky sweetness alongside crisp veggies—this recipe is truly special. Each spoonful resonates with layers of flavor that dance together harmoniously; it’s no wonder this dish has become a beloved staple in my home! I genuinely hope that my excitement has reached you because making this dish is not just about feeding ourselves; it’s about creating shared moments around the dinner table.
This recipe is an absolute must-try not just for its mouthwatering taste but also for the joy it brings while preparing it—there’s something so satisfying about watching simple ingredients transform into something extraordinary. Whether it’s a cozy weeknight dinner with family or a vibrant gathering with friends, these bowls shine bright on any occasion. Picture yourself pulling one from the stovetop: steam rising gently as vibrant colors catch your eye—a feast not only for the palate but also for the soul.
As you think about serving suggestions, imagine savoring one of these bowls alongside a crisp cucumber salad drizzled with tangy sesame dressing or perhaps some roasted edamame sprinkled with sea salt for an afternoon pick-me-up. For those moments when you want a truly decadent experience, pair them with a light miso soup or refreshing green tea—it will complement each bite beautifully!
Feeling adventurous? This recipe is wonderfully adaptable—you could swap out shrimp for succulent chicken breast or even tofu if you’re feeling plant-based! Add some bell peppers for an extra crunch or experiment with different vegetables based on what’s fresh at your market. The possibilities are endless! So why not grab your apron and give this recipe a try? I’d love to hear how it turns out for you—please share your own experiences and tips because cooking together makes us all part of one big family!
Honey Garlic Shrimp Rice Bowls
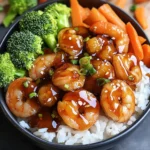
Enjoy flavorful Honey Garlic Shrimp Rice Bowls loaded with juicy shrimp and fresh veggies over fluffy rice. Try this quick recipe tonight!
- Prep Time: 10 minutes
- Cook Time: 10 minutes
- Total Time: 20 minutes
- Yield: Serves 4
- Category: Dinner
- Method: Sautéing
- Cuisine: Asian
Ingredients
- 500g shrimp, peeled and deveined
- 2 cups cooked rice (white or brown)
- 1 cup broccoli florets
- 1/2 cup carrots, sliced
- 2 tbsp honey
- 3 tbsp soy sauce (or tamari for gluten-free)
- 3 garlic cloves, minced
- 1 tbsp sesame oil
- 1 tsp ginger, grated
- 1 tbsp olive oil
- Optional: sesame seeds and chopped green onions for garnish
Instructions
- Heat olive oil and sesame oil in a large skillet over medium heat.
- Sauté minced garlic and grated ginger until fragrant (about 1-2 minutes).
- Add shrimp to the skillet and cook until pink and opaque (about 2-3 minutes per side).
- Mix honey and soy sauce in a bowl, then pour over the shrimp. Simmer for another minute to create a glossy sauce.
- Fold in broccoli florets and sliced carrots; cook for an additional 3-4 minutes until veggies are tender yet crisp.
- Serve over cooked rice, garnished with sesame seeds and green onions.
Nutrition
- Serving Size: 1 bowl (420g)
- Calories: 485
- Sugar: 10g
- Sodium: 970mg
- Fat: 14g
- Saturated Fat: 2g
- Unsaturated Fat: 10g
- Trans Fat: 0g
- Carbohydrates: 62g
- Fiber: 4g
- Protein: 29g
- Cholesterol: 186mg