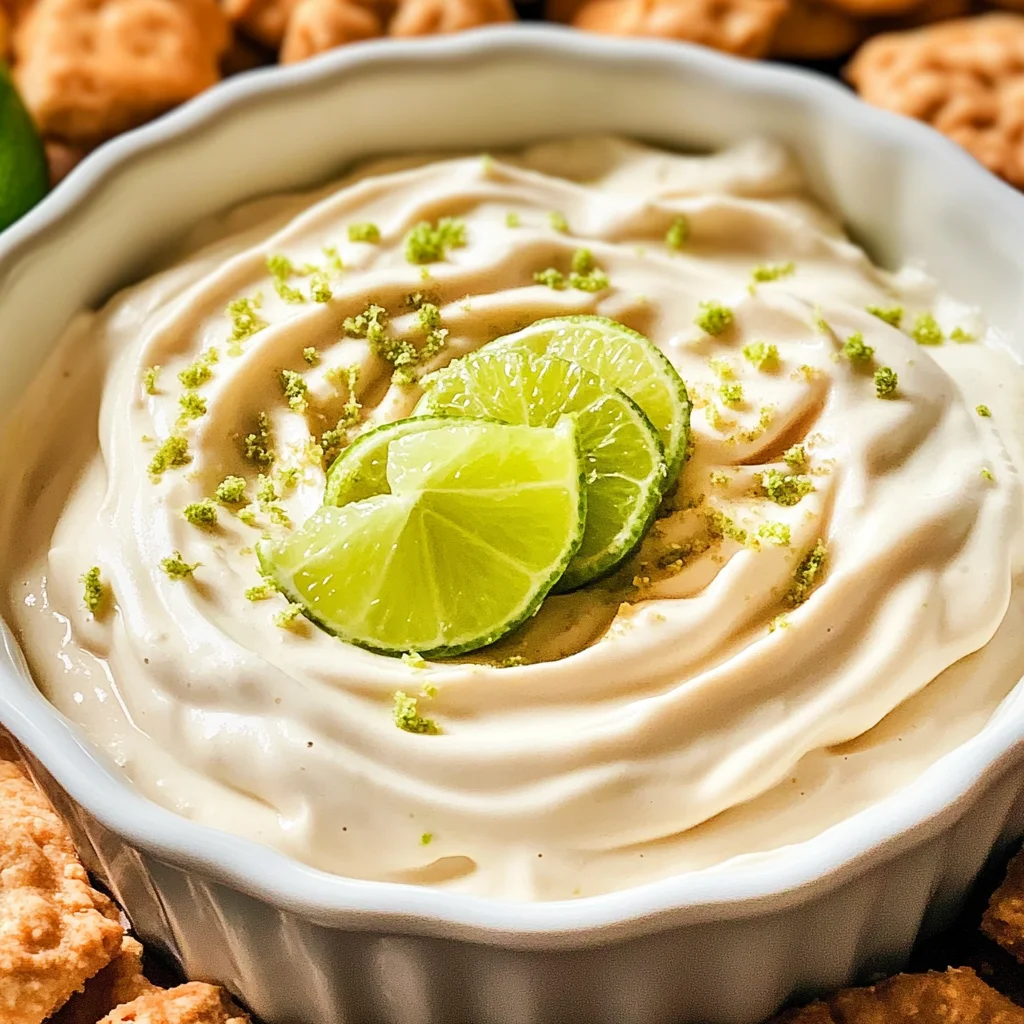
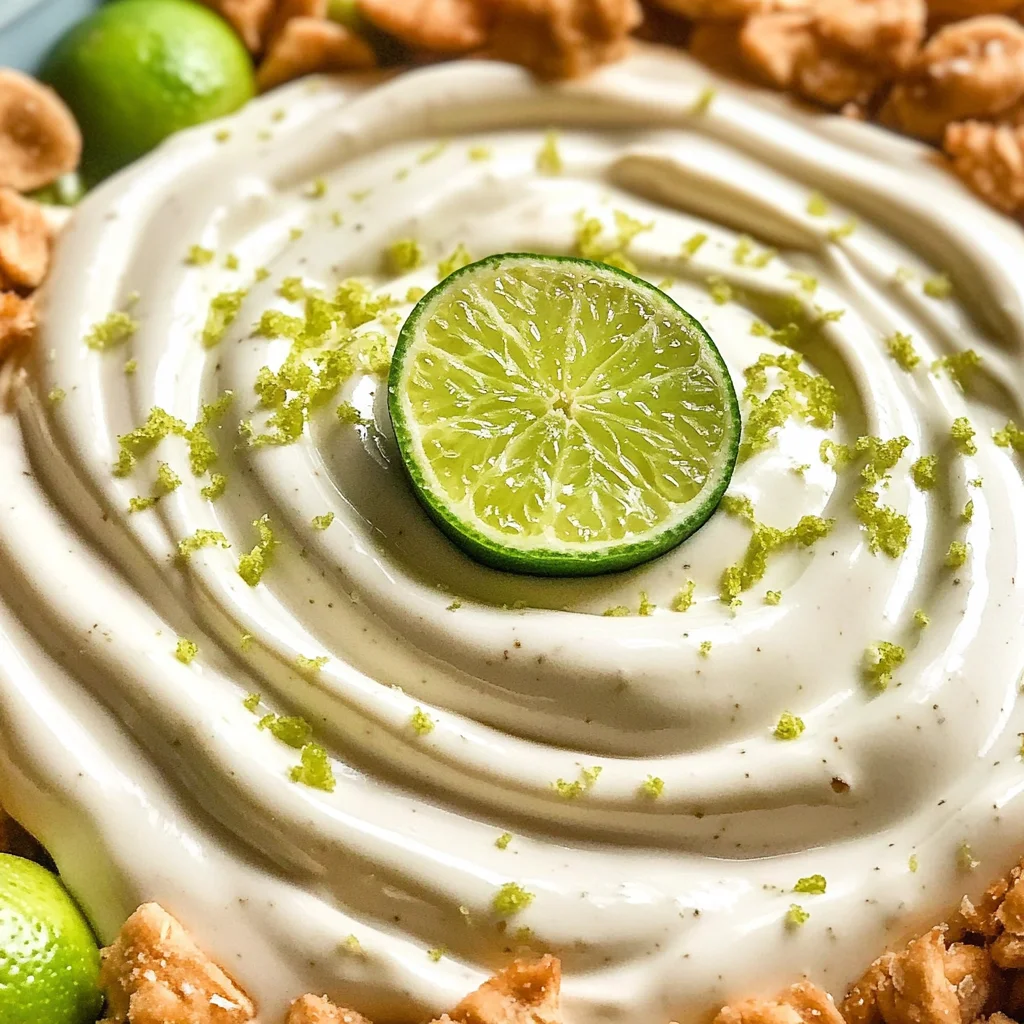
Key Lime Pie Fruit Dip
There’s something utterly enchanting about the first bite of a dessert that dances between sweet and tart, isn’t there? It transports us to sun-soaked afternoons, where laughter mingles with the fresh scent of citrus wafting through the air. This is precisely what you experience with my delightful Key Lime Pie Fruit Dip. It’s not just a recipe; it’s an invitation to create moments filled with joy and connection. Imagine dipping juicy strawberries or crispy graham crackers into a luscious dip that mimics the bright flavors of key lime pie, all while being breathtakingly easy to prepare. With just five ingredients and a mere five minutes of your time, you’ll find yourself with an utterly intoxicating treat that will leave everyone asking for seconds—and possibly thirds!
This dip is undeniably perfect for those warm spring and summer gatherings when you want something refreshing yet indulgent. The vibrant tang of key lime juice combined with the smooth creaminess of whipped cream creates a symphony of flavors that is as light as a cloud yet satisfying enough to satisfy your sweet tooth. I can already envision serving this at picnics, barbecues, or even just cozy evenings at home with friends, where we gather around to share stories and laughter over this delightful concoction. Trust me on this: once you bring this Key Lime Pie Fruit Dip into your life, you’ll wonder how you ever entertained without it.
Key Lime Pie Fruit Dip: A Refreshing Delight
Let me take you on a culinary journey as we dive into making this incredible Key Lime Pie Fruit Dip together! This recipe is designed for anyone who loves the zesty kick of key limes but prefers a lighter, more playful approach. It’s all about bringing that beloved classic dessert straight into the realm of easy-to-enjoy finger food—and I promise you, it’s worth every second spent preparing it. So let’s gather our ingredients and get ready to whip up something truly extraordinary!
Ingredients:
As we embark on this culinary adventure, let’s take a moment to appreciate each ingredient that contributes to our Key Lime Pie Fruit Dip. Each one plays a vital role in creating not just flavor but also texture and overall enjoyment.
- ½ cup vegan marshmallow fluff (or vegan marshmallows crème). This ingredient is like liquid gold in our dip; it adds sweetness and a fluffy texture that makes each bite feel luxurious. Vegan marshmallow fluff provides that signature gooeyness reminiscent of traditional marshmallows while remaining plant-based. When selecting your fluff, look for brands that are free from artificial additives—this will enhance both taste and quality in our dessert.
- ⅓ cup sweetened condensed milk. Sweetened condensed milk brings creaminess and richness to our dip that is absolutely essential. It acts as the backbone of the recipe by balancing out the tartness of the lime juice while adding its own subtle sweetness. When purchasing condensed milk, ensure you’re opting for a vegan version if you want to keep things plant-based; these alternatives have come such a long way in flavor!
- ¼ cup key lime juice (can use bottled). Ah, the star of our show—the zesty key lime juice! This ingredient lends its bright acidity which cuts through the creaminess beautifully and gives our dip its distinctive flavor profile. Freshly squeezed key limes are always best if you can find them, but bottled juice works perfectly fine too if you’re looking for convenience—just make sure it’s 100% juice without added sugars.
- 1 tbsp lime zest (plus extra for garnish). This seemingly simple ingredient packs an incredible punch! Lime zest amplifies the citrus flavor by providing aromatic oils that enhance our dip’s fragrance and taste. It’s crucial because it helps to elevate the overall profile from good to exceptional! When zesting limes, use a microplane or zester to avoid getting any bitter white pith—only capture that vibrant green outer layer.
- 1 cup heavy whipping cream. The heavy whipping cream adds an airy texture and richness that’s simply irresistible in this dip! When whipped properly until stiff peaks form, it transforms into clouds of lusciousness that marry beautifully with our other ingredients. It’s important to chill your mixing bowl beforehand; this little trick helps achieve those perfect peaks without too much effort.
Equipment You’ll Need:
Having the right tools on hand can make all the difference when creating something delicious—and trust me when I say they turn every step into a breeze! Let’s gather what we’ll need so we can focus solely on enjoying this process together.
- Medium mixing bowl – Perfect for combining your initial ingredients smoothly without making too much mess! Choose one that’s sturdy so it can handle some vigorous whisking without wobbling around.
- Large mixing bowl – This larger bowl will be essential when whipping up your heavy cream into those beautiful stiff peaks. You want ample space for air to incorporate effectively; otherwise, you might end up frustrated with insufficient volume!
- Whisk or electric mixer – A whisk can work wonders here if you’re feeling up for some arm workouts! However, I often opt for an electric mixer because it saves time and effort while ensuring perfect results every single time.
- Zester or Microplane – These handy tools will help you extract only the flavorful zest from your limes without any bitterness from the pith—non-negotiable if you’re aiming for perfection in your Key Lime Pie Fruit Dip!
Now that we’ve gathered all our ingredients and tools, let’s roll up our sleeves and dive into making this fabulous dish together!
Step 1: Whisking Together Flavors
In a medium mixing bowl, start by whisking together the vegan marshmallow fluff, sweetened condensed milk, key lime juice, and lime zest until everything is beautifully combined! You’ll notice how these elements meld seamlessly; it’s almost magical watching them transform into a creamy mixture filled with potential! Take your time here—this step sets the foundation for your dip’s flavor profile and texture. If you’re using bottled key lime juice, give it a quick taste before adding—it should be pleasantly tart but not overpowering!
Step 2: Preparing Your Cream
In another large mixing bowl (I recommend using chilled bowls if possible!), pour in your heavy whipping cream and begin beating it with either an electric mixer or whisk until stiff peaks form—this means when you lift out the whisk or beaters; peaks hold their shape firmly without drooping over. This process is known as whipping; by incorporating air into the cream, you’re creating lightness that will elevate our dip from good to spectacular! Be careful not to over-whip; if it starts looking grainy or separates into butter-like consistency… well, we definitely don’t want that!
Step 3: Folding It All Together
Once those beautiful peaks have formed in your whipped cream bowl, it’s time to fold them gently but thoroughly into your marshmallow mixture from earlier. Use a spatula or wooden spoon—this technique preserves all that lovely air you’ve created while combining flavors harmoniously! Be patient here; folding takes time but ensures each element becomes one cohesive masterpiece rather than two separate components battling against each other.
Step 4: Chill Out!
Cover your newly formed Key Lime Pie Fruit Dip tightly with plastic wrap or transfer it into an airtight container (if you’re feeling fancy!). Now comes perhaps one of my favorite steps: chilling! Pop it in the fridge for at least an hour—or better yet overnight—for those flavors to marry beautifully over time while allowing textures to mellow out too! Chilling isn’t just about temperature; it’s about letting all those components settle down together like old friends sharing secrets until they become something truly special.
With each step building towards creating an unforgettable experience infused with love and passion—stay tuned as we wrap up our delightful adventure soon enough!
The Joy of Crafting Your Key Lime Pie Fruit Dip
Step 5: Combining the Flavors in Harmony
Now, let’s dive into the heart of our creation—this is where the magic begins! In a medium-sized mixing bowl, you’ll want to combine the vegan marshmallow fluff, sweetened condensed milk, key lime juice, and lime zest. I find that using a sturdy whisk is best for this step; it not only helps to blend everything together but also incorporates air into the mixture, giving it a lovely lightness that mimics the airy texture of traditional key lime pie. As you whisk away, take a moment to savor the intoxicating aroma of fresh lime zest mingling with the sweetness of the marshmallow fluff and condensed milk—it’s like a tropical breeze wafting through your kitchen!
Make sure to whisk until everything is perfectly combined; you want a smooth, creamy texture that’s utterly inviting. Trust me on this: if there are lumps or unincorporated bits, they can disrupt the silky-smooth experience we’re aiming for. This step is crucial because it sets the stage for how well all these delightful flavors will meld together in your dip. Once combined, set this mixture aside while we prepare our whipped cream.
Step 6: Whipping Up Some Creamy Cloud Magic
Now we’re moving on to one of my favorite steps—whipping that heavy cream! In a large mixing bowl, pour in your heavy whipping cream and grab your electric mixer (or a good old-fashioned whisk if you’re feeling adventurous!). Start on low speed to prevent splatters, then gradually increase to medium-high. You’re looking for stiff peaks here—this means that when you lift your whisk out of the bowl, the peaks hold their shape firmly rather than drooping over. It usually takes about 2-4 minutes with an electric mixer to achieve this magical consistency.
Why is this step so important? Well, whipped cream acts as the lightener in our dip; it transforms our dense mixture into something airy and cloud-like. Plus, it introduces an element of richness without being overpowering. Watch closely toward the end of your whipping process; overwhipping can lead to butter forming (which is definitely not what we want). Aim for that perfect balance where you have fluffy clouds ready to be folded into our luscious base.
Step 7: The Art of Folding
With both mixtures prepped and ready, it’s time for one of my favorite techniques—folding! Take your whipped cream and gently scoop about one-third of it into your vegan marshmallow mixture. Using a spatula or large spoon, gently fold it in by scooping from underneath and bringing it over the top. This technique is all about preserving air; we don’t want to deflate all those lovely bubbles we just created with our whipped cream! Continue folding until just about incorporated—don’t worry if there are small streaks remaining; they’ll disappear as you add in more whipped cream.
Once you’ve folded in that initial third, repeat with the remaining whipped cream in two more additions. Be patient here; every gentle fold counts towards achieving that lightness we crave in our dip. If you rush this step or stir aggressively, you might lose some of that wonderful volume we’ve worked so hard for! Each fold should feel like you’re wrapping your ingredients in an embrace—it’s about creating harmony rather than rushing through.
Step 8: The Chilling Transformation
Ahh, now comes one of my favorite parts—the chilling! Once everything is beautifully combined and fluffy as can be, transfer your dip into an airtight container or cover your mixing bowl tightly with plastic wrap. Now here’s where patience really pays off: place it in the fridge for at least one hour but preferably up to twenty-four hours if you can resist snacking on it right away!
Why chill? Well, during this time, those flavors deepen and meld together beautifully—a process akin to letting fine wine breathe before serving (though I promise this dip is non-alcoholic!). The chill also helps firm up the texture slightly so that each bite feels substantial yet still melts effortlessly on your tongue. Plus, it provides a refreshing coolness when served cold—a perfect match for those warm spring and summer days ahead! So don’t rush this step; give yourself time to let this dip transform into something truly extraordinary.
Conclusion:
As we wrap up our delightful journey through making this spectacular Key Lime Pie Fruit Dip, I hope you’re feeling just as excited as I am! It’s been such a joy sharing this recipe with you—not only because of its ease but also due to its profound deliciousness. The combination of sweetened condensed milk mingling with tangy key lime juice creates an unforgettable symphony of flavors that dances on your palate. With every fluffy bite encapsulated in velvety creaminess, how could anyone resist? This dip isn’t merely a dessert; it’s an experience that brings smiles and happy memories around the table.
Why is this recipe a must-try? Well, it’s not only incredibly easy to whip up in just five minutes but also versatile enough to shine at any occasion—from summer picnics and birthday parties to cozy evenings at home with loved ones. Picture this: pulling out your chilled dip from the fridge while friends gather around—it’s almost intoxicating! The bright citrus aroma fills the air as everyone eagerly dips their fresh strawberries or graham crackers into this luscious creation. It’s moments like these that remind us why we gather together—to celebrate joy through food.
Speaking of pairings, imagine savoring one of those fluffy bites alongside ripe mango slices or juicy watermelon cubes—each contrasting flavor elevating your taste experience even further. For an afternoon pick-me-up, serve it with crispy animal crackers or buttery Nilla wafers; they complement the tanginess perfectly! And if you’re feeling extra indulgent, why not drizzle some vegan chocolate sauce over top before digging in? The possibilities are endless!
Feeling adventurous? This recipe is wonderfully adaptable; consider swapping out key lime juice for freshly squeezed lemon juice if you’re in need of something different yet equally refreshing! You could even fold in some crushed pineapple for added texture or a handful of toasted coconut flakes for that tropical twist—trust me on this one! Each variation brings new life to this beloved dip while maintaining its essence. So go ahead—experiment and make it your very own! I can’t wait for you to try this Key Lime Pie Fruit Dip; please share your experiences with me—I’m always eager to hear how you’ve personalized your creation!
Key Lime Pie Fruit Dip
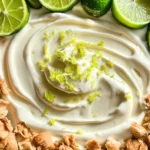
Indulge in the refreshing delight of Key Lime Pie Fruit Dip, a zesty and creamy treat that captures the essence of summer. This easy-to-make dip is perfect for gatherings, where its sweet-tart flavor will have everyone coming back for more. With just five ingredients and only five minutes of preparation time, you can create a luscious treat that pairs beautifully with fresh fruits like strawberries and pineapple, or crunchy options like graham crackers. Whether you’re hosting a picnic or enjoying a cozy night in, this light dessert is sure to impress and create memorable moments.
- Prep Time: 5 minutes
- Cook Time: 0 minutes
- Total Time: 5 minutes
- Yield: Approximately four servings 1x
- Category: Dessert
- Method: No-bake
- Cuisine: American
Ingredients
- ½ cup vegan marshmallow fluff
- ⅓ cup sweetened condensed milk (vegan)
- ¼ cup key lime juice
- 1 tbsp lime zest (plus extra for garnish)
- 1 cup heavy whipping cream
Instructions
- In a medium mixing bowl, whisk together vegan marshmallow fluff, sweetened condensed milk, key lime juice, and lime zest until smooth.
- In a large mixing bowl, whip heavy cream until stiff peaks form.
- Gently fold whipped cream into the marshmallow mixture until fully combined.
- Transfer dip to an airtight container and chill in the refrigerator for at least one hour before serving.
- Garnish with additional lime zest before serving.
Nutrition
- Serving Size: 1/4 cup (60g)
- Calories: 150
- Sugar: 12g
- Sodium: 30mg
- Fat: 10g
- Saturated Fat: 7g
- Unsaturated Fat: 3g
- Trans Fat: 0g
- Carbohydrates: 15g
- Fiber: 0g
- Protein: 1g
- Cholesterol: 30mg